Your unit has been designed to ”remember” the last run mode to which it was
set. If you have a power outage or any other power cut off, the unit will
automatically return to the previous temperature settings after the power is
switched on again.
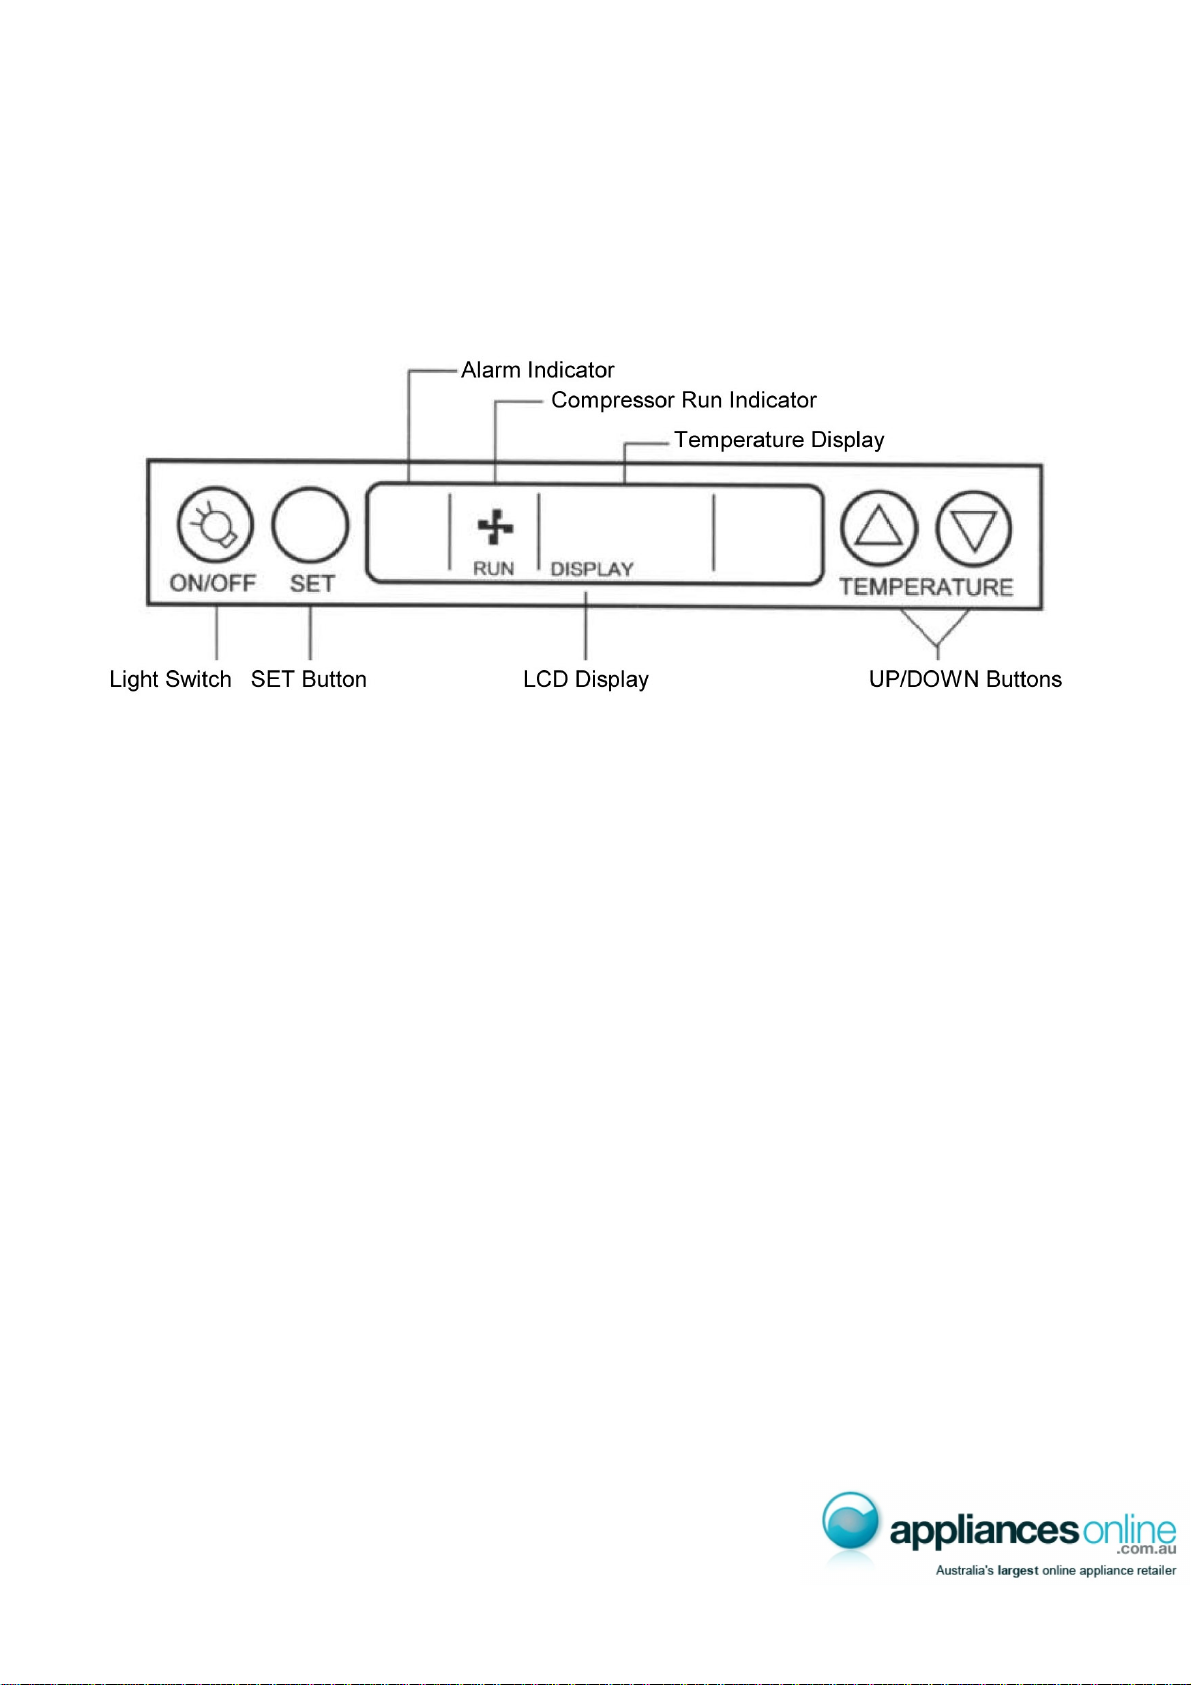
Liquid Crystal Display (LCD)
When you press any key, a backlight will appear in the Display Panel. If no
other key is pressed, the backlight will automatically go out after 2 minutes.
In the event that there is a fault in the unit, an ALARM indication will appear on
the screen.
Alarm Mode:
In ALARM mode, the unit will make a beeping sound and display an alarm
message.
If the Liquid Crystal Display (LCD) on the control panel displays any of the
following messages: PROBE ERROR, LOW TEMP or HIGH TEMP, consult
the Troubleshooting section of this manual.
Timed defrosting
Another feature of the beverage cooler is that the defrosting cycle will begin
automatically once the power has been on for 12 hours. Because of the low
temperatures inside the unit, frost or ice may begin to accumulate. During the
defrosting cycle, the interior fans run and the ice melts. The water produced
flows to the bottom of the compartment and collects in the drip tray on the
bottom (check occasionally to see if the tray need to be emptied manually).
During the defrosting cycle, the LCD display will show the average
temperature inside the unit, and the word STOP will flash once a second.
During defrosting, temperatures inside the unit will rise a little.
Normal defrosting time is 30 minutes.
Shelving
The shelves in your unit pull out only 1/3 of the way. This is a safety feature,
so that neither the unit nor the shelves will tip over. The space between
shelves is adjustable.
Replacement of the Energy-saving lamp
9