Smittybilt XRC 2 User manual

1
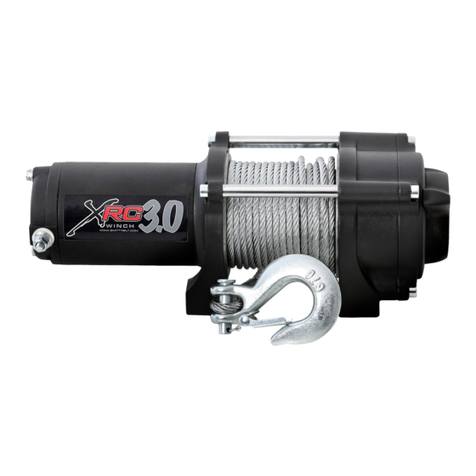
XRC 2 (2,000lb) Utility Winch
Table of Contents
Winch Packing List ………………………..………………….. 02
Safety Warnings & Precautions …………..…………........... 03
Installation……………………………..……………………..... 08
Mounting the winch …….…………………………. 08
Install the wiring ……………………………….…... 09
Check the system ….…………………………...…. 10
Winch operation …………………………………… 10
Winch Maintenance ………………………………………….. 11
Troubleshooting ………………………………..…………..... 11
Winch Assembly Drawing ……………………………..……. 12
Winch Parts List ………...………………………………….... 13
Winch Specification ………………………………………..… 14
Warranty ………………………………………………………. 15
Warranty Information Card ………………………………….. 17

2
XRC 2 (2,000lb) Utility Winch
Winch Packing List
Description Quantity
1. Winch Assembly with Wire Rope ……………………….…….….. 1
2. Bolt 8MM x 35… …………………………………………………… 6
3. Lock Washers …………………………………………………….... 8
4. Flat Washers ……………………………………………………….. 8
5. M8 Nuts ……………………………………………………………... 8
6. Bolt 8MMx20 …………………………………………………….…..2
7. Clevis Hook with Pin ……………………………………...….……. 1
8. Roller Fairlead……………….. ……………………………….…… 1
9. Hook Strap…………..…………….…………………………….…... 1
10. Remote ……………………………………………………….…... 1
11. Winch Plate …………………………………………………….….. 1

3
Safety Warnings & Precautions
Warnings and Cautions
As you read these instructions, you will see WARNINGS, CAUTIONS,
NOTICES and NOTES.
Each message has a specific purpose. WARNINGS are safety messages that
indicate a potentially hazardous situation, which, if not avoided could result in
serious injury or death. CAUTIONS are safety messages that indicate a
potentially hazardous situation which, if not avoided, could result in minor or
moderate injury. A CAUTION may also be used to alert against unsafe practice.
CAUTIONS and WARNINGS identify the hazard, indicate how to avoid the
hazard, and advise of the probable consequence of not avoiding the hazard.
NOTICES are messages to avoid property damage. NOTES are additional
information to help you complete a procedure. PLEASE WORK SAFELY!
MOVING PARTS ENTANGLEMENTHAZARD
Failure to observe these instructions could
lead to severe injury or death.
To avoid injury to hands or fingers:
• Always keep hands clear of rope, hook loop, hook and fairlead opening during
installation, operation and when spooling in or out.
• Always use extreme caution when handling hook and rope during spooling
operations.
• Always use supplied hook strap whenever spooling rope in or out, during
installation, and during operation.
• Always wear heavy leather gloves when handling rope.

4
CHEMICAL AND FIRE HAZARD
Failure to observe these instructions could lead to severe injury or death.
• Always remove jewelry and wear eye protection.
• Never lean over battery while making connections.
• Always verify area is clear of fuel lines, fuel tank, brake lines, electrical wires,
etc. when drilling.
• Never route electrical cables:
- Across any sharp edges.
- Through or near moving parts.
- Near parts that become hot.
MOVING PARTS ENTANGLEMENT
HAZARD
Failure to observe these instructions could lead to minor or moderate injury.
• Always keep wired remote control lead clear of the drum, rope and rigging.
Inspect for cracks, pinches, frayed wires or loose connections. Replace remote
control if damaged.
• Always pass wired remote control through a window to avoid pinching lead in
door, when using remote inside a vehicle.
• Never leave remote control where it can be activated during freespooling,
rigging, or when the winch is not being used.
• Always require operator and bystanders to be aware of vehicle and or load.
MOVING PARTS ENTANGLEMENT
HAZARD
Failure to observe these instructions could lead to minor or moderate injury.
General Safety:
• Always know your winch. Take time to fully read the Installation Guide and
the Basic Guide to Winching Techniques in order to understand your winch and

5
its operation.
• Never operate this winch if you are under 16 years of age.
• Never operate this winch when under the influence of drugs, alcohol or
medication.
• Never exceed winch or rope capacity listed on product data sheet. Double line
using a snatch block to reduce winch load.
Installation Safety:
• Always choose a mounting location that is sufficiently strong to withstand the
maximum pulling capacity of your winch.
• Always use factory approved mounting hardware, components, and
accessories.
• Always use grade 5 (grade 8.8 metric) or better mounting hardware.
• Never weld mounting bolts.
• Always use care when using longer bolts than those supplied from factory.
Bolts that are too long can damage the base and/or prevent the winch from
being mounted securely.
• Always mount the winch and attach the hook to the rope’s end loop before
connecting the electrical wiring.
• Always position fairlead with WARNING label on top.
• Always spool the rope onto the drum in the direction specified by the winch
warning label on the winch and/or documentation. This is required for the
automatic brake (if so equipped) to function properly.
• Always prestretch wire rope and respool under load before use. Tightly
wound wire rope reduces chances of “binding”, which can damage the rope.
MOVING PARTS ENTANGLEMENT
HAZARD
Failure to observe these instructions could lead to minor or moderate injury.
• Always inspect, rope, hook, and slings before operating winch. Frayed,
kinked or damaged rope must be replaced immediately. Damaged components
must be replaced before operation. Protect parts from damage.
• Never leave remote control plugged into winch when free spooling, rigging, or
when the winch is not being used.
• Never hook rope back onto itself. This damages the rope.
• Always use a choker chain, choker rope, or tree trunk protector on the
anchor.
• Always remove any element or obstacle that may interfere with safe operation
of the winch.
• Always take time to use appropriate rigging techniques for a winch pull.
• Always be certain the anchor you select will withstand the load and the strap

6
or chain will not slip.
• Never engage or disengage clutch if winch is under load, rope is in tension or
drum is moving.
• Always select an anchor point as far away as possible. This will provide the
winch with its greatest pulling power.
• Never winch with less than 5 wraps of rope around the drum. The rope could
come loose from the drum.
• Never touch rope or hook while in tension or under load.
• Never touch rope or hook while someone else is at the control switch or during
winching operation.
• Always stand clear of rope and load and keep others away while winching.
• Always be aware of stability of vehicle and load during winching, keep others
away. Alert all bystanders of any unstable condition.
• Never use winch to secure a load.
MOVING PARTS ENTANGLEMENT
HAZARD
• Always use a hook with a latch
• Always insure hook latch is closed and not supporting load.
• Never apply load to hook tip or latch. Apply load only to the center of hook.
• Never use a hook whose throat opening has increased, or whose tip is bent or
twisted.
FALLING OR CRUSHING HAZARD
Failure to observe these instructions could lead to severe injury or death.
• Never use winch to lift or move persons.
• Never use winch as a hoist or to suspend a load.

7
CUT AND BURN HAZARD
Failure to observe these instructions could lead to minor or moderate injury.
To avoid injury to hands and fingers:
• Always wear heavy leather gloves when handling a rope.
• Never let rope slip through your hands.
• Always be aware of possible hot surface at winch motor, drum or rope during
or after winch use.
AVOID WINCH AND EQUIPMENT
DAMAGE
• Always avoid side pulls which can pile up rope at one end of the drum. This
can damage rope or winch.
• Always ensure the clutch is fully engaged or disengaged.
• Never use winch to tow other vehicles or objects. Shock loads can
momentarily exceed capacity of rope and winch.
• Always avoid “powering out” for extended distances. This causes excess heat
and wear on the winch motor and brake.
• Always use care to not damage the vehicle frame when anchoring to a
vehicle during a winching operation.
• Never “jog” rope under load. Shock loads can momentarily exceed capacity of
rope and winch.
• Never use winch to secure a load during transport.
• Never submerge winch in water.
• Always store the remote control in a protected, clean, dry area.
• Always double line or pick distant anchor point when rigging. This maximizes
pulling power and avoids overloading the winch.

8
To prevent accidental activation of the winch and serious injury,
complete the winch installation and attach the hook before installing the
wiring.
DO NOT leave controller hooked/wired up to winch when not in use.
TO PREVENT SERIOUS INJURY OR DEATH FROM ELECTRICAL FIRE:
• Do NOT route electrical cables across sharp edges.
• Do NOT route electrical cables through or near moving parts.
• Do NOT route electrical cables through or near any high heat parts.
• Avoid pinch and wear/abrasion points when installing all electrical cables.
Installation
Step 1 - Mount the winch
To secure the winch, always use:
• A flat, secure mounting location at least 4.8 mm (3/16 in.) thick.
• Lock washers.
• Hex head cap screws when using a one-piece winch mount plate.
• Torque the mounting bolts to 16 N-m (12 lb-ft)
• Attach the clevis hook to the wire rope.
• Put clutch in freespool position.
• Manually feed cable loop through fairlead.
• Attach hook to cable loop and re-engage clutch.

9
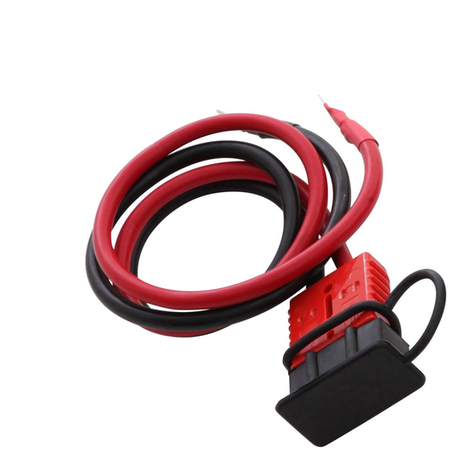
Step 2 - Install the wiring
• Connect short red cable from remote control to the positive terminal (+) on the
motor.
• Connect short black cable from remote control to the negative terminal (-) on
the motor.
• Connect long red cable from the remote control to the positive terminal (+) of
the battery.
• Connect long black cable from the remote control to the negative terminal (-)
of the battery.
(Wiring Diagram)
To avoid accidental operation DO NOT leave controller hooked/wired up
to winch when not in use.

10
Step 3 - Check the system
Before using the winch, verify the following:
• Wiring to all components are correct. All loose wires are tight.
• There are no exposed wiring or terminals.
• Check winch for proper operation. The wire rope should spool in and out in the
direction indicated on the switch.
Step 4 – Winch operation
To free spool pull knob out and twist approx ½” (Fig A)
When powering in make sure winch is engaged (twisting know back and knob
is all of the way back in.
Push “IN” button on remote. (Fig B)
(Fig A) (Fig B)

11
Winch Maintenance
No further internal lubrication is required for the life of the winch. The winch should not
be emerges in water (waterproof winch should not be soaked in water for a long time).
If the winch immersions in water by accident, you should loosen the screws, tilt the
winch to drain out the water as soon as possible. You should not use the winch within
(3) three days. After three days, turn on the winch and keep the motor running until
hands can feel it hot on the motor to vaporize any water in the motor.
Lubricate the cable periodically. Replace a new cable as soon as possible if glitch,
fracture, and/or crease were to occur.
You should clean and lubricate after use; always store the winch in a dry place,
disengage the clutch, and out of reach for children.
Check each assembly or connection screw; if loosen or corrode, please repair and
replace before use.
Troubleshooting
NO.
Symptom Possible Cause Suggested solution
1
Motor does not
turn on
-
Switch Assembly not
connected property
-
Loose battery cable
Connections
-
Defective motor
-
Insert Switch Assembly all the
way into the connector.
-
Tighten nuts on all cable
connections.
-
Replace Switch Assembly
-
Check for voltage at armature
port with Switch pressed. If
voltage is present replace motor.
2
Motor runs but
cable drum
does not turn
-
Clutch not properly
engaged
-
Engage clutch knob .
3
Motor runs slowly
or without normal
power
-
Insufficient current or
voltage, weak battery
- Defective Motor
-
Battery weak, recharge. Run
winch with vehicle motor running.
-
Loose or corroded battery cable
connections. Clean, tighten, or
replace.
4
Motor runs too
hot
-
Long period of operation
-
Let winch cool down
periodically

12
Winch Assembly Drawing

13
Winch Parts List
Ref SB part#
QTY De cription
1
97202-01
1 XRC2 Motor
2
97202-02
1 Stationary Gear Housing Asse bly
3
97202-03
1 T-Series Carrier Asse bly
4
97202-04
1 T-Series Rotator Gear
5
97202-05
1 Dru Support Plate
6
97202-06
4 Pan Head Screw
7
97202-07
1 Dru Support Bushing
8
97202-08
1 Clutch Asse bly
9
97202-09
1 Spring
10
97202-10
1 Dru Asse bly
11
97202-11
1 Screw
12
97202-12
1 T-Series Bushing
13
97202-13
1 Thick Flat Washer
14
97202-14
2 Hex Flange Nut
15
97202-15
1 T-Series Base plate Asse bly
16
97202-16
1 Tension Plate
17
97202-17
1 T-Series F/W Knob Asse bly
18
97202-18
1 Elastic Pin
19
97202-19
2 Hex Socket Screw
20
97202-20
2 Screw
21
97202-21
2 Screw
22
97202-22
2 Flat Washer
23
97202-23
2 Lock Washer
24
97202-24
2 Nut
25
97202-25
1 Red Strap
26
97202-50
1 Switch Asse bly (Re ote)
27
97202-32
1 Cable Asse bly

14
Winch Specifications
97202 - XRC 2.0 (2,000lb) Winch
Rated line pull: 2,000lbs (960kgs) single line
Motor: Permanent magnetic DC 12V ,1.0Hp
Gear train: 3-stage planetary
Gear ratio: 153:1
Wire rope: 5/32” x 49’
Drum size: 1.24” (D) x 2.88” (L)
Dimensions: 11.25” (L) x 4” (W) x 4.1” (H)
Net weight: 12lbs
Line speed and motor current (first layer)
Line pull LBS 0 500 1,000 1,500 2,000
KGS 0 227 454 680 907
Line speed FPM 13 10.7 7.7 5.6 3.3
MPM 3.9 3.2 2.3 1.7 1
Motor current
Amps 9 30 58 81 110
Line pull and cable capacity
Layer of cable 1 2 3 4 5 6
Rated line pull
per layer LBS 2,000 1630 1380 1190 1050 940
KGS 907 740 620 540 470 420
Cable capacity
per layer Ft. 6.5 14 23.5 35 47 50
M 2.0 4.3 7.2 10.6 14.4 15.2

15
Warranty
SMITTYBILT ADVANTAGE WARRANTY
LIMITED LIFETIME WARRANTY FOR MECHANICAL COMPONENTS
LIMITED ONE (1) YEAR WARRANTY FOR ELECTRICAL COMPONENTS
Smittybilt Automotive Products, LLC (SAP) warrants to the original purchaser that (a) the mechanical
components (e.g., gears, clutch, spools, etc.) of any SAP winch will be free of defects in material and
workmanship for the lifetime of the winch, and (b) the electrical components (e.g., electric motor, wires,
solenoid, etc.) will be free of defects in material and workmanship for a period of one (1) year from the
original date of purchase. This Warranty applies only to the original purchaser of the winch. To obtain
any warranty service, you must provide SAP with proof of purchase and date of purchase acceptable to
SAP, such as a copy of your purchase receipt.
This warranty does not cover the removal or reinstallation of the winch. SAP will, at its sole option,
repair, replace or refund the purchase price of a defective winch or component, provided you return the
defective winch or component during the warranty period, transportation charges prepaid, to SAP.
Attach your name, address, telephone number, a brief description of the problem, and a copy of your
receipt and original bill of sale bearing the SAP serial number of the defective winch and date of
purchase.
This warranty does not apply (i) to finish, paint or the wire rope; (ii) if the winch has been damaged by
accident, abuse, misuse, collision, overloading, modification, misapplication, improper installation, or
improper service; or (iii) any normally wearable part such as the break mechanism. This Warranty is
void if any SAP serial number has been removed or defaced. Commercial or industrial use or application,
or any hoisting application of the winch voids the Warranty. This Warranty is good only for winches
bought, sold and used in the United States unless otherwise specifically agreed in writing by SAP.
THE WARRANTY SET FORTH ABOVE IS THE ONLY WARRANTY. THERE ARE NO OTHER
WARRANTIES, EXPRESS OR IMPLIED, INCLUDING BUT NOT LIMITED TO, IMPLIED
WARRANTIES OF MERCHANTABILITY OR FITNESS FOR A PARTICULAR PURPOSE. ANY
IMPLIED WARRANTY WHICH BY LAW MAY NOT BE EXCLUDED IS LIMITED IN DURATION
TO ONE (1) YEAR FROM THE DATE OF ORIGINAL RETAIL PURCHASE OF THE PRODUCT.
No
SAP
dealer, agent or employee is authorized to make any modification, extension or addition to this
warranty. SAP SHALL NOT BE LIABLE FOR SPECIAL, INDIRECT, INCIDENTAL OR
CONSEQUENTIAL DAMAGES (INCLUDING, BUT NOT LIMITED TO, LOST PROFITS, DOWN
TIME OR LOSS OF USE) UNDER ANY LEGAL THEORY, EVEN IF SAP WAS ADVISED OF THE
POSSIBILITY OF SUCH DAMAGES. Some states do not allow the exclusion of implied warranties or
the exclusion or limitation of liability for incidental or consequential damages, or limitations on how
long an implied warranty lasts, so the above limitation or exclusion may not apply to you. This Warranty
gives you specific legal rights. You may also have other rights that vary from state to state. SAP
reserves the right to change product design without notice. In situations in which SAP has changed a
product design, SAP shall have no obligation to upgrade or otherwise modify previously manufactured
products. To submit a warranty claim please contact Smittybilt at 1-888-717-5797.

16
Smittybilt electric winches are intended for recreational self-recovery usage. The
warranty is void if the winch is used in commercial/industrial applications.
The obligation under this warranty, statutory or otherwise, is limited to the
replacement or repair at the manufacturer’s factory, or at a point designated by the
manufacturers, of such part(s) as shall appear to the manufacturer, upon inspection of
such part(s), to have been defective in material of workmanship. This warranty does
not obligate Smittybilt, Inc. to bear the cost of labor or transportation charges in
connection with the replacement or repair of defective parts, nor shall it apply to a
product upon which repairs or alterations have been made, unless authorized by the
manufacturer, or for equipment misused, neglected or improperly installed.
IMPORTANT NOTICE
To the fullest extent permitted by applicable law, the following are hereby excluded
and disclaimed:
1) All warranties of fitness for a particular purpose.
2) All warranties of Merchantability.
3) All claims for consequential or incidental damages.
There are no warranties that extend beyond the description that appears on the
face hereof.
Some states do not allow the above exclusions or disclaimers in consumer
transactions and as such this disclaimer /exclusion may not apply to you.
To the extent such warranties of fitness or merchantability are deemed to apply to
this product, they exist for only so long as the express limited warranty elsewhere set
forth is in existence.
Smittybilt, Inc. reserves the right to change, alter or improve its products in design,
materials or appearance without incurring any obligation to incorporate such changes
in products that were previously manufactured.
This warranty gives you specific legal rights and you may have other legal rights,
which vary from state to state to submit a warranty claim contact.

17
Warranty Information Card
Smittybilt
400 West Artesia Blvd.
Compton, CA 90220
1-888-717-5797
First name: Last name:
Age: Sex:
City/Province Zip/Postal Code:
Country: Telephone Number:
Email Address:
Which Smittybilt winch did you purchase?
Model Number: Date of Purchase:
Where did you purchase this product?
Store or catalog name: Store Location:
How satisfied were you with the dealer and /or sales staff?
Who installed or will install your Smittybilt product?
Is this the first time you have purchase a winch?
If no, what brand have you brought before?
What type of vehicle will this Smittybilt winch be installed on?
Year: Make: Model:
2WD 4WD
What is the vehicles main use?
What other accessories have you purchased/installed for your vehicle?
This manual suits for next models
1
Table of contents
Other Smittybilt Winch manuals
Popular Winch manuals by other brands
Portable Winch
Portable Winch PCW3000 user guide
Comeup
Comeup DS-9.5 instruction manual
Haklift
Haklift VAVIN150 manual
Ingersoll-Rand
Ingersoll-Rand Force 5 MANRIDER FA2MRA Installation and operation manual
HADEF
HADEF 43/86E-Liftboy Installation, operating and maintenance instructions
FULTON
FULTON 142401 installation instructions
Ingersoll-Rand
Ingersoll-Rand Force 5 FH5 Parts, operation and maintenance manual
Warrior Winches
Warrior Winches S9500HS Assembly & operating instructions

TOHO
TOHO S Series instruction manual
Allied Systems
Allied Systems W8L operating manual
Comeup
Comeup GIO 100s manual
GMP
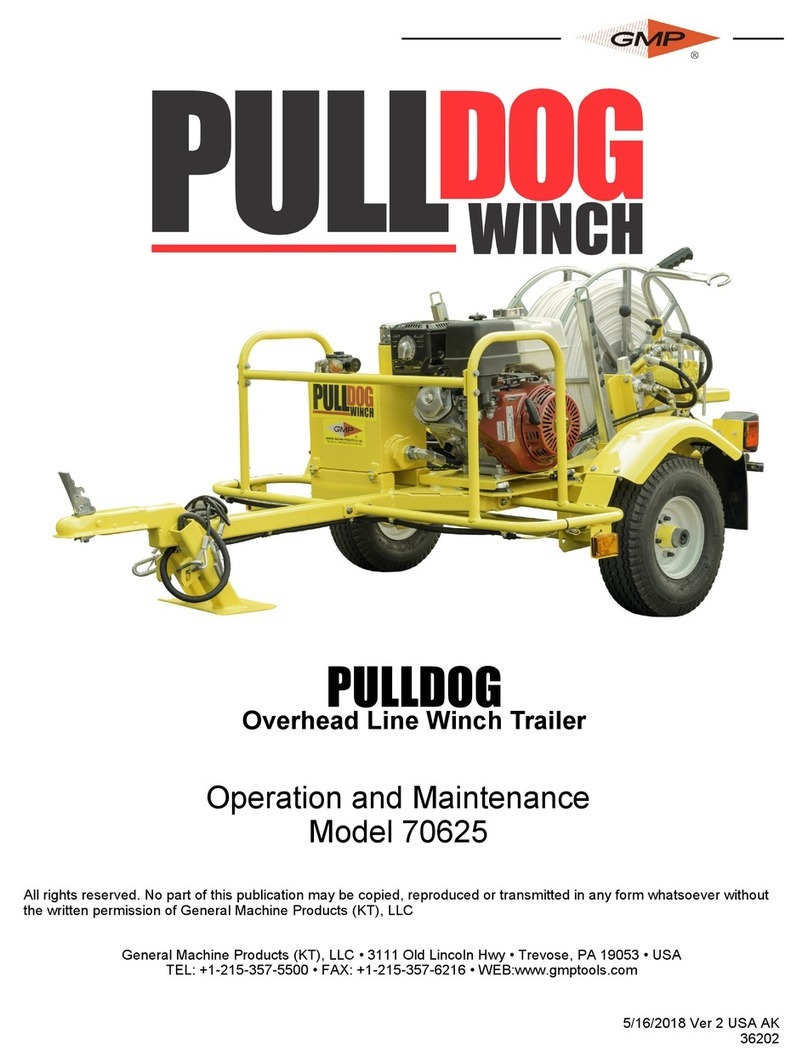
GMP PULLDOG 70625 Operation and maintenance
