Attaching Winch Line (Rope, Strap or Cable):
Always maintain a minimum of three complete wraps of rope, strap or cable on the drum.
Attaching a Rope:
Attaching a rope to the winch drum requires no bolts, nuts, or clamp. The rope must weave through the drum outer wall and be secured beneath
itself as shown in the illustration.
Attaching a Strap:
Winches designed for a strap have holes in the drums to accommodate a strap cross bolt. A grade
5 bolt of the largest possible diameter is required for strap mounting (see chart on following page).
Tighten the locknut just to where end play in bolt is taken up. Over-tightening can
deform drum. For winches having a strap anchor included, pass the strap loop under
the cross bolt, insert strap anchor in the strap loop, then pull tight.
If attaching strap without a strap anchor to a plastic covered winch, remove the drum
bolt and gently separate the plastic cover to allow the winch drum to be removed.
Install the strap according to the instructions below and re-install the winch drum as
it was before. On single-speed winches, torque the drum locknut to 9-10 ft-lbs. On
two-speed winches, torque the drum locknut to 24 ft-lbs. Be sure not to over tighten
as this may crush the spacer between the frame, and keep the drum from turning.
Attaching a Steel Cable to a Drum:
Pass the cable from the inside of the drum through one of the dimpled holes in the outer plate.
Loop the cable around the drum bearing, under itself, and leave 1” of cable extending past the
clamp location. Tighten the clamp nuts to approximately 2 ft-lbs.
Prior to Use
1) Inspect rope, strap or cable and replace if damaged.
2) Check mounting hardware for proper tightness and tighten if necessary.
3) Apply a drop or two of #30 weight engine oil to each bushing I.D. and to the ratchet pawl pivot points. Maintain a thin layer of chassis grease on
the gear teeth.
Rope
Cable
Keeper
Outer
Plate
Cable
Strap
Strap Anchor
F3295 (Rev-J 6525) 12/16
•Purchaser/owner must ensure that product is
installed according these instructions. Purchas-
er/owner must not alter or modify product.
•Operator and bystanders should never position
any part of body under any portion of this prod-
uct or the load being supported.
•Do not allow children to play on or around this
product or the load being supported.
•Do not use winch to move humans.
•Never exceed maximum rated capacity. Refer
to stamped markings or decals on product to
obtain rated capacity.
•Always inspect the cable or strap and its
attachment before each use to make sure they
are not damaged. Never use them if they are
worn, kinked, or frayed. If the cable or
attachment breaks, the cable will whip
violently, causing property damage, serious
bodily injury, and/or death.
•Never stand along side the winch cable, strap,
or rope or guide the cable, strap, or rope with
your
hands.
•Never operate with slippery, wet, or oily hands
and always maintain a firm grip on the winch
handle. Do not attempt to stop a winch by
grabbing the handle while in motion.
•Always maintain a minimum of three (3)
complete wraps of cable or rope on the drum, or
three layers of strap on the drum.
•Only winches that have a hub diameter of 1 3/4”
can accommodate steel cable.
•Assure there is adequate safety factor, of at least
3 times the maximum load for all components
used.
•A loud clicking sound from the ratchet must be
heard when lifting the load. If a loud clicking
sound is not heard, do not use and replace
ratchet components immediately.
•Never release the crank handle unless the
ratchet pawl is fully engaged and the load is
supported.
•Never leave a weight supported from the winch
while the winch is unattended, as another person
may attempt to operate the winch, thereby
creating an unsafe condition.
•This winch is designed for manual operation
only and the load rating is based on an
intermittent duty cycle.
•Excessive force in turning winch handle may
indicate overload. Winches require maximum
of 45 lbs of handle force to pull their rated load.
•If you cannot crank the winch with one hand
you are potentially overloading the winch.
•On two speed winches, make sure that the
ratchet pawl is properly engaged and holding
the load before attempting to change gears.
•Winches are not designed to secure boats to
trailers while towing. Boat tie downs should
be used for this purpose.
•Periodically check mounting hardware for
proper torque and tighten if necessary.
Always replace bent, broken, or worn parts
before using this product.
This product is rated according to SAE J1853
Failure to follow these warnings and instructions may result in property
damage, serious bodily injury, and/or death.
(Mounting hardware not supplied.) The winch stand must be capable of supporting at least five times the rated capacity of the winch. The mounting
surface must be equal to or greater than the footprint of the winch frame. When attaching the winch, use three 3/8” dia. grade-5 hardware and torque
to 28-30 ft-lbs. Mounting bolts will vary in length for each application. Check final installation and make sure winch is secure to mounting structure.
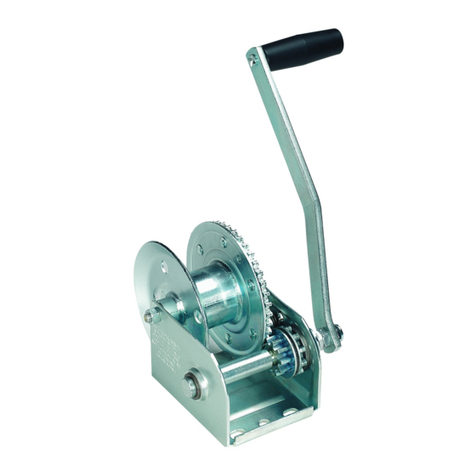
Installation Instr uctions
Warning: Failure to follow these warnings and instructions may result
in property damage, serious bodily injury, and/or death.
Read, Understand, Follow and Save These Instructions
Trailer Winches
Handle
Drum
Input
Shaft
Ratchet
Pawl
Handle
Locknut
Line direction
Drum
Bolt
Shift Lock
Lever
Input
Shaft
Handle
Locknut
Handle
Drum Hub
Ratchet
Line direction
Brake Lever
(optional)
Read, understand and follow all of these instructions and warnings (Instructions) before installing and using this product. Install and use this product only
as specified in these instructions. Improper installation or use of this product may result in property damage, serious injury, and/or death. Never allow
installation or use of this product by anyone without providing them with these instructions. You must read, understand and follow all instructions and
warnings for any product(s) to which this product is used in conjunction with or installed. Save these instructions with the product for use as a reference
for any future installation and use of the product.
®
Attaching a Handle:
Assemble the handle onto the flatted input shaft end. Tighten the 1/2” - 13 locknut against handle and torque to 22-25 ft-lbs. Do not over torque.
Drum
Bearing


