LV-381/manual/inside/date2023.6.30
Connection Table
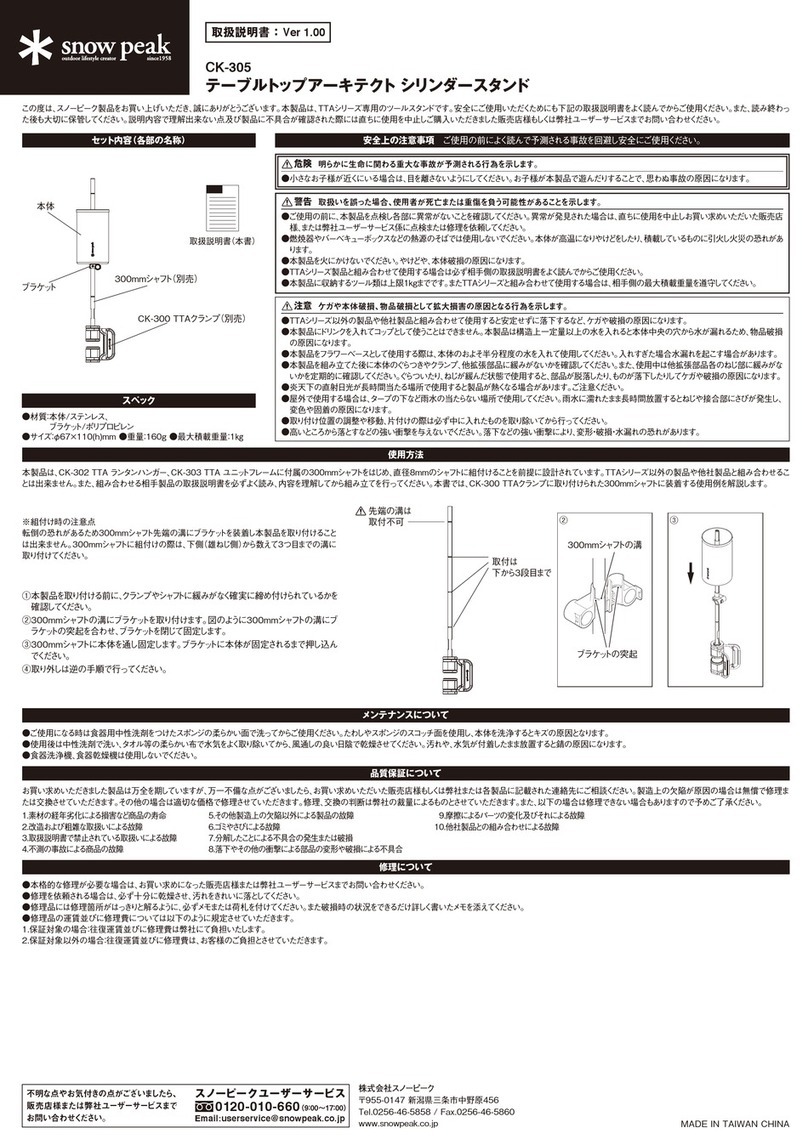
LV-381
Instruction Manual : Ver 1.00
Contents (Name of the Parts)
Thank you for purchasing a Snow Peak product. This product is an multi-functional camping table. For safety, read the following instruction manual before use. Please keep it safe
for future reference. Finally, if you find anything that you do not understand in the description or any problems with the product, please stop use immediately and contact the retailer
or Snow Peak Customer Service.
How to use *Disassembly should be performed in the reverse order of the assembly procedure.
Specification
●Size: 840×420×400 (h) mm / 33.1"×16.5"×15.7"
●Storage size: 850×100×505(h)mm /
33.4"×3.9"×19.8"
●Material: Tabletop / Stainless Steel (heat-resistant
coating), Legs / Stainless Steel
(heat-resistant coating), Rubber Cap
Knob / Aluminum alloy, Storage Case /
Polyester
●Weight: 6.5kg
DANGER / Misuse could easily result in a serious accident or death.
●When attaching this product, carefully read the instructions of the product to which this product is to be attached before use.
CAUTION / Misuse could result in injury to the user and/or damage to property.
●Take care to keep the joints free from any foreign objects or dirt. Dirty joints may
interfere in assembly. ●Be careful not to get sand, dirt, etc. caught in the threads
of the connecting bolt. ●This product is made of stainless steel, but it may rust
depending on the operating conditions and surrounding environment. ●This
product is not for permanent installation or use. ●Due to the characteristics of the
product, the bare metal of the tabletop and optional connection parts may be exposed
when using the product. ●Scratches on this product will expose the bare metal.
Please be careful when transporting and handling. ●If a hot Dutch Oven or pot is
placed on the tabletop, the heat may cause discoloration or melting of the coating
on the tabletop. ●Do not rub or scratch the product with hard or sharp objects.
●When placing something on this product, be careful not to dent or scratch it.
WARNING / Misuse could result in serious injury or death.
●Before using the product, check each part for abnormalities. If there are
abnormalities, take the product to the dealer or Snow Peak Customer Service for
inspection or repair. ●When attaching this product, carefully read the instructions
of the product to which this product is to be attached to before use. ●Do not move
the product with objects on top. Doing so may cause damage to the product or
injury to the user. ●Do not modify the product in any way. Modifications will impair
function, and strength is reduced. After-sales service for modified products is not
available. ●Make sure the legs are securely attached to the tabletop before use.
Otherwise, the joints may be damaged, or the top may fall off during use, which is
very dangerous. ●Do not place flammable or heat-sensitive materials on the
table. ●Use on a slope or in an unstable location may cause the unit to tip over,
resulting in a serious accident. ●When you use a combustion appliance on the
table, do not set up near flammable materials such as tents, tarps, dry grass, etc.
●When moving the product, changing the assembly pattern, or replacing items,
be sure to confirm that the fire of the combustion appliances is extinguished and
each item has cooled sufficiently before proceeding. Failure to do so may cause
burns. ●The body and surroundings may become hot under the blazing sun and
depending on the items used with the table. Please be careful to avoid burns. ●
The tabletop can become extremely hot when exposed to direct sunlight, depend-
ing on the item used and the location. This poses a risk of burns. Please carefully
assess the surface temperature before touching it, even if the table is placed in
the shade. Additionally, storing the product in direct sunlight or inside a car during
summer can also lead to burns. To prevent any accidents, avoid storing the
product in direct sunlight or in a car during hot weather. ●Due to the metal
composition of the tabletop in this product, there is a potential risk of electric
shock caused by electrical currents when using electrical equipment like portable
induction heaters or rice cookers on its surface. It's important to note that most
electrical equipment is not designed for outdoor use. Never utilize such
equipment on this tabletop, as there is a significant chance of electric currents
occurring. ●The load bearing capacity of this product is 50 kg / 110 lbs. Do not
place anything heavier than that on the product. ●Do not allow infants or small
children to sleep or sit on the table. ●Do not sit on the table or put your weight on
it with your hands. ●Pay close attention to fire and surrounding conditions while
using this product. Always keep a close eye on small children, especially while
using combustion appliances. ●Please read the "How to use" section carefully
and make sure that the product is set up correctly before use. If not set up correct-
ly, the product may tip over, catch fire, or burn.
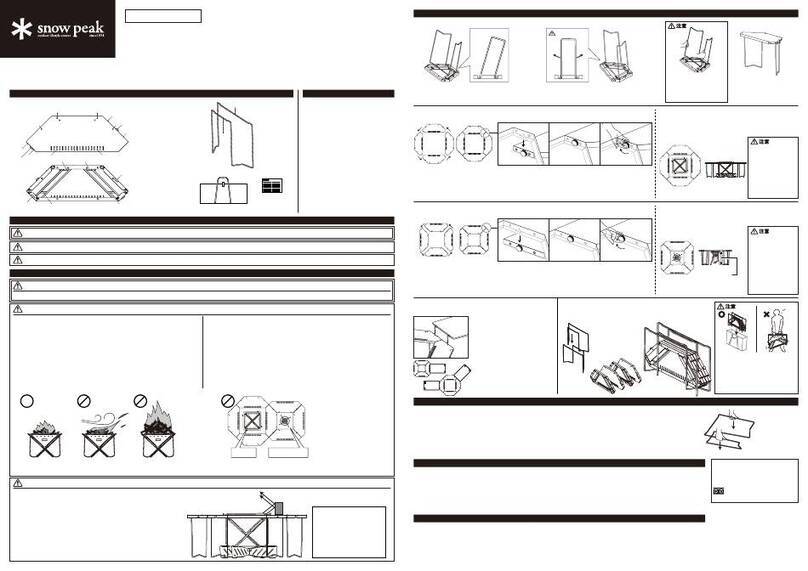
Connection Pattern
●Assembly of tabletop and legs
Place the surface of the tabletop facing you
and hold the legs. The Snow Peak logo
should be facing up at this time (it cannot be
assembled facing the other way).
Insert the heads of the Joint Pin of
the legs into the two ④slots A at the
bottom of the back of the tabletop at
the same time. At this time, insert
the Joint Pin by sliding, as shown in
Figure A.
Next, hold the bent part of the leg and
insert one side of the head of the Joint
Pin into the ⑤Slot B. At that time, it will
be smooth if you insert the head of the
Joint Pin into the ⑤Slot B while applying
force to the leg in the direction of the
arrow ①.
Confirm that the three Joint Pins have
been inserted securely, and insert the
head part of the Joint Pin into the ⑤Slot
B in the same way as in ③. At that time,
please hold the legs and the tabletop
firmly by hand so that the Joint Pins
inserted in ③will not come off.
(Surface)
(Back)
Tabletop
①Connection Bolt
②Connection Boss
③Multi-function Connection Hole
④SlotA
⑤SlotB
⑥NotchA
⑦NotchB
Leg
⑧Joint Pin
②
②
②
②
②②
③
③③
③
③③③③③
③
①
①
⑤
④
⑥⑥
⑥⑥
⑦
⑦
⑧
Storage case Instruction manual
(this document)
When the Snow Peak logo is facing up,
slot A ④should be on the bottom, and
slot B ⑤should be on the top.
①
Head of the Joint Pin
②
①
②
③①
②Insert
③Slide it
④①
②Insert
③Slide it
Snow Peak, Inc.
456, Nakanohara, Sanjo-Shi, Niigata 955-0147 Japan
Tel. +81 256-46-5858 / Fax. +81 256-46-5860
www.snowpeak.co.jp
Snow Peak USA, Inc.
404 NW 23rd Avenue, Portland, Oregon 97210, USA
Tel. +1 (503) 461-0781 / Instagram. @snowpeakusa
Email. info@snowpeak.com / www.snowpeak.com MADE IN KOREA
Repair
●If professional repairs are required, please contact the retailer where you purchased the product or Snow Peak Customer Service. ●When you request repairs, please
make sure that the product is dry and clean. ●Please attach a memo or a tag indicating the necessary repair and please write details of how and when the damage
occurred. ●Transportation and repair costs are determined as follows: 1. Within warranty: The transportation cost (both ways) and repair cost will be covered by Snow
Peak./ 2.Outside warranty: The transportation cost (both ways) and repair cost will be covered by the customer.
Snow Peak has taken all possible measures to ensure every product is durable and functions correctly. If you find any product defects, please contact the retailer where
you purchased the product or Snow Peak Customer Service. If there are apparent defects in the product's manufacturing, the defective product will be repaired or
exchanged free of charge. In other cases, Snow Peak will repair the product for an appropriate fee. The decision to repair or replace the product will be at our discretion.
Snow Peak will not repair the product for any damage that occurred due to the following:1.Material deterioration caused by age. / 2.Damage caused by modifications or
rough handling. / 3.Damage caused by inappropriate use not mentioned in the instruction manual. / 4.Damage caused by unexpected accidents. / 5. Any damage other
than defects in the manufacturing process. / 6.Damage caused by dust or rust. / 7.Damage and defects caused by dismantling the product. / 8.Damage and defects caused
by dropping, jolting or other shocks. / 9. Deterioration or failure of parts due to friction. / 10. Damage caused by the use of the product in combination with another
manufacturer's products.
Warranty
Maintenance
●Before using a product that has been in storage for a long time, check each part for abnormalities. If there are abnormalities, take the product to the retailer or contact
Snow Peak Customer Service for inspection or repair. ●When cleaning the product, do not use a scrubber made of hard material as it may scratch the product. Use a soft
cloth or sponge to clean the product. ●When storing, store in a well-ventilated, dry place out of direct sunlight. ●When light dirt, moisture, or oil adheres to the product,
immediately wipe it off with a dry cloth and dry it thoroughly. ●If salt (seasonings, etc.) or other chemicals adhere to the product, wipe thoroughly with a tightly wrung cloth
and dry thoroughly. ●When cleaning, painted parts should be cleaned with a mild detergent and should not be cleaned with acidic or alkaline cleaning agents. This can
cause paint to peel or stain.
①③Turn the knob of the
Connecting Bolt as if tracing
it with your finger from
the Notch A to bring the
edges of the tabletop closer
together. Be careful not to
overtighten.
②Adjust the position so that
the Connection bolts fit
into the corresponding
tabletop side notch.
●Installation example
Turn the knob of the
Connecting Bolt as if tracing
it with your finger from
Notch B to bring the edges
of the tabletop closer
together. Be careful not to
overtighten.
Adjust the position so that
the Connection bolts fit
into the corresponding
tabletop side notch.
Using the multi-functional Connection Hole in the
tabletop, it is possible to connect this product with
a Bamboo IGT Table Regular / Long, Bamboo
Left/Right Angle Extension, Bamboo Left / Right
Corner Extension (CK-116TR, CK-117TR, CK-218,
CK-219, CK-118TR, CK-119TR)
Use the IGT Low Height 400mm Leg Set (CK-112)
for each Multi-Function Table. Insert the Multi-Func-
tion Table into the Multi-Function Connection Hole,
as shown in the figure. Please read the instruction
manual for each item.
Loosen one connection
bolt until the threaded
part is visible by about
5~10 mm, and place the
Notch B over the knob
part of the connecting
bolt.
① ② ③
Jikaro Fire Ring Table (ST-050) can be connected using Connecting Bolt
and Notch B attached to the tabletop.
①Loosen one connecting bolt attached to the tabletop and the connect-
ing bolt on the Jikaro Fire Ring Table until the threaded parts are
visible by about 5~10 mm, and place the Notch B over the knob part
of the connecting bolt.
②Adjust the position so that the Connection bolts fit into the correspond-
ing tabletop side notch.
③Turn the knob of the Connecting Bolt as if tracing it with your finger
from Notch B to bring the edges of the tabletop closer together. Be
careful not to overtighten.
After removing the legs from the tabletop, stack them
as shown below and place them in the storage case.
●How to connect the "Connection Table" together
●Connection of long sides
Loosen the two Connec-
tion bolts until the threads
are visible by about 5~10
mm, and place Notch A
over the knob of the
connecting bolt.
Tighten the two Connecting Bolts
when attaching the long sides.
●Connection of short sides
●Combination example
●Connection with Jikaro Fire Ring Table (ST-050) ●Storage
■Connection with Bamboo IGT Table series
●Connection with Bamboo IGT Table Regular/Long, Bamboo Left / Right
Angle Extension, Bamboo Left / Right Corner Extension (CK-116TR,
CK-117TR, CK-218, CK-219, CK-118TR, CK-119TR)
<Attachment example>
(Back)
Figure A
Slot A
Slot B
Safety Precautions: Before use, please read thoroughly to ensure safety and avoid accidents.
The Connection Table cannot be attached to the
following products due to table structural reasons.
Never attach this product to a table of an incompat-
ible product number; otherwise, the table may tip
over, which may cause an injury.
・CK-300 TTA Unit Clamp Tool
・CK-020 IGT Stainless Steel Box Hanger
Non-compliant product number
ThisisalowresolutionPDFforconfirmation.
PleaseprinttheAIfile.
確認用の低解像度PDFです、
A I データが 入 稿 用 データとなります 。
