DANGER: Indicates actions from which life-threatening, major accidents are clearly expected.
■ When transporting the main unit by vehicle as a storage shelf
- Put the unit into the storage shelf / transportation state as instructed in the “Method of Use”section.
- Ensure that it does not obstruct the rear window or side windows.
- Ensure that the main unit and its contents do not fall out of the vehicle while the vehicle is moving.
- Keep multiple units unstacked and level if driving on bumpy roads. Otherwise, they may become damaged or tip over.
- Besides these instructions, also observe all traffic laws.
■ Other dangers
- If you are using this product in combination with any separately sold accessories, thoroughly read the instruction manual for
each item first.
WARNING: Indicates conditions which may lead to death or injury of the user if the product is mishandled.
● The plastic part of this product may deteriorate due to ultraviolet light, be damaged by strong impact, etc. Inspect for cracks,
partially whitened areas, and other abnormalities prior to use. If you discover any abnormalities, discontinue use.
● The maximum load of this product is 130kg per base unit (when used as a sofa, cot, or chair). When used as a storage shelf,
do not stack more than 3 units, and do not exceed a maximum load of 20kg per base unit.
● If a large load is placed on the base unit (plastic part) when the unit is being used on a carpet or other floor surface on which
the legs can easily slip, the unit may be damaged and tip over. After setting up the base unit, gently move it back and forth with
both hands. If the surface is slippery, do not use the unit there.
● This product’s plastic part and fabric are not flame-retardant. Be careful when using near lanterns, burners, fires, and other
high-temperature objects which may cause deformation or fire.
● Do not attempt to modify this product. Doing so may decrease its strength or durability, impairing its functionality.
● There are edges on parts of the back of the base unit. Be careful not to injure your hands.
CAUTION: Indicates actions which may lead to injury, damage to this product, or damage to other items.
● When using this product, select a sturdy, flat area that is not bumpy or sloped.
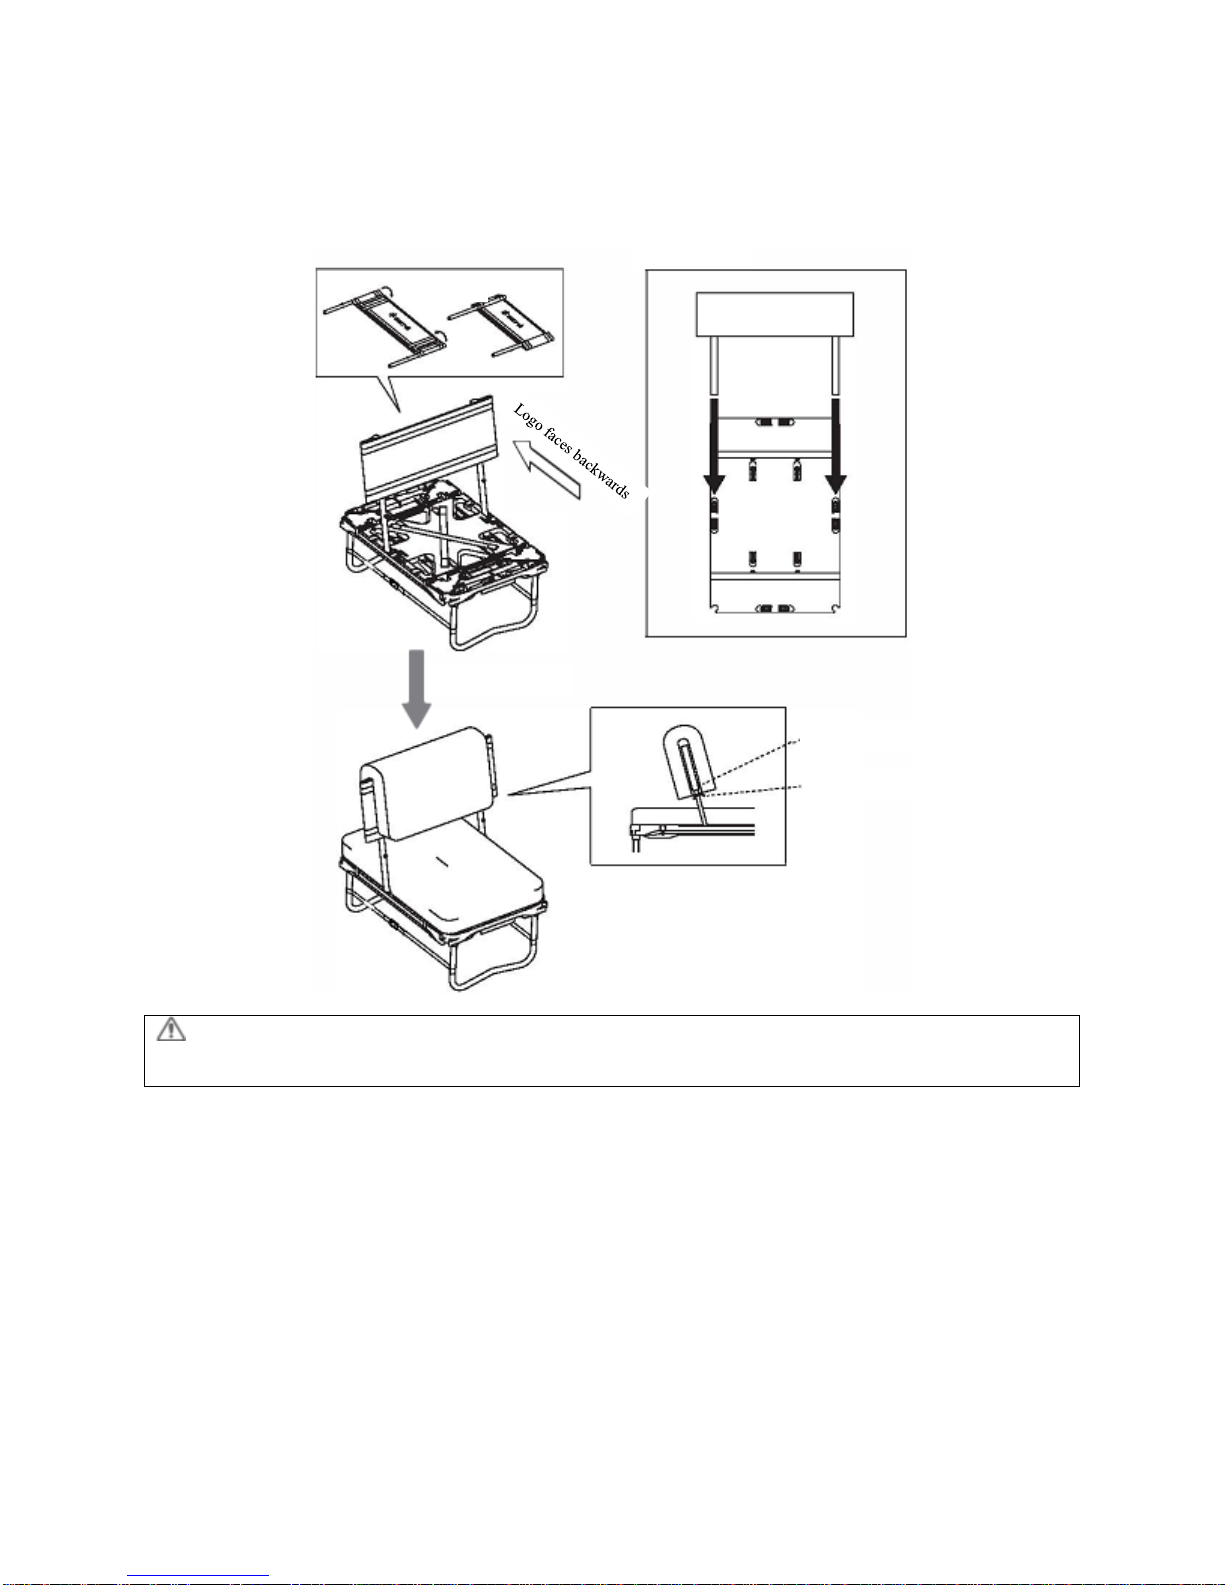
● When using this product as a sofa or chair, sit such that your back is in contact with the backrest.
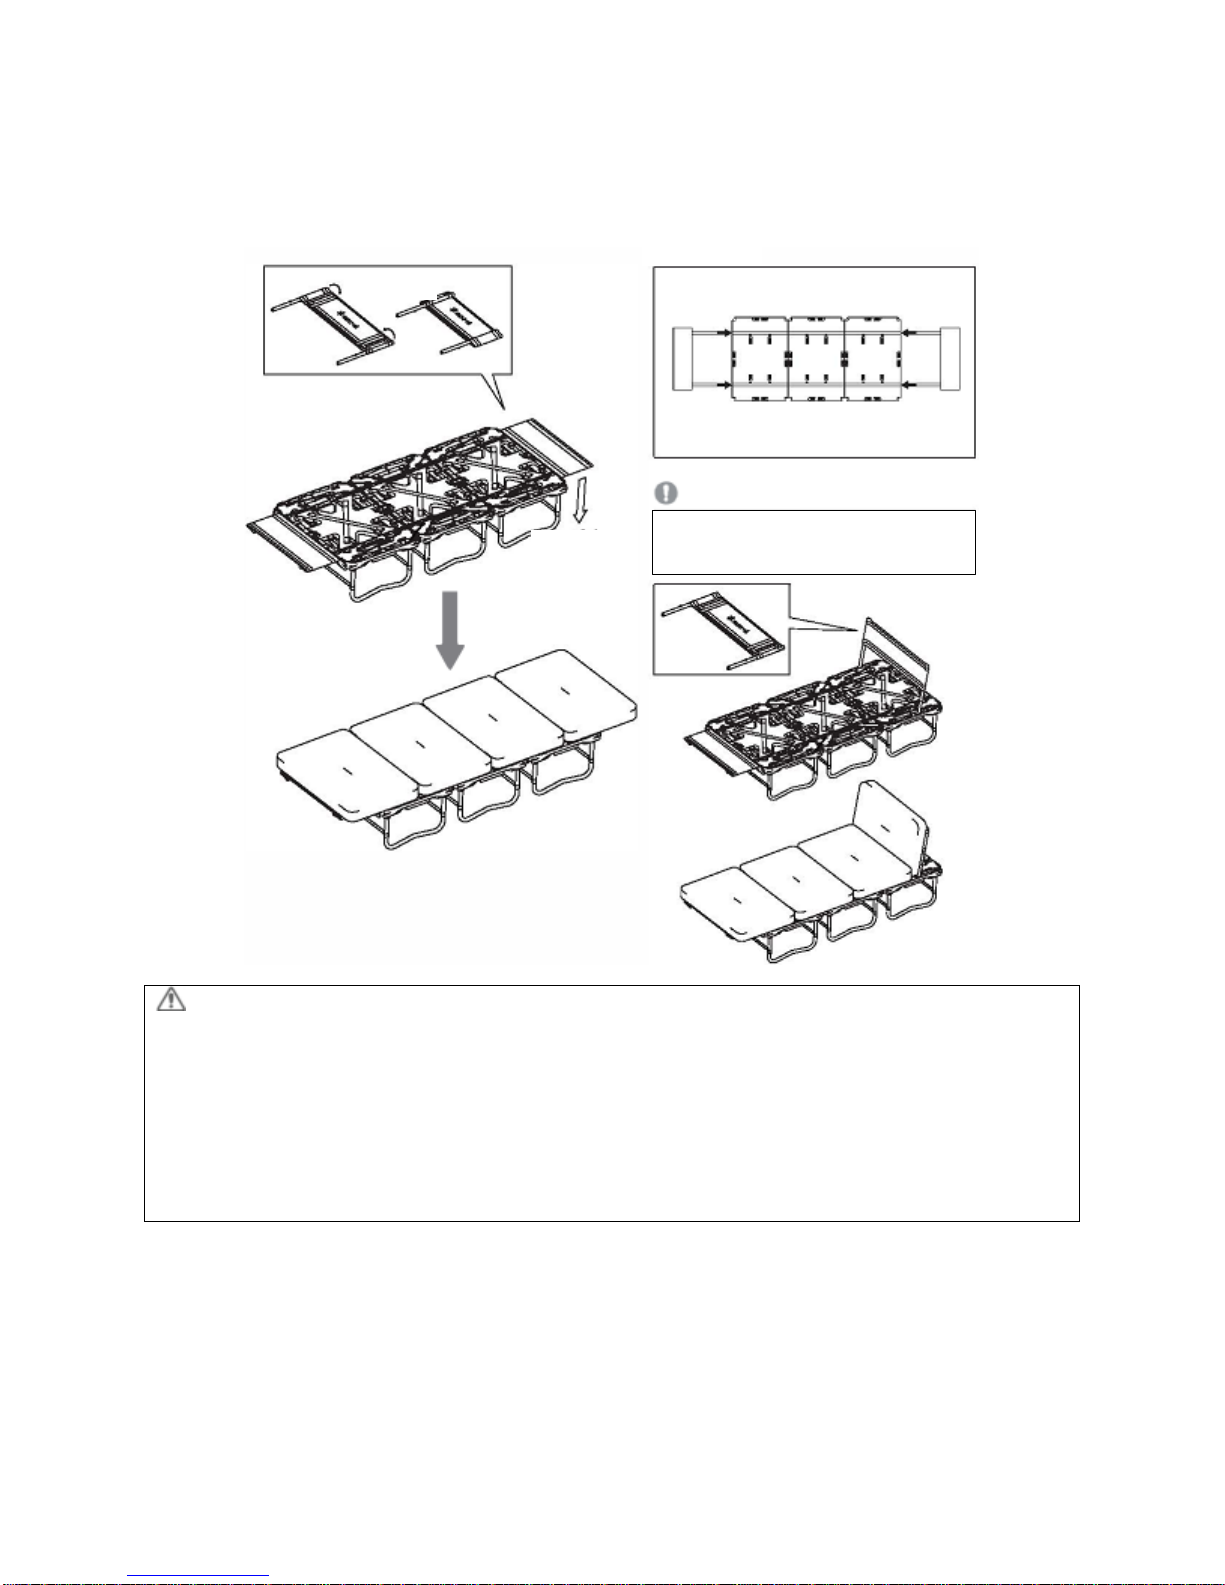
● When using this product as a cot, there are no legs on the ends of the seating surface (backrests). Placing weight on one end
can cause the other end to fly up or damage the backrest. Do not sit or place weight on either end of the cot, where you would
rest your head or feet. (Refer to the “Cot”subsection in the “Method of Use”section)
● When used as a cot, this product is for single-person use only.
● Take care not to let your fingers, etc. get pinched during assembly. After you finish assembling it, press the seat and backrest
with your hand to ensure that it is securely assembled before sitting on it.
● Do not impact or aggressively rock this product, as doing so can cause deformation or damage. In particular, ensure that you
sit down slowly so as not to place a large burden on the low seat.
● Always keep an eye on small children sitting on this product. Standing on the seat, facing backwards, and rocking are
particularly dangerous. The backrest could accidentally come off, or the unit could fall over. Only adults should assemble this
product.
● This product is not intended for permanent use.
● This product may scratch or damage certain types of flooring.
● Store in a location with little humidity and good ventilation. If stored when wet, mildew, unusual odor, or color transfer from
the outer material can occur. Remove any grime and moisture from the product and allow to sufficiently dry before storage.
● Do not move connected base units. If you are changing locations, separate the base units first. (Refer to the “Base unit:
Connection” subsection in the “Method of Use” section)
● When transporting a base unit, ensure that it does not accidentally touch people or other objects (walls, vehicles, etc.).
● The cushion fabric, plastic parts, and backrest may become discolored due to ultraviolet light, friction, water, etc. Please note
that leaving the unit outdoors may result in deterioration or discoloration of fabric and plastic parts.
● If the fabric of the cushion or backrest has water or sweat on it, color transfer to other objects can occur. Please handle with
care.
● Please take care when wearing accessories and other sharp objects while sitting on the cushion as these may tear or puncture
the fabric.
● The color of the cushion fabric may run when washed. Please wash separately.