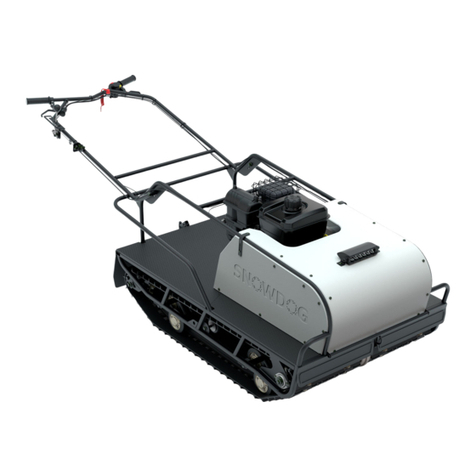
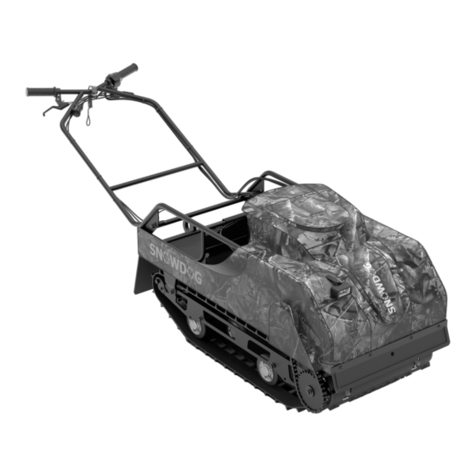
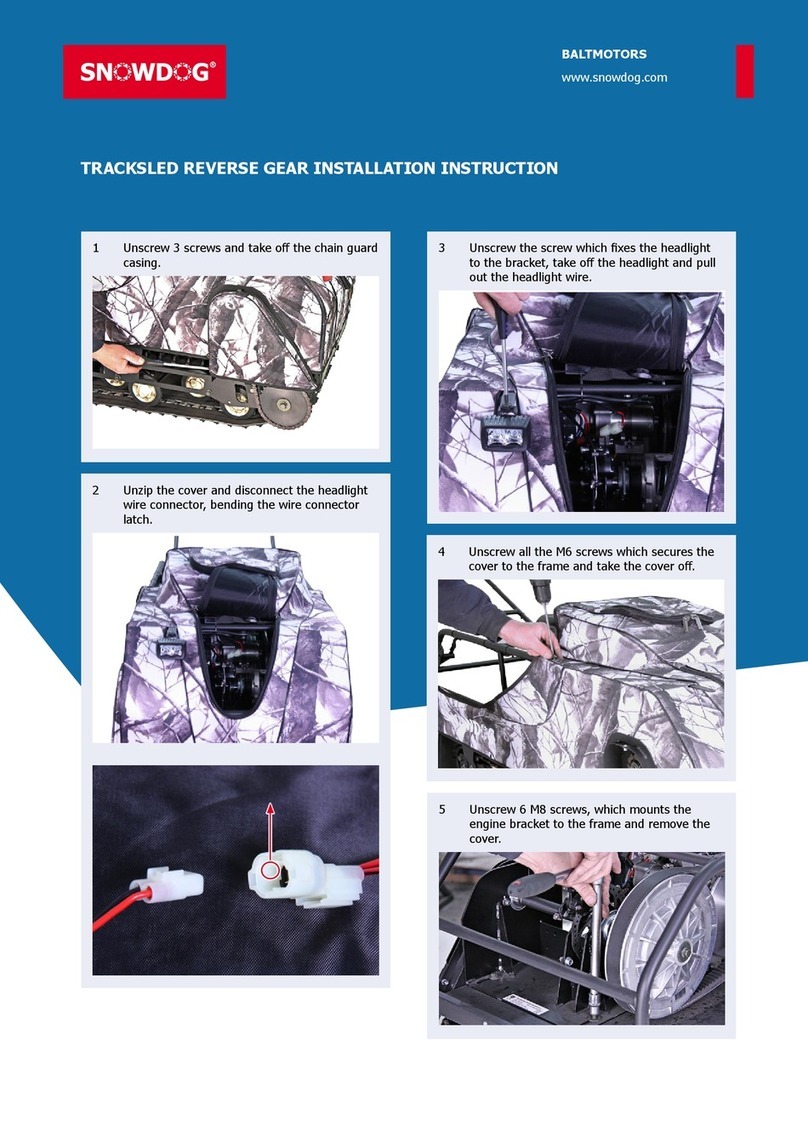
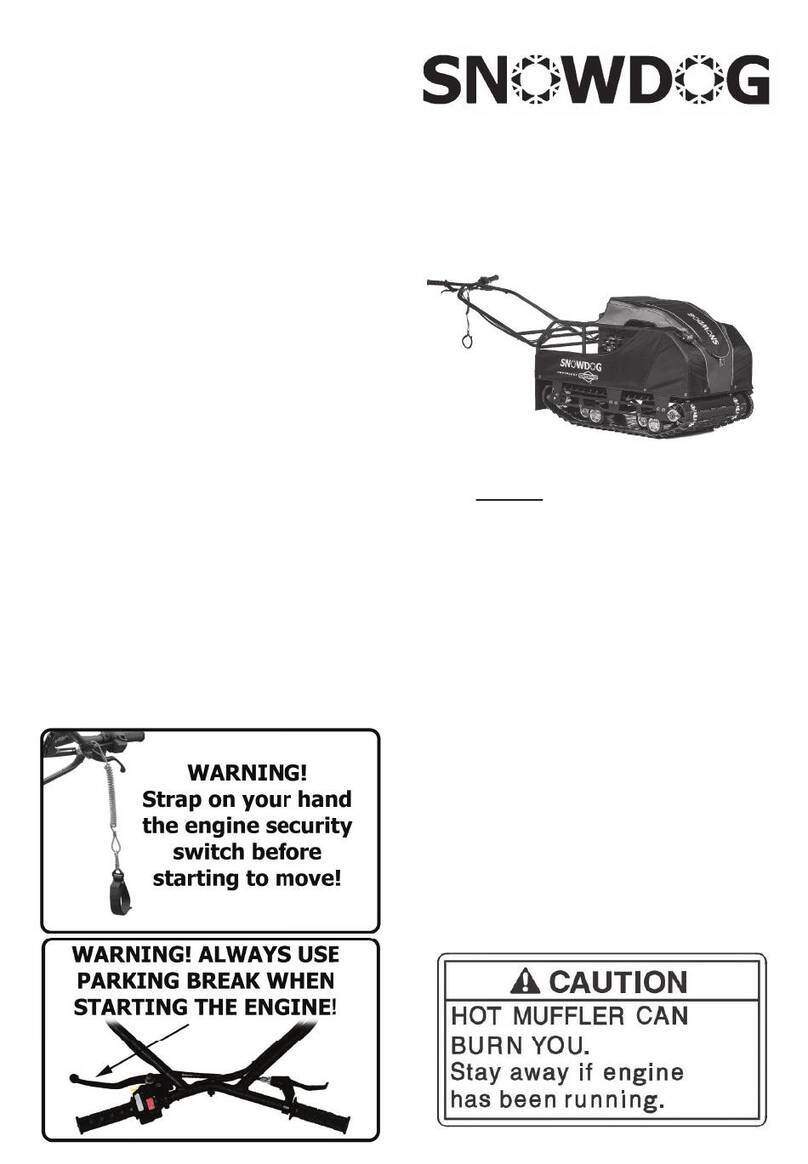
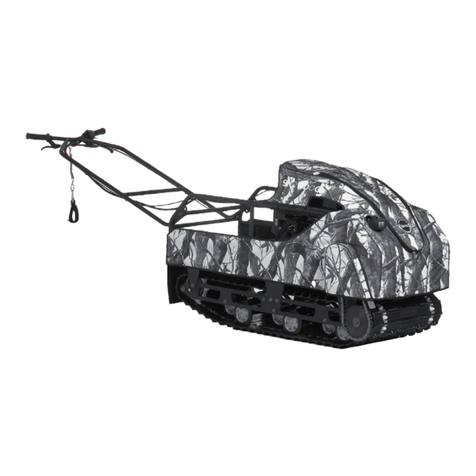
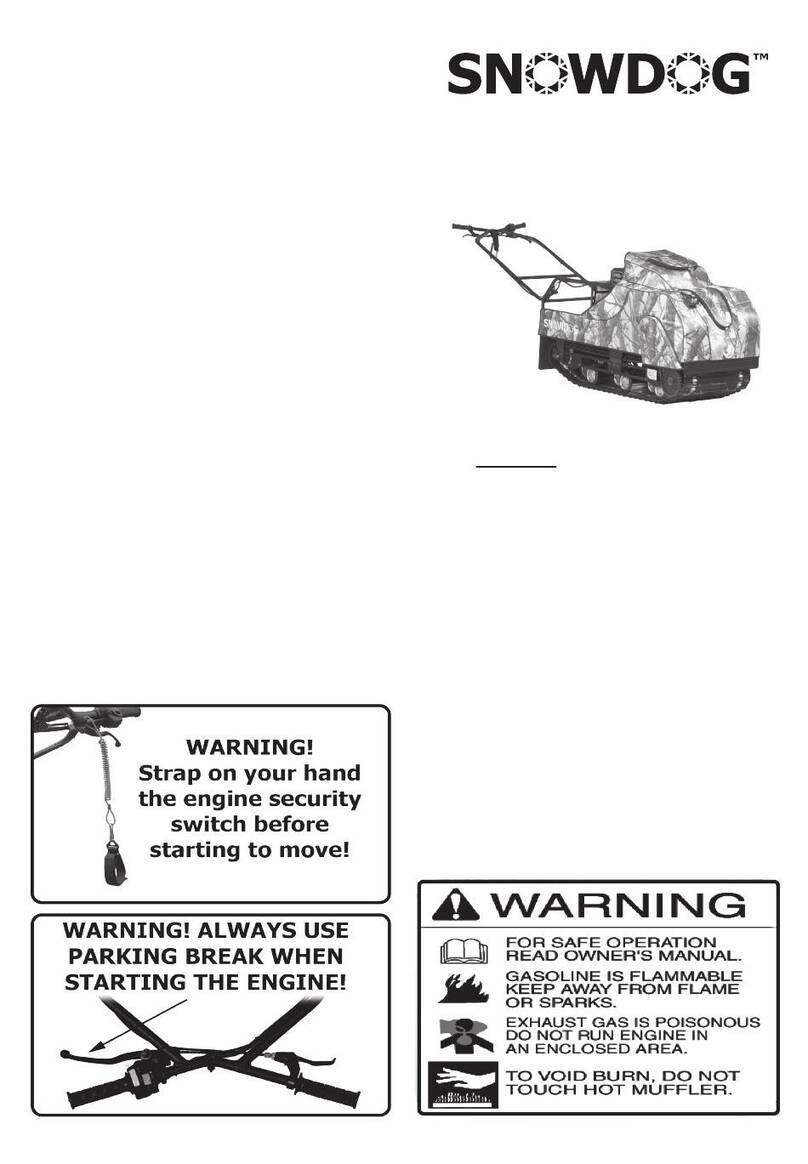
SNOWDOG Sport B13 MER User manual

1
User’s manual
Sport B13 MER,
Long Track B13 MER
SNOWDOG.COM

2
Content
1 Preamble ���������������������������������������������������������������������������������������������������������������3
2 Safety tips��������������������������������������������������������������������������������������������������������������3
3 SNOWDOG purpose������������������������������������������������������������������������������������������������4
4 Technical specications for SNOWDOG���������������������������������������������������������������������4
5 SNOWDOG overview�����������������������������������������������������������������������������������������������5
6 SNOWDOG identication, informational labels displacement���������������������������������������8
7 Operating the SNOWDOG����������������������������������������������������������������������������������������9
8 SNOWDOG inspection and maintenance�����������������������������������������������������������������12
9 Transportation������������������������������������������������������������������������������������������������������20
10 Storage��������������������������������������������������������������������������������������������������������������20
11 Snowdog manufacturer’s warranty ����������������������������������������������������������������������21
12 Electrical drawing �����������������������������������������������������������������������������������������������22
13 Warranty card�����������������������������������������������������������������������������������������������������23
14 Service list ���������������������������������������������������������������������������������������������������������24

3
1 Preamble
Thank you for purchasing the SNOWDOG!
To get the most of your SNOWDOG, please read this
manual carefully� Following technical instructions and safety
tips ensures continuous years of reliable product usage�
“SNOWDOG” is a compactly designed and highly reliable
SNOWDOG, equipped with a quality Briggs & Stratton engines
and ready for off -road work or recreation.
All information in this manual corresponds to the state of
the products at the date of signing and printing the document�
The manufacturer reserves the right to make changes to
design without prior notice and without any obligations� If
a diff erence is found between this Manual and your, please
contact your SNOWDOG dealer for the latest information�
The speci ed service life of SNOWDOG is 5 years,
provided the operation and maintenance rules speci ed in the
Manual are observed.
2 Safety tips
This Owner’s manual contains important information on
safety tips and operating instructions for SNOWDOG� In case
of resale, please transfer this document and the engine service
manual to the next SNOWDOG owner due to the importance
of the information contained� Please read this manual carefully
before operating the SNOWDOG�
!WARNING!
Non-compliance with the following rules
and instructions may cause serious damage
and even injuries. SNOWDOG operating
safety tips and instructions are marked with
“WARNING!” tag listed herein.
All the information on operating safety tips
and instructions for Briggs&Stratton engine is in the
Briggs&Stratton user’s manual. Please read the manual
carefully before using the SNOWDOG. Non-compliance with
the operation instructions and non-acquaintance with the
information in the user’s manual may cause serious damage
and even injuries�
!WARNING!
Before operating the SNOWDOG you must
read the Owner’s manual and engine
operator’s manual.
!After starting the engine, the Snowdog can
begin to move independently. Therefore,
before starting the engine make sure there
are no people, animals or objects in front
of the Snowdog that may be damaged or
injured.
It is prohibited to operate the SNOWDOG for minors
under 16 years old, and not recommended to operate
SNOWDOG for people who are not capable of safe operating
due to diff erent reasons.
• It is prohibited to operate the SNOWDOG under the
in uence of alcohol and/or drugs.
• It is prohibited to use SNOWDOG without the chain
protection cover, mud aps and emergency engine
shutdown switch�
• Operating a faulty or defective SNOWDOG unit is
prohibited�
• Operating the SNOWDOG on public roads and trails is
strictly prohibited�
• SNOWDOG is designated strictly for outdoor use� Indoor
use is prohibited�
• Park the SNOWDOG at a safe distance from people and
animals�
• Before starting the engine make sure there are no
people, animals or objects near the SNOWDOG that may
be damaged or injured�
• Strap the engine security switch on your hand before
starting the engine�
• Before starting the engine please make sure the throttle
control lever moves freely and is not xed.
• Do not start the engine if the handlebar are folded�
• Do not fold the handlebar while the engine is running�
• Always check the parking brakes�
• Stay clear of the moving gears in the drive shaft and
chain!
• Any maintenance of the SNOWDOG and the engine shall
be carried out only after the engine is shut off , unless
otherwise required for maintenance.
• Make sure all the screws on sprockets and shafts are
tightened before operating the SNOWDOG�
• If any malfunction occurs, stop the operation
immediately, locate the problem and x it.
• Wear protective gloves when riding the SNOWDOG�
• Wear protective helmet when riding the SNOWDOG�
• Wear ear protectors to reduce the harmful eff ects of
noise caused by the SNOWDOG�
• Sled or semi-trailers must be xed to the SNOWDOG
with rigid drawbars only�

4
3 SNOWDOG purpose
The SNOWDOG is designed primarily to be used
during winter time� For operating it during warm season it is
necessary to remove the wear strips and the plastic covers
and to take measures to prevent engine overheating�
The SNOWDOG is a labor-saving support equipment
(towing module), which is operated by a nearby operator. It
is designed for hauling cargo on sledge or semi-trailer. For
operating it during warm dry season, it is recommended to
use a semi-trailer. The SNOWDOG is not meant to be used on
roads, sandy soils and on the water.
4 Technical speci cations for “SNOWDOG”
Model Sport B13 MER Long Track B13 MER
Engine model Briggs & Stratton 25Т237
Engine series XR 2 100
Engine Displacement, ci (cc) 420
Length in ransporting/operating position, in (mm) 58/94,5 (1 430/2 400) 69/106,7 (1 755/2 710)
Width (including the handlebar), in (mm) 30,7 (780)
Height, in (mm) 30,3 (770) 30,6 (785)
Maximum speed, km/h 25
Weight, lbs (kg) 342 (155) 360 (163)
Maximum load capacity on top of the SNOWDOG, lbs
(kg) 110 (50) 132 (60)
Maximum sledge load capacity, lbs (kg) 440 (200) 550 (250)
Fuel type (gasoline) 87 octane
Fuel tank, l 6,6
Transmission type CVT
CVT belt, mm 30х14х1 120 30х14х1 380
Center distance between CVT pulleys, in (mm) 10,43 - 10,83 (265-275) 15,5 (395)
Track type Standard 56 MAX 66
Track length × width, in (mm) 111,3×19,69 (2828×500) 131,2×19,69 (3 333×500)

5
5.3 Top view
1� Engine
2� Brake disk
3� Brake caliper
4� Reverse gearbox
5� CVT belt
6� Driven pulley CVT
7� Battery
234 5 6
7
1
5 SNOWDOG overview
!WARNING
All the images in the Manual are for referential use only. The actual appearance of the Snowdog
may vary.
5.1 Basic elements for SNOWDOG:
1� Trunk box
2� Air lter
3� Mu er
4� Fuel tank
5� Raising hood
6� LED-headlight
7� Front handle
8� Handlebar
9� Rear handle
10� Rear mud ap
11� Track tensioner
12� Track
13� Wheel trolley of suspension
14� Slide-ways (if available)
15� Rubber hood latch
16� Driving sprocket
17� Transmission chain
18� Driven sprocket
19� Front mud ap
5.2 Basic controls
1� Plastic hand guards
2� Throttle control lever
3� Handle switch assembly
4� Handle
5� Gearbox shift mechanism
6� DC outlet for external devices
7� Kill switch
8� Parking control lever with lock
15
14
11
10
8
123 4 5 6 7
16 18 19
9
12 13 17
2
1
5 6
4
7
3
8

6
To shift the gear into the “reverse” position, stop the
SNOWDOG and switch on the parking brake. Reduce the
engine to idle. Make sure the CVT belt is xed. Switch the
lever backward as shown on the picture� Slowly start moving�
If the CVT belt is moving or there are diffi culties with
shifting gears, shut off the engine, switch off the parking
brake and rock the SNOWDOG back and forth�
!WARNING!
Never shift gears if the CVT driven pulley is
rotating.
!Never switch the direction of moving when
the parking brake is switched off . Never start
moving while the parking brake is switched
on.
!Never use the full throttle immediately after
the shift of the gear.
!Start moving smoothly, with minimal
possible speed. For the rst couple of meters
after the shift, move with the lowest possible
engine load.
5.7 DC outlet
The DC outlet can be used for plugging lighting devices,
radio devices, etc. The outlet should be used only when the
engine is running�
Maximum values of parameters permitted for using the
outlet:
rated voltage — 12V;
maximum power — 20 W (1,6 A).
1
5.4 Handle switch assembly
(1) - Electric starter start button. When this button is
pressed the electric starter is working and the engine can
be started� Do not hold the button down for more than
10 seconds�
(2) - Headlight switch (front light). When the switch is in
position the light and heaters are working�
When switch is in position the light and heaters are
working�
When switch is in position both the light and heaters
are off .
!WARNING!
Do not turn on the headlight if the battery is
not connected!
(3) - Ignition on/off switch.
When the switch (3) is in position – toward the
operator the ignition is on� The engine can be started�
When the switch (3) is in position – away from
the operator the ignition is off . The engine cannot be started.
5.5 Engine security kill switch
There is engine emergency kill switch in the middle of
the handlebar, it consists of the button and the safety pin.
The operator of the SNOWDOG should always operate
it with safety pin strap belt around his hand� If the operator
should leave the tracksled during a motion, the safety pin will
leave the button thereby turning the engine off .
5.6 Reverse gearbox (if available)
Choosing the direction of moving:
To shift the gear into the “forward” position, stop the
SNOWDOG and switch on the parking brake. Reduce the
engine to idle. Make sure the CVT belt is xed. Switch the
lever forward as shown on the picture� Slowly start moving�
32
1
Heat

7
!WARNING!
The power is only supplied to the DC outlet
in mode .
!When the outlet is not in use it must always
be covered by a cap.
Do not plug in external power consuming devices which
require more power than the aforementioned maximum value.
If external power consuming devices will be used while
the engine is not running, the battery may lose it’s charge
and it will be impossible to start the engine using the electric
starter�
Do not use car cigarette lighter and other accessories
with plugs that can produce heat as this can damage the
outlet�
5.8 Parking brake lever.
1� Parking brake lever�
2� Parking brake lever lock�
5.8.1 Switching the parking brake on:
1� Press the lever (1)�
2� Press and hold the lock (2)�
3� Release the lever (1).
4� Release the lock (2).
5.8.2 Switching the parking brake off :
1� Press the lever (1)�
2� Release the lever (1).
!WARNING!
Never start the engine while the parking
brake is switched off or faulty.
!Never start the motion while the parking
brake is switched on.
5.9 Throttle control lever
1� Gently press the lever to increase the RPMs in the
engine�
2� Release the lever for deceleration.
!WARNING!
Check the operation of the throttle control
lever before every use.
Heat
2
1
5.10 Choke control lever
When the choke control lever is in the position (1), the
choke is open (used during the Snowdog operation)�
When the choke control lever is in the position (2), the
choke is closed (used for starting the engine)�
5.11 Fuel valve
Fuel valves are used to control the ow of fuel from the
fuel tank�
The fuel valve is open when the lever is in
position (I)� The fuel valve is closed when the lever is in
position (O)�
!WARNING!
If you store and transport the SNOWDOG
with an open fuel valve, the fuel will get into
the crankcase and mix with the oil.
6 SNOWDOG identi cation,
informational labels
displacement
Manufacturer’s informational labels with the information
on the manufacturer, model, and SNOWDOG serial number
(double) are located on the front of the engine mount�
1
2

8
6.5 SNOWDOG serial number
Serial number is placed on the rear part of the engine
mount (under the cylinder) using point marking method�
6.6 Engine identi cation
Number, model and type of the engine are placed on the
front of the crankcase (1) using point marking method� An
adhesive label with the serial number and barcode (2) is
affi xed to the front of the fuel tank.
7 Operating the SNOWDOG
!WARNING!
Please read the user’s manual for the
engine and the SNOWDOG carefully before
operation. Make sure you have completely
understood the instructions for the operation
and maintenance of SNOWDOG.
!Please read the Briggs&Stratton engine
user’s manual carefully before using
SNOWDOG. All the information on engine
maintenance contained in this manual
serves as guidelines. If the maintenance
instructions in this SNOWDOG owner’s
manual are diff erent from those in the
Briggs&Stratton engine user’s manual,
follow the instruction speci ed in the latter.
!The rst 20 hours of operating the
SNOWDOG are needed for engine and
transmission to adjust. During this period,
use SNOWDOG with lowest possible load.
!When operating the SNOWDOG at an
ambient temperature of over 41 °F (+ 5 °C),
it is necessary to open the zipper placed in
the front part of the cover or remove the
cover.
2
1
6.1 Informational label with serial no.
6.2 WARNING labels #1 and #2.
6.3 WARNING label #3.
6.4 Dual-sided WARNING label #4.

9
!When operating under heavy duty conditions
the maintenance should be carried out more
often.
7.1 SNOWDOG set-up
!WARNING!
Please read the user’s manual for the
engine and the SNOWDOG carefully before
operation.
!Make sure you have completely understood
the instructions for the operation and
maintenance of SNOWDOG.
7.1.1 Battery installation
1� It is necessary to install and connect the battery before
using the SNOWDOG� You will need a battery (supplied
with the SNOWDOG), a metric wrench (not included)
and a Philips screwdriver (not included)�
2� Unscrew 2 bracket mounting bolts using metric wrench�
3� Install the battery, and tighten it with the bracket using
the metric wrench�
4� Connect the electric wires to the battery, strictly
observing the polarity� Wire with the red cover is
connected to the cleat marked with “+” sign, wire with
black cover is connected to the cleat marked with “-”
sign. Tightly secure the сontacts.
General view of the assembled battery is shown below�
!WARNING!
Pay attention to the polarity when
connecting the battery!
!Do not turn on the headlight if the battery is
not connected!
!The voltage of the charged battery should
be within the range of 12,6 – 12,9 volts. If
the battery voltage is less than 12,6 volts, it
must be charged.
!Use chargers designed for AGM batteries.
Do not use chargers with voltages above
14,6 volts as they will damage the battery.
7.1.2 Handlebar height adjustment
To adjust the height of the handlebar you must
rearrange xture in one of the three holes (1). In order
to raise the wheel higher, move the mounting holes in the
bottom. In order to lower the wheel, move the steering wheel
to the upper hole�
Please NOTE, both mountings of the handlebar must be
on the same level�
!WARNING!
Special attention shall be paid to the
fastening of the handlebar, as well as to
the attachment of the wiring and cables for
throttle and parking brakes. Make sure that
they are not caught between the handlebar
and the cover crossarm. Make sure the
wiring and cables are not stretched when
the handlebars are unfolded. Make sure
the wiring and cables are not breaking or
damaging when folding the handlebar.
!Do not press the steering handles during
operation on hard surface roads. Do not lift
the front of the Snowdog using the steering
handles.
7.1.3 Installation of hand guards
!WARNING!
Left and right hand guards are diff erent.
1� Attach the hand guards to the steering handles with a
screw (1), bushing (3) and nut (2) but do not tighten.
2� Install a bushing (3) and a screw (4) through the hand
guards�
3� Tighten the ttings.
7.2 Preparation for moving
!WARNING!
After starting the engine, the Snowdog can
begin to move independently. Therefore,
before starting the engine make sure there
are no people, animals or objects in front
of the Snowdog that may be damaged or
injured.
1
2 3
4

10
2� Close the choke on engine or on handlebar��
3� Shift the ignition switch located on the steering switch
assembly to “ON” position -
4� Install the safety pin of the kill switch (1) on the end
switch (2), put the strap belt (3) on your hand or attach
it to your belt�
5� Check how the kill switch is installed� Kill switch which
is not installed completely may lead to incorrect work of
the engine�
1
3
2
1� Move the handlebar from the transport to the working
position�
2� Make sure the control cables (throttle, brake and reverse
gearbox cables) are not overly bended, crushed or
damaged�
3� Clean the engine carburetor control levers from snow
and other contaminations. Make sure the carburetor
control lever moves and is not blocked�
4� Make sure the throttle lever is not faulty, moves freely
and returns to the initial position� Lubricate or change
the throttle cable, if necessary.
5� Make sure the brake lever is not faulty, moves freely and
returns to the initial position� Lubricate or change the
brake cable, if necessary.
6� Switch on the parking brake. Make sure it is functional
and prevents the SNOWDOG from moving�
7� Check the lubrication and the chain tension. If necessary,
lubricate and pull the chain�
8� Attach the sled or semi-trailer to the SNOWDOG using
the hitch� Check the mounting of the hitch�
9� Check the oil level in the engine�
10� Prepare the engine for starting, as described in the
Briggs&Stratton engine manual.
11� Check the fuel level. Add fuel, if necessary. Make sure
the tank lid is securely closed�
12� Check the position of the suspension trolleys and sliders�
13� Switch the reverse gearbox into the “forward”�
7.3 Starting the engine
!WARNING!
After the engine was started, the SNOWDOG
may start moving on its own. Before starting
the engine, make sure there are no people,
animals or objects near the SNOWDOG
that may be damaged or injured. It is
recommended to lock the SNOWDOG in place
with an obstacle, if you start a SNOWDOG,
which is faulty, or after long idle time, or
at extremely low temperatures. Check the
throttle lever operation before starting the
engine. Switch on the parking brake before
starting the engine.
1� Open the fuel lock�

11
6� Check the throttle lever operation�
7� Make sure the parking brake is on.
8� Make sure there are no people, animals or objects near
the SNOWDOG that may be damaged or injured by it�
9� Start the engine with an electric starter (if you will not
use the manual starter)� To start the engine press and
hold the electric starter button on the handlebar switch�
Release the button right after starting the engine. Make
sure the starter button does not touch the parking brake
lever�
!WARNING!
When starting the engine with the electric
starter do not rotate the engine for more
than 10 seconds at each attempt. If the
engine does not start, release the starter
button. Pause for 30 seconds before
attempting the next try. Do not rotate the
engine for more than 10 seconds at each
attempt.
10� Start the engine with a manual starter� Pull out the
starter handle until rst noticeable resistance. Without
returning it to its place, swiftly pull the handle further
out and start the engine. After starting the engine,
slowly return the handle back to its initial position,
allowing for the cord to wind-up.
!WARNING!
Do not twitch the handle when starting.
Do not pull the cord out all the way until it
stops. Do not release starter handle abruptly
after starting.
11� Let the engine to run with choke for about a minute, and
then gradually move away the choke� Let the engine to
warm up for at least two minutes�
12� Release the parking brake from the xed position before
moving�
7.4 Movement
The throttle lever on the right side of the handlebar
adjusts the RPMs, changing the speed and the towing force.
The SNOWDOG starts moving at approximately ¼ stroke of
the throttle lever. Start moving slowly, avoid sharp increase in
the RPMs.
To make a turn while moving, tilt the handlebar in the
opposite direction. While moving in the deep snow, you can
make a turn by tilting the SNOWDOG in the direction of the
turn�
7.5 Maintenance during movement
When moving on wet snow, or snow with water under it,
or on puddles, clean the transmission and the suspension of
snow and ice regularly�
!WARNING!
When operating the SNOWDOG for more
than an hour, it is necessary to stop and
check the following:
1. Check the throttle lever operation.
2. Check the carburetor and centrifugal governor
levers. There should not be any ice or frozen snow
on them.
3. Check the drive chain, lubricate if necessary.
4. Visually inspect the mounting, paying particular
attention to the attachment of the hitch and
handlebar mounting.
7.6 Stopping the SNOWDOG
To stop the SNOWDOG, cut the throttle. The SNOWDOG
will slow down and eventually stop�
To shut down the engine in case of emergency, ip the
ignition switch located on the handlebar switch assembly
on the left side of the handlebar to “OFF” position or pull
out the engine security switch. When the SNOWDOG stops,
turn the parking brake on� When the SNOWDOG is stopped
and the parking brake is on, you can switch off the engine.
When stopping for more than 10 minutes, close the fuel
lock. Turn off the headlight. When it is raining or snowing, or
the temperature is close to 32 degrees Fahrenheit (0°С) or
lower, it is necessary to protect the SNOWDOG with cover for
the time of parking. Otherwise, snow and water may freeze
on engine control levers and other parts of the SNOWDOG
making controlling the SNOWDOG impossible�
In case the SNOWDOG was riding through water or wet
snow, it is necessary to clear it from snow and ice, otherwise
the water can freeze and bind down the transmission resulting
in inability to move�

12
8.1.1 Checking oil level
Check the oil level on an idle engine located on a
horizontal surface.
1� Take the dipstick off and wipe it clean.
2� Put the dipstick into the oil ll neck to measure the oil
level, but do not tighten it. Take the dipstic out and
check the oil level�
3� If the oil level is near or lower the minimum mark on
the dipstic, add the recommended oil to the upper mark
level (lower edge of the oil ll). Do not pour oil above
the level�
4� Put the dipstic back�
!WARNING!
Operation with low oil level may damage the
engine.
!Increased oil level indicates water or fuel
ingress.
!Do not start the engine if the oil lter cap is
taken out.
8.1.2 Changing the oil
Change the oil for the rst time after 5 hours of engine
operation�
Then change the oil every 50 hours of engine operation
Change the oil only in a warmed-up engine.
1� Take the dipstic off and clean the oil ll area of any
debris�
2� Pump the oil out through the oil ll. Please make sure to
dispose of the used oil in an environmentally safe way�
We recommend that you take the used oil in a closed
container to your nearest waste disposal site�
!WARNING!
Dispose of the oil in accordance with current
legislation.
3� The engine should be located on a horizontal surface.
Add the recommended oil to the upper mark level (lower
edge of the oil hole)�
4� Put the dipstic cap back and tighten it�
7.7 Inspection and maintenance after
operation
1� Close the fuel lock�
2� Switch off the ignition.
3� Switch off the headlight.
4� Unload the SNOWDOG� Do not leave it loaded to prolong
the life of the suspension springs�
5� Clean the SNOWDOG of any snow, ice, branches, leaves
or dirt�
6� Check the chain tension. If necessary, lubricate and pull
the chain�
!WARNING!
It is recommended to use aerosol lubricants
designed for motorcycle chains.
7� Check the condition of the driving and the driven
sprockets�
8� Carefully inspect the CVT. Clean up, if necessary.
9� Check the condition and availability of plastic inserts�
Lubricate the working surface, if necessary. If plastic
inserts are missing or worn out — insert new ones�
10� Visually check the track tension. If necessary, pull the
track�
11� Visually inspect the SNOWDOG for leakage (fuel, oil).
12� Check the trolleys and sliders�
8 SNOWDOG inspection and
maintenance
!WARNING!
Please read the Briggs&Stratton engine
user’s manual carefully before using
SNOWDOG. All the information on engine
maintenance contained in this manual
serves as guidelines. If the maintenance
instructions in this SNOWDOG owner’s
manual are diff erent from those in the
Briggs&Stratton engine user’s manual,
follow the instruction speci ed in the latter.
8.1 Engine oil
Recommended oil
Use engine oil that meets or exceeds SJ or SL standards
of API� Do not use special additives� Always check the API
service mark on the oil container to be sure it contains the
letters SJ, SL or equivalent.

13
Use engine oil that meets or exceeds SJ and SL
standards of API� Do not use special oil additives� Always
check the API service mark on the oil container to make sure it
contains SJ, SL or equivalent symbols.
SAE 10W-30 or SAE 5W-30 oil is recommended for
common use� Engine oil capacity is 1�1 liters�
8.2 Fueling
!WARNING!
Fill the gasoline engine according to the
Briggs&Stratton engine manual.
!Fuel is highly fl ammable and explosive, you
should avoid getting burned and injured
while working with it.
Stop the engine before refueling. Make sure there are no
heating appliances, sparks or ames around.
Refuel only outdoors.
Refuel only in a well-ventilated area and only if the
engine is stopped. If the engine has been recently running, let
it cool down rst.
Spilled fuel is not only highly ammable but toxic and
may be harmful to people and the environment. If fuel spills,
wipe it up as soon as possible�
Make sure that there is enough fuel in the tank. Fill the
fuel tank up to the bottom part of the ller neck, as shown in
Figure�
!WARNING!
Do not ll the tank with fuel above the
maximum level. The fuel expands when
heated. If the tank is over lled then the fuel
heated by engine or sun can leak from the
tank.
!Do not spill fuel, especially on the engine and
the muffl er as it may cause re and heavy
injuries. Wipe the spilled fuel dry.
After refueling make sure that the cap of the
fuel tank is sealed tightly.
!If the SNOWDOG will lean heavily or turn
over it is possible for the fuel to leak through
the fuel tank cap.
8.3 Chain
8.3.1 Checking the chain tension
Visually inspect the proper tension of the chain after
each use� There should be no damage to the rollers or chain
links� There should be no jamming or rusty links�
It is necessary to remove the protection cover (if
available) to check the chain tension or change the sprocket
or chain� Correctly tensioned chain will have a loose lift of
0,2 in (5 mm) between the sprocket. Loose lift less than 0,2
in (5 mm) will result in rapid chain wear, and will lead to fast
sprocket wear. An excessively loose chain can fall off during
operation� Loose chain needs to be tightened�
While operating, the chain stretches, and the distance
between chain links changes� If the adjustment range is not
enough, the chain should be replaced. Do not shorten the
chain by removing links�
8.3.2 Chain lubrication
During visual inspection, it should be clear that the chain
is lubricated. However, it should not be lubricated excessively
so as to avoid sand and dirt sticking. Before lubrication, clean
the chain of dirt and the old lubricant with an aerosol cleaner
or a cloth moistened in kerosene or solvent. After cleaning,
wipe the chain dry�
After cleaning the chain, lubricate it with aerosol
lubricate for motorcycle chains� Lubrication should be sprayed
into the gap between the links and rollers of the chain� Wipe
the excess lubricant with a dry cloth�
!WARNING!
It is recommended to use aerosol lubricates
for motor vehicle chains.

14
4� Tighten the bolts�
!WARNING!
If the tracksled is regularly falling to one
side, increase the tension of the track on the
same side. On the opposite side, loosen the
tension of the track.
8.5 Wear strip maintenance (if provided)
After each operation check the condition of wear strips
(1). Make sure that the wear strip cover (2) is tightly adjacent
to the metal frame�
Make sure that no less than 7 mm of the wear strip
cover thickness remains. Otherwise, replace the cover.
8.5.1 Wear strip installation (if provided)
1� Loosen the track�
2� Unscrew and remove the central wheel trolley of
suspension (if provided)�
3. Remove the plugs (3) from the wheels.
4� Install the axle (4) inside the trolley�
5� Install the bushings (5) and (6) on the axle�
6� Install the wear strips (7)�
1
2
3
5
4
8
10
7
6
9
8.3.3 Adjusting the chain tension.
To adjust the chain tension:
1� Loosen six screws (1) that mount engine and CVT
brackets with SNOWDOG’s chassis platform�
2� To loosen the chain you need to move the engine
mount with the motor forward in the direction of movement;
to tension the chain you need to move the chain tensioning
engine mount with the motor back against the direction of
SNOWDOG movement�
3� Tighten six bolts (1) to the engine mounts of the
SNOWDOG chassis platform�
8.4 Track
8.4.1 Checking the track tension
Before starting any movement check the condition and
tension of the track�
The track tension is adjusted by feel�
Overtension causes signi cant overloads during running.
Low tension leads to fast wear of soft sprockets�
8.4.2 Track tensioning
1� Loosen the screws (1) on both sides of the rear
mounting shaft�
2� Turn eccentric (2) to adjust the tensioner axis�
3� Check the track tension�
1
12

15
7� Install the washers (8) and the nuts (9)� Tighten the
nuts�
8� Install and unbend the pins (10)�
8.6 CVT belt
!WARNING!
All the works on the CVT should be carried
out only with the stopped engine.
Carefully inspect the CVT. Clean up, if necessary.
Check the condition and availability of plastic inserts
after each case of use. Lubricate the working surface, if
necessary� If plastic inserts are missing or worn out — insert
new ones�
Lubricate the inserts (1) and the CVT shaft (2) every
month�
8.6.1 Putting the CVT belt off
1� Stop the engine�
2� Unzip or take off the cover and provide free access to
the CVT�
3� Pull the part of the belt off to the external side of the
driven pulley of the CVT�
4� Rotate the driven pulley and guide the belt to its external
side�
5� After the belt is completely off the driven pulley of the
CVT, take it off the driving pulley.
8.6.2 Putting the CVT belt on
1� Put the belt on the driving pulley of the CVT�
2� Put a part of the belt on the driven pulley of the CVT�
1
2
3� Rotate the driven pulley and guide the belt to the
working part of the pulley�
8.7 Air lter
The air lter body is xed on the carburetor.
The screening lter element is located under the air lter
cap�
To take the lter cap off , simply unscrew the wing nut.
When you install and uninstall the lter cap, pay
attention to the condition of the air lter. The foam lter skin
should be lubricated with a motor oil or a special air lter
spray. If there are contaminations on the lter, it needs to be
changed. If there is ice or snow on the lter, it needs to be
dried�
8.8 Spark plug maintenance
!WARNING!
Use only spark plugs recommended by
Briggs&Stratton. Using spark plugs with the
wrong heat grade can damage the engine.
1� Take the high-voltage wire connector off the spark plug
and unscrew the spark plug using a wrench�
2� Inspect the spark plug. If you nd any cracking or
signi cant electrode wear, replace the spark plug.
3� Measure the gap between the electrodes. If the gap
needs to be xed, bend the side electrode. The gap
should be 0,03 in (0,76 mm).
4� Check the condition of the washers� Engage the
spark plug with your hands preventing it from thread
misalignment�
5� Screw the spark plug in�
Tightening torque is 31 N•m.

16
!WARNING!
Spark plugs shall be tightened. Otherwise, it can
lead to engine damage.
8.9 Reverse gearbox (if available)
8.9.1 Oil change
1� Unscrew the oil lling plug (1) of the reverse gearbox.
2� Pump out the used oil from the reverse gearbox�
3� Fill the gearbox with the new oil and close the oil lling
plug�
!WARNING!
Required amount of oil in the empty gearbox
is 100 ml (3,38 fl .oz).
!Required amount of oil when changing is
80 ml (2,7 fl .oz).
The oil level in the reverse gearbox can be checked with
pumping oil out and pouring a measured amount of it�
Recommended oil viscosity depending on the ambient
temperature:
• outside temperature +14 °F (-10 °C) and below ........SAE
5W30,
• outside temperature +23 °F (-5 °C) and below .........SAE
15W40,
• outside temperature -22 °F (-30 °C) and higher ......SAE
75W90,
• outside temperature -4 °F (-20 °C) and higher ......SAE
80W90�
!WARNING!
Dispose of the oil in accordance with current
legislation.
8.9.2 Adjustment of the shift cable
If the shift cable of the reverse gearbox is sag or
there are diffi culties with switching gears, adjust the
shift cable�
1
!WARNING!
Operating the SNOWDOG with insuffi cient
adjustment of the shift cable will cause
damage to the reverse gearbox.
1� Shut down the engine� Switch the lever of the reverse
gearbox into the “forward” position�
2� Loosen the locknut (1), tighten the adjusting screw (2).
Loosen the cable xing nut (3).
3� Move the lever (4) all the way down. Rotating the driven
pulley of CVT, make sure the gear “forward” is switched
on�
4� Loosen the bolts (5) and move the bracket (6) down
until the moment of a signi cant tension of the spring.
Tighten the bolts (5)�
2
1
3
4

17
5� Pull the shift cable and tighten the cable xing nut (3).
6� Create the required tension using the adjusting screw (2)
and tighten the locknut (1)�
7� Switch the lever of the reverse gearbox into the
“reverse” position. Rotating the driven pulley of CVT,
make sure the gear “reverse” is switched on�
8� Repeat the adjustment if necessary.
8.10 Battery maintenance
The Snowdog can be equipped with a Delta CT 1211
(12V/11Ah) battery or its alternatives: ЕВZ12-4-1, YТ12В-BS,
YТZ14S.
Service life of a battery depends on its operation mode�
When the engine is started with an electric starter, the
5
6
battery gives up part of the charge and later makes up for this
loss during the driving� Prolonged driving at low speeds with a
headlight switched on, as well as frequent starts of the engine
result in the battery not having enough time to charge� The
voltage of a charged battery should be 12�6–12�9 volts� If the
battery voltage is less than 12.3 volts, the charge is around
70%� Charge the battery�
!WARNING!
Do not store the battery discharged. Leaving
the battery discharged or storing it at low
temperatures for a long time leads to its
damage.
Connect and disconnect the battery only when the
ignition is turned off . Connect the red wire to the plus (+)
terminal; connect the blue or black wire to a minus (-) battery
terminal�
!WARNING!
Incorrect battery connection will damage the
Snowdog.
To charge the battery, use a charger for AGM batteries.
!WARNING!
The use of a charger that is not intended for
AGM batteries will lead to the failure of the
battery.
8.11 Parking brake
8.11.1 Brake cable adjustment
Check the free movement of parking brake lever A� It
should have a value of 0,2 – 0,4 in (5 – 10 mm).
To do this, loosen the locknut (1) and rotate the
adjusting screw (2) counterclockwise to pull cable so that the
brake lever has a free wheeling within 0,2 – 0,4 in (5 – 10
mm)�
To loosen the brake cable, loosen the locknut (1) and
rotate the adjusting screw (2) clockwise�
If the lever adjustment is not enough to set up the free
lever motion, adjust the brake caliper and check the condition
of pads�
Before adjusting the brake caliper, loosen the brake cable
on the lever to the maximum�
8.11.2 Adjusting the brake caliper on the
SNOWDOG with the reverse gearbox
Fully loosen the tension of the brake cable on the lever�
Ensure ease of pushing the lever and the parking brake
cable and ease of returning them to the starting position� If
the movement of the lever is complicated, lubricate or replace
cable�
2
1

18
Loosen the bolt (1) and pull the cable until the necessary
clearance between the brake pads and the brake disk is set
up�
Tighten the bolt (1) and check the movement of the
parking brake lever�
Loosen the nuts (2) of the brake caliper bracket and
adjust the position of the brake pads to the brake disk�
Сheck the functioning of the parking brake.
If the brake pads are obstructing the brake disk`s
rotation, increase the brake lever stroke.
8.12 Adjusting the throttle
To adjust the throttle lever, loosen the locknut (2) and
rotate the adjusting screw (1) counterclockwise� Pull the rope
so that the throttle has a free running within 0,2 – 0,3 in (5 –
7 mm)�
1� To loosen the throttle cable, loosen the locknut (2) and
rotate the adjusting screw (1) clockwise� Loosen the
cable�
1
2
1
2
2� Screw the adjusting screw (2) in to increase the free
travel of the throttle lever� Unscrew the adjusting screw
(2) to decrease the free travel of the throttle lever�
3� At the end of the adjustment, tighten the locknut (1).
4� If you cannot achieve the needed throttle lever by
rotating the adjusting screw or the throttle cable jams
while moving, please contact the SNOWDOG dealer to
adjust, lubricate or change the throttle cable.
8.13 Washing and cleaning
After each trip, clean the SNOWDOG of any snow, ice,
branches, leaves, dirt, or other foreign parts. Use water and
a cleansing agent. Before using the cleansing agent, read its
instructions for use�
!WARNING!
Do not direct a jet of water under pressure
at bearings, suspension parts, muffl er, air
lter or electrical parts. Water can wash out
the lubricant from the bearings and damage
other parts.
8.14 Routine maintenance
Maintenance of the SNOWDOG should be carried out
with SNOWDOG dealers. For a list of SNOWDOG authorized
service dealers, visit
www�SNOWDOG�com
We recommend addressing any Briggs & Stratton
authorized service dealer for all maintenance work
on the engine and engine components� For a list of
Briggs & Stratton authorized service dealers, visit
www�briggsandstratton�com
�
!WARNING!
Engine maintenance should be carried out
in accordance with Briggs&Stratton engine
user’s manual. All the information on engine
maintenance contained in the manual
serves as guidelines. If the maintenance
instructions in this SNOWDOG owner’s
manual are diff erent from those in the
Briggs&Stratton engine user’s manual,
follow the instruction speci ed in the latter.
!Maintenance intervals speci ed in this
manual are valid for the SNOWDOG
operation in normal conditions.
!When operating under heavy duty conditions
the maintenance should be carried out more
often.
Heavy duty operating conditions include:
• Moving on deep loose snow (more than 16 inches in
depth);
• Moving at temperature below -13 and above 50 degrees
Fahrenheit (-25 °С and above +10 °С);
• Moving on wet snow and on snow containing water;
• Moving on surfaces ooded by water;
• Moving on rocky terrain;
• Moving on snow crust which cannot withstand the weight
of the tracksled and sleds;
• Participation in races and competitions;
• Prolonged moving at low speed, “tightly strained”;
• Moving with a towed load more than 330 lbs (150 kg);
• Moving on hard-surfaced roads;
• Moving in mud;
• Moving in sand;

19
• Prolonged moving uphill, downhill, or on slopes;
• Short trips with frequent stops;
• Prolonged idling of the engine�
8.14.1 After the rst 5 hours of SNOWDOG
operation
1� Change the oil in the engine�
8.14.2 Every 8 hours of SNOWDOG operation or
daily
1� Check the motor oil level�
2� Clean the area around the muer and the controls.
3� Clean the air intake grilles�
8.14.3 After the rst 20 hours of SNOWDOG
operation but no later than in 1 month
1� Clean or change the air lter.
2� Lubricate the throttle and parking brake cables with
silicon oil�
3� Lubricate the chain and the driving sprockets�
4� Adjust free travel of the throttle and parking brake
levers�
5� Adjust the chain tension�
6� Check the transmission bearings�
7� Check all the bolts fastening trolleys, bearings and chain
sprockets for tightness�
8� Check the reverse gearbox shift mechanism (if available)�
8.14.4 Maintenance every 50 hours of running,
but not less than once a year
1� Change the oil in the engine�
2� Clean or change the air lter.
3� Change the spark plug�
4� Lubricate the throttle and parking brake cables with
silicon oil�
5� Lubricate the chain and the driving sprockets�
6� Check the transmission bearings�
7� Adjust free travel of the throttle and parking brake
levers�
8� Adjust the chain tension�
9� Check all the bolts fastening trolleys, bearings and chain
sprockets for tightness�
* a detailed list of necessary operations is indicated in
the maintenance table�
8.15 SNOWDOG maintenance table
Before each trip or every 8 hours of running
After each trip
After the rst 5 hours of operation
After the rst 20 hours of operation or every month*
Every 50 hours of operation or every year*
Under severe operation conditions
Preparation for transportation
Maintenance after transportation
Preparation for long storage
During long storage
Commissioning after long storage
Engine oil IR R
Fuel I I I I R
Process uids leakage I I I I I
Throttle lever stroke I A A
Parking control lever
stroke�
I A A
Fuel lock I I I I I I
Electric starter operation I I I
Before each trip or every 8 hours of running
After each trip
After the rst 5 hours of operation
After the rst 20 hours of operation or every month*
Every 50 hours of operation or every year*
Under severe operation conditions
Preparation for transportation
Maintenance after transportation
Preparation for long storage
During long storage
Commissioning after long storage
Manual starter operation I I I I
Engine idling I I I I
Engine response to
throttle lever position
I I I
Unusual sounds with
running engine
I I I I
Handlebar and their
tting
I I I I
Hooking device
attachment
I I A A A
Reverse gear shifting I I
Kill switch I
Handle switchI
Chain I A
C
L
A
L
A
L
A
L
L C
L
Headlight I I I I
Cleaning from dirt or
snow
I C C
Battery I I I I I I
Track I
C
A A A I A
Cleaning carburetor
controls from snow
I C C
Sprockets I
C
I I
Sprocket fastening I I I I
Track shafts I I
Suspension trolleys I I I I
Transmission shaft
bearings
I I I I
Trolley bearings I IIR
CVT pulleys I I
L
I
L
I
CVT belt I I I
Plastic inserts I L L
Gearbox oil R R
Throttle cable lubrication L L L L L
Air lter I
C
RI
C
I
Fuel hose I I I
Battery cables I I I I I
Charging I I I
Parking brake pads and
brake caliper
III
Parking brake disk III
Parking brake cable
lubrication
I L L L
Side plate fastening III

20
Before each trip or every 8 hours of running
After each trip
After the rst 5 hours of operation
After the rst 20 hours of operation or every month*
Every 50 hours of operation or every year*
Under severe operation conditions
Preparation for transportation
Maintenance after transportation
Preparation for long storage
During long storage
Commissioning after long storage
Suspension trolley
fastening
III
Support wheels
fastening
IIL
Engine fastening III
Gearbox fastening I I
Engine mount fastening I I
Spark plug RI
Carburetor C I
A: Adjust
C: Clean
I: Inspect
L: Lubricate
R: Replace
* carried out by a SNOWDOG dealer
9 Transportation
Shut down the fuel lock before transporting the
SNOWDOG. The SNOWDOG must be in a horizontal position
during loading and unloading� When transporting the
SNOWDOG, make sure it is secure. It is recommended to use
the hitch on the rear part of the SNOWDOG and the carry
handle on the front part�
10 Storage
SNOWDOG should be stored in a dry ventilated room or
outdoors under a canopy with a waterproof cover� SNOWDOG
must be protected from direct sunlight�
!WARNING!
Make sure the storage area is free of high
humidity or dust.
!Engine maintenance must be carried out
in accordance with Briggs&Stratton user’s
manual. If the instructions in this SNOWDOG
owner’s manual are diff erent from those in
the Briggs&Stratton engine user’s manual,
follow the instruction speci ed in the latter.
10.1 Preparation for short storage (less than
one month)
1� Clean or wash the SNOWDOG�
2� Lubricate the throttle and parking brake cables with
silicon oil�
3� Lubricate the chain and the driving sprockets�
10.2 Preparation for long storage (more
than one month)
1� Clean the SNOWDOG�
2� Warm up the engine and change the motor oil�
3� Fill the fuel tank completely�
4� Shut down the fuel lock�
5� Unscrew the drain bolt (1) on the carburetor and drain
the fuel�
6. Take the battery off and charge it. Check the battery
charge at least every two months� Charge as needed�
7� Store the battery in a room with a temperature range
of 33 °F (+1 °C) to 68 °F (+20 °C)�
8. Rotate the track half a turn at least every six months.
9� Cover the SNOWDOG from dust�
This preservation ensures the safety of the SNOWDOG
for up to 12 months, provided the storage rules are observed.
After 12 months, prepare the SNOWDOG for operation and run
the engine for a few minutes. If further storage is required,
prepare it for storage again�
10.3 SNOWDOG commissioning after long
storage
1� Clean the SNOWDOG of dust and dirt�
2� Fill the fuel tank with fresh fuel�
3� Charge and install the battery�
4� Lubricate the chain and the driving sprockets�
5� Adjust free travel of the throttle and parking brake
levers�
11 Snowdog manufacturer’s
warranty
11�1 Manufacturer’s offi cial representative
(SNOWDOG LLC) warranties against
defects of material or workmanship for a
period of 12 months from the original date
of sale (this warranty is not transferable)�
SNOWDOG will repair or replace at it`s
option any parts or assembly that is
proven to be defective in material or
workmanship under normal use during the
applicable warranty time period� Warranty
repairs will be made without charge for
parts and/or labor. Any part or assembly
replaced under warranty becomes the
property of SNOWDOG LLC and all parts
1
Other manuals for Sport B13 MER
1
This manual suits for next models
1
Table of contents
Other SNOWDOG Snowmobile manuals

SNOWDOG
SNOWDOG Compact B10 ME User manual

SNOWDOG
SNOWDOG Sport B13 MER User manual

SNOWDOG
SNOWDOG COMPACT B7ZE L User manual

SNOWDOG
SNOWDOG Snowdog COMPACT Operating instructions

SNOWDOG
SNOWDOG Twin Track V14 MER User manual

SNOWDOG
SNOWDOG STANDARD B10 User manual

SNOWDOG
SNOWDOG Sport B13R User manual

SNOWDOG
SNOWDOG COMPACT B13 ME WR User manual

SNOWDOG
SNOWDOG COMPACT B13ME-WR User manual