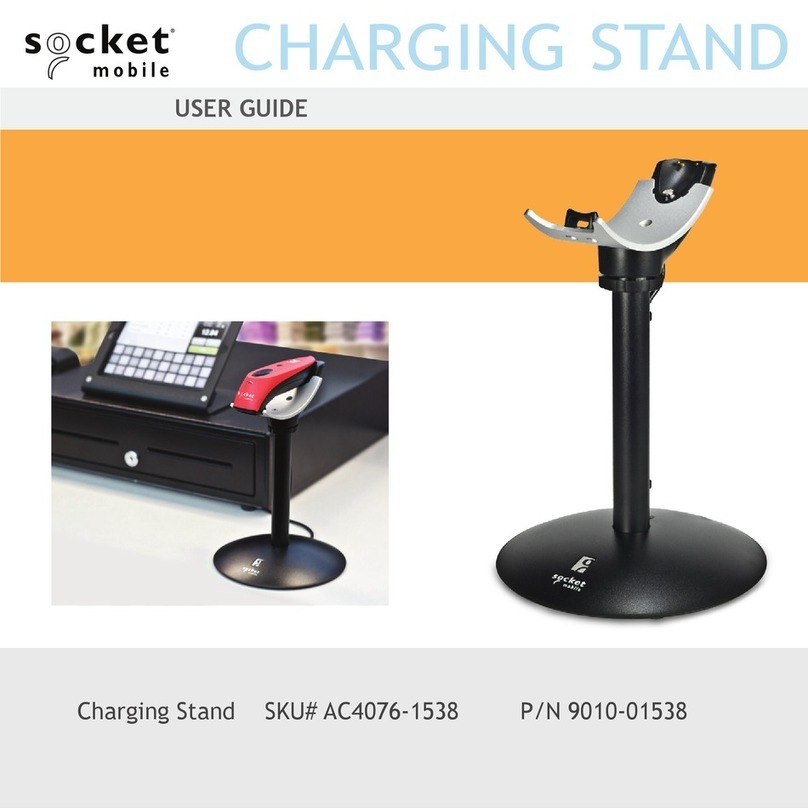
Socket 600 Series User manual

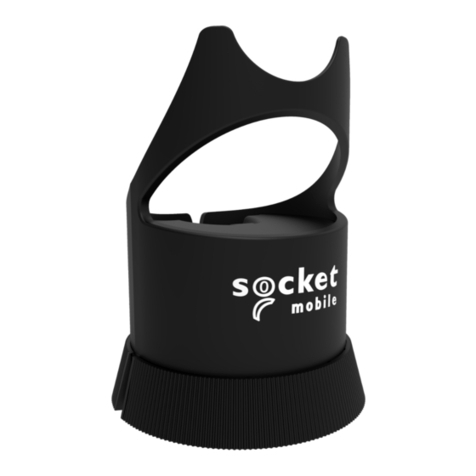
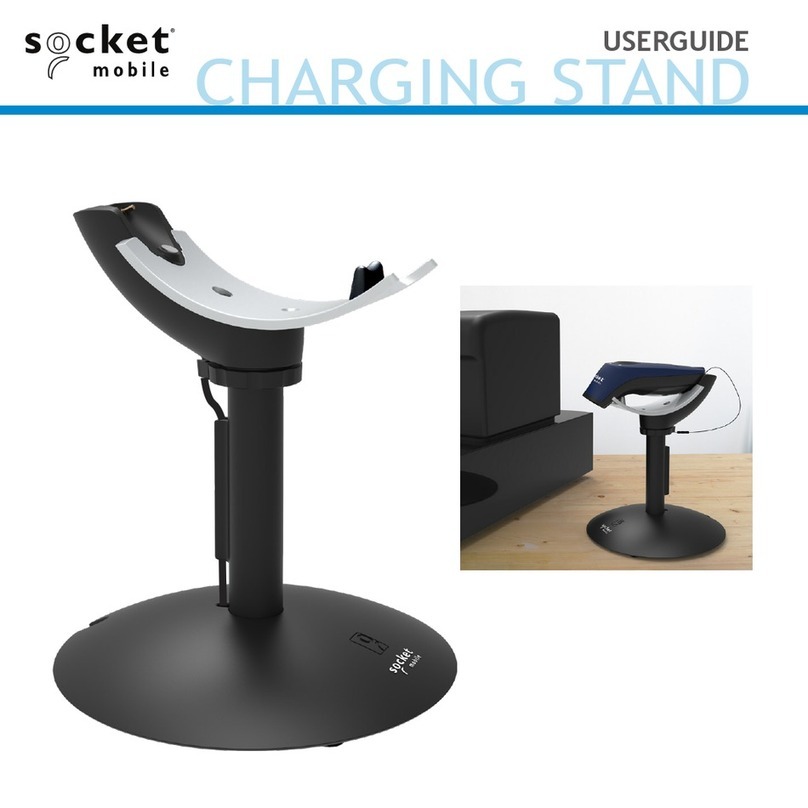
CHARGING STAND
USERGUIDE

©2023 Socket Mobile, Inc. All rights reserved. Socket®, the Socket Mobile logo, SocketScan®, DuraScan®, XtremeScan,Battery
Friendly® are registered trademarks or trademarks of Socket Mobile, Inc. Microsoft® is a registered trademark of Microsoft
Corporation in the United States and other countries. Apple®, iPad®, iPad Mini®, iPhone®, iPod Touch®, and Mac iOS® are
registered trademarks of Apple, Inc., registered in the U.S. and other countries. The Bluetooth® Technology word mark and logos are
registered trademarks owned by the Bluetooth SIG, Inc. and any use of such marks by Socket Mobile, Inc. is under license. Other
trademarks and trade names are those of their respective owners.
Charging Stand
PACKAGE CONTENTS
Micro USB
Charging Cable
*Table Mounting
Template
TOP VIEW
SCALE 1:1
2x DRILL DIA
3/32
”
3
5/16
”
Charging Stand TableMount Drill Template
Insert Lock
Leavespace ~2 mm-4 mm
User Guide
*Security Cable
*Optional
Charging Stand
USERGUIDE

Magnet
Hook
*Illuminates Red when connected to AC Power.
Charging Pins
Light*
Charging Cable
3
PRODUCT INFORMATION
Slot for security cable

Step 1 Step 2
Step 3 Step 4
4
*ATTACHING THE SECURITY CABLE
++
*Security cable comes Pre-installed for your
convenience. To remove, follow step 2 and
step 1.

Insert the post into the top of the base, lining up the marker on the post to
the unlock icon. Push down and turn the post towards the lock icon until
you hear a click. Run the USB cord through the channel at the bottom of
the base. 5
INSERTING THE POST TO THE BASE

The charging pins must align
to supply power to the reader.
The red light on the back of the
charging stand will illuminate and
the reader will beep twice.
6
CHARGING STAND OPERATIONS

Approximately
4-8 inches*
(10-20 cm)
7
CHARGING STAND OPERATIONS
*When set to Auto Scan with Socket Mobile’s 2D barcode readers
(D720, D740, D745, D750, D755, D760, S720, S740), the barcode
should be 4 to 8 inches away.

8
Two keyholes are provided on the Charging Stand base for an optional
installation on a wooden surface (screws and drill template included).
1. Place the Charging Stand on the drill template and position these in
the desired location. Rotate the Charging Stand to align with the solid
notch (not the dotted notch) on the template.
2. Rotate the Stand/template combination so the Socket Mobile logo
faces the direction you want the reader to aim.
3. Tape the template to the surface and remove the Charging Stand.
4. Drill two 3/32” holes through the drill marks on the template.
5. Tighten the two screws with about 1/4” of the screw head exposed.
6. Place the Charging Stand on the template aligned with the dotted
notch.
7. You can now tear away the template.
8. Twist the Charging Stand clockwise to lock the screws in the
keyholes.
OPTIONAL TABLE MOUNTING
TOP VIEW
SCALE 1:1
2x DRILL DIA
3/32
”
3
5/16
”
Charging Stand Table Mount Drill Template
Insert Lock
Leave space ~2 mm-4 mm

9
Magnet Magnet
Magnet Command barcode
for conguring Auto
Scan mode. Please
scan when reader is
disconnected
(ashing blue light).
Keyholes for table mounting
Notch for charging cable
Model:
Charging Stand
Do Not Expose To
Extreme Temperatures
Auto Scan
© 2019 Socket Mobile, Inc.
Made in Singapore
OPTIONAL TABLE MOUNTING

Please only scan command barcodes when reader is
disconnected (ashing blue light).
Charging Stand Modes
Auto Scan
Scan the barcode to enable Auto Scan.
This will allow the reader to
automatically scan barcodes without
pressing the scan button.
#FNB 41FBA50003#
Manual Mode - Normal (default)
Scan the barcode to congure the reader
back to normal. It will be in manual scan
mode even when placed in the stand or
cradle. #FNB 41FBA50000#
10
COMMAND BARCODES

11
1. Scan command barcode to place your reader in Auto Scan.
Note: Turn off host device’s Bluetooth before scanning command
barcode.
2. Once the reader is in Auto Scan, it will switch to automatic
scanning when it detects power coming from the charging pins of
the Dock or Stand. Place a barcode in the readers eld of view
and the reader will automatically scan it.
*Supported 2D Readers:
D720, D740, D745, D750, D755, D760, S720, S740
AUTO SCANNING MODE (CONTINUED)

12
Action Behavior Notication
Beep Pattern Light Activity Vibrate
Place Reader in
the Stand Reader
switches to
Auto Scan
Mode
High-high tone
conrms proper
seating*
Battery Status
Light is
Disabled
None
Place a
barcode in the
Readers Field
of View
Decode
barcode 1 Beep when
Data
successfully
scanned
Green Light
blinks (while
scanning)
None
Action Behavior Notication
Beep Pattern Light Activity Vibrate
Remove the
Reader from
the Stand and
press the scan
button
Reader
switches to
Manual Mode
None Battery Status
Light is Enabled Enabled
Press the scan
button Decode
barcode 1 Beep when
Data
successfully
scanned
Green Light
blinks (while
scanning)
Vibrate when
Data
successfully
scanned
Auto Scanning Mode: Barcodes placed in the Reader’s eld of view are automatically scanned.
Manual Mode (default): Pressing the scan button initiates a scan.
How Auto Scanning Mode Works in the Stand or Dock
How the Reader reverts to Manual Mode (Not in the Stand)
AUTO SCAN MODE

Dimensions
Stand Height 6.5 in (165 mm)
Charging Mount Width 1.80 in (46 mm)
Charging Mount Length 5.50 in (140 mm)
Base Diameter 5.75 in (146mm)
Total Weight
Without Reader and Power Adapter 12.7 oz (360 g)
13
PRODUCT SPECIFICATIONS

Technical Support and Product Registration: https://sckt.tech/support
Phone: 800-279-1390 +1-510-933-3020 (worldwide)
Warranty Checker: https://sckt.tech/warranty-checker
Socket Mobile Developer Program: https://sckt.tech/capturesdk
Download Socket Mobile’s reader User Guide and Command Barcodes at
https://sckt.tech/downloads
HELPFUL RESOURCES
2023 6430-00358I Printed in U.S.A.
CE MARKING AND EUROPEAN UNION COMPLIANCE
The unit under test was found compliant with all the applicable Directives,
2004/108/EC and 2006/95/EC.
WASTE ELECTRICAL AND ELECTRONIC EQUIPMENT
The WEEE directive places an obligation on all EU-based manufacturers and
importers to take-back electronic products at the end of their useful life.
ROHS STATEMENT OF COMPLIANCE
This product is compliant to Directive 2011/65/EU.
NON-MODIFICATION STATEMENT
Changes or modications not expressly approved
by the party responsible for compliance. RoHS
COMPLIANCE STATEMENT

Dimensions
Stand Height 6.5 in (165 mm)
Charging Mount Width 1.80 in (46 mm)
Charging Mount Length 5.50 in (140 mm)
Base Diameter 5.75 in (146mm)
Total Weight
Without Scanner and Power Adapter 12.7 oz (360 g)
Technical Support and Product Registration: socketmobile.com/
support Phone: 800-279-1390 +1-510-933-3020 (worldwide)
Warranty Checker: socketmobile.com/warranty-checker
Socket Mobile Developer Program: socketmobile.com/developer
Download Socket Mobile’s scanner User Guide and Command Barcodes at
socketmobile.com/downloads
HELPFUL RESOURCES
2021 6430-00358H Printed in U.S.A.
CE MARKING AND EUROPEAN UNION COMPLIANCE
The unit under test was found compliant with all the applicable Directives,
2004/108/EC and 2006/95/EC.
WASTE ELECTRICAL AND ELECTRONIC EQUIPMENT
The WEEE directive places an obligation on all EU-based manufacturers and
importers to take-back electronic products at the end of their useful life.
ROHS STATEMENT OF COMPLIANCE
This product is compliant to Directive 2011/65/EU.
NON-MODIFICATION STATEMENT
Changes or modifications not expressly approved
by the party responsible for compliance. RoHS
COMPLIANCE STATEMENT

LADESTÄNDER
BENUTZERHANDBUCH

©2021, Socket Mobile, Inc. Alle Rechte vorbehalten. Socket®, das Socket-Mobile-Logo, SocketScan®, DuraScan® und Battery
Friendly® sind eingetragene Schutzmarken oder Schutzmarken von Socket Mobile, Inc. Microsoft® ist eine eingetragene Schutzmarke
von Microsoft Corporation in den USA und anderen Ländern. Apple®, iPad®, iPad Mini®, iPhone®, iPod Touch® und Mac OS® sind
registrierte Schutzmarken von Apple, Inc., eingetragen in den USA und anderen Ländern. Die Bluetooth®-Technologie-Wortmarke
und das Bluetooth-Logo sind eingetragene Schutzmarken der Bluetooth SIG, Inc. USA und jegliche Nutzung dieser Marken durch
Socket Mobile, Inc. ist lizenziert. Weitere Marken und Markennamen sind Eigentum der jeweiligen Inhaber.
Ladeständer
LIEFERUMFANG
Micro-USB-
Ladekabel
*Bohrschablone für
Tischmontage
TOP VIEW
SCALE 1:1
2x DRILL DIA
3/32
”
3
5/16
”
Charging Stand TableMount Drill Template
Insert Lock
Leave space ~2 mm-4 mm
Benutzer-
handbuch
*Sicherheitskabel
*Optional
CHARGING STAND

Magnet
Haken
*Leuchtet rot, wenn der Ständer ans Stromnetz angeschlossen ist.
Ladepins
Signallicht*
Ladekabel
3
PRODUKTINFORMATIONEN
Öse für das
Sicherheitskabel

Schritt 1 Schritt 2
Schritt 3 Schritt 4
4
*ANBRINGEN DES SICHERHEITSKABELS
++
*Das Sicherheitskabel ist zu Ihrer Bequem-
lichkeit bereits vorinstalliert, zum Entfernen
folgen Sie bitte Schritt 2 und Schritt 1.

Setzen Sie das Standrohr von oben in die Basis und richten Sie die
darauf befindliche Markierung auf das Entriegelungssymbol aus.
Drücken Sie das Rohr nach unten und drehen Sie ihn in Richtung des
Schlosssymbols, bis Sie ein Klicken hören. Zuletzt führen Sie das
USB-Kabel durch den Kanal an der Unterseite der Basis. 5
EINSETZEN DES STÄNDERS IN DIE BASIS
This manual suits for next models
1
Table of contents
Languages:
Other Socket Batteries Charger manuals
Popular Batteries Charger manuals by other brands

Halo2Cloud
Halo2Cloud Charge it 3000 operating instructions
ATEMPOWER
ATEMPOWER AP30DC user manual
Natek
Natek ML314B User instruction
Circutor
Circutor RAPTION 160C Series installation guide
Williams Sound
Williams Sound CHG 516 Specification sheet

Intelligent Charging Limited
Intelligent Charging Limited IC48V Operator's manual
