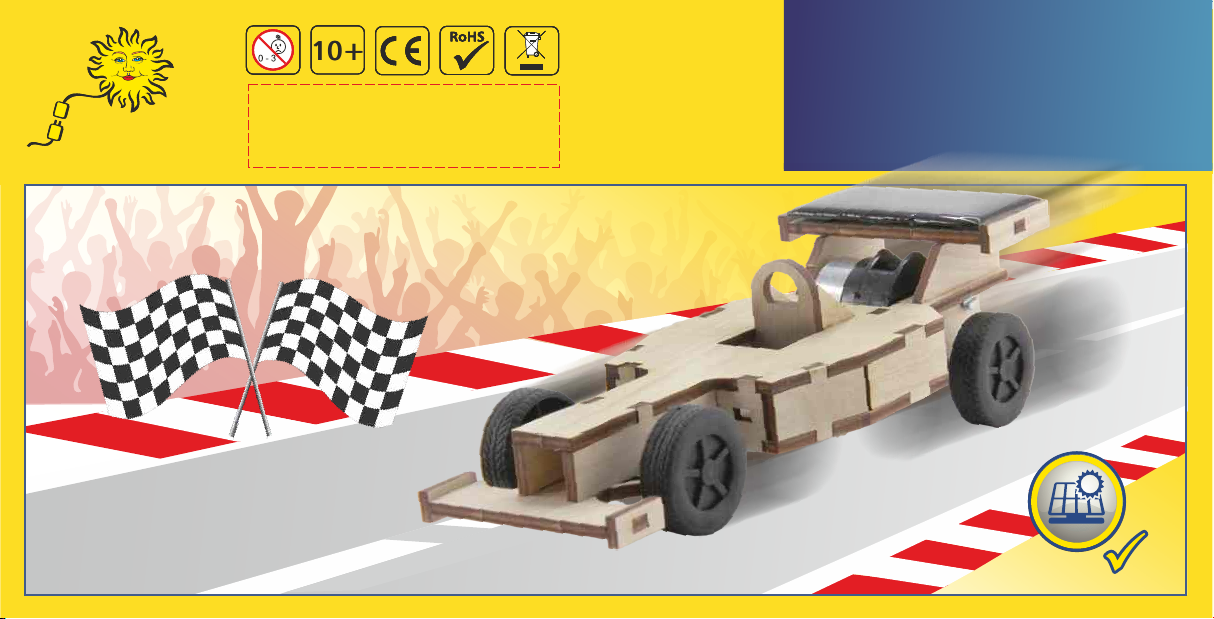
Sol-Expert Solar Racing Car User manual
SOL-EXPERT
group
group
SOL-EXPERT
group
group
Item no.: 40306
SOLAR
Sicherheitshinweise?
Was zum Aufbau noch benötigt wird..?
WEEE... rein?
Zuschauer Motiv nachgezeichnet!
10+10+
Keep the address of the company.
Not suitable for children under 3 years!
Contains small parts!
How you can help the
environment: Please
return the parts to a
certified provider at the
end of their useful life!
Solar Racing Car
Wooden building kit with
gearbox, runs on "solar fuel"
MADE IN EUROPE
1
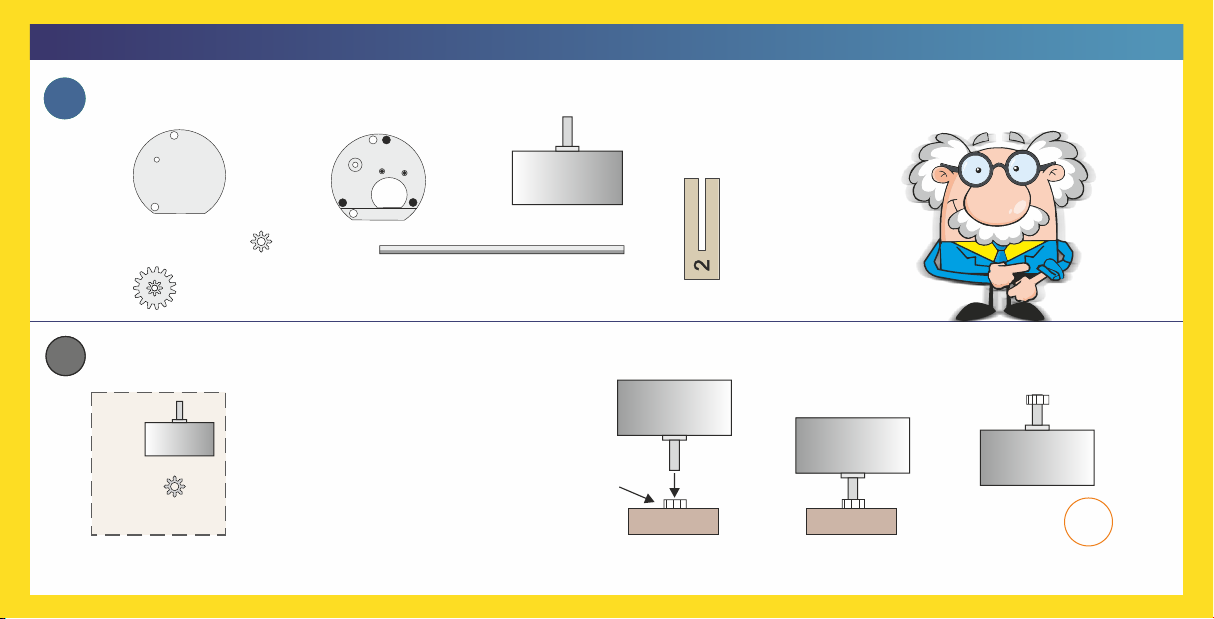
1ASSEMBLY INSTRUCTIONS, parts:
1 x 1 x 1 x 1 x
1 x
3 x
1 x
3
A
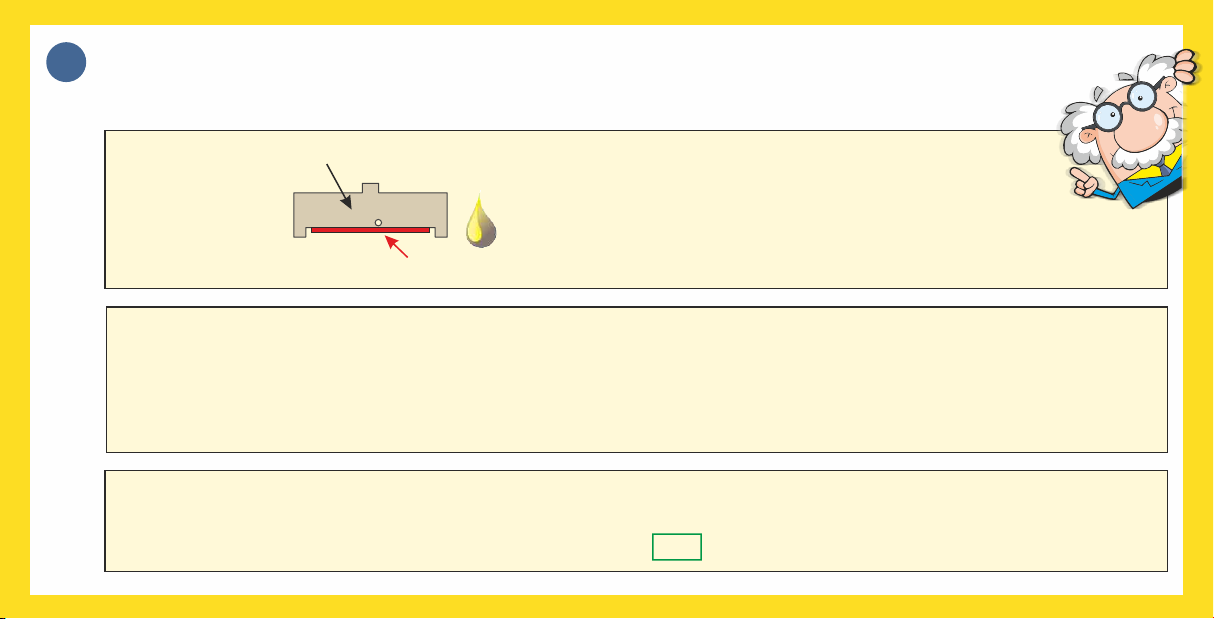
The gear will be flush with the
shaft.
Place the small gear on the
table and carefully slide the
motor shaft into the small gear
from above. Gear
Find the following parts and lay them out:
1 X
1 X
Table Table = A
0,5 mm
60 mm
ASSEMBLY INSTRUCTIONS
(You only need 2 gears, one is a spare)
Carefully
remove this
part (2) from
the wooden
board.
3
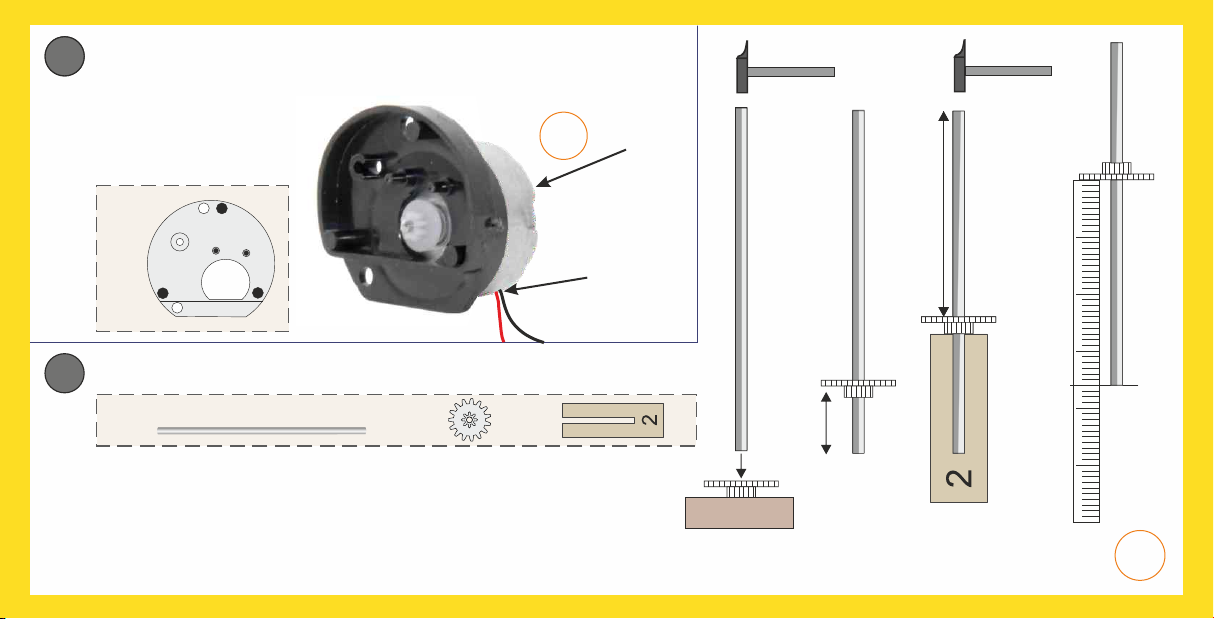
BNow slide the motor into the gearbox casing. Turn the motor
so the cable comes out at the bottom.
2C
the shaft all the way into the spacing template. The shaft will now still stick out 36 mm.
Take the 60 mm shaft (use the ruler at the right to measure if the length
is correct) and carefully tap it into the double gear (the of the smaller
double gears is at the bottom!). Then apply some pressure and slide
the gear approx. 1 cm onto the shaft. Use the hammer to slowly tap
Find the following parts and lay them out:
approx. 10 mm
0 mm60 mm
= B
36 mm
Ruler for measuring the shaft
Table
A
The cable must
be here!
1 X
1 X 1 X 1 X
60 mm
36 mm
Find the following parts
and lay them out:
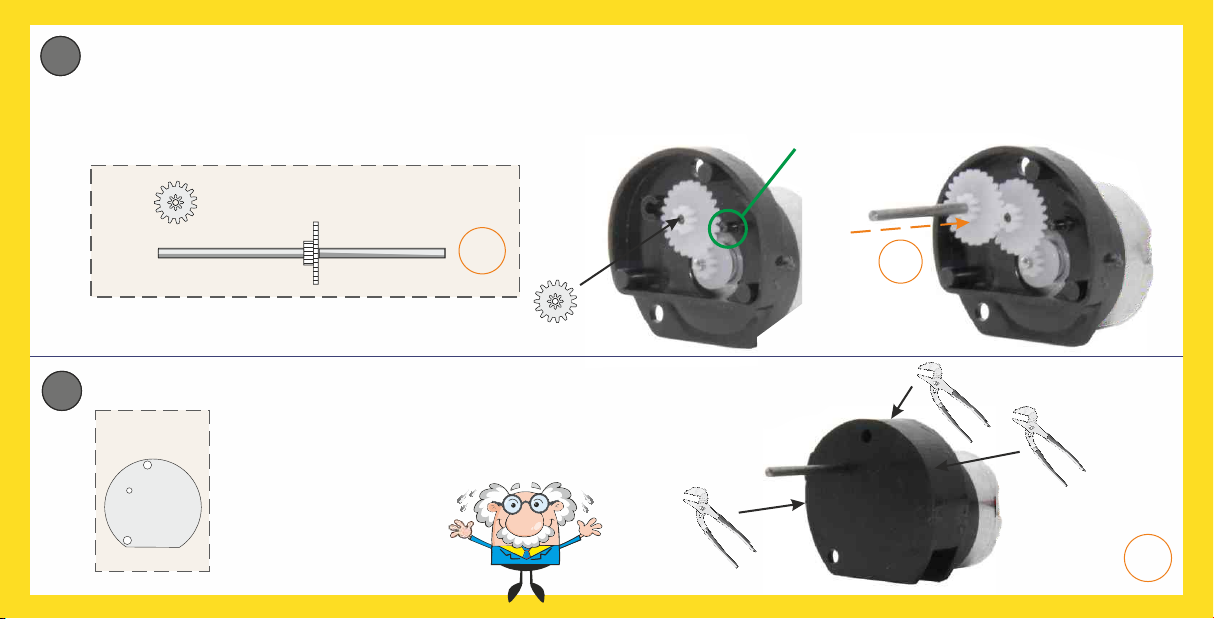
DNow slide the second double gear, with the large gear in front, onto the bolt in the gearbox casing. Then assemble the gear/shaft
assembly (B). Also slide this with the large gear in front into the hole for the shaft guide. If you now slightly turn the shaft, all gears
must turn.
B
6
E
Fit the gearbox cover and
slightly squeeze the
gearbox casing in three
areas with pliers. The
casing will close.
= C
Find the following parts and lay them out:
Find the following part and lay it out:
1 X
1 X B
1 X
This pin is not used.
If the shaft turns, you
did it correctly! Great!
1
2ASSEMBLING THE RACING CAR
Carefully read the information below before starting assembly:
2 (1.)
Glue notice:
Assembly order :
Important information:
You will need to apply glue in the red areas just before
assembly. Use glue sparingly. You can clean excess glue with
a cloth. Close the glue after assembly. Perhaps you can use it
for another project.
Every part has a separate red part number (in this case "2"). Behind it is a
number in brackets (in this case "1") . The number in brackets (blue)
indicates when the part will be used. Assembly is in sequence, always first
the part marked (1), then (2), etc.
Some parts have peculiarities which must be taken into account. This can
be e.g. the orientation of the part or something different. These parts are
marked with Follow the information in the note.Note.
Red area
Part
1
2
4
3
5
6
7 8
910
11
1 x
1 x
1 x 1 x
1 x
2 x
2 x
2 x
1 x
1 x
2 x
2 x
2 x 2 x
4 x
1 x
M3 x
20 mm
2 x
2 x M3
12
13
14
15
16
18
17
1 x 19
50 mm
C
1 x
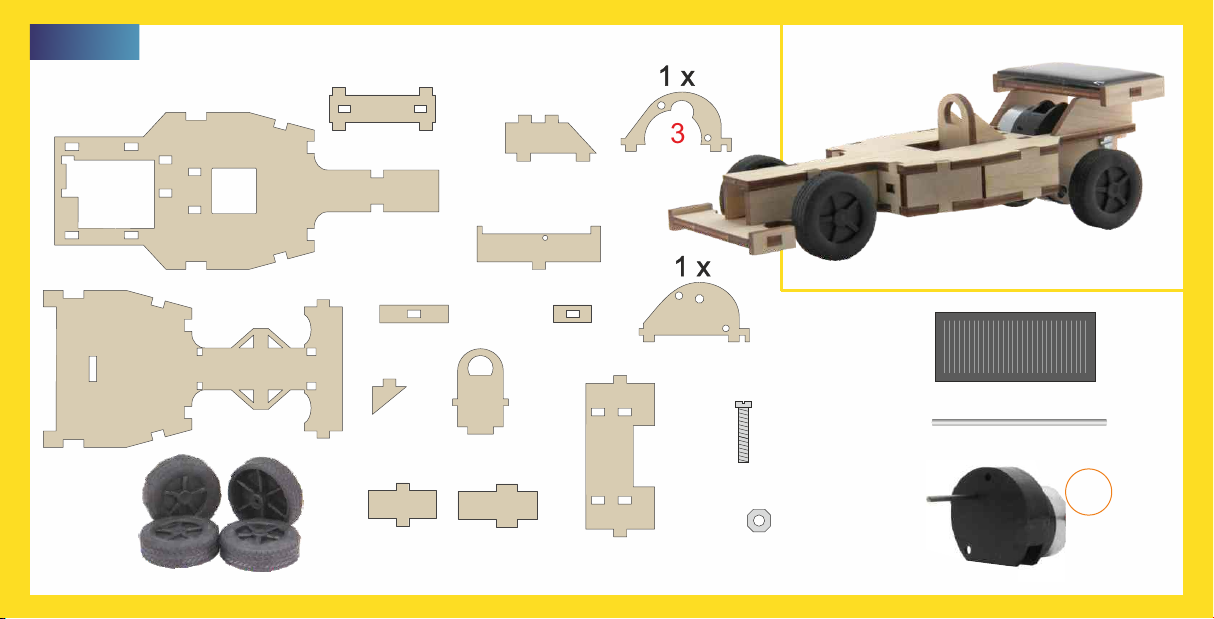
MONTAGE DES RENNWAGENS
PARTS: Carefully remove the individual wooden parts from the wooden board:
4
6
10
(2.)
(1.)
(3.)
(4.)
Find the following parts and lay them out:
Aussparung
Steg
2
2
10
2 x 6
4
1 x
1 x
1 x
Wichtiger Hinweis:
Wenn Du die Teile „6" aufklebst, muss sich die
Aussparung für die Achse direkt über der Mitte
des befinden. Steges
A
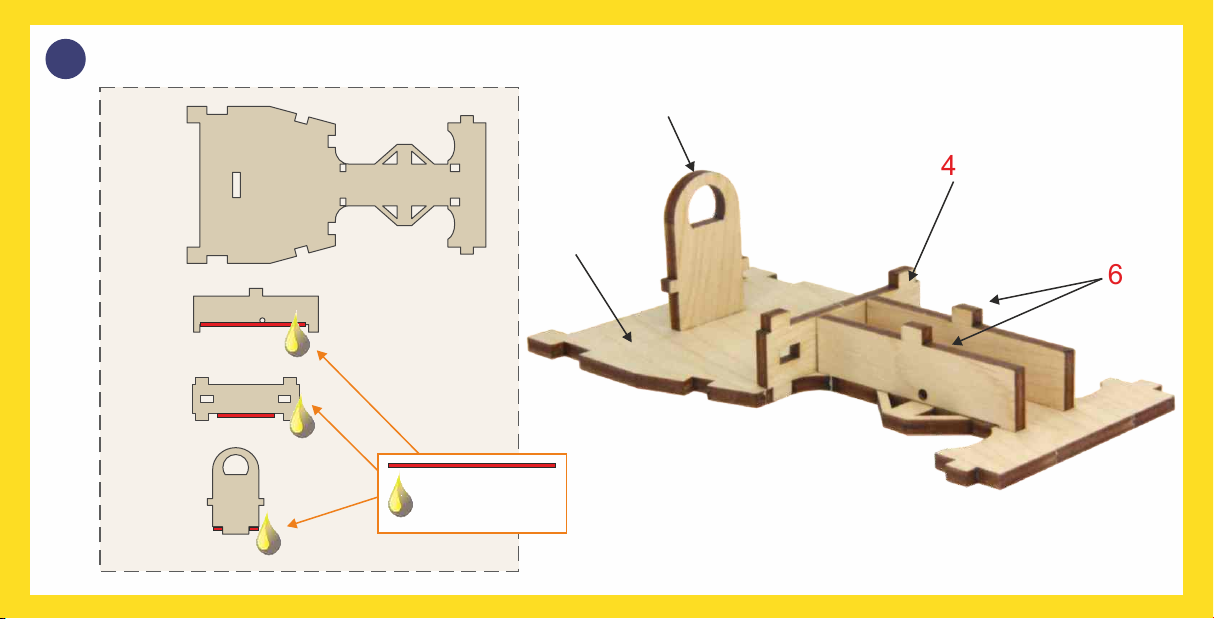
TIP: Apply glue
thinly here!
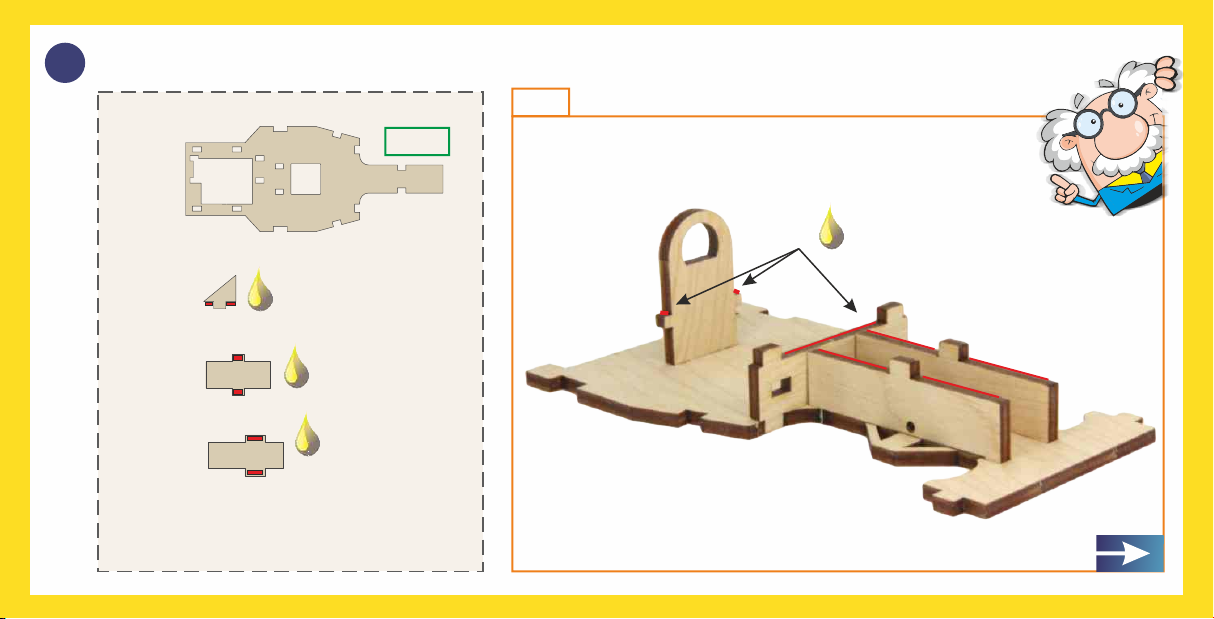
B
Apply glue sparingly
Find the following parts and lay them out:
TIP:
9
11
2 x
12
2 x
2 x
1
1 x
Note
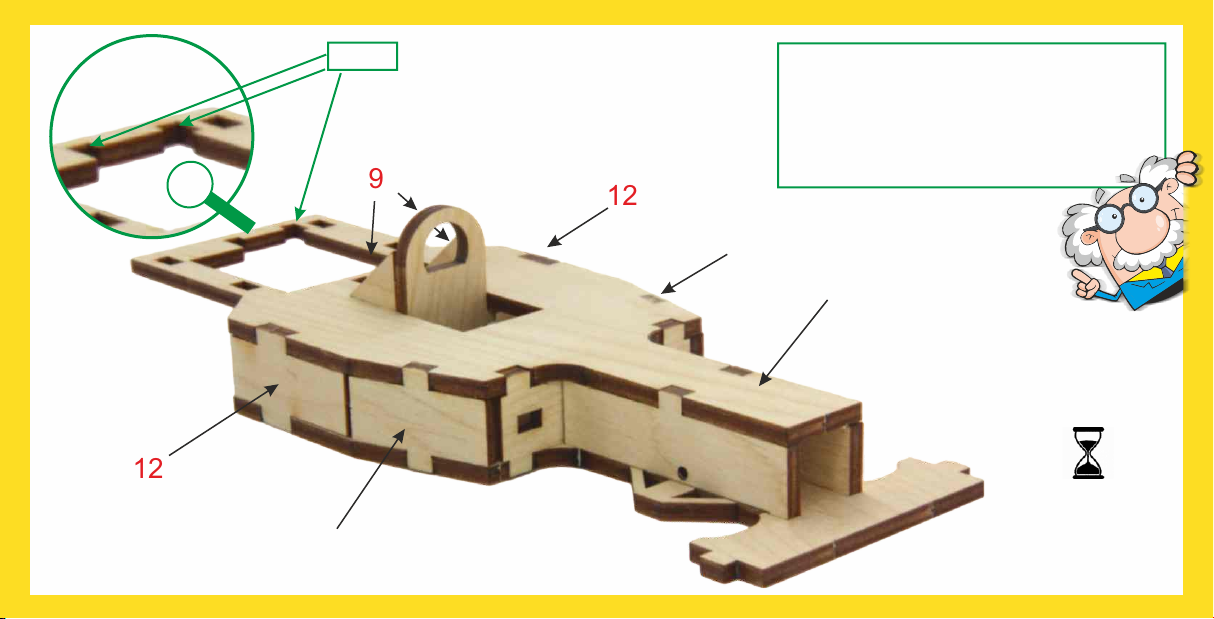
9
12
12
(1.)
(2)
(3.)
(3.)
(4.)
11
11
1
Important note:
You need to glue the correct side of part 1
onto the body: i.e. there are two notches
at the back which must be in the correct
location.
Note
(4.)
Allow glue to dry
for 10 min.

(2.)
(1.)
(3.)
(4.)
(3.)
(4.)
C
15
5
7
7
8
8= D
Find the following parts and lay them out:
Hinweis
15
7
8
5
2 x
2 x
2 x
1 x
Important note:
Part 15: The notch in the spoiler
faces the back of the racing car

D
(1.)
(1.)
(2.)
(2.)
(2.)
14
13
16
17
17
Slightly tighten the nuts (2 x part 17) with your
fingers. The axle must still turn easily by hand.
If the nuts are too tight, the gearbox will lock.
In this case, slightly loosen the nuts.
Important note:
C
= E
Find the following parts and lay them out:
Das Teil1 musst du mit der richtigen Seite auf
die Karosserie aufkleben, da sich hinten zwei
Aussparungen befinden, die an der richtigen
Position sein müssen.
Wichtiger Hinweis:
M3 x
20 mm
2 x
2 x M3
14
13
16
17
1 x
1 x
Note

EFind the following parts and lay them out:
Hinweis
E
1 x
1 x
D
D
E
Apply
glue here!
Allow glue to dry
for 10 min.

(2.)
(2.)
3
3
(2.)
3
FFind the following parts and lay them out:
Hinweis
3
2 x
50 mm
19
1 x
18
1 x
(1.)
3
3
3
19 19
When the wheels are mounted to the axle, it must
turn easily. If the axle is difficult to turn, simply pull
the wheels slightly outward until the axle turns
freely again.

18 (3.)
CAUTION: Information for connecting the
cables to the solar cell: Slightly loosen the
screws, insert the cables in the holes and
tighten the screws with minimal force!
Do not tighten screws with a screwdriver
to avoid shearing the cables!
Glue to solar cell onto the spoiler, connect
the cable and attach the wheels.
18
-
=+
=
18
1 x
3
2 x
3
31
2
G
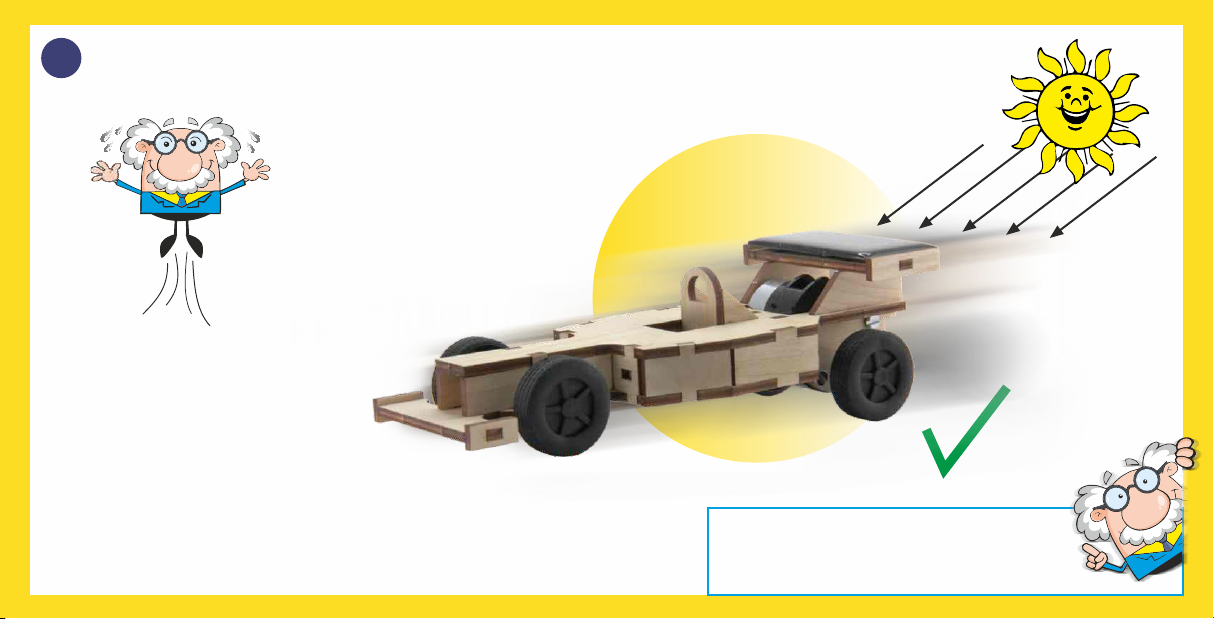
CONGRATULATIONS - Your racing car is finished and you are ready to race!
TIP: If the racing car runs backwards,
switch the red and black cable.
To ensure your solar racing car
will be really fast, it will need pure
"fuel" from direct sunlight!
The car will therefore run best
outside. Or use a halogen lamp
indoors to power the solar cell.
H
Find more cool kits at:
www.sol-expert-group.de
SOL-EXPERT group, C.Repky
Mehlisstrasse 19 - D-88255 Baindt
Tel.: +49 (0)7502 - 94115-0 - Fax: +49 (0)7502 - 94115-99
[email protected] - www.sol-expert-group.de
Changes and error reserved.
©
Juli 2020 / Christian Repky
Please return electronic parts to
a certified provider at the end of
their useful life!
Click here for the instructions:
Hier geht es zur Anleitung:
Cliquez ici pour les instructions:
Klik hier voor de instructies:
https://www.sol-expert-
group.de/Solar-
Produkte/Modelle-aus-
Holz/Solar-Holz-
Steckbausaetze/Solar-
Rennauto::1113.html?language
=de
https://www.sol-expert-
group.de/Solar-products/Models-
made-of-wood/Solar-wooden-
building-kits/Solar-racing-
car::1113.html?language=en
https://www.sol-expert-
group.de/Articles-
solaires/Modeles-reduits-en-
bois/Kits-dassemblage-solaires-
en-bois/Voiture-de-course-
solaire::1113.html?language=fr
https://www.sol-expert-
group.de/Producten-op-zonne-
energie/Modellen-van-hout/In-
elkaar-te-steken-houten-
bouwsets-op-zonne-
energie/Zonne-
raceauto::1113.html?language=nl
SOL-EXPERT kits keep you wanting more: detailed instructions, accurately fitting parts, high quality standard!
4 0 3 7 3 7 3 4 0 3 0 6 6
This manual suits for next models
1
Table of contents


