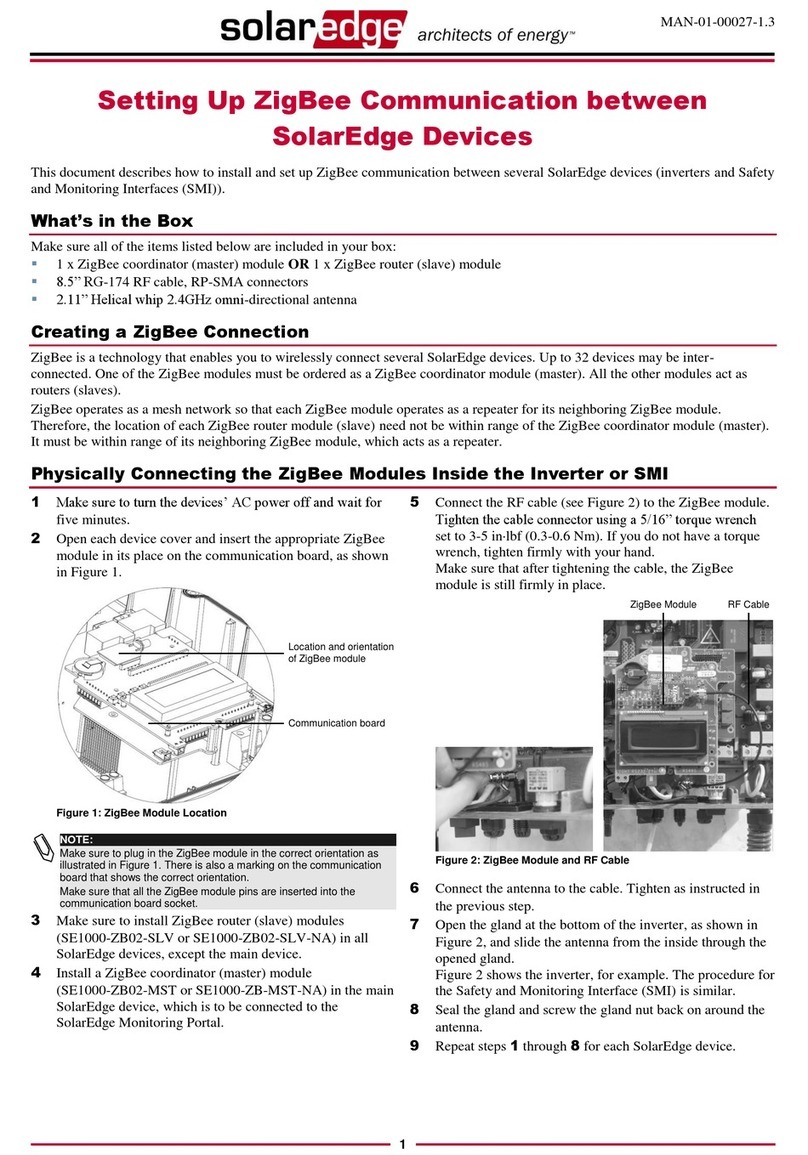
SolarEdge ZigBee Plug-in User manual

ZigBee Plug-in
Installation Guide
For Inverters with SetApp
Configuration
Version 1.2

Contents
Revision History 2
Disclaimers 3
Important Notice 3
Emission Compliance 4
Support and Contact Information 6
About This Guide 8
Overview 9
Package Contents 10
Installing the Antenna 11
Clipping the Antenna to the Inverter 11
Connecting the Antenna to a Vertical Surface using a
Bracket 13
Installing the ZigBee Plug-in 14
Configuring Communication 16
Appendix A: Technical Specifications 17
ZigBee Plug-in Installation Guide MAN-01-00554-1.2
1

Revision History
Version 1.2 - April 2019
Removal of Monitoring support
Version 1.1 - February 2019
Addition of Smart Energy Management support
Version 1.0 - January 2019
First version of this guide.
ZigBee Plug-in Installation Guide MAN-01-00554-1.2
2 Revision History

Disclaimers
Important Notice
Copyright © SolarEdge Inc. All rights reserved.
No part of this document may be reproduced, stored in a
retrieval system or transmitted, in any form or by any means,
electronic, mechanical, photographic, magnetic or otherwise,
without the prior written permission of SolarEdge Inc.
The material furnished in this document is believed to be
accurate and reliable. However, SolarEdge assumes no
responsibility for the use of this material. SolarEdge reserves
the right to make changes to the material at any time and
without notice. You may refer to the SolarEdge web site
(www.solaredge.com) for the most updated version.
All company and brand products and service names are
trademarks or registered trademarks of their respective holders.
Patent marking notice: see http://www.solaredge.com/patent
The general terms and conditions of delivery of SolarEdge shall
apply.
The content of these documents is continually reviewed and
amended, where necessary. However, discrepancies cannot be
excluded. No guarantee is made for the completeness of these
documents.
ZigBee Plug-in Installation Guide MAN-01-00554-1.2
Disclaimers 3

The images contained in this document are for illustrative
purposes only and may vary depending on product models.
Emission Compliance
This equipment has been tested and found to comply with the
limits applied by the local regulations.
These limits are designed to provide reasonable protection
against harmful interference in a residential installation. This
equipment generates, uses and can radiate radio frequency
energy and, if not installed and used in accordance with the
instructions, may cause harmful interference to radio
communications. However, there is no guarantee that
interference will not occur in a particular installation. If this
equipment does cause harmful interference to radio or
television reception, which can be determined by turning the
equipment off and on, you are encouraged to try to correct
the interference by one or more of the following measures:
Reorient or relocate the receiving antenna.
Increase the separation between the equipment and the
receiver.
Connect the equipment into an outlet on a circuit different
from that to which the receiver is connected.
Consult the dealer or an experienced radio/TV technician
for help.
ZigBee Plug-in Installation Guide MAN-01-00554-1.2
4 Emission Compliance

Changes or modifications not expressly approved by the party
responsible for compliance may void the user’s authority to
operate the equipment.
ZigBee Plug-in Installation Guide MAN-01-00554-1.2
Disclaimers 5

Support and Contact Information
If you have technical problems concerning SolarEdge
products, please contact us:
Support Center: https://www.solaredge.com/service/support
Country Phone E-Mail
Australia (+61) 1800 465 567 support@solaredge.net.au
APAC (Asia
Pacific)(+972) 073 240 3118 support-
asia@solaredge.com
Belgium (+32) 0800 76633 support@solaredge.be
China (+86) 21 6212 5536 support_
china@solaredge.com
DACH & Rest of
Europe (+49)
089 454
59730 support@solaredge.de
France (+33) 0806 700409 support@solaredge.fr
Italy (+39) 0422 053700 support@solaredge.it
Japan (+81) 03 6262 1223 support@solaredge.jp
Netherlands (+31) 0800 7105 support@solaredge.nl
New Zealand
(+64) 0800 144 875 support@solaredge.net.au
Republic of
Ireland (+353) 1800 901 575 support-
uk@solaredge.com
United Kingdom 0800 028
ZigBee Plug-in Installation Guide MAN-01-00554-1.2
6 Support and Contact Information

Country Phone E-Mail
(+44) 1183
US & Canada (+1) 510 498 3200 ussupport@solaredge.com
Greece (+49) 89 454 59730
support@solaredge.com
Israel (+972) 073 240 3122
Middle East
&Africa (+972) 073 240 3118
South Africa (+27) 0800 982 659
Turkey (+90) 216 706 1929
Worldwide (+972) 073 240 3118
Before contact, make sure to have the following information at
hand:
Model and serial number of the product in question.
The error indicated on the inverter SetApp mobile
application or on the monitoring platform or by the LEDs,
if there is such an indication.
System configuration information, including the type and
number of modules connected and the number and
length of strings.
The communication method to the SolarEdge server, if the
site is connected.
The software version as appears in the status screen.
ZigBee Plug-in Installation Guide MAN-01-00554-1.2
Support and Contact Information 7

About This Guide
This guide explains how to install and configure the ZigBee
Plug-in to manage your Smart Energy devices.
This guide is intended for Photovoltaic (PV) system owners,
installers, technicians, maintainers, and integrators who use
the SolarEdge power harvesting system.
This guide assumes that the SolarEdge power harvesting
system is already installed and commissioned. For additional
information about how to install and commission the
SolarEdge power harvesting system, refer to the relevant
installation guide.
For further information, datasheets and the most up-to-date
certifications for various products in different countries, please
visit the SolarEdge website: www.solaredge.com.
ZigBee Plug-in Installation Guide MAN-01-00554-1.2
8 About This Guide

Overview
ZigBee is a technology that enables wireless connection
between several SolarEdge devices.
Smart Energy uses the ZigBee Home Automation protocol with
up to 10 devices connected to a SolarEdge inverter that serves
as a Smart Energy manager.
Smart Energy devices include:
Smart Energy Hot Water
Smart Energy Socket
Smart Energy Switch
Smart Energy Relay
For more information on how to add a device to your Smart
Energy network, see the installation manual that comes with
the device or go to:
https://www.solaredge.com/products/device-
control#/
ZigBee Plug-in Installation Guide MAN-01-00554-1.2
Overview 9

Package Contents
The package contains the following items. Other items may be
included, if necessary.
ZigBee Plug-in
Antenna
This installation guide
WARNING!
When installing the ZigBee Plug-in, follow the safety
instructions of the inverter.
ZigBee Plug-in Installation Guide MAN-01-00554-1.2
10 Package Contents

Installing the Antenna
There are two ways to install an antenna for ZigBee
communication:
Clipping the antenna to the inverter
Installing the antenna on a vertical surface using a bracket
(not provided by SolarEdge).
Clipping the Antenna to the Inverter
1. Power off the inverter:
a. Switch the inverter ON/OFF/P switch to OFF. Wait 5
minutes for the capacitors to discharge.
b. Turn the Safety Switch (if applicable) to OFF.
c. Disconnect the AC to the inverter by turning off the
circuit breakers on the distribution panel.
2. Clip the antenna vertically to the heatsink fins or the
inverter side.
ZigBee Plug-in Installation Guide MAN-01-00554-1.2
Installing the Antenna 11

Figure 1: Antenna mounted on the inverter
3. Pass the antenna cable between the mounting bracket and
the rear side of the inverter or along the heatsink fins.
4. Open the communication gland at the bottom of the
inverter.
5. Remove the rubber seal from the gland and insert the cable
through the gland.
6. Insert the rubber seal with the cable into the gland body
and reconnect the gland to the inverter. Tighten the sealing
gland.
ZigBee Plug-in Installation Guide MAN-01-00554-1.2
12 Clipping the Antenna to the Inverter

Connecting the Antenna to a Vertical
Surface using a Bracket
For connecting the antenna to a vertical surface, use a bracket
with the following recommended dimensions (not supplied by
SolarEdge):
Figure 2: Example of an antenna bracket
1. Drill two holes in the surface and attach the bracket to it
with two screws.
2. Clip the antenna onto the bracket. Make sure the antenna
is positioned vertically.
ZigBee Plug-in Installation Guide MAN-01-00554-1.2
Installing the Antenna 13

Installing the ZigBee Plug-in
1. Make sure the inverter is powered off.
2. Remove the inverter cover as explained in the inverter
installation manual.
3. Install the ZigBee Plug-in on the communication board as
shown below.
ZigBee Plug-in Installation Guide MAN-01-00554-1.2
14 Installing the ZigBee Plug-in

4. Connect the antenna cable to the ZigBee Plug-in and
tighten the connector.
5. Close the inverter cover as explained in the inverter
installation manual.
ZigBee Plug-in Installation Guide MAN-01-00554-1.2
Installing the ZigBee Plug-in 15

Configuring Communication
1. Access SetApp and select Commissioning è
Communication.
Communication
Server LAN ›
LAN DHCP ›
RS485-1 SolarEdge Slave ›
RS485-2 Multi -Device
(Modbus)
›
ZigBee None ›
Wi-Fi None ›
Cellular PCL ›
Modbus
TCPport
Disable ›
2. From the Communication screen, select the following:
ZigBee è Protocol è Home Automation.
ZigBee Plug-in Installation Guide MAN-01-00554-1.2
16 Configuring Communication

Appendix A: Technical Specifications
Performance
North
America Worldwide Unit
Transmit power 22.8 11.8 dBm
Receiver sensitivity -102 dBm
EIRP with antenna 27.8 16.8 dBm
Outdoor (LOS) range* 400/1300 m/ft
Indoor range* 50/160 m/ft
Operating frequency
range 2.4 - 2.5 GHz
Maximum emitted power ≤ 30 ≤ 20 dBm
Bandwidth 2 MHz
Modulation O-QPSK with DSSS
coding
Antenna gain 5 dBi
Dimensions 78x32/3x1.3 mm/in
Certification
Regulatory approvals
FCC (USA), IC (Canada), ETSI
(Europe), C-Tick (Australia), Telec
(Japan)
* Approximate values, may differ depending on specific
installation conditions
ZigBee Plug-in Installation Guide MAN-01-00554-1.2
Appendix A: Technical Specifications 17

lf you have technical queries concerning our products, please
contact our support through the SolarEdge service portal:
www.solaredge.com/service/support
APAC (Asia Pacific)(+972) 073 240 3118
Australia (+61) 1800 465 567
Belgium (+32) 0800-76633
China (+86) 21 6212 5536
DACH & Rest of Europe (+49) 089 454 59730
France (+33) 0806 700409
Greece (+49) 89 454 59730
Israel (+972) 073 240 3122
Italy (+39) 0422 053700
Japan (+81) 03 6262 1223
Middle East &Africa (+972) 073 240 3118
Netherlands (+31) 0800-7105
New Zealand (+64) 0800 144 875
Republic of Ireland 1-800-901-575
South Africa (+27) 0800 982 659
Turkey (+90) 216 706 1929
United Kingdom (+44) 0800 028 1183
US & Canada (+1) 510 498 3200
Worldwide (+972) 073 240 3118
Table of contents
Other SolarEdge Control Unit manuals
Popular Control Unit manuals by other brands
Eaton
Eaton Vickers DF3S4-16 Series Overhaul manual
Pfeiffer Vacuum
Pfeiffer Vacuum EVI 005 MI operating instructions
Spectrum Digital
Spectrum Digital TMS320DM368 Technical reference
Viessmann
Viessmann 5569 Operation manual
cashco
cashco 964 Installation operation & maintenance
wtw
wtw MIQ/CHV PLUS operating manual
