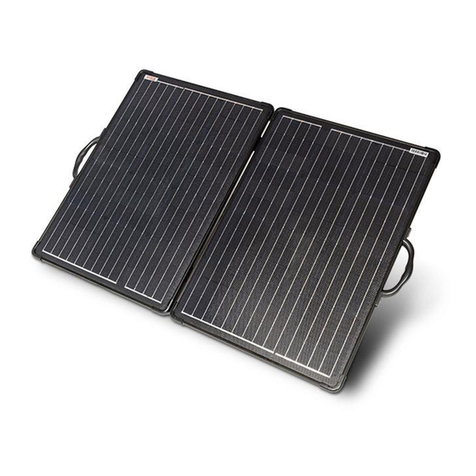
SolarSheat 1000g User manual

YSH WM1000G-R1.0
SOLARSHEAT
1000
G
Wall Mount Installation Manual
By
Your Solar Home, Inc.
Version 1.0
December 12, 2007
All building, plumbing, electrical and safety codes supersede the instructions in this manual.
The manufacturer assumes no liability for improper installation. Use this manual at your own risk.

YSH WM1000G-R1.0
1.0 Introduction
The SolarSheat 1000G is a modular solar collector designed for supplemental room heating.
Interior air is drawn though the SolarSheat, heated up and pushed back into the adjoining
room. The system is self-powered and does not require any external electrical connections.
1.1 Installation orientation
The SolarSheat 1000G should be positioned on a South facing wall (in the Northern
Hemisphere) in order to optimize the performance of the solar collector. Position the
SolarSheat 1000G so that the collector panels are un-shaded and not obstructed by
neighboring trees or buildings. The collector panels can be mounted to the building wall in
"Portrait" style or "Landscape" style orientations as shown below:
PV
“Portrait” Style,
PV side
on top only.
"Portrait" style installation; Vermont, USA
SolarSheat 1500G model shown
PV
“Landscape” Style,
PV on the left or
right side
"Landscape" style installation; Colorado, USA
SolarSheat 1500G model shown
2

YSH WM1000G-R1.0
ITEM NO.
PART NO.
DESCRIPTION
QTY.
1
SolarSheat 1000G -
SolarSheat 1000G
1
2
1017
Duct Kit 1000G/1500G-GS
1
3
y001
Wall mount - 42" long
2
4
f004
TEK screw -hex washer head,
black
8
2.0 General installation
The successful operation of the SolarSheat solar collector depends entirely on the proper
installation and maintenance as outlined in this manual. Prior to installation read the
installation instructions completely to insure the required tools and supplies are on hand. The
installation of the SolarSheat 1000G should comply with all local building codes, permits and
OSHA requirements. The SolarSheat can be installed into new construction projects or
retrofitted to existing buildings.
2.1 SolarSheat 1000G (Part #1132) Packing list
3
2
1
4
Collector Only
Before beginning installation insure you have received all items listed in the packing list for
the SolarSheat 1000G as shown above. A cardboard template is included in the SolarSheat
box to use as a guide to position the holes for the duct work. If any items are missing please
contact your local SolarSheat dealer or call 1.866.556.5504. 3

YSH WM1000G-R1.0
4
2.2 SolarSheat 1000G overall dimensions with wall mounts
SolarSheat
1000G
Wall mount
Duct hole
location
Rear Isometric
View
3'-7 1/8"
1096
4'-10 9/16"
1487
3'-6 1/2" REF
1079
8"
203
Side View
1'-9 9/16"
548
4 13/16"
123
Rear View
Check overall size and space requirements prior to installation on building

YSH WM1000G-R1.0
5
2.3 Duct Kit 1000G/1500G-GS (Part #1017) Packing list
5
2
4
2
2
2
1 3
1 2 6 7
2 1
ITEM NO.
PART NUMBER
DESCRIPTION
1017/QTY.
1
e027
Thermostat
1
2
d016
5" aluminum duct
2
3
d003
4"/5" adapter collar
2
4
v004
Foam gasket - 3/4" thick
2
5
v005
Foam gasket - 1/2" thick
2
6
d006
5" round diffusor
2
7
d001
5" backdraft damper
1
Insure you have received all items listed in the packing list for the Duct kit as shown above.

YSH WM1000G-R1.0
6
Overhang
dimension
Locate upper edge of
template at least
2 X overhang dimension
below overhang
Hot
air
exhaust
duct
(supply)
Intake
duct
(return)
Cardboard
template
2.4 Basic mounting procedures
Locate lower edge of
template above snow line
1. Locate the position of the SolarSheat duct holes on the interior and exterior of the building.
As indicated previously the collector can be installed in a" landscape" or "portrait"
orientation. Do not locate the hot air exhaust (supply) duct below the intake (return) duct.
Warning: Avoid all electrical wires, plumbing and gas piping!
2. Position and level the cardboard template on the exterior wall.
3. Tape or staple the template temporarily to the wall.

YSH WM1000G-R1.0
Duct holes
Cardboard
template
Lower wall
mount
4. Drill pilot holes for the duct work through the template and exterior cladding and wall with a
long drill bit.
5. Cut 5-1/8" to 5-1/4" duct holes through the template and wall using a hole saw or jig saw.
6. Cut matching holes in the insulation in the back of the SolarSheat collector using a knife.
7. Place the lower wall mount (Part #y001) below the template (as shown). Insure the mount 7
is correctly centered on the template.

8
YSH WM1000G-R1.0
Wall
Mounting screws
(not Included)
House siding
Lower mount
8. Drill holes through the lower mount for mounting screws (not included).
9. Screw lower mount to exterior wall. Choose appropriate mounting screws/bolts
(stainless steel is recommended) for wall material.

9
YSH WM1000G-R1.0
Trim away
extra duct
Outer wall Inner wall
Duct
Screws Round
diffusor
shaft
3/4"
2
Base of Round
Diffusor
10. Temporarily insert ducts (Part #d016) into the wall.
11. Mark where to cut the duct. The trimmed duct should be flush with the exterior wall.
12. Remove ducts and trim away excess duct material and put them back into the wall.
13. Seal any gap around the duct with sealant or spray foam insulation material.
14. If your wall thickness is 4" (100mm) or less the lower (air intake) diffuser shaft will need
to be trimmed ¾" (20mm) (as shown). This will allow additional clearance for the
installation of the backdraft damper.
15. Install round diffuser into ducts (as shown above).

1
0
YSH WM1000G-R1.0
3/4" thick foam
gasket
1/2" thick foam
gasket 5" collar
Backdraft damper
edge
5" collar with
assembled gaskets
1/4" (7mm) hole
for thermostat wire
16. Apply thick gasket to inside of duct collars as shown.
17. Apply thin gasket to outside face of duct collars as shown.
18. For 4" (100mm) or less thick walls the edge of the backdraft damper will need to be
crimped. Insert crimped edge of damper into 5" collar. This will allow additional clearance
for adjustment of the round diffuser.
19. Insert backdraft damper into lower (air intake) duct.
20. Seal and/or caulk the 5" collars and insert them into the ducts.
21. Drill a ¼" (6mm) hole through the wall at the desired location for the thermostat. Insure
that the final placement of the thermostat inside the building will not be in direct sunlight.

YSH WM1000G-R1.0
Black Tek screws Mounting screw (not included)
Upper wall mount
SolarSheat Seal hole with
outdoor sealant
Thermostat
Thermostat
wire
Black Tek screws
Lower mount
22. Screw SolarSheat 1000G to upper mount (Part #y001) using 4 supplied TEK screws.
Equally space the screws across the span of the mounting rail.
23. Drill holes in upper mount for mounting screws to wall (not supplied).
24. Position SolarSheat onto lower mount on wall. Run thermostat wire through predrilled
hole. Seal around the thermostat wire with exterior grade sealant. Screw upper wall
mount to wall (as shown) using appropriate fasteners. Secure SolarSheat to lower mount
using the remaining 4 supplied TEK screws.
25. Install thermostat on interior wall. Connect the red or black wire to the RH terminal. 11
Connect the white wire to the W terminal.

YSH WM1000G-R1.0
3.0 Maintenance
The SolarSheat 1000G operates best when the glass is clean and free of debris. If the glass
becomes dirty wash the glass with mild soapy water and rinse.
Congratulations! You have
completed the installation of the
SolarSheat 1000G. We hope you
enjoy many years of maintenance
free solar powered heat.
12
Table of contents
Popular Solar Panel manuals by other brands

Baxi
Baxi Solargen PHOTOVOLTAIC manual
CNBM
CNBM AVANCIS POWERMAX 3.5 Safety, installation, and operation manual
LG
LG LG Q1K-V5 Series installation manual
Immergas
Immergas SOLARSMART 110 Instruction booklet and warning
Vaillant
Vaillant auroTHERM VTK 570/2 installation manual

Kyocera
Kyocera KS16 datasheet
Homelite
Homelite T-7 Assembly instructions and parts list
Lippert
Lippert Furrion FSFP37MW2-BL user manual

Projecta
Projecta SPM80K Operation manual
Maxeon
Maxeon SunPower Performance SPR-P6-555-UPP Safety and installation instructions

UMA Solar
UMA Solar Heliocol Series installation manual
RFI
RFI SMP-5-10W installation guide

