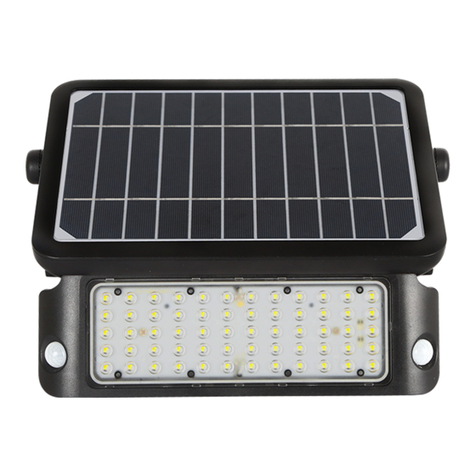
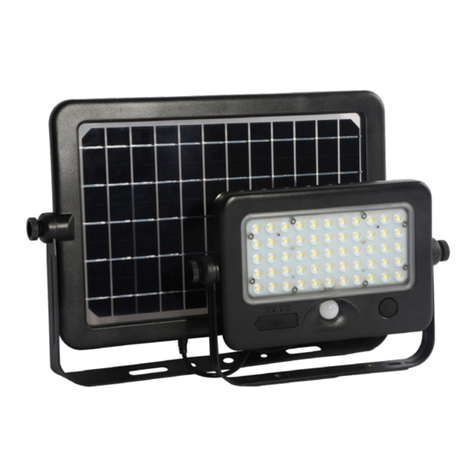
Soltech SOLTAB 10W User manual

01
SOLTAB
Flood Lights
10W
Installation Manual
SOLTECH offers Advanced LED
Technology That Is Eco-friendly And
Utilizes Clean Energy.

02 03
01 Introduction 02 Specification
Thank you for purchasing SOLTAB Urban Lighting Products.
Important
Please read these instructions before installation to ensure optimum results
and longevity of your lights. The solar panel should be charged in full
sunlight for 8 to 9 hours before initial first use to provide optimum results.
Features
• Change the operating modes using the silicon rubber on/off button.
• The light can be used separately or connected to the solar panel
with the water tight quick connector
• Use outdoor as a flood light or wall pack
• Use indoor as a desk light or emergency light
• Use as a portable work light or camping light
• Use as your power bank with solar recharging and a USB port
• Tempered-glass laminated, reliable and durable for portable
usage. Double-sided solar panel achieves a higher
conversion efficiency.
• Tools-free rotator enables solar panel angle adjustment or
light direction adjustment, with just bare hands
• Clear Indicator of Battery Capacity: 25% 50% 75% 100%. It
quickly shows the battery capacity at any time. Enables better
planning for your activities
• Lenses for superior optical control, enhanced lighting efficiency
and reduced glare
Notice & Warning
1. The SOLTAB will provide optimal usage where there is
enough sunshine.
2. Please note the lighting time depends on sunshine duration
and weather.
3. The lamp will light up automatically at dusk.
4. Built-in intelligent IC is with over-charge, over-discharge
and over-voltage protection.
5. The lamp is equipped with an internal battery pack, which is
replaceable. If needed, please contact for correct new battery pack.
6. If the battery is taken out and put back in or replaced with new
batteries, please allow the solar panel to receive maximum sunshine
to activate the lamp.
7. Non-professionsals please do not disassemble the lamp.
8. Please do not dispose the battery with household garbage to
avoid explosion.
Please Note
During continuous rainy or cloudy days, run time may be reduced as
the battery will not be fully charged.
Ordering Information Chart
SOLTAB 10W
4 Operating Modes
90° / 16–26 ft
10W
Mono-Crystalline 6V 10W
27WH 3.7V 7.2AH
1,100
PC & Aluminum
100 lm/W
7hrs (1000W/m2)
2–3 Days
-5 °F to 113 °F
32 °F to 149°F
LED Nominal Power
Solar Panel
Lithium Ion Battery
CCT
Lumen Output@4000K
IP65
Beam Angle
Waterproof Rate
> 70
Solar Panel: 13.6 X 8.1 X 0.8 Inches Light: 9.1 X 6.5 X 1.3 Inches
90°
4,000K & 5,000K
CRI
Casting
Efficiency@4000K
Product Size
* Charging Time
Run Time (@Full Power)
Operation Mode
PIR Sensor Angle / Distance
* Operating Temperature
* Charging Temperature
* The temperature can impact the battery’s charging and normal operation. * The solar charge time data is base on 77 degree F ambient temperature with the
panel pointed directly at the solar radiation. The standard radiation value is 1000W/m2.
SOLTAB 10W
Specifications
STL-TAB=SOLTAB
SERIES WATTAGE COLOR
TEMPERATURE
MOUNTING
OPTIONS FINISH
10=10W 1000 Lumens 4=4000K
5=5000K
WM=Wall Mount BK=BLACK
- - - -
9.1 inches 1.3 inches
6.5 inches
13.6 inches
8.1 inches
0.8 inches

04 05
03 Installation
WALL MOUNT
Connect
1. Take out all of the parts
from the package. Confirm
the installation location and
wire length.
2. Use the card to mark hole
positions, then drill 4 holes
of 0.3 inch diameter and 2.4
inches depth.
3. Drive expansion screw into the
holes leaving enough room
to slide the brackets onto the
screws. Then secure the Panel
and Fixture.
4. Open the silicon cover at the
bottom of the light, connect
the cable from the solar panel
to the cable from the light and
screw together tightly.
5. Adjust the solar panel and
LED light to the right angles
according to the local latitude
and the desired direction for
the light.
9.8–16.4 Ft
3.2–6.6 Ft
TIP
In order to get the best lighting
results and extend the life
span, we suggest you follow
the installation guide provided,
when you install the light.

06 07
04 Remote Control
Mode A 01
Press 1st time for 50% Constant Brightness.
Mode B 01
Automatically turns on full brightness (1000lm) when motion is detected
within a range of ≤8m and then turns to 5% brightness after 20 seconds of
no motion.
Mode B 02
Automatically turns on and remain 100% brightness(1000lm) for 5 hours.
After 5 hours or when battery capacity < 30% it turns to back to Mode B01.
Mode A 02
Press for a 2nd time for 100% Constant Brightness.
Mode A 03
Press for a 3rd time to turn off.
Mode B 03
Press for a 3rd time to turn off.
Additonal Power Bank Function
ACCORDING TO THE CONNECTION OF THE LIGHT AND SOLAR PANEL,
THE LAMP WILL AUTOMATICALLY RECOGNIZE THE SENSOR MODE &
CONSTANT LIGHTING MODE & POWER BANK FUNCTION.
Mode A: Constant Lighting Mode (Lamp separate with Solar Panel) Mode B: Sensor Mode (Lamp body connected to Solar Panel)
NOTE: Under this work model, the Radar sensor & Photocell induction will not work. NOTE: Under this work mode, the lamp will automatically turn on at night and will turn off daytime.
5 Hours
On/Off Mode
USB Cable
(Not included)
USB Discharge:
5.0V/1.0A
DC-Micro Charge:
5.0V/1.0A

08 09
Alaska
25° N
0°– 13°
13°– 26°
26°– 37°
37°– 45°
19° N
21° N
26° N
20° N
27° N
28° N
29° N
30° N
31° N
32° N
33° N
34° N
35° N
36° N
37° N
38° N
39° N
40° N
41° N
42° N
43° N
44° N
45° N
46° N
47° N
48° N
60° N
49° N
Washington
Oregon
California
Nevada
Arizona
Utah
New Mexico
Kansas
Colorado
Oklahoma
Texas
North Dakota
South Dakota
Nebraska
Idaho
Montana
Wyoming
61° N
62° N
63° N
64° N
65° N
70° N
66° N
67° N
68° N
69° N
Hawaii
Minnesota
The Solar charge in a battery pack won’t last forever. The off–grid system
relies on stored solar energy for autonomy. Angling your solar panels
properly can boost the power intake of your solar lighting system. You
want to angle your solar panels at a tilt based on the area’s latitude.
Tip
You can increase the tilt 15° in the winter or decrease 15° in the summer.
In this way you can get the maximum sunlight to recharge the battrey.
Strong sunlight Normal sunlight Less sunlight
Key
The area will dictate the installation of the fixtures and will sometimes
prevent the lights from facing south. But that’s okay! Panels facing West
& East won’t get as much light as Southern facing panels, but will still
collect a good amount of sunlight. A North facing panel also works, but
it will take longer to charge than any other direction. This would mean
that the solar charge will be less optimal if installations are facing North.
0°– 13°
13°– 26°
13°– 26°
37°– 45°
45°
37°– 45°
Arkansas
Louisiana
Mississippi
Alabama Georgia
South
Carolina
North
Carolina
Virginia
West
Virginia
Kentucky
Illinois
Wisconsin
Iowa
Missouri
Michigan
Indiana
Ohio
Pennsylvania
New York Massachusetts
Rhode Island
Connecticut
New Jersey
Delaware
Maryland
Tennessee
Florida
World Wide Panel Angles
Best Facing Direction of Solar Panel
Best
Worst
OKOK
New Hampshire
Vermont Maine
26°– 37°
26°– 37°
05 Panel Angle

010 011
06 Luminous Distribution
SOLTAB 10W
07 Warranty
SOLTAB is covered by a 3 year limited warranty. SOLTAB
urban light warrants to the original purchaser that this
product is free from defects in materials and workmanship
for the period of 3 years from date of purchase. To obtain
warranty service please contact your local distributor or sales
rep for further instruction.
SOLTECH offers
advanced LED
technology that is
eco-friendly and
utilizes clean energy.
IESViewerv2.99n
A.Legotin(C)2004
0
100
200
300
400
50
0
Type CLamp=1 210.9 lm
Max=531 cd/klm
Power=1 W
Multiplier=1.2109
Degrees=0
Point 0x0x0 m
m

012
Copyright©2020–2021 SOLTECH LLC,
All Rights Reserved.
SOLTECH LLC reserves the right to update all
product data sheets at any time. Consult SOLTECH
marketing specialists for publication updates at
1460 Park Avenue.
Emeryville CA 94608 USA
www.soltechlighting.com
Other Soltech Floodlight manuals
Popular Floodlight manuals by other brands
IQ-group
IQ-group E-614 Installer's guide

BEGA
BEGA 84 517 Instructions for use

RAB Lighting
RAB Lighting ANGSHARK quick start guide
Utilitech
Utilitech Motion Sensing Security Light UT-9250-BZ owner's manual
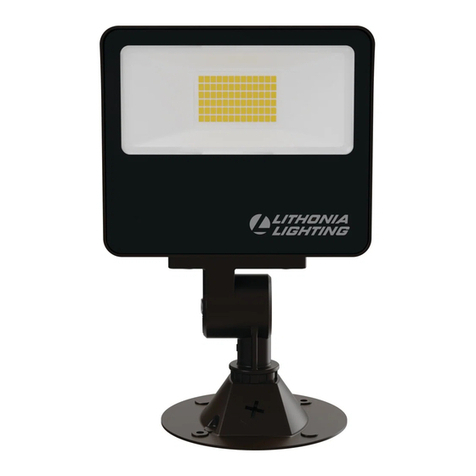
Lithonia Lighting
Lithonia Lighting ESXF1 P0 installation instructions

Ledj
Ledj Stage Wash 36 user manual
