SOMFY inteo CHRONIS IB User manual
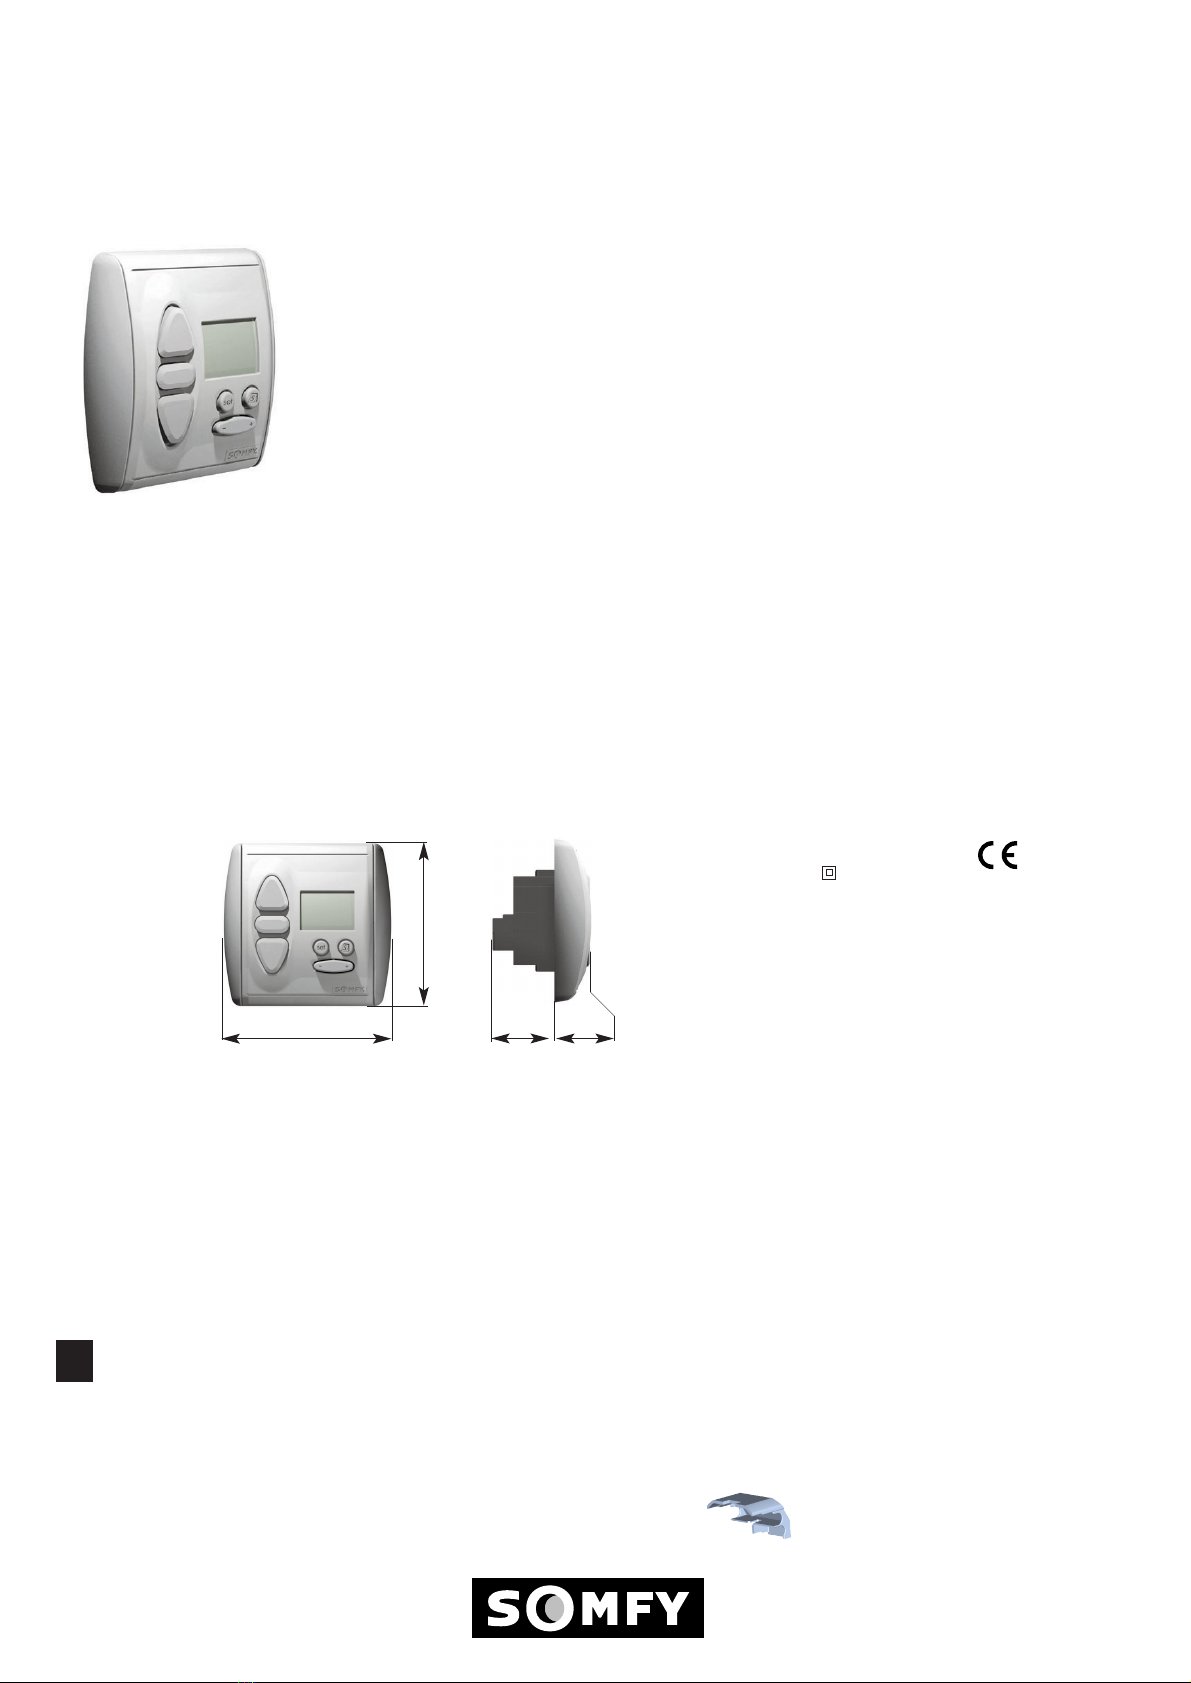
The CHRONIS IB is a timer and manual control for IB BUS line.
The main function of the CHRONIS IB is "to give controls according to the time".
In that way, one “UP” and one “DOWN” control per day can be programmed.
❏ Weekly timer :
different times can be programmed for every day of the week.
❏ Cosmic function :
the time of the automatic up and down controls are determined according to the season.
❏ SEC function :
Thanks to a specific working mode (chosen by the end user), Chronis gives the impression
that a house is inhabited (automatic controls are sent within a window of +/- 15 minutes
around the programmed times).
®
inteoCHRONIS IB
INSTALLATION
guide
Ref.182253A
1
Installation:
280 mm
80 mm
Characteristics:
33 mm 17 mm
Cabling :
A
The CHRONIS IB is compatible with the SOMFY “IB” BUS line (common = +V). Cabling arrangements are
shown in the diagram below. Respect the electrical standards in force as well as the following points:
- disconnect the mains before carrying out any work.
- ensure that no forces act on the screw terminals after installation.
- Do not forget to mount the protection cover to separate the cables
for the BUS line and the cables for the power.
❏Main supply : 220-240V 50Hz.
❏Class II product
❏Protection index IP40.
❏Output : dry contacts 3A.
❏Output temporisation : active for 0,5s.
❏Environmental conditions for use :
- temperature +5°C to +40°C (no condensation allowed).
- pollution degree typical for usual living space.
❏Time accuracy : +/- 5 minutes a year.
❏Power failure : date and time are stored up to 10 days. The
memorized open and closing time are not erased by a power failure.
EN60730-1
EN50081-1
EN50082-1
Installation allowed only by authorized electrician.
Before connecting the unit, read the instructions carefully.
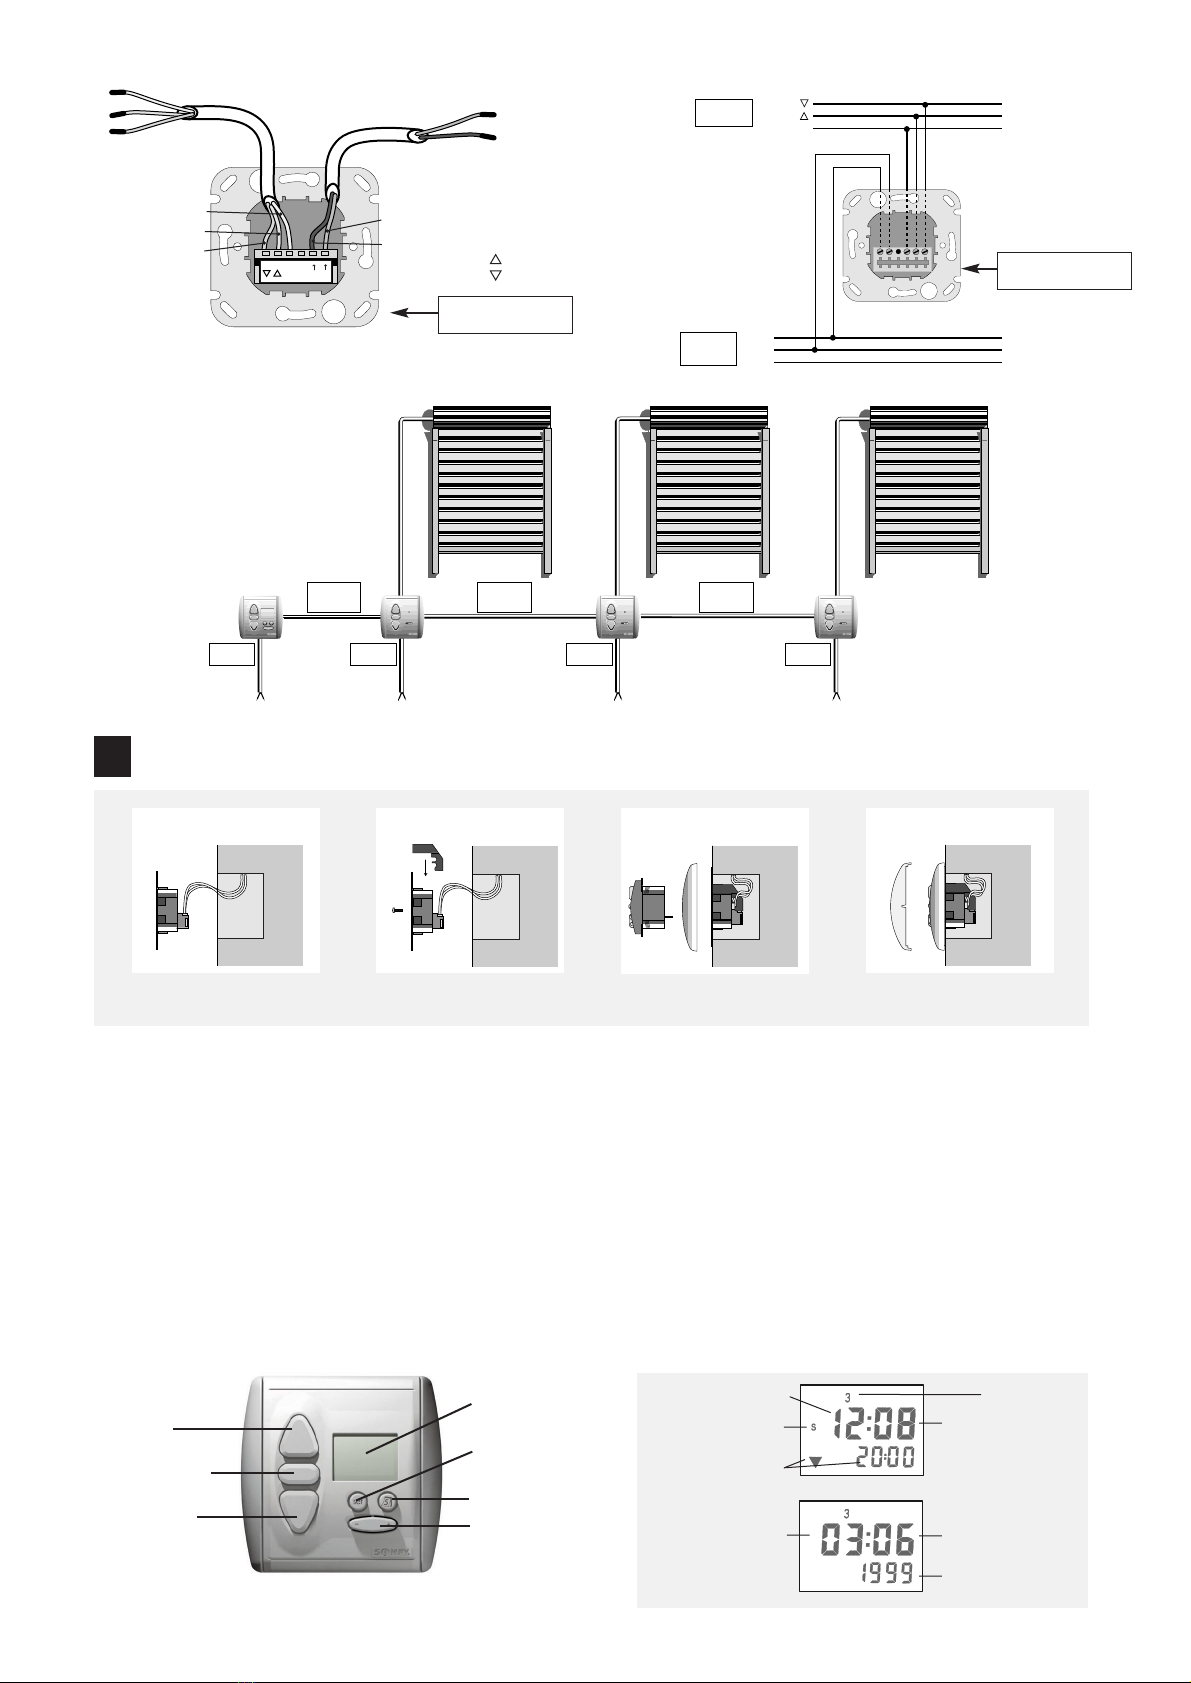
UP button
STOP button
DOWN button Calendar button
SET button
Adjusting button
Display
Non-binding document. Products and references in this document are subject to change without prior notice. Please consult SOMFY before using such references. © SOMFY 09/99
Mount the protection cover and
screw the bracket.
Cable the bracket.
Mounting :
B
Programming:
3Clip the front plate.
Year
Month
Day
Current Day
1 : Monday
2 :Tuesday
3 :Wednesday
4 :Thursday
5 : Friday
6 : Saturday
7 : Sunday
Min
Next automatic control
Hour
Summer/Winter time
SUPPLY
230V 50Hz
IB BUS line
Phase
Neutral
Earth
DOWN :
UP :
Common :
C
2 x
CENTRALIS UNO IB
CHRONIS IB
CENTRALIS UNO IB CENTRALIS UNO IB
BUS LINE
3 x 0,75 mm2
BUS LINE
3 x 0,75 mm2
BUS LINE
3 x 0,75 mm2
4 x 0,75 mm2 4 x 0,75 mm2 4 x 0,75 mm2
SUPPLY
230V - 50 Hz
2 x 1,5 mm2
SUPPLY
230V - 50 Hz
3 x 1,5 mm2
SUPPLY
230V - 50 Hz
3 x 1,5 mm2
SUPPLY
230V - 50 Hz
3 x 1,5 mm2
on off on off on off
3 x 0,75 mm2
2 x 1,5 mm2
Mains Neutral
Mains Phase
BUS line UP
BUS line COMMON
BUS line DOWN
SUPPLY
IB BUS line
L
N
C
L➜ = Mains phase
N➜ = Mains neutral
C = BUS Line common
= BUS Line UP
= BUS Line DOWN
Fit the frame and plug the
module in the bracket.
1 2 34
Do not forget to mount the protection cover to separate the cables for the BUS line and the cables for the power.
CHRONIS IB bracket
“Rear view”
CHRONIS IB bracket
“Front view”
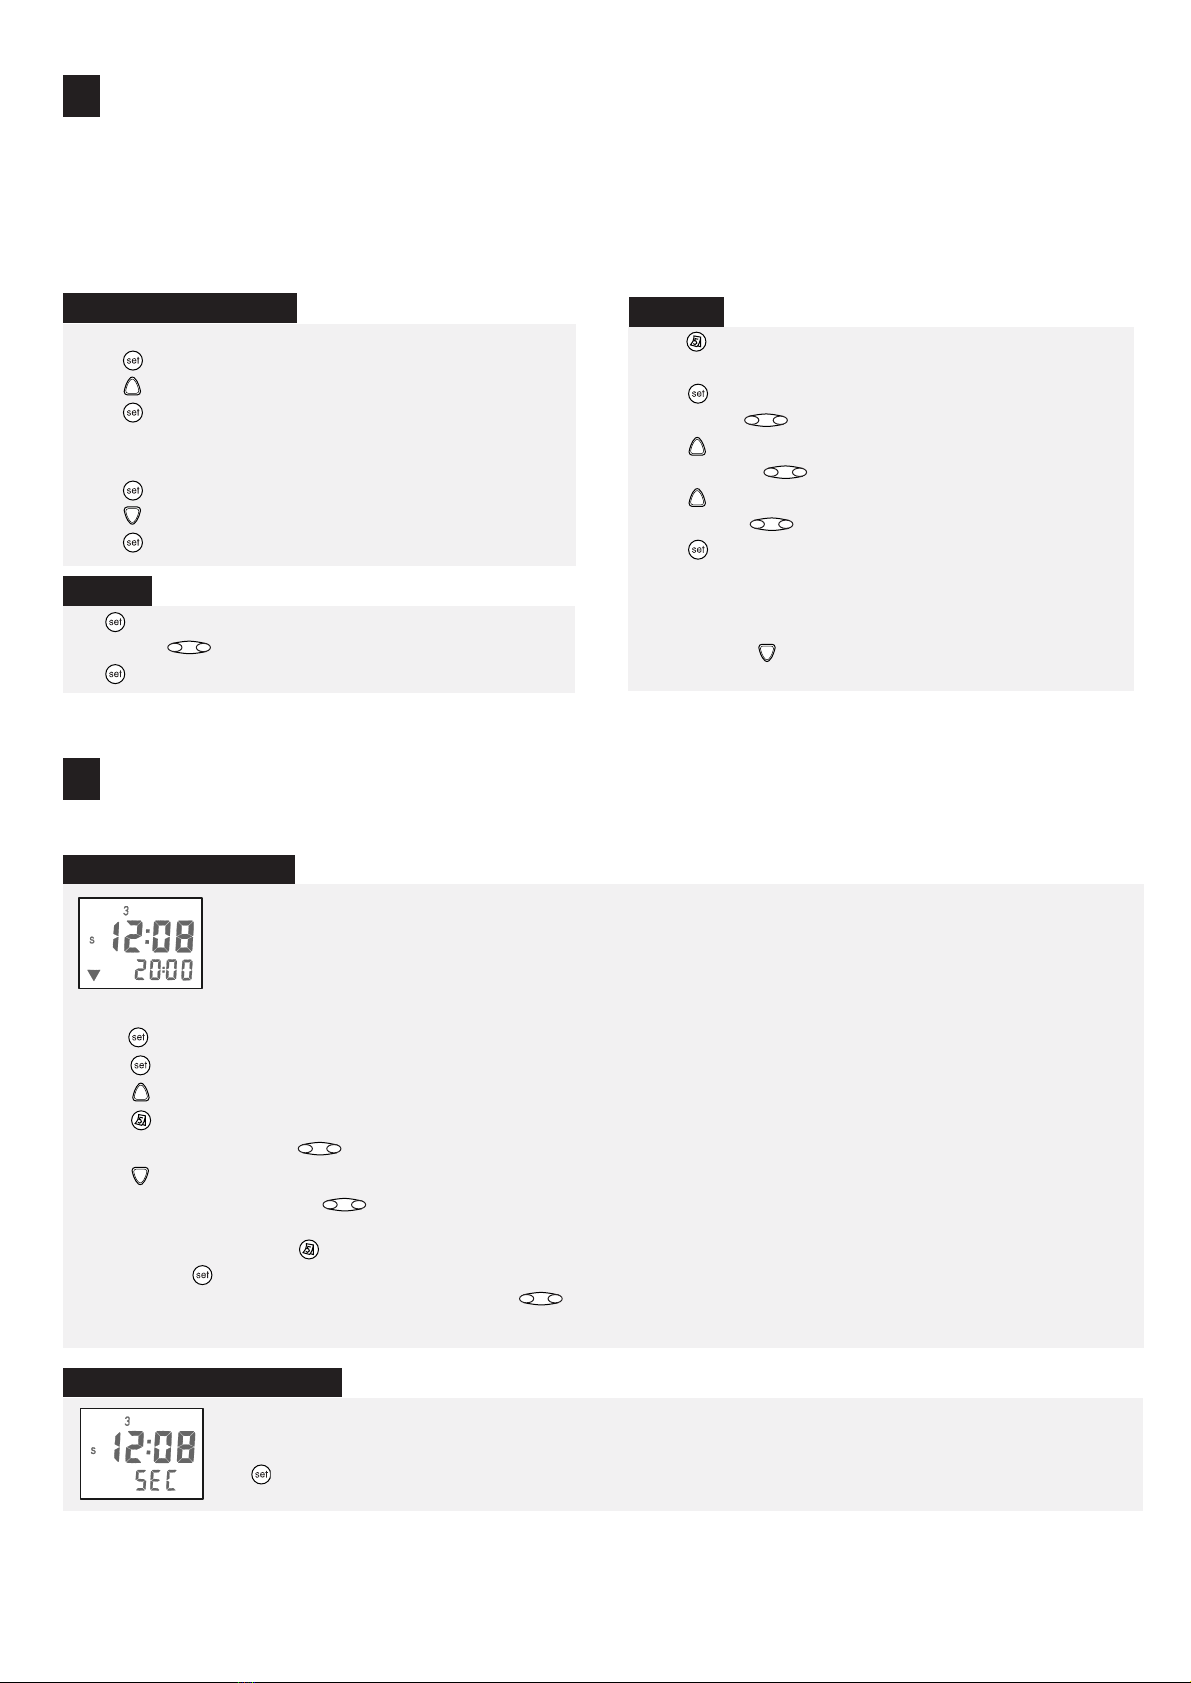
With this mode, your house appears to be inhabited during your absence, with the shutters opening and closing at random times.
The times deviate automatically from the weekly program input times within a window of +/- 15 minutes.
Hold down until
(SEC) is displayed.
The CHRONIS IB offers five different operating modes, which can meet all personal requirements by pressing a button.
Security/holiday switching (SEC)
Configurations :
B
Weekly program (▼ 20:00)
The shutters are automatically opened or closed at the input opening and closing times.
❑The factory setting for opening is 06:00 and 20:00 for closing.
❑Different times can be input for each day of the week.The day of the week to which the time input applies is always shown blinking.
Changing the weekly program (if necessary):
1. Hold down until the weekly program (▼ 20:00) is displayed.
2. Press briefly ➜ time blinks.
3. Press briefly ➜ “UP” switching time blinks.
4. Press to select the day of the week you wish to program.You can also select all days of the week (1234567).
5. Set “UP” switching time with
6. Press briefly ➜ “DOWN” switching time blinks.
7. Set “DOWN” switching time with
If required, set the next day with and repeat (3) to (7).
After input press briefly (store) ➜ time display.
If the “UP” or “DOWN” time is turned further than 23:59 with the , the display shows (OFF).
Automatic opening or closing can be deliberately switched off for “UP”and “DOWN”commands on individual days by using the OFF setting.
+
-
+
-
+
-
Basically valid for setting or changing values:
❑Blinking values can be changed
❑Always press SET to terminate and store input values
❑If no input is entered for approximately 20 seconds, the input menu is automatically exited.The settings made up to that point are not stored.
Before setting the time, summer or winter time setting must be carried out. Factory setting is winter time (“W” is shown on
the display).
Initial setting operation :
A
❑From winter time to summer time
1. Press briefly ➜ time blinks.
2. Press for longer than 5 seconds ➜ summer time is set.“S” is shown.
3. Press briefly (store) ➜ time display.
❑From summer time to winter time
1. Press briefly ➜ time blinks.
2. Press for longer than 5 seconds ➜ winter time is set.“W” is shown.
3. Press briefly (store) ➜ time display.
Press briefly ➜ time blinks.
Set time with
Press briefly (store) ➜ time display stops blinking.
+
-
SET summer or winter time
SET time
1. Press briefly ➜ date display (if no input within 10 sec., the display
returns to the time)
2. Press briefly ➜ day blinks.
3. Set day with
4. Press briefly ➜ month blinks.
5. Set month with
6. Press briefly ➜ year blinks.
7. Set year with
8. Press briefly (store) ➜ year stops blinking, time display.
The day of the week is set automatically.
The day, month,year selection can also be carried out in the opposite
direction using the button.
+
-
+
-
+
-
SET date

Only manual move commands are executed.
press +briefly with the ➜ (OFF) is displayed.
press -briefly with the ➜ time is displayed.
+
-
+
-
The shutters open and close at approximately sunrise and sunset.
By inputting a differential time, opening and/or closing can be moved independently in relation to the times of sunrise and sunset
by up to +/- 1h 59 min.
By inputting individual blocking times, it particularly prevents very early or late move commands in the summer months.
Example: With +1h differential time for UP,the shutters open 1 hour after sunrise.With -1h they open 1 hour before sunrise.
The sun rises shortly after 05:00 in June. However, you want your roller shutters to open at 07:00 at the earliest. Input the blocking time 07:00 for UP.
Sunset occurs at approx. 21:40.If you want your roller shutters to close at 21:00 at the latest, then input the blocking time 21:00 for DOWN.
The factory setting for the UP blocking time is 06:00, and 20:00 for DOWN.If you want these blocking times to have no effect on the opening or closing, and
the shutters to be controlled at the time of sunrise and sunset, then you can set the UP blocking time to 05:00 and the DOWN blocking time to 22:00.
Cosmic 2 always opens the roller shutters at the times set in the weekly program and close them at the times from Cosmic 1.
The differential time and the blocking time that were set in Cosmic 1 are taken into account. No changes can be made to the swit-
ching times in Cosmic 2.
Set differential time
1. Hold down until (COS 1) is displayed.
2. Press briefly ➜ time blinks and the next switching command is dis-
played.
3. Press briefly ➜ differential time UP blinks.
4. Change differential time “UP” with
5. Press briefly ➜ differential time “DOWN” blinks.
6. Change differential time “DOWN” with
7. Press briefly (store) ➜ differential times are stored, time display.
+
-
+
-
Cosmic 1 (COS 1)
OFF mode
Cosmic 2 (COS 2)
Set blocking time
1. Hold down until (COS 1) is displayed.
2. Press briefly ➜ time blinks and the next switching command is dis-
played.
3. Press twice briefly ➜ blocking time “UP” blinks.
4. Change blocking time “UP” with
5. Press twice briefly ➜ blocking time “DOWN” blinks.
6. Change blocking time “DOWN” with
7. Press briefly (store) ➜ blocking times are stored, time display.
+
-
+
-
®
Using:
4
By pressing briefly the or push buttons, the output is activated to control the BUS line (“UP” or“DOWN” controls).
By pressing briefly the push button, the both “UP” and “DOWN” outputs are activated to control the BUS line (“STOP” control).
AMOVE / STOP command :
Other SOMFY Timer manuals


