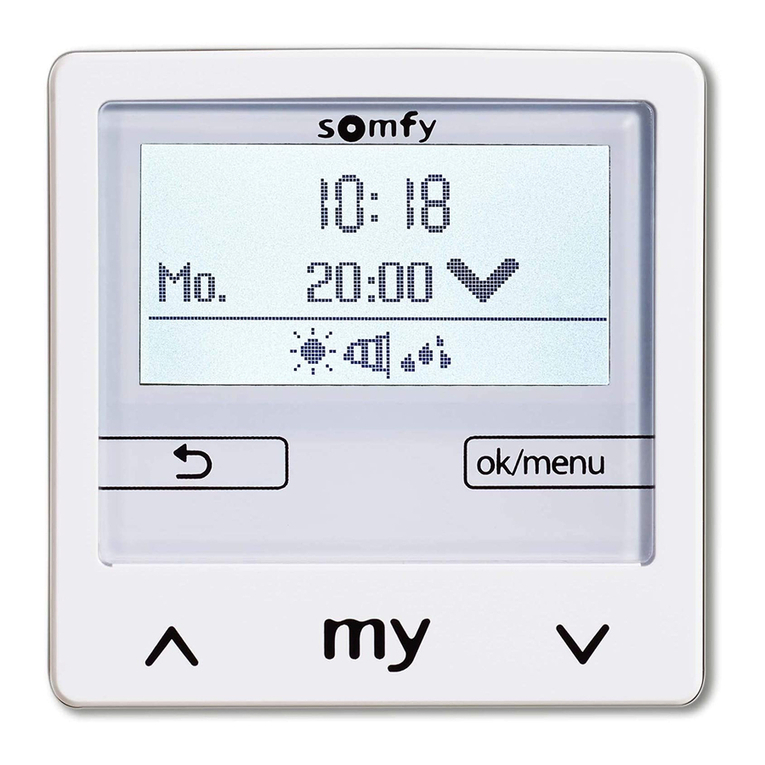
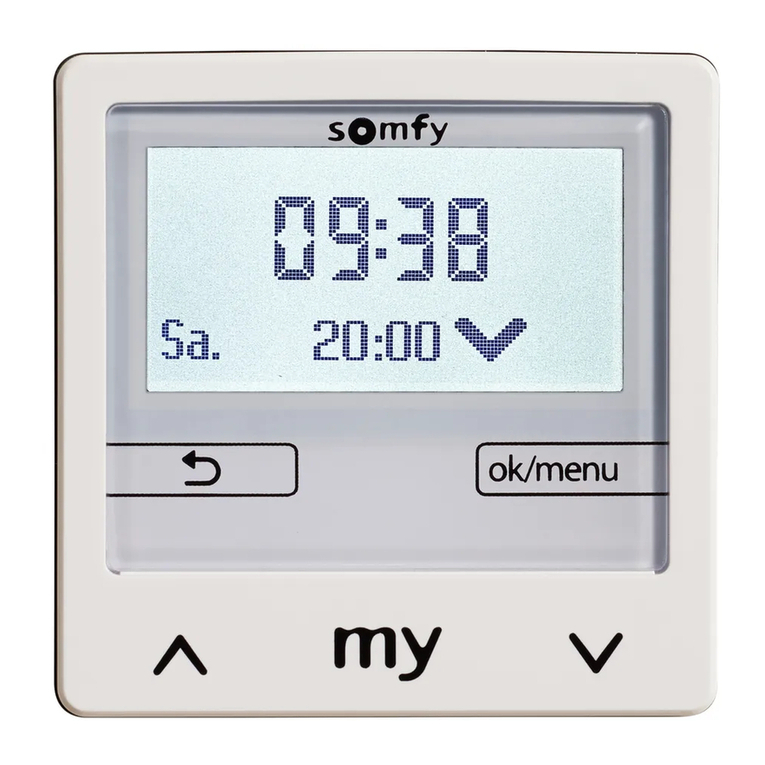
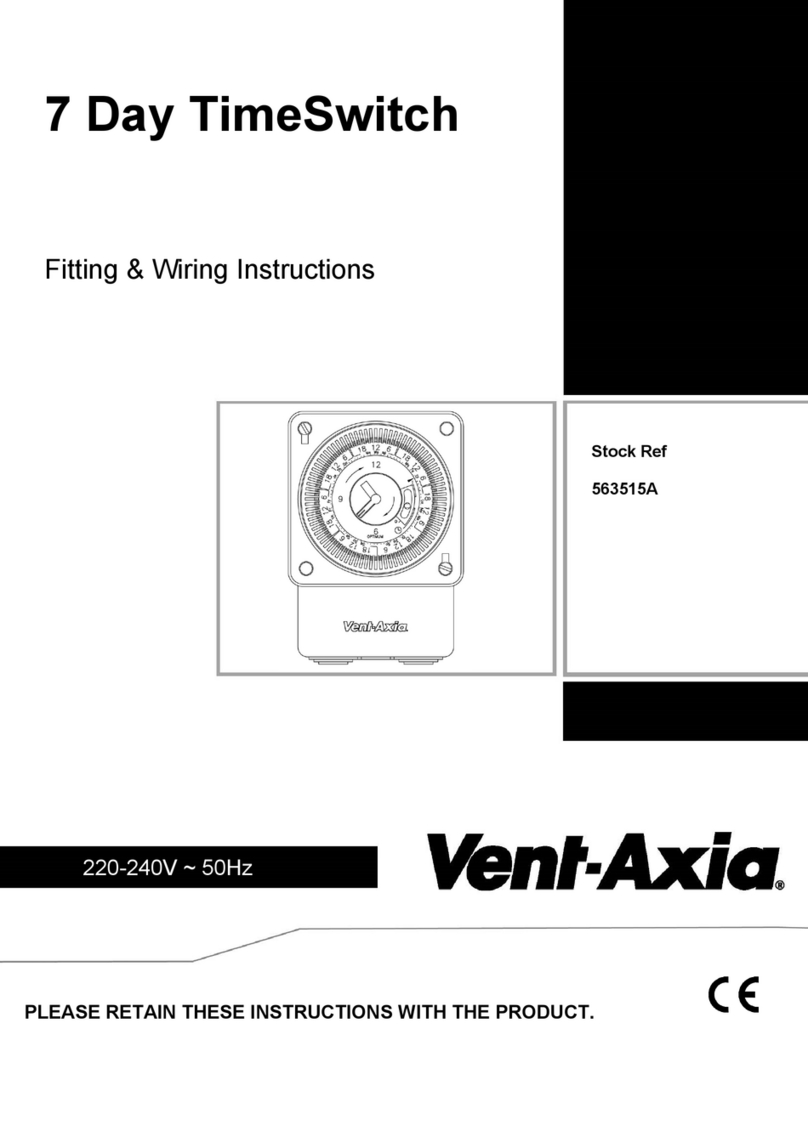
SOMFY Chronis io User manual

Chronis io
Ref. 5110620A
l6Ag$m
EN User manual
Animations available on your Somfy website
IT Manuale d’uso
Guida multimediale disponibile al sito web Somfy
NL Gebruikershandleiding
Animaties beschikbaar op uw Somfy internet site
ES Manual del usuario
Versión interactiva disponible en nuestra pagina web Somfy
EL
PL
!"!#$%&!'(")!*+'""
!&)"$'""'($
HU
A Chronis io m,ködésér-l a Somfy honlapon animációkat
is talál
CS
Animované návody najdete na webové stránce Somfy

Somfy hereby declares that the product conforms with the essential requirements and other relevant provisions
of the European Directives applicable for Europe. A Declaration of Conformity is available at www.somfy.com/ce.
Images are not contractually binding.
Con la presente SOMFY dichiara che il prodotto è conforme ai requisiti essenziali e alle altre disposizioni
pertinenti stabilite dalle Direttive europee applicabili per l’Europa. Una dichiarazione di conformità è disponibile
su Internet alla pagina www.somfy.com/ce. Immagini non contrattuali.
Hierbij verklaart Somfy dat dit product in overeenstemming is met de essentiële eisen en andere relevante
bepalingen van de Europese richtlijnen die van toepassing zijn voor Europa. Een conformiteitsverklaring staat ter
beschikking op de website www.somfy.com/ce. Aan de afbeeldingen kunnen geen rechten worden ontleend.
Por la presente, Somfy declara que este producto cumple los requisitos esenciales y otras disposiciones
aplicables de las directivas europeas vigentes en Europa. Tiene a su disposición una declaración de
conformidad en la dirección www.somfy.com/ce. Imágenes sin valor contractual.
internetové adrese www.somfy.com/ce. Vyobrazení nejsou závazná.
ENGLISH
ITALIANO
NEDERLANDS
ESPAÑOL
POLSKI
MAGYAR
Caution! Note
Attenzione! Nota
Opgelet! Opmerking
¡Atención! Nota
Figyelem! Megjegyzés
Pozor! Poznámka

Copyright © 2013 Somfy SAS. All rights reserved.
Chronis io
1
EN
CONTENTS
1. Introduction 1
2.1. Safety and liability 2
2.3. Compatibility 2
3. Contents 2
4. The Chronis io in detail 3
4.1. Front 3
4.2. Screen in manual mode 3
4.3. Screen in automatic mode 3
4.4. Screen in simulated presence mode 3
4.5. Back 3
5. Commissioning 4
5.1. Battery installation and replacements 4
5.3. Adding or deleting a Chronis io at an
end-product 6
5.4. Initial setting of the date and time
parameters 6
5.5. Programming the days of the week 7
6. Installation 10
6.1 Recommendations 10
6.2 Attaching the wall mount 10
6.3 Clipping on and unclipping the
Chronis io from its wall mount 10
7.1. Manual mode 11
7.2. Automatic mode 11
7.3. Simulated presence mode 12
7.4. Modifying the programming of
the days of the week 12
7.5. Modifying the date and
time parameters 12
Questions about the Chronis io? 13
9. Technical data 13
1. INTRODUCTION
The Chronis io is a wall-mounted wireless control with timed programming which permits the
simultaneous manual or automatic control of one or more io-homecontrol®* end-products such as
awnings, blinds, roller shutters, lights, skylights, etc.
The Chronis io can be used in 3 ways: in manual mode, automatic mode or in simulated presence
mode.
Manual mode allows the user to send occasional orders to one or more end-products in the
home and deactivate the programming of automatic orders.
Automatic mode permits the automatic control of one or more end-products after you have
set up the weekly, day-by-day programming known as: automatic orders. Up to 4 automatic orders
can be programmed for each day of the week.
It is also possible to send occasional orders to one or more end-products.
permits the automatic control of one or more end-products by
randomly modifying (by + 1 to + 30 min) the time at which orders programmed in automatic mode are
activated. This mode is specially recommended to simulate your presence when you are away from
your house for an extended period of time.
It is also possible to send occasional orders to one or more end-products.
(*) io-homecontrol®: radio control system developed by Somfy and its io-homecontrol®partners. The
system controls motors and automated devices that incorporate this technology (radio protocol) in
the home. For more information about
io-homecontrol®technology, please go
to www.io-homecontrol.com.

Copyright © 2013 Somfy SAS. All rights reserved.
Chronis io
2
EN
2. SAFETY
Before installing and using this product, please read this manual carefully.
and discharges Somfy of all liability, as does any failure to comply with the instructions given herein.
equipment and accessories.
Keep the Chronis io out of the reach of children.
To avoid damaging the product:
1) Avoid impacts!
2) Do not drop!
3) Do not spill liquid on the product or immerse in liquid.
4) Do not use abrasive products or solvents to clean the
product. Its surface can be cleaned with a soft, dry cloth.
In compliance with standard EN 12453 on the safe use of power operated doors and gates, if
using the Chronis io to control an automatic garage door or gate not visible to the user, it is
obligatory for a photo-electric cell type security device to be installed on this automated system. If
these instructions are not complied with, SOMFY does not accept any liability for any damage that
may be caused.
It is prohibited to use the Chronis io to control an alarm device.
1
3
2
4
aChronis io 1
bWall mount 1
cType AAA (LR03) batteries 2
3. CONTENTS
ab
c

Copyright © 2013 Somfy SAS. All rights reserved.
Chronis io
3
EN
4.1. Front
dScreen
eMode selection cursor:
- automatic mode
- simulated presence mode
- manual mode
fbutton (raise, switch on, open, position and increase
lighting or heating)
gbutton (stop, go to favourite position [my]: only for
Somfy products)
hbutton (lower, switch off, close, position and reduce
lighting or heating)
iLeft arrow button
h
lRight arrow button
i
(You can scroll through the characters faster by pressing and holding down these buttons)
jBack button
- To return to the previous step when making settings
kOK/Menu button
- To select a menu, select a parameter and go on to the next step when making settings
4.2. Screen in manual mode
m"Low battery" symbol:
nCurrent time
4.3. Screen in automatic mode
m"Low battery" symbol:
nCurrent time
Days of the week:
= Monday, = Tuesday, = Wednesday,
= Thursday, = Friday, = Saturday, = Sunday
Programmed automatic orders (1 to 4 )
"twilight"
Order to be triggered at the chosen time: , ,
Similar screen to automatic mode
Simulated presence mode:
4.5. Back
tINSTAL button
uPROG button
2 recesses for the centring pins of the wall mount
Battery compartment
x
l
j
ik
h
g
df
e
t
u
x
mn
m
o
r
q
n
s
o
q
r
s
4. THE CHRONIS IO IN DETAIL
To modify the parameter selected when making the settings

Copyright © 2013 Somfy SAS. All rights reserved.
Chronis io
4
EN
Before commissioning the Chronis io, each motor must have been programmed by an installer
using an individual io control point or a setting tool and the end limits must have been adjusted.
This manual only describes commissioning using a Smoove io type individual io control point .
To perform commissioning using a different io control point, refer to the corresponding manual.
1The backlighting of the Chronis io switches off automatically after the device has been
inactive for a few seconds.
The Chronis io display switches off automatically after the device has been inactive for a few
minutes (time differs depending on mode).
Never use rechargeable batteries.
Replace the batteries when the ( ) symbol appears on the screen.
If there is no power supply for an extended period of time (> 2 min) (batteries out of charge or
removed), the date and time will have to be reset. The other settings are saved.
- Unclip the Chronis io from the wall mount (see section
Clipping on and unclipping the Chronis io from its wall
mount).
- Remove the used batteries from the compartment in the
back of the Chronis io.
-
the polarity indicated.
- When the batteries are inserted, the screen lights up.
Batteries or accumulators have to be separated
from other types of waste and must be recycled
through your local treatment and recycling system.
The of the Chronis io is as follows:
in standard end-product control mode: "MODE STD : 1".
with the standard radio frame repetition setting: "RADIO : 1".
in control mode for non-self-powered motor: "SOLAR MOTOR : NO".
If the factory presettings are suitable for the installation, go on to the next section.
controlled end-product or end-products by selecting a control mode for the end-product, a radio frame
4 control modes are available and you can change between these depending on the controlled
end-product:
"MODE STD : 1": To control all io-homecontrol®end-products, for example roller shutters, windows,
garage doors, gates.
"MODE DIM : 2": Recommended for the control of adjustable level lighting and heating.
"MODE TILT1 : 3": Recommended for the control of exterior venetian blinds and roller shutters with
adjustable slats.
"MODE TILT2 : 4": Recommended for the control of interior venetian blinds.
repetitions (in the automatic and simulated presence modes). 5 settings are available: "RADIO : 1" for
1 repetition, "RADIO : 2" for 2 repetitions, "RADIO : 3" for 3 repetitions, "RADIO : 4" for 4 repetitions and
"RADIO : 5" for 5 repetitions.
The higher the number of repetitions, the shorter the battery life is.
If a self-powered motor is controlled by the Chronis io: choose the option "SOLAR MOTOR : YES".
2 x LR03
AAA 1,5 V
5. COMMISSIONING

Copyright © 2013 Somfy SAS. All rights reserved.
Chronis io
5
EN
Otherwise go to the section Adding or deleting a Chronis io at an end-product.
to self-powered motors, you can use the , , buttons to test the response of the
end-product.
- Press the INSTAL button located on the back of the
Chronis io.
-
- The parameters appear in the following order:
MODE
hi
RADIO
hi
SOLAR MOTOR
hi
SOFT
hi
RESET
hi
EXIT
hi
MODE ...
- To access another parameter, use the arrow keys
h
or
i
:
To change the :
- Select "MODE" and press OK: the current setting
- Use
h
or
i
to choose a setting and press OK.
- Choose "SAVE : YES" to save this setting (or "SAVE :
NO" by pressing
h
or
i
if you do not want to save
the setting and to return to the previous step) and
press OK.
To change the :
- Select "RADIO" and press OK: the current setting
- Use
h
or
i
to choose a setting and press OK.
- Choose "SAVE : YES" to save this setting (or "SAVE :
NO" by pressing
h
or
i
if you do not want to save
the setting and to return to the previous step) and
press OK.
To control a :
- Select "SOLAR MOTOR" and press OK: the current
- Choose "SOLAR MOTOR : YES" by pressing
h
or
i
and
press OK.
- Choose "SAVE : YES" to save this setting (or "SAVE :
NO" by pressing
h
or
i
if you do not want to save
the setting and to return to the previous step) and
press OK.
To display the of the Chronis io:
- Select "SOFT".
To reset the Chronis io to its :
The end-products are still associated with the
Chronis io.
- Select "RESET"and press OK.
- Choose "RESET : YES" to delete the settings you have
made (or "RESET : NO" by pressing
h
or
i
to keep the
settings) and press OK.
- Repeat Chronis io commissioning in full.
To :
- Select "EXIT" and press OK: the Chronis io exits the

Copyright © 2013 Somfy SAS. All rights reserved.
Chronis io
6
EN
The same procedure is used to add or delete a
Chronis io.
1)
point that is already associated until the end-product
moves back and forth: programming mode is activated
for 10 minutes.
2)
end-product moves back and forth, and the Chronis io
is added or deleted.
- Repeat the procedure to add or delete the Chronis io at
other end-products.
automatic or simulated presence mode (cursor on or ), the date
and time setting function is activated directly: " SET " (Set) and "YEAR" (Year) are displayed on the screen,
.
To change these parameters later, see section "Modifying the date and time parameters".
1) The current year "YEAR".
2) The number of the current month "MONTH".
3) The number of the current day "DAY".
4) The current hour "HOUR".
5) The current minutes "MINUT".
6) The automatic time change between summer time and
winter time "AUTO TIME SET"*.
7) The hour at twilight in midsummer "JUNE"**.
8) The number of minutes at twilight in midsummer "JUNE"**.
9) The hour at twilight in midwinter "DEC"**.
10)The number of minutes at twilight in midwinter "DEC"**.
The twilight times must be set between 6 am and
11 pm.
You can press the back button
to return to the
previous step.
11) The screen displays "SAVE : YES". Click OK to terminate
and save the parameter settings. The Chronis io returns
to the mode selected using the cursor.
Choose "SAVE : NO" and press OK to restart the
procedure for setting the date and time parameters
from the beginning.
1)
2)
0,5 s.
2 s.
SET
SET
SET SET
SET
SET
SET
SET
SET
SET
1)
3)
5) 6)
7)
9)
11)
2)
4)
8)
10)
1
- To modify the parameter, press
h
or
i
(you can press and hold down a button to scroll through
the characters more quickly).
-press OK.

Copyright © 2013 Somfy SAS. All rights reserved.
Chronis io
7
EN
*
The change-over to summer time takes place on the last Sunday of March and the change-over to
winter time on the last Sunday of October.
In countries where there is a summer time/winter time clock change, choose "AUTO TIME SET : YES".
In countries where there is no summer time/winter time clock change, choose "AUTO TIME SET : NO".
**
In automatic and simulated presence mode, the "Twilight"
function ( ) makes it possible to vary the time an order is
triggered based on the time of sunset on any given date
(see diagram). Indicate the time at which the order is to be
given in June (time at midsummer) and in December (time
at midwinter). The Chronis io will automatically recalculate
the twilight time for the other days of the year.
Chamonix (France): the time in midwinter is 5.25 pm and
the time in midsummer 10.05 pm.
Country City Time in
winter Time in
summer Country City Time in
winter Time in
summer
France Paris 17:33 22:40 Germany Berlin 16:36 22:23
Marseille 17:38 21:58 Austria Vienna 16:39 21:40
Lyon 17:33 22:12 Belgium Brussels 17:18 22:46
Brest 18:02 23:04 Switzerland Bern 17:19 22:08
Bordeaux 17:58 22:29 Netherlands Amsterdam 17:10 22:56
Germany Munich 16:59 21:59 Poland Warsaw 16:06 21:50
Hamburg 16:45 22:26 Spain Madrid 18:22 22:21
Frankfurt 17:04 22:23 Italy Rome 17:13 21:22
Stuttgart 17:06 22:12 Greece Athens 17:39 21:23
The Chronis io makes it possible to send orders automatically to one or more end-products (in
automatic mode and in simulated presence mode ) once the corresponding programming
has been performed. All these end-products are controlled at the same time.
Up to 4 automatic orders can be programmed for each day of the week.
Each of these automatic orders can be:
either , or , or
The days of the week can be programmed irrespective of the mode selected using the cursor.
The days of the week are preprogrammed in the factory settings:
- from Monday to Friday, at 5.30 am, at twilight .
- Saturday and Sunday, at 8.00 am, at twilight .
1) Press the OK/Menu button .
2) When "PROG" is displayed, press OK: Monday ( )
3) Press the arrow buttons
h
or
i
to select the day to be
programmed and press OK: "EDIT
1)
3)
PROG
PROG PROG
2)

Copyright © 2013 Somfy SAS. All rights reserved.
Chronis io
8
EN
5.5.2. Editing an automatic order
4) When "EDIT
5) Creating or modifying an automatic order:
To create a new automatic order: press
h
or
i
to select the blank order and press OK, then go to
step 6. (If 4 automatic orders have already been
To an automatic order: press
h
or
i
to select
the order and press OK, then go to step 6.
Selecting the time
6) The time is displayed and the twilight option
Press
h
or
i
option** (see last page).
To edit a , press OK when the twilight
option and go to step 9.
To edit a
and go to step 7.
7) press
h
or
i
to change the hour and
press OK.
8) press
h
or
i
to change the minutes
and press OK.
Selecting the order
9) An order (
, , or )
press
h
or
i
to choose
one of the orders , or , and press OK.
10)The screen displays "SAVE : YES
edition of the automatic order, press OK: the selected
Choose "SAVE : NO" and press OK to restart the procedure
for programming the days of the week from step 3.
11) press
h
or
i
until "EXIT PROG"
is displayed (after "SUN") and press OK.
12) "PROGpress
h
or
i
until "EXIT" is displayed and
press OK.
- To after step 10, repeat the procedure from step 3.
- To after step 10, repeat the procedure from step 3.
- To , see section "Checking the programming in DEMO mode".
- To and assign it to another day, see section "Copying the
programming from one day to another day or to several days".
- To delete an automatic order, see section "Deleting an automatic order".
4)
PROG
5)
PROG
PROG
6)
PROG
PROG
7) 8)
PROG PROG
9) 10)
PROG
11)
12)
PROG
PROG
PROG
PROG

Copyright © 2013 Somfy SAS. All rights reserved.
Chronis io
9
EN
perform a test to check the various automatic orders you
have programmed.
1) Press the OK/Menu button .
2) When "PROG" is displayed, press OK: Monday ( )
DEMO mode is also accessible when the selected day
3) Press
h
or
i
to select the day you want to test and then
press the buttons ‹ and › at the same time.
4) "DEMO" is displayed and the orders programmed for
the selected day are started at intervals of 1min 30.
screen again.
You can press to stop DEMO mode while it is running.
You can use the copy/paste function to copy all the programming already performed for one day and
paste it:
on another day, or
on Monday, Tuesday, Wednesday, Thursday and Friday, or
on Saturday and Sunday, or
on all the days of the week.
1) Press the OK/Menu button .
2) When "PROG" is displayed, press OK: Monday (
3) Press
h
or
i
to select the day you want to copy and
press OK: "EDIT
4) Press
h
or
i
to select "COPY " and press OK: "COPY
OK" appears and the highlighting of the copied day
until it is pasted). The day highlighted for copying stops
PASTE
- day-by-day (e.g.: Tu
i
We),
- then from Monday to Friday (MoTuWeThFr),
- then Saturday and Sunday (SaSu),
- then every day (MoTuWeThFrSaSu)...
5) Press
h
or
i
until the
the programming are highlighted and press OK.
6) "PASTE OK" appears and the chosen day or days are
day or days.
7)
-
To copy the programming of another day, repeat the
procedure.
Once a day has been programmed, you can delete the automatic orders associated with it one-by-one
or delete all the automatic orders together:
1) Press the OK/Menu button .
2) When "PROG" is displayed, press OK: Monday ( )
3) Press
h
or
i
to select and
press OK: "EDIT
1)
3)
PROG
2)
PROG
4)
PROG
PROG PROG
1)
4)
2) 3)
PROG PROG
PROG
5)
PROG PROG
6) 7)
PROG
PROG
PROG PROG
1) 2) 3)

Copyright © 2013 Somfy SAS. All rights reserved.
Chronis io
10
EN
6.1. Recommendations
The Chronis io wall mount must be installed at a central location between the products to be controlled.
Choose an accessible location where it is easy to see and use.
The building in which the product is used may reduce the radio range. The radio range is 20 m through
2 concrete walls. Check the radio transmission range before installing the wall mount for the Chronis io.
The use of radio appliances (e.g. Hi-Fi radio headphones) operating on the same frequency may
cause interference and reduce the product's performance.
Never install the product on or near metallic surfaces since this may reduce the radio transmission
range.
Somfy recommends installing the product at a height of between 1 m and 1 m 50 so that the
screen is easy to read.
- Place the wall mount in the desired position and mark the
position of the screws.
-
screws or 2 x 3 mm screws.
The screw heads must not stick out from the mount.
1) Position the Chronis io on the mount using the centring
pins and press to clip it to the mount.
2) To unclip the Chronis io from its mount, push it upwards
slightly and tilt it by pulling it towards you.
Ø 4 Ø 3
1)
2)
6. INSTALLATION
4) Press
h
or
i
to select "DELETE " and press OK: an
5) Press
h
or
i
to select:
either a single automatic order for deletion,
or .
6) Once you have selected the required order or all the
orders, press OK: "DELET OK" appears. The selected
orders are deleted (the selected or or all the orders for
5)
6)
PROG
4)
PROG
PROG

Copyright © 2013 Somfy SAS. All rights reserved.
Chronis io
11
EN
To change mode, move the mode selection cursor:
Manual mode
Automatic mode
Simulated presence mode
7.1. Manual mode
The manual mode of the Chronis io is used to:
send occasional orders to the associated end-product or end-products.
deactivate automatic order programming.
In manual mode the current time is permanently displayed.
7.1.1. button
- When the favourite position has been programmed and the end-product or end-products are
: the end-product or end-products move to the corresponding favourite
positions (my).
- When the end-product or end-products are moving, you can press
7.1.2. / buttons
""):
- In "MODE STD : 1":
Brief press or long press: raise, switch on, open / lower, switch off, close.
- In "MODE DIM : 2":
Brief press: fully switch on / switch off the lighting or the heating.
Long press (> 0.5 s): increase / reduce the lighting or the heating.
- In "MODE TILT1 : 3":
Brief press: tilt the slats of exterior venetian blinds or roller shutters with tiltable slats.
Long press (> 0.5 s): Fully raise / lower exterior venetian blinds or roller shutters with adjustable
slats.
- In "MODE TILT2 : 4":
Brief press: raise / lower the interior venetian blinds.
Long press: tilt slats of interior venetian blinds.
7.2. Automatic mode
The automatic mode of the Chronis io is used to:
send occasional orders to the associated end-product or end-products.
automatically control the associated end-product or end-products by means of automatic orders
programmed according to the days of the week.
- Program the automatic orders for each day of the week (see section "Programming the days of
the week").
7. OPERATION

Copyright © 2013 Somfy SAS. All rights reserved.
Chronis io
12
EN
The following is displayed in automatic mode :
- the current time and day
- the number of automatic orders programmed for the day
- the next automatic order programmed for the day (or an empty space if all the
orders programmed for the day have been started).
-
To view all the automatic orders programmed for a week starting from the current day, use the hor i
buttons to move between them. To return directly to the current screen, press the back button .
- To stop an automatic order that is currently being executed, press stop/ .
You can also press the , , buttons in automatic mode.
The simulated presence mode of the Chronis io is used to:
send occasional orders to the associated end-product or end-products.
randomly change the times at which the automatic orders programmed in automatic mode are
triggered, within a range of +1 to +30 minutes.
This mode is specially recommended to simulate your presence when you are away from home for
an extended period of time.
- Program the automatic orders for each day of the week (see section "Programming the days of
the week").
- The following is displayed in simulated presence mode :
- the current time and day
- the icon (simulated presence)
- the number of automatic orders programmed for the day
- the next automatic order programmed for the day (or an empty space if all the
orders programmed for the day have been started).
- To stop an automatic order that is currently being executed, press .
You can also press the , , buttons in simulated presence mode.
See section "Programming the days of the week".
1) Press the OK/Menu button .
2) When "PROG" appears, press
i
to display "SET" and then press OK.
1
- To modify the parameter, press
h
or
i
(you can press and hold down a button to scroll through
the characters more quickly).
-press OK.
3) Press
h
or
i
to select the menu in which you want to make the changes. The menus appear in
the following order:
- "TIME" (to set the hour: "HOUR", the number of minutes: "MINUT", automatic time change on or off:
"AUTO TIME SET")
- "DATE" (to set the year: "YEAR", the month: "MONTH", and the current day: "DAY")
- "JUNE" (hour and minutes of twilight at midsummer)
- "DEC" (hour and minutes of twilight at midwinter)
4) When you have selected the menu, press OK.
5) In each menu, modify the parameters as required (or leave them unchanged) and press OK
The twilight times must be set between 6 am and 11 pm.
You can press the back button to return to the previous step.

Copyright © 2013 Somfy SAS. All rights reserved.
Chronis io
13
EN
6) The screen displays "SAVE : YES". Click OK to terminate and save the settings for the current menu.
7) The Chronis io returns to the previous step.
Choose "SAVE : NO" and press OK to restart the procedure for setting the date and time parameters
from the beginning.
8) Press
h
or
i
until "EXIT SET" is displayed (after "DEC") and press OK.
9) "SETashes: press
h
or
i
until "EXIT" is displayed and press OK.
Questions about the Chronis io?
Observations Possible causes Solutions
The selected products do not
react at all when a button on
the Chronis io is pressed.
The batteries are low. Replace the batteries.
The remote control transmitter is
not programmed.
See section "Adding or deleting a Chronis io
at an end-product".
External radio equipment is
interfering with the radio reception. Turn off any radio appliances nearby.
The motor(s) or receiver(s) are in
thermal cut-out mode.
Wait for the motor to cool down, then press
the desired button again.
An end-product stops during
activation.
The end-product has encountered
an obstacle. Remove the obstacle and try again.
Another control point is sending an
order to the motor or receiver. Wait until activation of the end-product has
The order is shifted in relation
to the programmed time. The Chronis io is in simulated
presence mode. Select automatic mode using the cursor.
One or more end-products
systematically do not react
to a programmed automatic
order.
A signal from another automatic
device in your home is causing
interference.
Increase the number of frame repetitions.
See section "".
Change the programmed time for the
automatic order.
"ERROR"is displayed. The
Chronis io only works in
manual mode .
Defect in automatic mode
and simulated presence mode . Contact an installer.
8. TIPS AND RECOMMENDATIONS
9. TECHNICAL DATA
Radio frequency: 868.95 MHz, io-homecontrol®
Radio range: 20 m through 2 concrete walls
Protection rating: IP 20
Safety level: Category III
Operating temperature: 0 °C to + 60 °C (+ 32 °F to + 140 °F)
Dimensions (w x h x d): 120 x 80 x 21 mm
Power supply: 2 type AAA (LR03) 1.5 V alkaline batteries

Copyright © 2013 Somfy SAS. All rights reserved.
Chronis io
14
EN

Copyright © 2013 Somfy SAS. All rights reserved.
Chronis io
1
IT
SOMMARIO
1. Introduzione 1
2. Sicurezza 2
2.1. Sicurezza e responsabilità 2
2.3. Compatibilità 2
4. Chronis io nel dettaglio 3
4.1. Pannello anteriore 3
4.2. Schermo in modalità manuale 3
4.3. Schermo in modalità automatica 3
4.4. Schermo in modalità simulazione di
presenza 3
4.5. Pannello posteriore 3
5.1. Inserimento e sostituzione
delle batterie 4
5.3. Aggiungere o eliminare Chronis io
da un prodotto portante 6
5.4. Impostazione iniziale dei parametri di
data e ora 6
5.5. Programmazione dei giorni
della settimana 7
6. Installazione 10
6.1. Istruzioni 10
6.2. Installazione del supporto a muro 10
6.3. Posizionamento e rimozione di
Chronis io dal supporto a muro 10
7. Utilizzo 11
7.1. Modalità manuale 11
7.2. Modalità automatica 11
7.3. Modalità simulazione di presenza 12
giorni della settimana 12
8. Suggerimenti e consigli 13
Domande su Chronis io? 13
9. Dati tecnici 13
1. INTRODUZIONE
Chronis io è un comando wireless da parete dotato di funzione di programmazione oraria che
permette di controllare contemporaneamente, in modalità manuale o automatica, uno o più prodotti
portanti io-homecontrol®
Chronis io può essere utilizzato in 3 diverse modalità: manuale, automatica o simulazione di presenza.
La modalità manuale permette di inviare ordini occasionali a uno o più prodotti portanti della
casa e di disattivare la programmazione degli ordini automatici.
La modalità automatica permette di controllare automaticamente uno o più prodotti portanti,
dopo aver creato i programmi settimanali e giornalieri detti ordini automatici. È possibile programmare
È inoltre possibile inviare ordini occasionali a uno o più prodotti portanti.
permette di controllare automaticamente uno o più prodotti
in modalità automatica. Questa modalità è particolarmente indicata in caso di un'assenza prolungata,
per simulare una presenza in casa.
È inoltre possibile inviare ordini occasionali a uno o più prodotti portanti.
(*) io-homecontrol®: sistema di trasmissione radio sviluppato da Somfy e dai suoi partner
dell'associazione io-homecontrol®. Questo sistema controlla i motori e le funzioni automatiche
presenti nell'abitazione dotati di questa
tecnologia (protocollo radio). Per
maggiori informazioni sulla tecnologia
io-homecontrol®, consultare il sito
internet www.io-homecontrol.com.

Copyright © 2013 Somfy SAS. All rights reserved.
Chronis io
2
IT
2. SICUREZZA
Prima di installare e utilizzare questo prodotto, leggere attentamente il presente manuale.
tale prescrizione e delle istruzioni fornite nel presente manuale comporta la decadenza della garanzia
e solleva Somfy da qualsiasi responsabilità.
associati.
Tenere Chronis io lontano dalla portata dei bambini.
Per evitare danni al prodotto:
1) Evitare gli urti!
2) Non farlo cadere!
3) Non spruzzare e non immergere il prodotto in liquidi.
4) Non utilizzare detergenti abrasivi o solventi per pulire
morbido e asciutto.
Conformemente alla norma EN 12453 relativa alla sicurezza dell'utilizzo di porte e cancelli
o cancelli non visibile all'utente occorre installare un dispositivo di sicurezza di tipo cellula fotoelettrica.
Somfy declina ogni responsabilità in caso di danni causati dal mancato rispetto di tali istruzioni.
È vietato l'utilizzo di Chronis io per il controllo di un dispositivo di allarme.
1
3
2
4
aChronis io 1
bSupporto a muro 1
cBatterie AAA (LR03) 2
3. COMPONENTI
ab
c

Copyright © 2013 Somfy SAS. All rights reserved.
Chronis io
3
IT
4.1. Pannello anteriore
dDisplay
eCursore per la selezione della modalità:
- modalità automatica
- modalità simulazione di presenza
- modalità manuale
fTasto (alzare, accendere, aprire, posizionare e
aumentare l'illuminazione o il riscaldamento)
gTasto (arrestare, raggiungere la posizione preferita
[my]: unicamente per i prodotti Somfy)
hTasto (abbassare, spegnere, chiudere, posizionare
e ridurre l'illuminazione o il riscaldamento)
iTasto di navigazione verso sinistra
h
lTasto di navigazione verso destra
i
(Per far scorrere i caratteri più velocemente, tenere premuti questi tasti)
jTasto Indietro
- Per tornare alla fase precedente durante l'impostazione
kTasto OK/Menu
- Per selezionare un menu o un parametro e passare alla fase successiva durante l'impostazione
4.2. Schermo in modalità manuale
mSimbolo batteria quasi scarica:
nOra corrente
4.3. Schermo in modalità automatica
mSimbolo batteria quasi scarica:
nOra corrente
Giorni della settimana:
= lunedì, = martedì, = mercoledì, = giovedì,
= venerdì, = sabato, = domenica
Ordini automatici programmati (da 1 a 4 )
o "crepuscolo"
Ordine che verrà attivato all'ora selezionata:
, , .
4.4. Schermo in modalità simulazione
Schermo simile alla modalità automatica
Modalità simulazione di presenza:
tTasto INSTAL
uTasto PROG
2 fori per perni di centraggio del supporto a muro
Alloggiamento delle batterie
x
l
j
ik
h
g
df
e
t
u
x
mn
m
o
r
q
n
s
o
q
r
s
4. CHRONIS IO NEL DETTAGLIO
le impostazioni

Copyright © 2013 Somfy SAS. All rights reserved.
Chronis io
4
IT
motore deve essere stato programmato da un installatore tramite un singolo punto di comando
io o uno strumento di regolazione.
Il presente manuale descrive soltanto la messa in servizio con l'aiuto di un singolo punto di comando
locale io di tipo Smoove io. Per una messa in servizio con un punto di comando io diverso,
consultare il relativo manuale.
1La retroilluminazione di Chronis io si spegne automaticamente dopo qualche secondo di
inattività.
Il display di Chronis io si spegne automaticamente dopo qualche minuto di inattività (tempo
differente, a seconda delle modalità).
5.1. Inserimento e sostituzione delle batterie
Non utilizzare mai batterie ricaricabili.
Sostituire le batterie quando il simbolo ( ) compare sul display.
Se il telecomando resta senza alimentazione per un periodo di tempo prolungato (> di 2 minuti
- perché le batterie sono scariche o sono state rimosse) occorrerà resettare i parametri generali
del telecomando. Le altre impostazioni saranno invece salvate.
- Rimuovere Chronis io dal supporto a muro (consultare
il capitolo Posizionamento e rimozione di Chronis io dal
supporto a muro).
- Rimuovere le batterie esaurite dall'apposito alloggiamento
nella parte posteriore di Chronis io.
- Inserire 2 batterie di tipo AAA (LR03) nel vano rispettando
la polarità indicata.
- Dopo aver inserito le batterie, lo schermo si accende.
Le batterie o gli accumulatori devono essere
l'apposito centro di raccolta.
di fabbrica di Chronis io è la seguente:
modalità di controllo del prodotto portante standard: "MODE STD : 1".
impostazione delle ripetizioni dei frame radio standard: "RADIO : 1".
modalità di controllo per motore non autonomo: "SOLAR MOTOR : NO".
Se le preimpostazioni di fabbrica sono adatte all'impianto, passare al capitolo successivo.
controllati, selezionando una modalità di controllo del prodotto portante, un'impostazione delle
"MODE STD : 1": per controllare tutti i prodotti portanti io-homecontrol®
porte di garage e cancelli.
"MODE DIM : 2": consigliata per controllare le luci e il riscaldamento con variazione.
"MODE TILT1 : 3": consigliata per controllare veneziane esterne e tapparelle avvolgibili con stecche
orientabili.
"MODE TILT2 : 4": consigliata per controllare le veneziane interne.
e simulazione di presenza) può essere aumentato. Sono disponibili 5 regolazioni: "RADIO : 1" per 1 ripetizione,
"RADIO : 2" per 2 ripetizioni, "RADIO : 3" per 3 ripetizioni, "RADIO : 4" per 4 ripetizioni e "RADIO : 5" per 5 ripetizioni.
Maggiore è il numero delle ripetizioni, minore è l'autonomia delle batterie.
Se un motore autonomo è controllato da Chronis io: selezionare l'opzione "SOLAR MOTOR : YES".
2 x LR03
AAA 1,5 V
5. MESSA IN SERVIZIO
Other manuals for Chronis io
1
Table of contents
Languages:
Other SOMFY Timer manuals
