Sommet SHDNZ3 User manual

TABLE OF CONTENTS
TABLE OF CONTENTS .................................................................................................1
1.0 INTRODUCTION...........................................................................................1
1.1 Safety Instructions ...........................................................................................1
1.2 Storage ............................................................................................................2
1.3 Equipment Set-up ............................................................................................2
1.4 Features & Accessories ...................................................................................3
2.0 YOUR RECEIVER.........................................................................................4
2.1 Front Panel ......................................................................................................4
2.2 Rear Panel.......................................................................................................5
2.3 Remote Control Unit ........................................................................................6
3.0 CONNECTIONS............................................................................................8
3.1 Connecting to Terrestrial Antenna....................................................................8
3.2 Connecting to TV .............................................................................................8
3.3 Connecting to Digital Audio Amplifier ...............................................................8
4.0 MAIN MENU..................................................................................................9
4.1 Favorites ..........................................................................................................9
4.2 HD TV Settings ................................................................................................9
4.3 Parental Control.............................................................................................10
4.4 Installation...................................................................................................... 11
4.5 System Setting...............................................................................................12
A.1 TROUBLESHOOTING...........................................................................................14
A.2 SPECIFICATIONS .................................................................................................15
1
1.0 INTRODUCTION
1.1 Safety Instructions
DO NOT INSTALL YOUR RECEIVER:
•In a closed or poorly ventilated cabinet;
•Directly on top of or under any another equipment;
•On a surface which might obstruct the ventilation slots.
DO NOT EXPOSE THE RECEIVER OR ITS ACCESSORIES:
•To direct sunlight or near any other equipment that generates heat;
•To rain or intense moisture;
•To any shock which may cause permanent damage to your receiver;
•To any magnetic objects, such as loudspeakers, transformers, etc.;
•To intense vibration;
•Never open the cover. It is dangerous to touch the inside of the receiver due to high voltage
currents and possible electrical hazards. Your warranty will be void if the receiver has been
opened.
•When the receiver is not used for a long period of time, you should unplug the power cord
from the wall socket.
•Do not use a damaged power cord. It may cause a fire or an electrical shock.
•Do not touch a power cord with wet hands. It may cause an electric shock.
•Place the receiver in a well-ventilated environment.
•When you are connecting the cables, be sure that the receiver is disconnected from the mains
supply voltage.
•Do not use your receiver in a humid environment.
Make sure you read this user manual before installing your receiver.

2
1.2 Storage
Your receiver and its accessories are stored and delivered in a packaging designed to protect
against electric shocks and moisture. When unpacking it, make sure that all the parts are
included and keep the packaging away from children. When transporting the receiver from one
place to another or if you are returning it under warranty make sure to repack the receiver in its
original packaging with its accessories. Failing to comply with such packaging procedures could
void your warranty.
1.3 Equipment Set-up
We recommend you consult a professional installer to set up your equipment. Otherwise, please
follow the instructions below:
• Refer to the user manual of your TV and your antenna.
• Make sure that the SCART cable and outdoor components are in a good condition and
the SCART connections are well shielded
This manual provides complete instructions for installing and using this receiver. The following
symbols will serve as follows:
WARNING: Indicates warning information.
TIPS Indicates any other additional important or helpful information.
MENU Represents a button on the remote control or the receiver (Bold Character)
Move to Represents a menu item within a window. (Italic Character)
3
1.4 Features & Accessories
Features
•Use ST HDTV chip;
•MPEG-2 HD & H.264 HD Support;
•DVB-T standard HDTV Receiver;
•Receive standard DVB-T signal which modulate by COFDM;
•Fully compatible with Australian Frequency Standard
•Multiple display mode: 1080i/ 720p/ 576p/ 576i;
•Output High Definition Digital Video by HDMI;
•Output HD Video by YPbPr;
•Output SD Video by CVBS ;
•Audio output Dolby AC3 by S/PDIF(Coaxial & Optical);
•Output Stereo by RCA;
•1000 Memory Channels;
•Simple & easy on screen set up;
•Multiple OSD Language;
•Support Parental Control (Channel Lock);
•Support LCN(Logic Channel Number);
•Favorite program setting;
•Games;
•Upgrade software through USB port
•Display EPG/TTX/Subtitle etc.;
•Low power consumption
•Wider bound input power:90 ~ 250V 50/60HZ;
Accessories:
■ 1 x User’s Manual
■ 1 x Remote control unit
■ 1 x AV cable
■ 2 x Batteries (AAA type)
Note: The batteries should not be recharged, disassembled, electrically short-circuited or be
mixed or used with other types of batteries.

4
2.0 YOUR RECEIVER
2.1 Front Panel
Figure 1
1. POWER Button
Turn the receiver on or standby.
2. MENU Button
Show the main menu or return to previous menu.
3. CH-/CH+ Button
Moves the cursor up/down in Menu state. Change the current program to the previous/next
program in No-menu state.
4. VOL-/VOL+ Button
Increases/decreases the volume levels in No-Menu state. Change the setting values in specific
Menu item.
5. OK Button
Executes the selected item in the menu screen, or confirm the input value.
6. Power indicator.
7. Lock indicator.
8. Display (4-digi 7-segment)
4-digi displays channel information. In Standby mode the 7-segment displays local time.
5
2.2 Rear Panel
Figure 2
1. ANT IN
RF Modulator (female part). If you have an additional antenna (cable or terrestrial) as well,
and you do not use a scart cable to connect the receiver to the TV, then your additional
antenna has to be connected here.
If you do use a scart cable to connect the receiver to your TV, the additional antenna can
be put directly into your TV.
2. TO TV
Connect the receiver to your TV, using a coax cable.
3. USB
USB2.0 slot.
4. S-VIDEO
This jack connects to a TV or VCR that accepts S-Video input.
5. HDMI
HDMI output.
6. CVBS
AV Output.
7. OPTICAL
Use this optical output to connect your receiver to the input of your digital audio amplifier.
8. Y, Pb, Pr
Y/Pb/Pr output.
9. AUDIO Right and Left
These connectors give you the possibility to connect the audio signal to an external
amplifier, or the audio input of your TV.
10. COAXIAL
Connect with Dolby Digital decoder audio-visual equipment.
11. External DC power outlets.
6
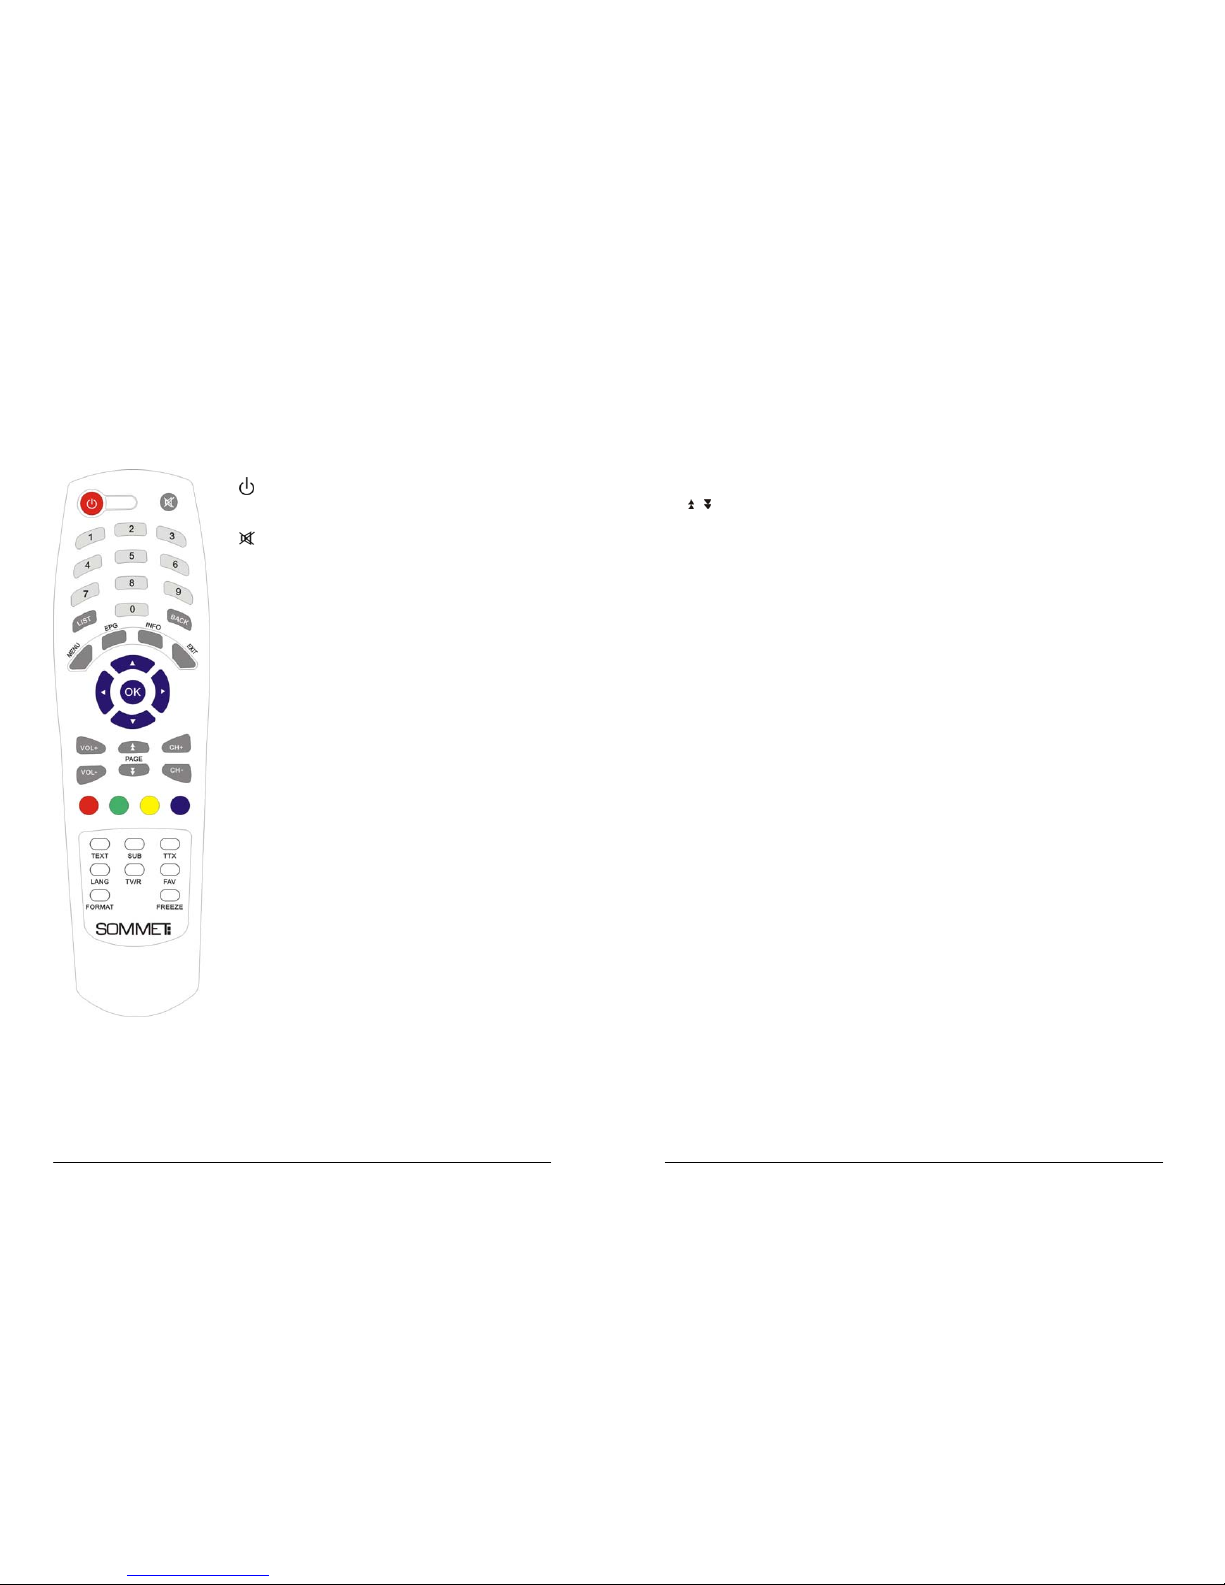
2.3 Remote Control Unit
All features of the set-top box can be controlled with the remote controller.
A.
Turn the receiver On/Standby.
B.
Mute audio output of the receiver.
C. NUMERIC KEY (0-9)
Controls the numerical operation and especially changes program
directly.
D. List
Enter the TV Channel list.
E. BACK
Turn back to the last channel.
F. MENU
Show the main menu or turn back to previous menu.
G. EPG
Show the EPG (Electronic Program Guide) (during no-menu state
only).
H. INFO
Show information on the current channel.
I. EXIT
Exits from the menu or sub-menu and cancels the progressing
function if applicable.
J. ◄►
Increase/decrease the volume level in No-menu state. Enter the
next sub-menu or back to previous menu.
K. ▲▼
Change the current program to the previous/next program in NO-menu state. Move the cursor to
upward/downward in Menu state.
L. OK
Activate the highlighted menu item. Display channel list according to TV/Radio Mode in No-menu
7
state.
M. V +/V-
Increases or decreases the receiver volume level.
N. P /P
Page up and down in menu list.
O. CH+/CH-
Changes the current program to the previous/next program in NO-menu state
P. TEXT
Show the list of Teletext languages the current channel supports.
Q. SUB
Shows the list of subtitled languages the current channel supports.
R. TTX
Used for MHEG5 in future.
S. LANG
Display Subtitle.
T. TV/R
Select TV or RADIO mode.
U. FAV
Enter the Favourites menu.
V. FORMAT
Display the video format.
W. FREEZE
Freeze the program.

8
3.0 CONNECTIONS
3.1 Connecting to Terrestrial Antenna
To receive the broadcast signal, the terrestrial antenna cable should be connected to the ANT IN
Connector at the back of the receiver.
3.2 Connecting to TV
1. Connect the YPbPr connector at the back of the receiver to the YPbPr input connector on
your TV set
2. Connect the Audio Left and Right RCA connectors at the back of the receiver to the Audio
Left and Right input connectors on your TV set or audio amplifier.
3. Connect the HDMI connector at the back of the receiver to the HDMI input connector on your
TV set.
4. Connect the receiver‘s S-VIDEO output connectors to the TV’s S-VIDEO input connectors,
and the receiver’s Audio L/R output connectors to the Audio L/R input connectors of the TV.
3.3 Connecting to Digital Audio Amplifier
Connect S/PDIF connector at the back of your receiver to appropriated input of your Digital Audio
Amplifier.
9
4.0 MAIN MENU
Press the MENU button, the MAIN MENU screen will
appear.
All the important settings and features of your
receiver can be operated in Main Menu. The Main
Menu consists of four sub-menus: “Favorites”, “HD
TV Settings”, “Parental Control”, “Installation” and
“System Setting”.
4.1 Favorites
In MAIN MENU screen, press buttons to select Favorites, which consists of the
sub-menus “Edit TV lists”, “Edit Radio Lists”, “Favorite TV Lists” and “Favorite Radio Lists”.
4.1.1 Edit TV Lists
In this menu, you can add the channels to the
different favorite groups and rename the favorite
groups.
The operation of “Edit Radio Lists” is the same as
“Edit TV Lists”.
4.2 HD TV Settings
In MAIN MENU screen, press buttons to select
HD TV Settings and press or OK key to enter,
which consists of the sub-menus “Resolution”, “TV
Screen Format”, “Display Format”, “TV Audio Mode”
and “Digital Audio”.
In this menu, you can set resolution, TV screen
format, display format, TV audio mode and digital
audio by pressing and buttons.
Table of contents


