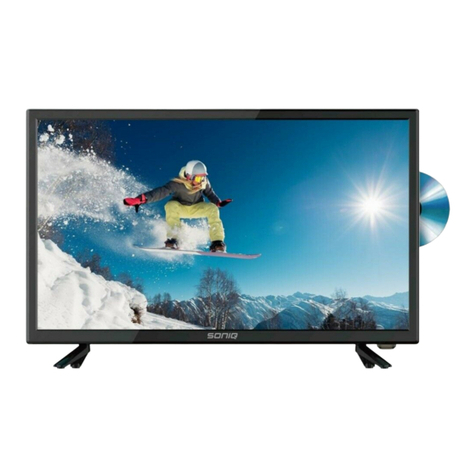
SONIQ E24Z15B-AU User manual

Instruction Manual
www.soniq.comPrinted in China
E24Z15B-AU
24" HD LED LCD TV COMBO

Caution
If the television is placed into a confined
space, ensure that the minimum distances
are observed as shown. Heat build up can
reduce the service life of your television,
and can also be dangerous.
Caution
Never stand on, lean on, push or apply
force to the product or its stand. You
should pay special attention to children.
Warning
High voltages are used in the operation of
this product. Do not remove the back cover
of the cabinet. Refer servicing to qualified
service personnel.
Warning
To prevent fire or electrical shock hazard,
do not expose the main unit to rain or
moisture.
Warning
Do not insert foreign objects into the
televisionʼs slots or openings. Never spill
any kind of liquid on the television receiver.
Caution
Do not place the main unit on an unstable
cart stand, sheif or table.
Serious injury to an individual, and damage
to the television, may result should it fall.
12. Power Sources - The appliance should only be connected to a power supply as described in the operating
instructions or as marked on the appliance.
13. Grounding or Polarization - Precautions should be taken.
14. Power Cord Protection - Power supply cord should be located so that it is not likely to be walked on, or pinched by
items placed upon it.
15. Cleaning - The appliance should be cleaned only as recommended by the manufacturer.
16. Power Lines - An outdoor antenna should be located away from power lines.
17. Outdoor Antenna Grounding - If an outside anternna is connected to the receiver, the antenna system must be
grounded so as to provide against voltages and built-uo static charges.
18. Non-use Periods - The power cord of the appliance should be unplugged from the outlet when left unused for a long
period of time.
19. Objects and Liquids - Care should be taken so that objects do not fall, and liquids are not spilled into the enclosure
through openings.
20. Conditions Requiring Service - The appliance should be serviced by qualified service personnel
when:
The power-supply cord or the plug has been damaged.
Objects have fallen on or liquid has been spilled into the appliance.
The appliance has been exposed to rain.
The appliance does not appear to operate normally or exhibits a marked change in
performance.
21. This appliance should not be exposed to water and no objects filled with liquids such as a vase should be placed on
the unit. Where the mains plug or an appliance coupler is used as the disconnect device, the disconnect device shall
remain readily operable.
1. Read Instructions - All the safety and operating instructions should be read before the appliance is operated.
2. Retain Instructions - The safety and operating instructions should be retained for future reference.
3. Heed Warnings - All warnings on the appliance and in the operating instructions should be adhered to.
4. Follow Instructions - All operating instructions should be followed.
5. Battery - Batteries shall not be exposed to excessive heat such as sunshine, fire or the like.
6. Earthing Connection - The apparatus shall be connectsd to a MAINS socket outlet with a protective earthing
connection.
7. Water and Moisture - The appliance should not be used near water.
8. Cart and Stands - The appliance should only be used with a cart or stand that is recommended by the manufacturer.
9. Wall or Ceiling Mounting - The appliance should be mounted to a wall or ceiling only as recommended by the
manufacturer.
10. Ventilation - The appliance should be well situated so that its location or position does not interfere with its proper
ventilation.
11. Heat - This appliance should be placed away from heat sources such as radiators, heat registersand stoves.
Safety Instruction

Caution
When the product is not used for an
extended period of time, it is advisable to
disconnect the AC power cord from the AC
outlet.
Caution
Avoid exposing the main unit to direct
sunlight and other sources of heat. Do not
position television receiver directly on other
products which give off heat.e.g. video
cassette players, audio amplifiers. Do not
block the ventilation holes in the back
cover. Ventilation is essential to prevent
electrical failure. Do not squash power
supply cord under the main unit.
Caution
The panel used in this product is made of
glass. It can break if the product is dropped
or if force is applied to the panel.
Individuals should execute caution when
dealing with broken glass should the panel
break.
acts by the third parties, accidents, ownerʼs misuse or use in other improper conditions.
of record data, etc.) caused by use or inability to use of product.
ʼs manual.
and the connected equipment.
Exemptions
Introduction
Thank you for purchasing the unit. Your unit will bring you years of high-quality viewing enjoyment. The television is easy
to operate and provides exceptionally high quality image. The manual will explain the operation of the unit, including its
functions, features and other important features. Before installing or operating your unit, please take the time to
thoroughly read this manual, particularly the sections on safety.
Package Contents
dnatStinUniaM
Screws: 4x12BA
(x4)
Remote Control
AAA Batteries(x2)
Instruction Manual
Screws: 3x8BA
(x4) 1p uick
Installation
1pc Warranty
Card
Instruction Manual
an
ih
C
ni
de
tn
ir
Pm
oc.qino
s
.www
E24Z15B-AU
24" HD LED LCD TV COMBO
STAND SUPPORT

Stand Installation
Multi-family Dwellings/Apartments
(Connect to wall antenna socket)
Single-family Dwellings/Houses
RF Coaxial Wire (75 ohm)
Wall
Antenna
Socket
Outdoor
Antenna
(VHF, UHF)
Connecting the Power Cord
Connection
Connect the power cord directly to the wall outlet.
Wall outlet
Screws:4PCS 4x12BA
UNIT
STAND
Power cord
1. Take out the main unit, the stand support and the table-top stand from the carton,
(flat surface).
side down on a table
and place the main unit with display
STAND SUPPORT
2. Connect the main unit and the stand support. Then fix them with 4 screws (ST4X12)
3. Fix the table-top stand with 4 screws (ST3X8) included.
included.
Screws:4PCS 3x8BA
2
1 3

USB Device
Connection and Setup
Connecting the USB Device
Insert USB device directly to unit.
1. Please do not turn off the TV or unplug the USB device when connected USB storage device is working. When
such device is suddenly separated or unplugged, the stored files or the USB storage device may be damaged.
2. Please use only a USB storage device which was formatted as a FAT32 file system, NTFS file system provided
with the Windows operating system. In case of a storage device formatted as a different utility programmer which
is not supported by Windows, it may not be recognized.
3. Please connect power to a USB storage device(over 500ma) which requires an external power supply. If not, the
device may not be recognized.
4. If the USB HDD does not have an external power source, the USB device may not be detected. So be sure to
connect the external power source.
5. The recommended capacity is 1TB or less for a USB external hard disk and 32GB or less for USB memory.
6. Only English is supported in USB mode. Other languages such as Chinese, Japanese, etc. Will not be displayed
or display an error.
DVD Player
Audio (AV) Cable
Component Video
Cable
Composite (AV)
Video Cable
Video Game
D-SUB 15-pin cable
(VGA cable)
PC
Red
White
Audio cable
Blu-ray DVD Player
Green
Blue
Red
Red
White
Yellow

Note:
USB/SD/3D/DVD are invalid.

Reminder
Your unit has integrated HD digital and analog tuner in the same unit. You can enjoy both digital and analog broadcasting
under following set-up easily.
The latest news, software, utility, driver
http://www.soniq.com
TV Auto Scan
There are two methods for perfoming an automatic digital TV channel search.
Method 1
Auto Scan
1. Use to choose Auto Scan, press “OK” button to continue.
2. Press to select Mode, press OK button to confirm, then use to choose
tuning type.
3. Choose “Start” to start auto search.
2. Use to choose Auto Scan, press “OK” button to confirm, and use to choose tuning type.
Note: This system is available in Australia.
▲
▲
/
1. Press “SOURCE” button on remote control to display Input Source.
2. Use ▲/▼
button to choose input source and press “OK” button to confirm.
1. The Initial Setup window will appear when you begin. This system is available in Australia.
Method 2
Press MENU button to enter the CHANNEL page as follows:
Supported PC Input Signal
Your unit can use as PC monitor, it supports below RGB-PC, HDMI mode INPUT
.
3. Choose “Start” to start auto search.
▲/▼
▲/▼
▲/▼
▲
▲
/

HOTLINE
AUSTRALIA : 1300 765 663
: 0800 100 236
Design and specifications are subject to change without prior notice.
SpeciLcation
Operating Voltage
Power Consumption
Video Format Supporting
Digital TV
Analog TV
Panel Spec
Input & Output
Audio Power
Unit Dimension
DC 12V 4A
40W, < 1W(Standby)
COMPONENT
HDMI
Programme Coverage
Channel Bandwidth
Video Decode
Audio
TV System
Active Area
Pixel Format
Luminance White
Contrast Ratio
Color Depth
Expected Life Time
ANT IN
HDMI input
USB input
YPbPr input
VGA input
VGA AUDIO input
VIDEO input
DIGTAL AUDIO OUT OPTICAL
3W + 3W
555(L) x 165(W) x376(H)mm
480i, 480p, 576i, 576p, 720p (50Hz/60Hz),
1080i (50Hz/60Hz),1080p(50Hz/60Hz).
480p, 576p, 720p (50Hz/60Hz),
1080i (50Hz/60Hz),1080p (50Hz/60Hz).
Australia
VHF-H: 177.5 to 226.5MHz
UHF: 522.5MHz to 816.5MHz
1080i, 720p, 576p, 576i
MPEG -1; MPEG-2; AC-3
PAL B/G; D/K; I
521.47mm x 293.18mm
24 Inch(60cm)
1366horiz.by768vert
pixels RGB Horizontal Stripe arrangement
210cd/m²
1200:1
8-bit(D), 16,7M colors
about 50,000 hours
ANT IN x 1
HDMI x 1
USB x 1
YPbPr x 1
VGA x 1
VGA AUDIO x 1
VIDEO x 1
DIGT
DVD input
1xENOHPTUOENOHP
DVD x 1
AL AUDIO OUT OPTICAL x 1
Input
Format
RGB-PC, HDMI mode INPUT SPEC
VGA / HDMI Input
Resolution
640 x 480
640 x 480
640 x 480
720 x 400
800 x 600
800 x 600
800 x 600
832 x 624
1024 x 768
1024 x 768
1152 x 870
1280 x 800
1280 x 960
1360 x 768
1366 x 768
Horizontal frequency(KHz)
31.5
37.861
37.5
31.5
37.9
48.077
46.9
49.7
48.4
60
68.68
47.8
60.0
47.7
Vertical frequency(Hz)
60
72.809
75
70
60
72.19
75
75
60
75
75
59.8
60
60
Standard
VGA
VESA
VESA
VGA-T
VESA Guidelines
VESA
VESA
Mac
VESA Guidelines
VESA
Mac
VESA
VESA
ASEV97.95217.74
Table of contents
Other SONIQ LCD TV manuals
SONIQ
SONIQ L32V12B-AU User manual
SONIQ
SONIQ E40V16A-AU User manual
SONIQ
SONIQ Qvision LCDTV15/A User manual
SONIQ
SONIQ QSL230XT User manual
SONIQ
SONIQ L32V12A-AU User manual
SONIQ
SONIQ qv220lti User manual
SONIQ
SONIQ G75UW40A User manual
SONIQ
SONIQ Qvision QV192LCT User manual
SONIQ
SONIQ Freeview User manual
SONIQ
SONIQ E32S12A User manual
SONIQ
SONIQ L42V11A -AU User manual
SONIQ
SONIQ Qvision QV195LT User manual
SONIQ
SONIQ S42V14A-AU User manual
SONIQ
SONIQ E65UV40A User manual
SONIQ
SONIQ G75UW62A User manual
SONIQ
SONIQ QASA QSL470XT User manual

SONIQ
SONIQ E23Z15A-AU User manual
SONIQ
SONIQ G43FW60A User manual
SONIQ
SONIQ QSL322T User manual
SONIQ
SONIQ QSL423XT User manual
