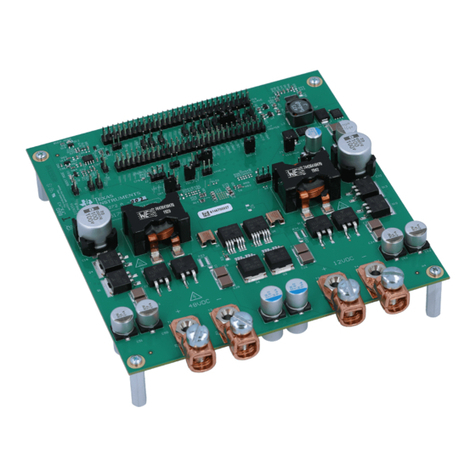
Sonosax AEM-1 User manual

Camera Accessories for ALEXA 35:
Audio Extension Module AEM-1
U S E R M A N U A L
July 4 2022
Camera Accessories for ALEXA 35:
Audio Extension Module AEM-1
U S E R M A N U A L
July 4 2022

Disclaimer 2
Disclaimer
Before using the products, be sure to read and understood all respective instructions.
The products are available for commercial customers only.
For product specification changes since this manual was published, refer to the latest publications of
ARRI data sheets or data books, etc., for the most up-to-date specifications. Not all products and/or
types are available in every country. Please check with an ARRI sales representative for availability and
additional information.
ARRI assumes no responsibility for any errors that may appear in this document. The information is
subject to change without notice.
While ARRI endeavors to enhance the quality, reliability and safety of their products, customers agree
and acknowledge that the possibility of defects thereof cannot be eliminated entirely. To minimize
risk of damage to property or injury (including death) to persons arising from defects in the products,
customers must incorporate sufficient safety measures in their work with the system and have to heed
the stated canonic use.
ARRI or its subsidiaries expressly exclude any liability, warranty, demand or other obligation for any
claim, representation, or cause, or action, or whatsoever, express or implied, whether in contract or tort,
including negligence, or incorporated in terms and conditions, whether by statue, law or otherwise. In
no event shall ARRI or its subsidiaries be liable for or have a remedy for recovery of any special, direct,
indirect, incidental, or consequential damages, including, but not limited to lost profits, lost savings, lost
revenues or economic loss of any kind or for any claim by third party, downtime, good will, damage to or
replacement of equipment or property, any cost or recovering of any material or goods associated with
the assembly or use of our products, or any other damages or injury of the persons and so on or under
any other legal theory.
Neither ARRI nor its subsidiaries assume any liability for infringement of patents, copyrights or other
intellectual property rights of third parties by or arising from the use of ARRI products or any other
liability arising from the use of such products. No license, express, implied or otherwise, is granted
under any patents, copyrights or other intellectual property right of ARRI or others.
ARRI or its subsidiaries do not assume any responsibility for incurred losses due to improper handling
or configuration of the camera or other system components, due to sensor contamination, occurrence
of dead or defective pixels, defective signal connections or incompatibilities with third party recording
devices.
In the case one or all of the foregoing clauses are not allowed by applicable law, the fullest extent
permissible clauses by applicable law are validated.

Content 3
Content
1 About this Document....................................................................................................... 5
2 About the Products.......................................................................................................... 6
2.1 Identification...................................................................................................................... 6
2.2 Environmental Conditions.................................................................................................7
2.3 Technical Data.................................................................................................................. 8
2.4 Dimensional Drawings...................................................................................................... 9
2.5 Scope of Delivery and Warranty...................................................................................... 9
2.6 Certification and Safety Standards...................................................................................9
3 Safety Instructions..........................................................................................................12
3.1 Safety Conventions and Product Labels........................................................................ 12
3.2 General Safety Instructions............................................................................................ 12
4 Overview Audio Extension Module AEM-1.................................................................. 14
5 Mounting the Accessories.............................................................................................15
6 Operating......................................................................................................................... 17
6.1 Switch on Audio Extension Module AEM-1....................................................................17
6.2 Home Screen Overview and Navigation........................................................................ 17
6.2.1 Home Screen Overview................................................................................................17
6.2.2 Home Screen Control Elements...................................................................................17
6.3 Menu Overview and Navigation..................................................................................... 19
6.3.1 Menu Overview.............................................................................................................19
6.3.2 Menu Navigation...........................................................................................................19
6.4 Selecting an Input Source.............................................................................................. 20
6.5 Analog Input Settings..................................................................................................... 21
6.5.1 Gain Input..................................................................................................................... 21
6.5.2 Limiter Threshold.......................................................................................................... 22
6.6 Digital Input Settings.......................................................................................................22
6.7 Headphone Settings....................................................................................................... 22
6.8 Reference Tone Settings................................................................................................ 23
6.9 Peak Meters....................................................................................................................23
6.10 AEM-1 OLED Brightness................................................................................................24
6.11 Software Update............................................................................................................. 24
6.12 Reset to default settings.................................................................................................25
6.13 Power Input Control........................................................................................................25
6.14 Error Messages and Debugging.....................................................................................26
7 Cleaning and Repair.......................................................................................................27
7.1 Cleaning Instructions...................................................................................................... 27

Content 4
7.2 Repair..............................................................................................................................27
8 Transportation and Storage...........................................................................................28
9 Disposal........................................................................................................................... 29
10 ARRI Service Contacts...................................................................................................30

About this Document 5
1 About this Document
This user manual is aimed at everyone involved in using the system and provides directions on how to
operate it safely and as intended. To ensure safe and correct use, all users must read the user manual
before using the accessories for the first time.
This user manual is an essential part of this product and must be easily accessible and in proximity to
the equipment so that users can use it as a reference anytime.
Keep this user manual and all other operating and assembly instructions belonging to the system in a
safe place for future reference and possible subsequent owners.
Document Revision History
Document ID: D45 10006708
Version Release Date Description
1.0 K10950 04.07.2022 Initial Release

About the Products 6
2 About the Products
INFO
All versions of the product are intended exclusively for professional use and may only be used by
skilled personnel.
Every user should read and understand the operating instructions and the user manual. Use the
product only for the purpose described in this document. Always follow the instructions and system
requirements for all equipment involved.
The Audio Extension Module AEM-1 enables audio source selection for the ALEXA 35 and serves as
a microphone amplifier. In camera playback mode, the audio from the camera is injected into the main
audio channels.
In all other camera states, the audio source can be:
Main MIC/LINE inputs
AES input
Reference tone generator
The Audio Extension Module AEM-1 is compatible with the ALEXA 35.
2.1 Identification
The product number and the serial number of the accessory are located on the product label, the serial
number consists of the last 4 digits of the product number (here: 1234).
Audio Extension Module AEM-1
(K2.0023750)

About the Products 7
2.2 Environmental Conditions
The ALEXA 35 electronic accessories should only be used and stored under certain environmental
conditions. Check the following conditions before commissioning and operation:
Electrical Requirements
Operating Temperature
Storage Temperature
Humidity
Input voltage: 20.5 - 33.6 V DC
-20° C to +45° C / -4° F to +113° F
-30° C to +70° C / -22° F to +158° F
0-95% RH from -20° C to +45° C / -4° F to +113° F, non-condensing

About the Products 8
2.3 Technical Data
Audio Extension Module AEM-1
Measurements (HxWxL) 132.50 x 119.45 x 34.72 mm
Weight 504 g / 1,111 lbs
Frequency Response 20 Hz - 90 kHz
Operating Temperature -20°C - +45°C
Power Outputs 1x 24 V 3-pin Fischer connector supporting start/stop (max. 4.0 A)
1x 12 V 2-pin Lemo connector (max. 2.0 A)
Maximum Input Level +18 dBu (with Primary Gain 0 dB)
-2 dBu (with Primary Gain +20 dB)
Analog Audio Inputs 2x balanced MIC/LINE inputs on TA3 connectors with 48 V phantom power
(max. 10 mA) switchable on each channel, +20 dB pre-gain, analog first order
low frequency cut filter, dual-ADC, phase reversal, adjustable second order
digital low frequency cut filter, gain and limiter
Low Frequency Cut Fil-
ter
3rd order hybrid (1st order analog) adjustable Low Frequency Cut filter, 60 to
320 Hz, 20 Hz steps
Dynamic Range 135 dB (with Primary Gain 0 dB)
129 dB (with Primary Gain +20 dB)
Noise LIN 22-22 kHz -133 dBFS (with Primary Gain 0 dB)
-127 dBFS (with Primary Gain +20 dB)
Noise ASA A -135 dBFS (with Primary Gain 0 dB)
-129 dBFS (with Primary Gain +20 dB)
Equivalent Input Noise
22-22 kHz 150 Ω
-112 dBu (with Primary Gain 0 dB)
-126 dBu (with Primary Gain +20 dB)
THD < 0.001%
Digital Audio Input 1x AES input on TA3 connector with asynchronous sample rate converter
(ASRC)
AES3 Input Sampling
Rate
6 - 192 kHz
AES3 Output Sampling
Rate
48 kHz
ASRC Dynamic Range 139 dB (A-weighted)
Headphone Output 1x stereo mini jack unbalanced output for headphones with full monitoring

About the Products 9
2.4 Dimensional Drawings
All measurements given in Millimeters.
Audio Extension Module AEM-1
133,0
119,5
26,0
34,7
2.5 Scope of Delivery and Warranty
INFO
The packaging consists of recyclable materials. For the sake of the environment, dispose of the
packaging material at a suitable disposal site.
Always store, ship and dispose according to local regulations. ARRI is not liable for consequences
from inadequate storage, shipment or disposal.
On delivery, please check if package and content are intact. Never accept a damaged delivery.
Warranty
For scope of warranty, please ask your local ARRI Service Partner. ARRI is not liable for consequences
from inadequate shipment, improper use or third-party products.
2.6 Certification and Safety Standards
Approval Information
The Audio Extension Module AEM-1 is approved for use in countries where the CE or FCC declaration
is accepted. That contains the European Union, Canada, Japan and the USA. The import and use in
other countries may be subject to legal, official or regulatory requirements and regulations. It is the
importer's or the user's responsibility, prior to importation or use, to inform themselves of the applicable
legal, regulatory and administrative requirements and regulations and to ensure compliance with these
requirements and regulations. This includes the applying for and obtaining of all necessary approvals or
registrations.
As far as reasonable and legally possible, ARRI will support requests in relation to such applications by
providing technical documents or declarations. As an importer or user, you confirm that you are familiar
and comply with the legal, regulatory, and administrative requirements and regulations that apply in
the countries to which you ship or use the products. You further confirm that you will arrange for any
necessary registrations, enrollments, or authorizations that are required in such countries.
You release ARRI from all obligations resulting from any legislative, regulatory, or administrative
requirements regarding import or use of the products, except in countries where ARRI has obtained
a registration or certification. You agree to indemnify, defend, and hold ARRI harmless from any and

About the Products 10
all claims, damages, losses, liabilities, costs, and expenses (including reasonable fees of attorneys
and other professionals) that may arise out of a demand on ARRI in connection with your obligations
mentioned above.
EU Declaration of Conformity
Brand Name:
Product Description:
SONOSAX SAS SA
Audio Extension Module AEM-1
The product conforms to the specifications of the following European directives:
Directive 2014/30/EU EU of the European Parliament and of the Council of 26 February 2014 on
the harmonisation of the laws of the Member States relating to electromagnetic compatibility
Directive 2014/35/EU of the European Parliament and of the Council of 26 February 2014 on the
harmonisation of the laws of the Member States relating to the making available on the market of
electrical equipment designed for use within certain voltage limits
Compliance with the requirements of the European directives has been verified by applying the
following standards:
EN 55032:2015
EN 55035:2017
IEC 62368-1:2018
UK Declaration of Conformity
Brand Name:
Product Description:
SONOSAX SAS SA
Audio Extension Module AEM-1
The designated products conform to the specifications of the following United Kingdom regulations:
1) The Electromagnetic Compatibility Regulations 2016 (SI 2016 No. 1091 as amended by SI 2019
No. 696)
2) The Electrical Equipment (Safety) Regulations 2016 (SI 2017 No. 1206 as amended by SI 2019
No. 696)
3) The Restriction of the Use of Certain Hazardous Substances in Electrical and Electronic
Equipment Regulations 2012 (SI 2012 No. 3032 as amended by SI 2020 No. 1647 SI 2021 No. 422
and SI 2019 No. 492)
The compliance with the requirements of the United Kingdom regulations was proved by the
application of the following standards:
EN 55032:2015 + A11:2020
EN 55035:2017 + A11:2020
IEC 62368-1:2014/AC:2015
EN IEC 63000:2018
The manufacturer bears sole responsibility for issuing this declaration of conformity.
FCC Class A Statement
This equipment has been tested and found to comply with the limits for a Class A digital device,
pursuant to Part 15 of the FCC Rules. These limits are designed to provide reasonable protection
against harmful interference when the equipment is operated in a commercial environment. This
equipment generates, uses, and can radiate radio frequency energy and, if not installed and used in
accordance with the instruction manual, may cause harmful interference to radio communications.
Operation of this equipment in a residential area is likely to cause harmful interference in which case
the user will be required to correct the interference at his own expense.

About the Products 11
Changes or modifications to the product not expressly approved by the party responsible for
compliance could void the user's authority to operate the equipment.
Industry Canada Statement
CAN ICES-003(A)/NMB-003(A)

Safety Instructions 12
3 Safety Instructions
This safety information is in addition to the product specific operating instructions in general and must
be strictly observed for safety reasons. Read and understand all safety and operating instructions
before you operate or install the system. Retain all safety and operating instructions for future
reference. Always follow the instructions in this and all documents supplied with the device to avoid
injury to yourself or others and damage to the system or other objects.
Assembly and operation should only be carried out by trained staff familiar with the system. Only
use the tools, materials and procedures recommended in this document. For the correct use of other
equipment, see the manufacturer's instructions.
3.1 Safety Conventions and Product Labels
Structure of Safety and Warning Messages
These instructions use safety instructions, warning symbols and signal words to draw your attention to
different levels of risk:
WARNING!
WARNING indicates a potentially hazardous situation which, if not avoided, may result in death or
serious injury.
Always follow the recommended measures to avoid this hazardous situation.
CAUTION!
CAUTION indicates a potentially hazardous situation which, if not avoided, may result in minor or
moderate injury.
Always follow the recommended measures to avoid this hazardous situation.
NOTICE
NOTICE signifies a potentially hazardous situation which can result in damage to property.
Always follow the recommended measures to avoid this hazardous situation.
INFO
Not relevant to safety, INFO provides additional information to clarify or simplify a procedure.
3.2 General Safety Instructions
WARNING!
Powering Accessories without Camera Connection
Risk of electric shock and fire hazard caused by short circuit.
Do not power the accessories if not attached to the camera.
Remove all power sources before you mount and remove accessories.

Safety Instructions 13
WARNING!
Operation of the Camera System in Case of Obvious Damage
Risk of electric shock and fire hazard caused by short circuit.
Do not use the system if electrical lines or housing are visibly damaged.
Operate the system using only the type of power source indicated in the manual.
Unplug the power cable by gripping the power plug, not the cable.
Do not operate the system in areas with humidity above operating levels or expose it to water or
moisture.
Do not get the system wet.
Do not lay cables over sharp edges (e.g. sheet metal, profile or other cut edges). Damaged
cables can cause electric shock, short circuit or fire.
Do not remove or deactivate any safety measures from the system (incl. warning stickers or paint
marked screws).
Repairs may only be carried out by authorized ARRI service partners.
CAUTION!
Using the Camera or Camera Accessories in a Humid Environment and with Con-
densation
When moving the camera and the camera accessories from a cool to a warm location or
when the camera is used in a damp environment, condensation may form inside the cam-
era, on the sensor, and on internal or external electrical connections. Operating the cam-
era while condensation is present bears risk of electric shock and/or fire caused by a short
circuit.
Never operate the camera and camera accessories when condensation occurs.
After moving the camera and camera accessories from a cool to a warm environment, wait for
some time for the system to warm up.
To reduce the risk of condensation, find a warmer storage location.
CAUTION!
Hot Surfaces on Camera Body and Camera Accessories
During extended operation, high data rates and/or operation at high ambient temperatures,
the camera's surface and the area around the fan outlet can get hot. Direct sunlight can re-
sult in camera housing temperatures above 60° C (140° F).
Never cover, obstruct or block the fan in- or outlets while the camera is powered.
Do not place the camera system near any heat sources during operation.
At ambient temperatures above 25° C (77° F), protect the camera and camera accessories from
direct sunlight.
CAUTION!
Connected Cable on the Floor
Risk of injury caused by tripping, falling or slipping over connected cables.
Always properly secure cables connected to the camera and camera accessories.
Install cables in a way that they cannot be tripped over.
If necessary, use a cable duct or secure the cables with adhesive tape.
Disconnect the cables from the camera and camera accessories before moving.

Overview Audio Extension Module AEM-1 14
4 Overview Audio Extension Module AEM-1
7
8
9
10
11
12
1
2
3
4
5
6
1MIC 1 Input
2MIC 2 Input
3AES Input
424 V Output
512 V Output
6Headphones Output
7User Display
8Rotary Encoder for Phones Level
and Menu Navigation
9Menu Button
10 BACK Button
11 Rotary Encoder for MIC 1 Gain
12 Rotary Encoder for MIC 2 Gain
A USB port is used for firmware update. It acts as a USB host which will read a file from a USB stick
connected to it.

Mounting the Accessories 15
5 Mounting the Accessories
WARNING!
Falling Camera Accessories
If the system is inadequately built up or assembled, it can fall down and cause serious in-
juries and damage to the system or property.
Installation and operation may only be carried out by trained personnel who are familiar with the
system. Observe accident prevention regulations.
Do not place the system on an unstable trolley or hand truck, stand, tripod, bracket, table or any
other unstable support device.
Always place the camera on dedicated support devices.
Secure the system and its accessories against falling and tipping over. Observe the general and
local safety regulations.
When using the system on camera cranes, a suitable safety rope must be used.
Use only accessories approved by ARRI. The use of accessories not approved by ARRI is at
your own risk. Please observe all relevant safety guidelines.
CAUTION!
Improper Mounting of Lenses and Accessories
Mounting the camera on tripods or other support equipment and attachment of accessories
like e.g. lenses, electronic and mechanical accessories poses a crushing hazard for fingers
and/or hands.
Before mounting ARRI accessories or recommended third-party accessories (such as lenses,
mechanical accessories, electronic accessories), read the operating instructions provided by the
manufacturer.
Always use the tools specified by the manufacturer for mounting.
INFO
The Audio Extension Module AEM-1 is compatible with the ALEXA 35.
Please note that either the Audio Extension Module AEM-1 or the Power Distribution Module PDM-1
can be mounted on the camera.
Preparation:
Switch off the camera and unplug any power supply.
Arrange the ALEXA 35 on a table with its back turned towards you.
Put the unpacked Audio Extension Module AEM-1 next to the camera.
Prepare a 3.0mm Allen/hex key.

Mounting the Accessories 16
How to mount Audio Extension Module AEM-1:
The Audio Extension Module AEM-1 attaches to the back of the camera with three captive M4 screws.
1. Gently place the Audio Extension
Module AEM-1 counterpart in the re-
cessed area at the back of the cam-
era.
2. Tighten the three captive M4 screws
crosswise with a 3mm Allen key to
attach the Audio Extension Module
AEM-1 to the camera.
3. Check with your hands if the Audio
Extension Module AEM-1 is firmly at-
tached to the camera.
→The Audio Extension Module
AEM-1 is ready for use.

Operating 17
6 Operating
INFO
The AEM-1 automatically saves all your selected settings in the menu. These settings are retained
even after the power is turned off.
To ensure that no settings can be lost, you should wait for 10 seconds after you have adjusted a
setting, before switching off the AEM-1.
6.1 Switch on Audio Extension Module AEM-1
The Audio Extension Module AEM-1 is powered from 12V or 24V camera and will boot up as soon as a
power supply is applied.
After the boot-process, the home screen appears in the user display. Depending on the selected input
source, the home screen looks slightly different:
Analog Input Digital Input Camera Source
6.2 Home Screen Overview and Navigation
6.2.1 Home Screen Overview
1Monitoring Routing
2Head Phones level
3Phase reversal
4Phantom power
5Input Gain 1
6Input Gain 2
7Peak Hold
8Reference Level
9Peak Meters
6.2.2 Home Screen Control Elements
During the Home screen, the control elements on the Audio Extension Module AEM-1 are used as
follows:

Operating 18
1Rotary Encoder for Phones Level
2Opens the Menu
3-No action-
4Rotary Encoder for MIC/LINE 1 Gain
5Rotary Encoder for MIC/LINE 2 Gain
The three rotary encoder can be moved in and out by pressing them.

Operating 19
6.3 Menu Overview and Navigation
6.3.1 Menu Overview
6.3.2 Menu Navigation
Press the MENU button on the Audio Extension Module AEM-1 to open the menu.
The following buttons are used within the menu:

Operating 20
1Navigation control and setting values
2Menu button
3Back button
The Navigation control allows to switch between different menu items and function controls. With the
navigation control you can also adjust values.
To select a menu item or confirm changes, use the Menu button.
To cancel a setting procedure or to return to a previous menu, press the Back button.
A long press on the Back button returns to the home screen.
6.4 Selecting an Input Source
INFO
If you have selected the digital input or camera source, all the settings for the analog inputs in the
menu are hidden.
You have three different possibilities for the AEM-1 input source:
Analog Input 2 analog inputs independently configurable
Digital Input 1 input for external devices
Camera Source When you select the Camera Source, the AEM-1 connects directly to
the camera. Thereby you can listen to recorded audio on the camera.
How to select an input source:
1. Open the menu via Menu button.
2. Go to INPUT > SOURCE .
3. Select an input source.
→ The selected input source is displayed on the Home screen.
Table of contents
Other Sonosax Control Unit manuals
Popular Control Unit manuals by other brands
Telcoma Automations
Telcoma Automations T10 FM400 Operation and Programming Instructions
Leroy-Somer
Leroy-Somer R 725A Connection and Adjustments

Grundfos
Grundfos CIM 1 Series Installation and operating instructions
National Instruments
National Instruments NI 9214 Operating instructions and specifications
Simplex
Simplex MINIPLEX 4100ES Series quick start guide
ThermoTec
ThermoTec 67912 quick guide
