Sonostar UProbe-C User manual

Wireless Probe Type
Ultrasound Scanner
UProbe-C & UProbe-L
User's Guide
No.:SS-IFU-1501-02 Versions:A/2
Date:2021.12

Table of Content
Section 1 INTRODUCTION .......................................................................................................1
1.1 Signs and Meaning ......................................................................................................1
1.2 TECHNICAL PARAMETERS ............................................................................................2
1.3 INDICATIONS FOR USE ................................................................................................2
1.4PRECAUTIONS & WARNINGS ........................................................................................2
Section 2 GETTING STARTED ...................................................................................................3
2.1 UNPACKING ................................................................................................................3
2.2 INSTALLING APP ..........................................................................................................3
2.3 STARTING PROBE ........................................................................................................7
2.4 WIRELESS CONNECTION ..............................................................................................8
Section 3 APP OPERATIONS ....................................................................................................9
3.1 ULTRASOUND SCAN ....................................................................................................9
3.2 ENTER PATIENT INFORMATION ..................................................................................10
3.3 SELECT THE IMAGE MODE .........................................................................................10
3.4 MEASUING ................................................................................................................11
3.5 STORAGE OF IMAGES ................................................................................................13
3.6 SETTINGS ..................................................................................................................13
Section 4 MAINTEANCE ........................................................................................................14
4.1 PROBE CHARGING .....................................................................................................14
4.2 WATERPROOF IPAD ...................................................................................................14
4.3 CLEANING .................................................................................................................14
4.4 STORAGE ...................................................................................................................14
4.5TROUBLE SHOOTING ..................................................................................................15
4.6Disposal .....................................................................................................................15
Section 5 Safety ....................................................................................................................16
5.1 Safety Instructions ....................................................................................................16
5.1.1Electric Safety ...................................................................................................16
5.1.2 Mechanical Safety
5.1.13 Accessories Safety
5.2 Principles of Using Acoustic Power
5.2.1 Biological Safety
5.2.2 Mechanical and Thermal Indices
5.2.3 Acoustic Output Statement
5.2.3.1 The Influencing Factors of Acoustic Uncertainty

5.2.3.2 Differences between Actual and Displayed MI and TI
5.2.3.3 Uncertainty of Measurement
5.2.4 Operator Control Property
5.2.5 Acoustic Power Settings
5.2.6 ALARA
5.3 Electromagnetic Compatibilities
5.3.1 Electromagnetic Emission
5.3.2 Electromagnetic Immunity
5.3.3 Recommended Separation Distance
Appendix A Specifications
Appendix B Acoustic Output Data

1
Section 1 INTRODUCTION
The Wireless Probe Type Ultrasound Scanner (Model: Uprobe-C 、Uprobe-L) is the new
generation instruments for ultrasonography with the outstanding feature of wireless.
Different with traditional ultrasound scanner with a cable connecting from probe to main unit,
no cable appears at the end of the probe of the Scanners. The probe of the Scanner is highly
integrated with ultrasound image processing, power management and a wireless signal provider to
be connected by the main unit. The main units different with traditional devices are now changed to
be any iPad from Apple Inc or Apple iPhone. The probe acts as a Wi-Fi Access Point and can be
connected by iPad or iPhone. With the probe be connected through WiFi and the App is running,
enjoy your days of working without the trouble making cables.
This manual is intended to provide a thorough overview of the Scanner and should be carefully
read before starting operating the device.
Thank you for your trust in us to provide for your ultrasonography needs.
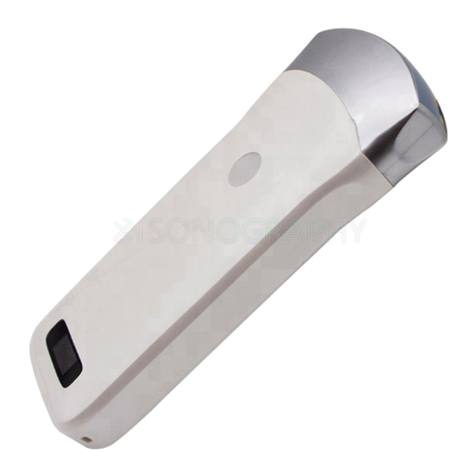
Figure 1.1 UProbe-C Wireless Probe Type Ultrasound Scanner
1.1 Signs and Meaning
Sign
Meaning
Caution! Please consult the accompanying document.
Consult the user manual
Type BF applied part
Degree of IP protection
Non-ionizing electromagnetic radiation
Manufacturer
Date of manufacture
Serial number

2
Keep dry
IPX5
Prevent the water from the nozzle from invading in all directions and cause damage to
the electrical apparatus.
1.2 TECHNICAL PARAMETERS
Display: iPad / iPhone Series
Probe: 3.5MHz (convex)/7.5MHz(line)
Operation frequency
3.5MHz
7.5MHz
Depth
≥160mm
≥60mm
Measurement Accuracy
Lateral Resolution:
≤3(Deep≤80);
≤4(80<Deep≤130)
Axial Resolution:
≤2(Deep≤80);
≤3(80<Deep≤130)
Lateral Resolution:
≤2(Deep≤40)
Axial Resolution:
≤1(Deep≤50)
Display Mode: B Mode, B+M Mode
Gray Scale: 256 levels
Battery last: > 3 hours
Size: 104mm x 50mm x 22mm
Weight: ≈308g
Operations
Storage and Transportation
Relative Humidity
25% to 80%,
non-condensi
ng
25% to 93%, non-condensing
Ambient Temperature
5°C to +40°C
-20°C to +55°C
Atmospheric Pressure
700hPa to
1060hPa
700hPa to 1060hPa
Electronic:
Input:5Vd.c. 1A
Battery Capacity:modle(SNP-4200)3.8Vd.c. 4200mAh
continuous working time:2hour
Waterproof: IPX5
1.3 INDICATIONS FOR USE
The Wireless Probe Type Ultrasound Scanner (Model: UProbe) is intended for diagnostic ultrasound
echo imaging, measurement, and analysis of the human body for general clinical applications
including obstetrics (OB), gynecology (GY) and general (abdominal) imaging.
Contra-indication:
The basic equipment is not suitable for injuries or acute inflammatory site inspection, to avoid
cross infection.
The diagnosis, the basic equipment is not suitable for gas containing organs such as lung,
stomach and intestine.
The Diagnostic Ultrasound System is not intended for ophthalmic use or any use causing the
acoustic beam to pass through the eye.

3
1.4 PRECAUTIONS & WARNINGS
PRECAUTION 1: Read the user manual carefully before operating the device, be familiar with
the equipment and operation procedures, and strictly implement; the company is not
responsible for the damage caused by the improper use of the machine and the resulting
potential adverse consequences;
PRECAUTION 2: The instrument must work in a clean environment, should avoid direct sunlight,
extreme temperature changes, dust, near heat sources, high humidity places, do not place
anything on top of the instrument.
PRECAUTION 3: The device shall be operated in undisturbed conditions so as to avoid data
transmission interruption.
PRECAUTION 4: When there is wireless channel congestion, switch the channel (Refer to
Section 3.5 SETTINGS), and then restart the probe.
PRECAUTION 5: Prescription Use. The device shall be operated by professional physicians, and
should wears gloves before use.
PRECAUTION 6: The device shall be repaired by professional recognized by the manufacturer.
PREACUTION 7: The device does not have shelf life. Its expected use life is 10 years. After 10
years, though the device still works normally, it is recommended to have it checked by the
manufacturer.
PRECAUTION 8: Useless components shall be disposed according to local regulations.
PRECAUTION 9: Be careful when holding the device, for the device is handheld, it may fall.
PRECAUTION 10: Pay attention: the words “Insufficient Storage Space”will appear on the
interface to remind the user to clean up space when storage space will be insufficient.
PRECAUTION 11: Put on a condom that meets the medical qualification for use, dispose the
used condom in the medical waste recycling box after use, and then disinfect and clean the
probe according to Section 4.3.
WARNING 1: The device is not explosion-proof. Do not use it in inflammable and explosive
environment (such as in the presence of anesthetic gas, oxygen or hydrogen,etc.);
WARNING 2: Instrument is not waterproof, do not spill water or other liquids on the instrument.
WARNING:The user and/or patient should be reported“any serious incident that has occurred
in relation to the device ”to the our company and the competent authority of the Member
State.
Section 2 GETTING STARTED
FOR YOUR PROTECTION, please read these safety instructions completely before applying
power to, or operating the system.
2.1 UNPACKING
The Scanner is carefully packed to prevent damage during shipment. Before unpacking, please
note any visible damage to the outside of the shipping containers.
Items should be checked in order to ensure that all ordered items have been received. The
following table lists the items which should be received with each particular system.
Table 2-1 Items List for The Wireless Ultrasound Scanner
ITEMS
INCLUDED
scanner(C-Probe/L-Probe)
√

4
Each item should be examined for any noticeable defects or damage that may have occurred during
shipment although it is packed carefully. If any defect or damage exists, please contact your local
representative immediately to report the problem.
2.2 INSTALLING APP
Open the App Store on the iPad or the iPhone, type "Wireless USG" in the search bar.
Find the software and download and install it.
USB Cable for Charging
√
The Wireless Ultrasound Scanner Users’ Guide
√
APP
√
IPad
Optional

5
2.2.2 Method 2
Using the two-dimensional code scanning software to scan the two-dimensional code below, you can
get the download link of APP for installation.

6
2.3 STARTING PROBE
Figure 2-1 The Wireless Ultrasound Probe
The Wireless Connection Indicator and the Battery Capacity Indicator on the probe may be
invisible before the probe is turned on.
Press the button to turn on the probe. The Battery Capacity Indicator will be light to indicate
the capacity of the battery. The four grids of the indicator imply the battery capacity. (Probe charging
will be described in section 4.)
Seconds after the probe turned on, the Wireless Connection Indicator will be light and blinking
to notice that the probe is ready for a wireless connection from the iPad or iphone.
The probe can be turned off by hold down the button for seconds. When the probe is off, the
indicators will be turned off.
2.4 WIRELESS CONNECTION
When the probe is waiting for a wireless connection as described in previously, launch the
Settings of iPad or iPhone, turn on the Wi-Fi (if not on), Find the SSID of the probe. The SSID is like:
“SS-1 GMBFCA001”, the suffix “GMBFCA001” is a code generated from Serial Number. Connect to
the SSID with the password same as the Serial Number (in lower case). The Serial Number is in the
form like “WSPBFCA001” with the prefix of “WSP”. It can be found on the surface of the probe.
After Wi-Fi is connected, launch the WirelessScan App, after the connection from the app to
the probe is confirmed, the Wireless Connection Indicator on the probe will be light with no
blinking.
Every connection steps are done. The operations of using the system to finish ultrasonography
task will be described in the next section.

7
Section 3 APP OPERATIONS
3.1 ULTRASOUND SCAN
Figure 3-1 Main Screen
1. Transmission Gain +: increase image gain.
2. Transmission Gain -: reduce image gain.
4. Focus: adjust the focus position of the image.
5. Dynamic range: adjust the dynamic range of the image.
5. Frequency: can change the working frequency of the probe.
6. Noise reduction: used to eliminate low-level echoes caused by noise.
7. Noise reduction, image processing
8.Image mode: B mode, B / M mode, Color Doppler mode (COLOR),
Energy Doppler mode (PDI), Pulse Doppler (PW).
9. Patient information management: patient information input.
10.Freeze/ operate: image freeze and thaw.
11.Movie playback: replay after the image freezes.
12.Measurement: distance / area / obstetrical measurement.
13.Note: enter a comment on the image.
14.Puncture: draw a puncture line for puncture guidance.
15. Delete measurements and notes: delete measurement results and notes on images.
16.Save the image: save a single image.
17. Save Image Video: save whole Image Video.
18.Setting: WIFI channel selection to avoid channel blocking.
19. TGC (time gain compensation) the function menu pops up by clicking on the top of the right
"<".
20 BB Dual B mode

8
3.2 ENTER PATIENT INFORMATION
First,click on the top right of the ultrasonic software interface with your finger
Pop-up screen
In ID, enter the name of the patient information bar, click on sex selection, picture mode, and
then click OK, the patient information will be entered, if an input error, you can click again to modify
or create new cases.
3.3 SELECT THE IMAGE MODE
Enter patient information section can select the image mode, select B mode or BM mode, you can
enter different modes, as shown:
B mode:

9
BM mode:
In the BM mode, by clicking with your finger to move here, you can adjust the position of M sample
lines:

10
3.4 MEASUING
Click “Measure” in the B mode freeze state, and then the ten measurement functions of the
screen shown in Picture 3-8 will pop up. Users should select the appropriate measurement function
according to the product probe model, the applicable range and the data to be measured.
Picture 3-9 Measurement function
After selecting the “LENGTH” length measurement function, click on the two points to be
measured in the frozen screen, the measurement trajectory will appear, click the moving point on the
trajectory line (as shown in the middle of Figure 3-7), move the trajectory, and adjust the length. The
size of the real-time measurement data is displayed at the top right of the screen. Among them, GA
(CRL), GA (BPD), GA (GS), and GA (FL) are measured in the same manner.
Select the "AREA/CIRCUMFERENCE" area/circumference measurement function, select the 3
o'clock position to be measured in the frozen screen and click on it. 3 moving points will appear on
the screen, and 3 moving points will automatically form an elliptical trajectory. Click on the moving
point to adjust the measurement position, and the measured data will be displayed in real time on the
upper right of the screen. Among them, GA (HC) and GA (AC) are measured in the same way.
Select the “ANGLE” angle measurement function to measure the angle. You can select the 3

11
o'clock position to be measured in the frozen screen and click it will appear 3 moving points on the
screen. 3 moving points will automatically form an angle. Click the moving point to adjust the
measuring angle. The measured data is displayed in real time on the upper right.
After selecting the “TRACE” track area measurement function, you can measure the irregular
position area of the edge, and draw the edge on the screen with your finger to get the area size.
The final measured data is displayed at the top right of the screen.
Note: Measurement functions GA (CRL), GA (BPD), GA (GS), GA (FL), GA (HC), and GA
(AC) are only available for obstetrics.
The above measurement functions can be fine-tuned using the virtual trackball of the screen.
During the measurement, you can click on the generated measurement point, and the virtual trackball
that appears (as shown in the lower right corner of Figure 3-10) can be fine-tuned according to the
direction of the measurement point.
Note:When measuring other data, such as area, in addition to finger click, the size can also be
adjusted by the virtual scroll ball.

12
Click on the right data○
x,Measurement data can be deleted:
3.5 STORAGE OF IMAGES
When image is showing in image area, Save Image Button (11) can be pressed to save the
image to the album of the iPad.
By pressing the Browse Stored Image Button (12), users can select a stored image and show it
on the image area.
The stored images can be exported with same method as photos exporting using iTunes or
other equivalent methods.
3.6 SETTINGS
If users hold the probe on the right hand, and want to operate the software by the left hand,
the software provides settings to adjust the interface.
Press the settings button(14), settings screen will appear as Figure 3-5 below.

13
Figure 3-2 Settings Screen
Switch ON/OFF the Left Hand Operation to adjust the screen to convenience operators.
When the system is using in an environment where the WiFi channel is crowd, a new channel
can be selected for the probe by pick a channel from the picker and tap Select button. After 2
seconds, please restart the probe to make the new channel available and the user also have to
reconnect the probe with a different SSID.

14
Section 4 MAINTEANCE
4.1 PROBE CHARGING
When battery goes down, it is necessary to recharge the probe. Pull the insertion at the end of
the probe, then connect the USB Charger and USB Cable with the probe to charge the probe as
shown in figure 4-1. When in charging, the battery indicator will be blinking and the grids indicate
the capacity of the battery charged.
Figure 4-1 Charge the Probe
If four grids all light and the indicator not blinking means the battery is fully charged. Unplug
the USB cable and the insertion should be carefully plugged to make the probe able to keep out
water.
4.2 WATERPROOF IPAD
A waterproof bag is provided by local repository. Users can use it to protect the iPad when it is
used in humidity or dirty fields.
4.3 CLEANING AND DISINFECTION
4.3.1 Precaution and warnings
When cleaning and disinfecting:
• Follow the procedures in the order they are described in this guide, without
skipping steps.
• Follow the manufacturer's instructions, recommendations, and guidelines for
cleaners and disinfectants, as well as your regional regulations.
• Check expiry dates, concentration, and efficacy of the chemicals used.
• Wear the appropriate personal protective equipment (PPE), such as eyewear
and gloves, as recommended by the chemical manufacturer.

15
• Repeated use and cleaning over the course of the scanner ’ s life may
deteriorate its cleanliness.
• Using incompatible solutions to clean the scanner may damage its surface.
• Cleaning or disinfecting the scanner while the battery is installed may cause
the battery to short-circuit and overheat, causing an electric shock or burn.
WARNING: During an emergency where the scanner is used to examine multiple
patients in a short period of time, the lack of proper cleaning and disinfecting
between patients may spread infections to other patients and users.
Put on a condom that meets the medical qualification for use, dispose the used
condom in the medical waste recycling box after use, and then disinfect and clean
the probe
4.3.2 Cleaning and Disinfection the probe
1. Thoroughly dry the instrument with a clean, soft cloth before using.
2. To clean the probe, Use a soft cloth dampened with 75%Alcohol to wipe the
Probe until it is thoroughly cleaned.
3. To remove all traces of disinfectant solution, wipe the instrument with a clean
soft cloth dampened in sterile water or potable tap water. Wiping the device three
separate times to remove all residual disinfectant is recommended.
4. Verify that all gel, particulate matter, and bodily fluids have been removed.
5. Dispose the soft cloth and the instrument used to insert the cloth.
4.4 STORAGE
When not in use, it is recommended that the equipment should be put in the case. While
stored,the equipment should be protected from temperature extremes.
4.5TROUBLE SHOOTING
Inspect: check if the probe and the scanner is properly connected.
Fault handling:
Serial number
problem
Solution method
1
No response after pressing the power switch
Check wires and plugs
2
Display on the screen to show the band or
snowflake like interference
1.Check if any other device is
started
2.Check the electric field or
magnetic field in the surrounding
environment.
3
The image area is dark.
1.adjusting brightness
4.6Disposal
*Warning: products should not be discarded at will.
-Battery recycling meets local requirements.
-Recycling of waste electrical and electronic products should comply with local laws
and regulations.

16
WARNING:The user and/or patient should be reported“any serious incident that has occurred
in relation to the device ”to the our company and the competent authority of the Member
State.
Section 5 Safety
The operation safety is the most important concern of the designer . To ensure the safety and
efficiency of the system, the operator should read carefully about this chapter before using the
system.
5.1 Safety Instructions
Read and understand all precautions in this manual before using the system.
Keep this manual with the system at all times. Periodically review the procedures for operation and
safety precautions.
To maintain the performance and safety of the system, electric and mechanical safety inspections for
the system should be performed periodically by professional technicians in less than 6 months.
5.1.1Electric Safety
●The biocompatibility of this product has been verified, in normal circumstances, it will not
bring harm to the operator or patient.

17
●No modification of this equipment is allowed.
●If any operator requests more information such as circuit diagrams, parts list and product
descriptions, for repairs carried out by qualified technical personnel, please contact us.
●
●Please check and replace the battery periodically, please use batteries as power supply when
there is any problem with protective earthing
●Warning: Class I equipment, to avoid the risk of electric shock, the equipment must only be
connected to a supply mains with protective earth.
●
●The video printer should be connected to the cable provided by the manufacturer, otherwise,
there is a danger of electric shock.
●
●Do not pour any fluid onto the ultrasound system surfaces, as fluid seepage into the electrical
circuitry may cause excessive leakage current or system failure. If carelessly pour any water onto the
system, immediately stop using the ultrasound system and contact Service Representative
immediately.
●Only use the probes provided by the manufacturer. Otherwise, the ultrasound system cannot
be performed, and an accident such as a fire may result in the worst case.
●The machine that are not serviced or maintained while in use with the patient.
●
● The outer surface of the portions of transducer assembly which is intended to be
inserted into a PATIENT should be checked to ensure that there are no unintended rough
surfaces, sharp edges or protrusions which may cause harm.
●Please read the instructions and then set and control the acoustic output levels.
5.1.2Mechanical Safety
●Be careful when holding the device, for it is handhold, it may fall.
This manual suits for next models
1
Table of contents
Other Sonostar Scanner manuals
