Notes
Be
careful not to pinch
your
fingers
when
opening
and
closing the battery
:ompartmentcover.Carelesshandlingmaycauseinjury
Checking
batteries
The
POWER lamp
of
this
unit
lights
up
red when the batteries are low.
•
When
the
POWER
lamp lights up red, Sony
recommends
that
you replace the
batteries.
If
the
CHG
lamp lights
up
amber,
the flash can still fire even
when
the
POWER
lamp
is
red. However, charging takes longer
than
usual
•
If
neither the
CHG
lamp
nor
the
POWER
lamp lights up
when
the shoe
POWER
switch
is
set to [ONJ, check
if
the batteries are installed currectly.
If
the balleries are
installed correctly
but
the
lamps
still
do
not
light up, replace
the
batt
eries.
•
If
the POWER lamp goes off
soon
after it lights up, replace the batteries.
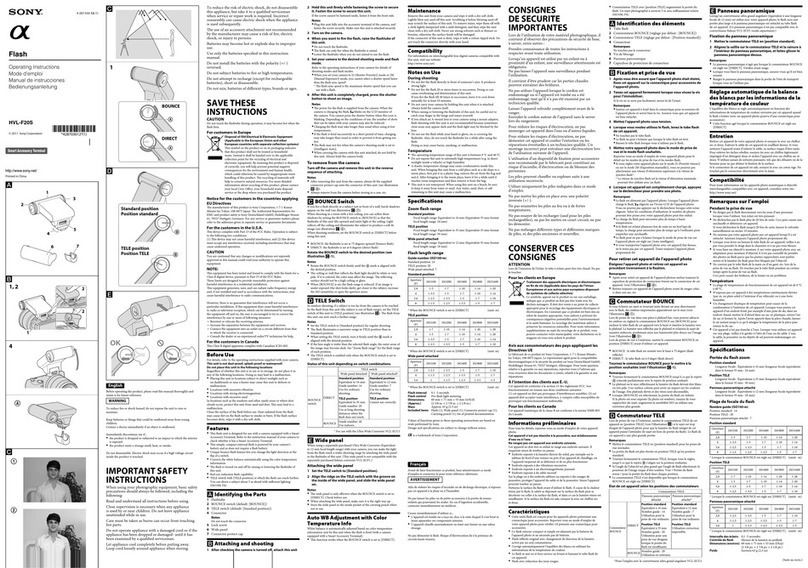
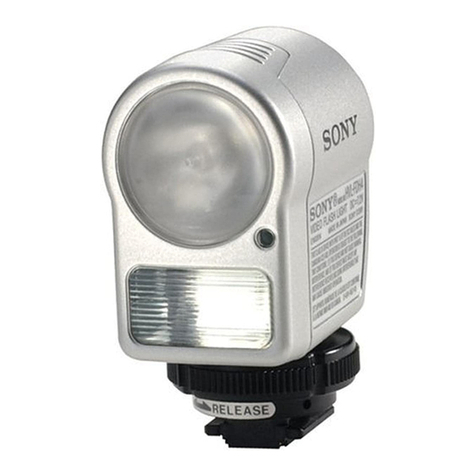
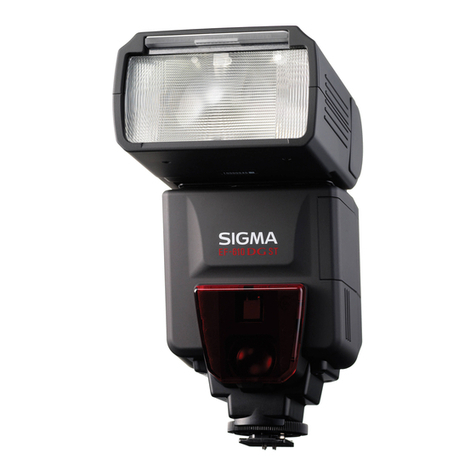
Attaching
this
unit
to
your
camera
and
turning
it
on
(see
illustration
[ill
1Make
sure
that
the
shoe
POWER
switch
of
this
unit
is
set
to
[OFFI.
Ifit
is
not, set it to [OFF]
{See
step 5for
how
to
turn
this unit
on
and
off.)
2Make
sure
the
built-in flash
of
your
camera
is in
the
down
position.
If
your
camera has abuilt-in flash
and
the flash
is
in the up position,
return
it to
the down position
3Slide
the
mounting
foot
of
this
unit
into
the
accessory
shoe
of
your
camera
in
the
direction
of
the
arrow
until it locks.
When
this
unit
is properly attached to the shoe, it automalicallylock
s.
To
remove this unit, press the
mounting-foot
release
button
and
slide the
mounting
foot in the opposite direction to the attaching
procedure
.(see
illustration[!J-3-@)
4Turn
your
camera
on.
STurn
this
unit
on.
When
you flip this
unit
up until it clicks, it
turns
on
and
the
POWER
lamp
lights
up
Toturnthisunitoff,flipitdown.(seeillustration[!J-S-@)
Power
save
Ifyou do not operate
your
camera
or
this
unit
for
more
than
1
minute
after
your
camera has
entered
the power save state, this unit automatically
turns
offto save
power,
and
the POWER lamp
and
CHG
lamp
turn
off.
This unit also enters the
power
save state
when
you set the
POWER
switch
of
your camera to [OFF] {with all Suny digital single lens reflex cameras except the
DSLR-AlOO).
To exit the power saving state,
turn
this
unit
back
on
or
operate
yo
urcamera.
Shooting
1Make
sure
that
your
camera
and
this
unit
are
turned
on.
2
Set
your
camera
to
the
desired
shooting
mode.
Refer to the
operating
instructions
of
your
camera for
shooling
mod
es
When
you set
your
camera to
shutter
speed priority (S)
mode
or
manu
alexposure
(M) mode, you
cannot
select a
shutter
speed faster
than
the flash syn
cspeed*
*Flash sync speed is the
maximum
shutter
speed
that
you can use wit
haflash.
3After
charging
of
this
unit
is
completed,
press
the
shutter
button
to
shoot
a
subject.
When
charging is completed, the
CHG
lamp
of
this
unit
turns
amber.
When
the
proper
exposure can again be
obtained
after shooting, the
CHG
lamp
blinks amber.
Notes
o
Ifyoushootbeforechargingiscompleted,youmaynotbeabletogetenough
lighting
(underexposure).
o
When
using the flash in self-timer shooting. make sure
thatcharg
ing is
completed
before pressing the
shutter
button.
o
When
your
camera
is
in auto flash mode, the flash
may
not
fire
dependi
ngonthe
lighting conditions
Overheat
protection
Overheat protection is afunction for protecting this
unit
from overheating.
If
this
unit
gets
warm
when used in
continuous
flash
mode
or
in a
hot
environment,
flash firing is
automatically disabled.
o
When
overheating
is
detected, the
POWER
lamp blinks in red at
one-second
intervals.
oFlash firing
cannot
be re-enabled until this
unit
cools down.
o
When
this
unit
is
in an overheated state, leave it
without
any operation for
10
minutes to cool
down
mBOUNCE Switch
If
you fire aflash directly at asubject just in front
ofa
wall,
harsh
s
hadowsappearon
the wall
{see
illustration I!]-(j)
When
shooting in a
room
with alow ceiling, you can soften these shadows
by
setting
the BOUNCE switch to [BOUNCE] so
that
the flashtube
of
this
unit
tilts
upward
and
emits light at the ceiling. Light reflects offthe ceiling
and
illuminate
sthesubjectto
produceasoft-litimage{seeillustrationl!]-@).
In
outdoor
shooting, setting the BOUNCE switch to [DIRECT] lets you illuminate a
subject at adistance
that
abuilt-in flash
cannot
reach
oBOUNCE: the flashtube
is
set at
75
degrees
upward
(bounce
flash)
oDIRECT: the flashtube is set at 0degrees {direct tlash)-
Slide
the
BOUNCE
switch
to
the
desired
position
(see illustration
Ii]
-1).
Notes
oMake sure you slide the BOUNCE switch until the A
mark
is aligned with
the
desired posilion mark.
oThe ceiling
or
wall that reflects the flash light should be white
or
very pale.
Ifitis
colored, the color
may
affect the image. The reflecting surface
shou
ld
not
be
ahigh
ceiling
or
glass.
o
When
[BOUNCE] is set. the flash range is reduced. If
an
image is
under
exposed
(the shot looks dark), get closer to the subject, increase the ISO sensitivity
or
open
the aperture more.
II
TELE
Switch
In
outdoor
shooting, ifasubject
is
too far from the
camera
to be rea
chedbytheflash
from this
unit
(the subject
is
out
of
flash range), set the TELE switch
of
this
unit
to
[Tcleposition]{seeillustration~).Theflashfromthisunitcannowreach
afurther
range.
Notes
oSet the TELE switch to [Standard position] for regular shooting.
o
When
setting the TELE switch,
turn
it firmly until the B
mark
is aligned
with
the
desired position.
o
If
the lens angle
is
wider
than
the selected flash angle, the
outer
ar
eas
of
the
image
may
become dark. See
"Zoom
tlash range" for the flash range
of
each position.
oThe
THE
switch is enabled only when the BOUNCE switch is set to IDIRECT].
o
If
this unit is attached to acamera with abuilt-in flash
that
operate
sasanAF
illuminator,
AF
accuracy
may
be greatly reduced in night view
shoo
ling
Wireless Control
1
Connect
this
unit
to
your
camera,
and
set
the
power
switches
of
your
camera,
off-camera flash
and
this
unit
to
[ONI.
2
Set
the
mode
of
your
camera
and
off-cameraflash
as
follows.
Camera:
Set the
mode
to [Wireless].
Refer to the
operaling
instruelions
of
your
camera
for details.
Off-camera flash:
Set the off-camera flash to [Wireless remote mode]
and
the wireless
channel
to
[CHI].
Refer to the
operating
instructions
of
your
off-camera flas
hfordetails.
3
Set
your
camera
and
off-camera flash.
Refer to the
operating
instructions
of
your
off-camera flash
forho
wto
set it.
4Make
sure
the
off-camera flash
and
this
unit
are
fully
charged.
5Fire a
test
flash
to
check
the
off-camera flash.
oThe flash test differs
depending
on
the camera. Refer to
theoperat
inginstructions
of
your
camera.
o
If
your
off-camera flash does
not
fire, change
the
position
ofyourca
mera,off-
camera
flash
and
the subject
and
try atest flash again
6Make
sure
that
this
unit
and
your
off-camera flash
are
charged,
and
press
the
shutter
button
fully
down
to
shoot.
Notes
oThis
unit
cannot
be
used as
an
off-camera flash.
oLighting ratio
control
selling (RATIO)
is
not
available.
Auto WB Adjustment
with
Color
Temperature
Info
White
balance
is
automatically adjusted based
on
colortemperatu
re
information
sent
by this
unit
when
the tlash is fired {with all Sony digital single len
sreflexcameras
except
the
DSLR-AlOO).
oThis function works in TTL flash
mode
using the clip-on
connection
to
your
Maintenance
Remove this
unit
from
your
camera
and
wipe it with a
dry
soft cloth. Lightly blow
any
sand
offthis unit. Scrubbing it before blowing
sand
offmay scratch
the
surface
of
this unit.
To
remove stains, wipe them offwith acloth lightly
dampened
with
amild
detergent,
and
then
wipe
the
unit
clean with a
dry
soft cloth. Never use
strong
solvents
such as
thinner
or
benzine, otherwise the surface finish will be
dam
aged
Compatibility
For
information
on
digital single lens retlex cameras compatible
with
this unit, visit
our
website:
http://www.sony.net/
Notes
on
Use
During
shooting
o
Do
not
fire the flash directly in front
of
some
one's
eyes.
Itproducess
tronglight
oDo
not
fire the flash 20
or
more
times in succession.
Doing
so can cau
seoverheating
and
deterioration
of
this
unit
and
its batteries.
If
you fire the flash acertain
number
of
limes in succession, leave i
tto
cool
down
naturally for at least
10
minutes.
o
Do
not
carry
your
camera by
holding
this
unit
when it is attached. Always
hold
the
camera itself.
o
When
changing the
shoe
POWER
switch to the [OFF] position, be careful
not
to
catch
your
finger in the hinge. It
may
cause injury.
Batteries
oThe displayed battery level
maybe
lower
than
the actual
batterycapa
city
depending
on
the
temperature
and
storage conditions. The displayed level usually becomes
accurate after you use this
unit
afew times.
oThe
output
of
Nickel-metal
hydride
batteries
drops
suddenly
when
the batteries
become low. You may
not
be able to use this
unit
soon
after the
POWER
lamp
turns
red.
oThe frequency
and
number
of
flashes
ofthis
unit
may
he
different from those shown
in
the
specification table even when new batteries are installed, d
ependingontheir
date
of
production.
o
Turn
the
power off
and
wait several
minutes
before removing the batteries.
Be
careful when
touching
the batteries because they
maybe
hot,
dep
ending
on
the
battery type
and
conditions
of
use.
oRemove
and
store the batteries
if
you
do
not
intend
to use this
unit
foralongtime.
Temperature
oThe
operating
temperature
range
of
this
unit
is between
O°Cand40°
C.
o
Do
not
expose this
unit
to extremely high
temperatures
{e.g.
in di
rectsunlight
inside avehicle)
or
high humidity.
o A drastic
temperature
change may cause
condensation
inside this
un
it.
When
bringingthisunitfromacoldplacesuchasaskislopetoawarmplace,
first
put
it in
aplastic bag, remove the'air from the bag
and
seal it. After
bringing
it to the
warm
place, leave it for awhile until it reaches
room
temperature
and
then remove it from
the bag.
oBattery
output
decreases as
temperature
decreases.
When
using in acold
environment,
use new batteries
or
prepare
spare batteries kept
warm
and
use
them
interchangeably with
another
set. The
POWER
lamp
may
temporarily
turn
red in
acold
environment
even
though
the batteries still have
remainingc
apacity.Tfthe
battery
output
becomes low
due
to low temperature, leave the batte
riesindoors
until they reach
room
temperature. The battery
output
will
return
to normal.
oThis
unit
is
not
waterproof.
When
using this
unit
on
abeach, be sure to keep it away
from water
or
sand.
Any
water, sand, dust,
or
salt
remaining
in this
unit
may
cause
amalfunction.
Fran~ais
I.e HVI.-F20AM est
un
flash
con~u
exclusivement
pour
les appareils
photo
numeriquesreflexilobjectifsinterchangeablesSony(appelesci-dessous«l'appareil
photo»).
Avant de faire
fonctionnerceproduit,
lisezattentivementce
mod
ed'emploiet
conservez-le
pour
toute
reference ulterieure
IAVERTISSEMENT I
Ne pas
demonter
Ie
flash.
Risqued'electrocution
lieala
presence de circuits
haute
tension.
CONSIGNES DE SECURITE
IMPORTANTES
Lors de l'utilisation de votre materiel photographique, il convient
d'observer des precautions de securite de base, asavoir, entre
autres :
Prendre connaissance de toutes les instructions arespecter avant
toute utilisation.
Lorsqu'un appareil est utilise par un enfant ou aproximite d'un
enfant, une surveillance attentionnee est obligatoire.
Ne pas laisser I'appareil sans surveillance
pendant
l'utilisation.
11
convient d'etre
prudent
car les parties chaudes peuvent
entrainer des brulures,
Ne pas utiliser l'appareillorsque
Ie
cordon
est endommage
ou
si
l'appareil est tombe
ou
aete endommage, tant qu'il n'a pas ete
examine
par
un
technicien qualifie.
Laisser I'appareil refroidir completement avant de
Ie
ranger.
Enrouler
Ie
cordon
autour de l'appareil sans
Ie
serrer lors
du
rangement.
Pour
reduire les risques d'electrocution, ne pas immerger cet
appareil dans l'eau
ou
d'autres liquides,
Pour
reduire les risques d'electrocution, ne pas
demonter
cet
appareil et confier I'entretien
ou
les reparations eventuelles aun
technicien qualifie,
Un
montage incorrect peut entrainer une
electrocution lors de l'utilisation suivante de l'apparei!.
L'utilisation
d'un
dispositifde fixation
pour
accessoires
non
recommande par
Ie
fabricant peut constituer
un
risque
d'incendie, d'electrocution
ou
de blessure des personnes.
Les
piles peuvent chauffer ou exploser suite aune utilisation
incorrecte,
Utiliser uniquement les piles indiquees dans
ce
mode d'emploi.
Ne pas mettre les piles en place avec une polarite inversee
(+/-).
Ne pas soumettre les piles au feu
ou
11
de fortes temperatures.
Ne pas essayer de les recharger (sauf
pour
les piles rechargeables),
ne pas les mettre en court-circuit, ne pas les demonter.
Ne pas melanger differents types et differentes marques de piles,
ni des piles anciennes et nouvelles.
CONSERVER
CES
CONSIGNES
ATTENTION
Lors
de
I'emission
de
I'eclair,
Ie
tube
aeclairs
peutetretreschaud.
Nepaslatoucher.
Pour les clients en Europe
:a
Traitementdes appareils electriques etelectroniquesen
fin
de
vie
(Applicable dans
les
pays de l'Union Europeenne
et
aux autres
pays europeens disposant de systemes de collecte selective)
•
Cesymbole,apposesurleproduitousursonemballage,indiqueque
ce
produit
ne
do
it pas
etretraite
avec les deehets menagers.
Ildoi
tetre
_
:~:;:i~:;S
~~~~:~;~~:~:;:.
;r::?:S:~r;~~~::
rceec;~~J:i~::te~~~::~~
rebutdemaniereappropriee,vousaiderezapn'venirlesconsequences
negativespotentiellespourl'environnementetlasantehumaine.Le
recyclagedesmateriauxaideraa
preserver lesressourcesnaturelles.
Pour
toute
information
supplementaireausujetdu
recyclagedece
produit,vouspouvezcontactervotremunicipalite,votredechetterieou
Ie
magasinouvousavezacheteIe
produit.
Avis
aux
consommateurs
des pays
appliquant
les Directives
UE
Le
fabricant de ce
produit
est Sony Corporation, 1-7-1 Konan
Minato-ku
Tokyo,
10S-007S)apon.Lereprcsentantagrccpourlacompatihilitccleetromagnctiqueet
la securite
du
produit
est Sony Deutschland
GmbH,
Hedelfinger Strasse 61, 70327
Stuttgart, Allemagne.
Pour
toute
question
relativealagaranti
eouauxreparations,
reportez-vousa
l'adresseque
voustrouverezdanslesdocumenlsci-joints,
relatifs
ala
garantieetauxreparations.
Informations preliminaires
l'our
tous les details, reportez-vous au
mode
d'emploi
de votre
app
areilphoto.
Cet
appareil n'est pas etanche
ala
poussiere, aux eclaboussures d'eau ou a
I'eau.
Ne
rangez cet appareil aux endroits suivants
Cetappareilnedoitetreniutilisenirangeauxendroitssuivants.JI
risqueraitsinon
de
tomberenpanne.
