This
lens is
designed
for
Sonya.
cameras.
This
lens was developed
jointly
by Carl
Zeiss
and
Sony
COl"JX'lnuion
and
designed for
Sonya.
mount
cameras.
This
lens is
produced
according
to the
strict
standards
and
quality
assumnce
system
of
Carl Zeiss.
WARNING
To reduce fire
or
shock hazard.
do
not
expose
the
unil to rain
or
moisture.
Do
nOI
directly look
at
the sun through this lens.
Doing
so
might
hann
your
eyes
or
cause
loss
of
eyesight.
Keep the lens out
of
reach
of
small children.
There
is
danger
of
accident
or
injury.
For
the
customers
in
the
U.S.A.
This
device complies with Part
15
of
the FCC Rules. Operation
is
subject to
the following
two
conditions:
(1)
This
device
may not
cause
harmful interference. and
(2)
this device must
accept
any inlerference received. including interference thai
may
cause
undesired operation.
CAUTION
You
are
cautioned
that any
changes
or
modific:uions not expressly approved
in
thi~
manual
could
void
your
authority
to
operate
this
equipment.
NOTE:
This
equipment has
been
tested and found to
comply
with the limits for a
Class
Bdigital device. pursuant to
Pm1
15
of
the
FCC
Rules.
These
limits
are designed to provide reasonable prolection againsl harmful interference
in
aresidential installation.
This
equipment
generales. uses. and
can
radiate
radio frequency energy and. if not installed and used
in
accordance
with the
instructions. may
cause
harmful interference to radio
communications.
However. there
is
no
guarantee
that interference will not
occur
in
aparticular
inslallation.
If
this
equipment
docs
cause
harmful interference to radio
or
television reception. which
can
be
determined
by turning the
equipment
off
and on. thc user is
encouraged
to try
10
correct the interference by
one
or
more
of
the following measures:
-Reorient
or
relocate the recei\'ing antenna.
-ItlCrcase
th~
sc:paration between
the
equipmem and receiver.
-Connt:cl the equipment into an outlt:t on acircuit different from that
to
which the
receiver
is
connected.
-Consult the dealer
or
an experienced radiolTV technician for help.
For
the
customers
in
Canada
This
Class
Bdigital appar.lIus
complies
wilh
Canadian
ICES-OOJ.
For
the
customers
in
Europe
RDisposal of Old Electrical &Electronic Equipment
(Applicable in the European Union and other
European countries with separate collection
systems)
This
symbol
on the product
or
on
its
packaging
indicates Ihat
_Ihis
product
shall not
be
treated as household waste. Instead it
shall be
handed
over to the
applicable
collection point for Ihe
recycling
of
electrical
and
electronic
equipment.
By
ensuring
this product is
disposed
of
correclly. you will help prevent potential negative
consequences
for the environment and
human
health, which
could
olhern'ise
be
caused
by
inappropriate waste
handling
of
this product.
The
recycling
of
matcrials
will help to
conseryc
natural resources. For more detailed
information
about recycling
of
this product.
please
conlact
your
local
Civic
Office.
your
household waSte disposal
service
or
the
shop
where
you
purchased
the
product.
Notice
for
the
customers
in
the
countries
applying
EU
Directives
The
manufacturer
of
this produl·t
is
SOllY
Corporation.
1-7-1
Konan Millalo-
ku Tokyo. 108-0075 Japan. The Authorized Representative for
EMC
and
product safely
is
Sony
Deutschland
GmbH.
Hedclfinger
Strasse
61. 70327
Stutlgar1. Germany. For any service
or
guarantee matters please refer to Ihe
addresses
given in separate
service
or
guarantee documents.
Notes
on
use
•Do not leave the lens
in
direcl sunlight. Ifsunlighl
is
focused onto anearby
object. it may cause afire. Ifcircum
...
tances necessitate \caving the lens
in
direcl
sunlighl. be sure to attach the lens cap.
o
Be
careful
not
to subjcct the lens to mechanical shock while attaching
it.
oAlways place the lens caps on the lens when storing.
•Do
nOt
keep the lens
in
avery humid place for along period
of
time to prevenl
mold.
oHold both
Ihe
camera and lens. when you carry the camera with the lens
allached.
•Do
not
hold the camera by the lens part extended for zooming.
oDo not touch the lens contacts.
If
dirt. etc
..
gets un the lens contacts,
it
may
interfere or prC\'ent the sending and receiving
of
signals between the lens and the
camera.
rc~ulting
in
operational malfunction.
Precaution
for
flash
use
With certain
of
lens/flash
combinations.
the lens may par1ially block. the light
of
the flash. resulling
in
a
shadow
at the
boltom
of
the picture.
When
using a
buill-in
camera
nash. make sure
10
remove the lens hood.
Vignetting
When
you use lens. Ihe
comers
of
the screen
b..."'Come
darker
than
the
center.
To
reduce this
phenomena
(called vignclting),
close
the aper1ure by Ito 2
SlOpS.
Condensation
If your lens
is
brought directly from a(:old prace to awarm place.
condensation
may
appear
on the lens. To avoid this. place the lens
in
aplastic
bag
or
somelhing
similar.
When
the air temperature inside the bag
reaches
the surrounding lemperalure, t:lke the lens out.
Cleaning
the
lens
oDo not touch the surface
of
the lens direclly.
oIf the lens gets din)'. brush offdusl with a
len:.
blower and wipe with asoft.
dean
doth
(Cleaning Cloth KK-CA (optional)
is
recommended).
oDo not
u.~e
any organic solvent. "uch as thinner
or
benzine. to
dean
the lens
or
Ihe
camer3 cone
..
m
Names
of
parts
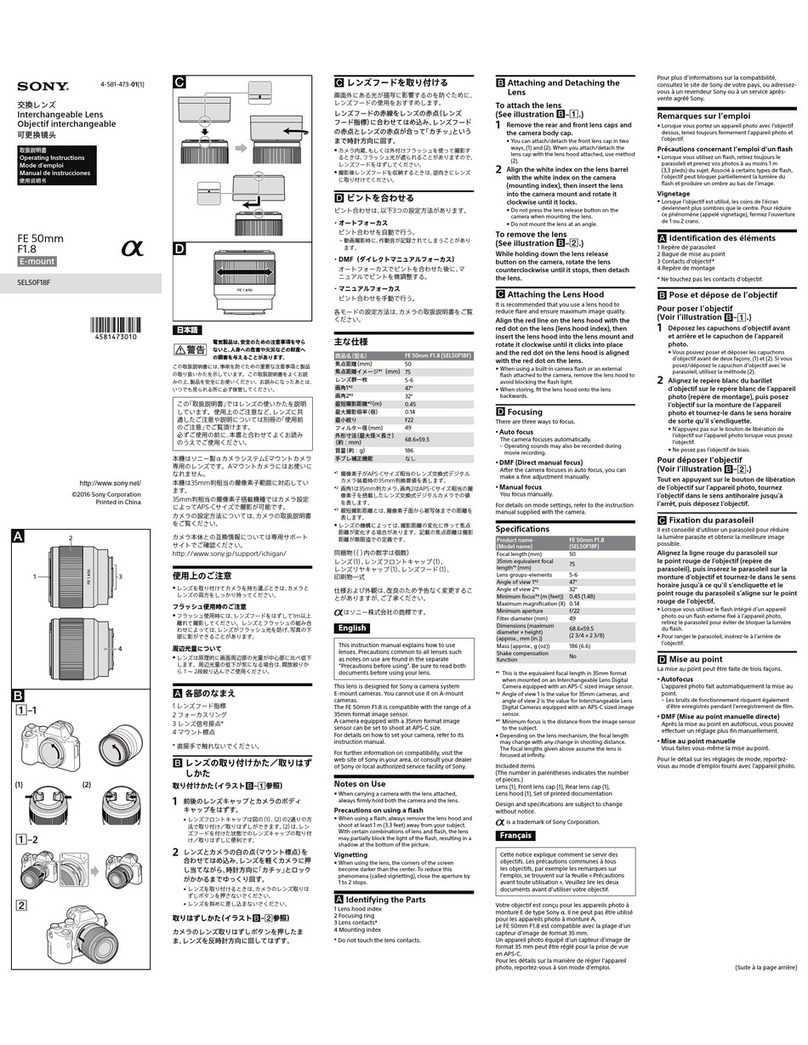
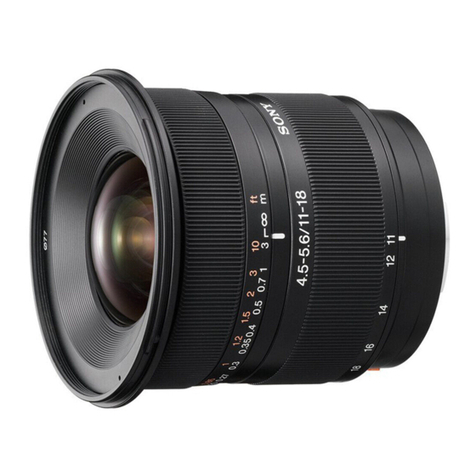
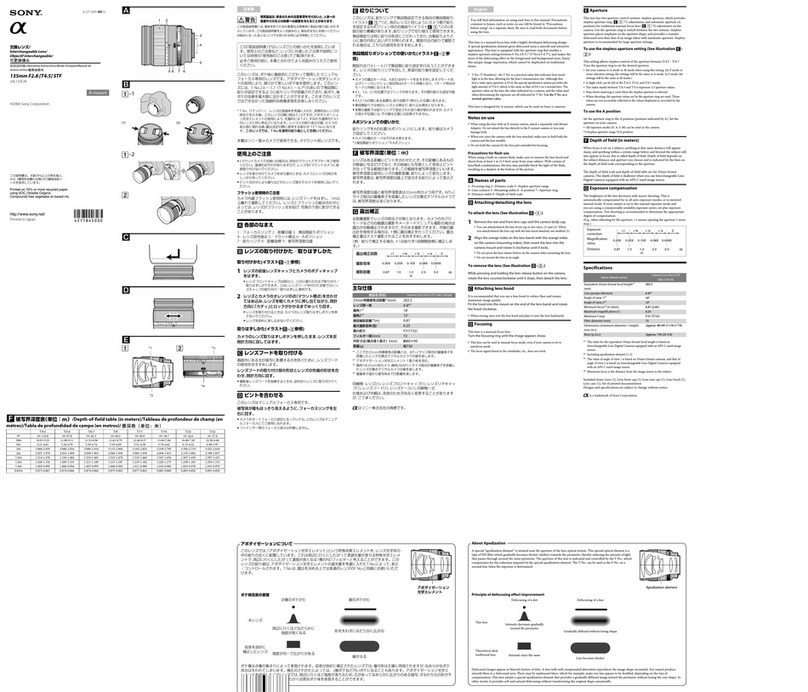
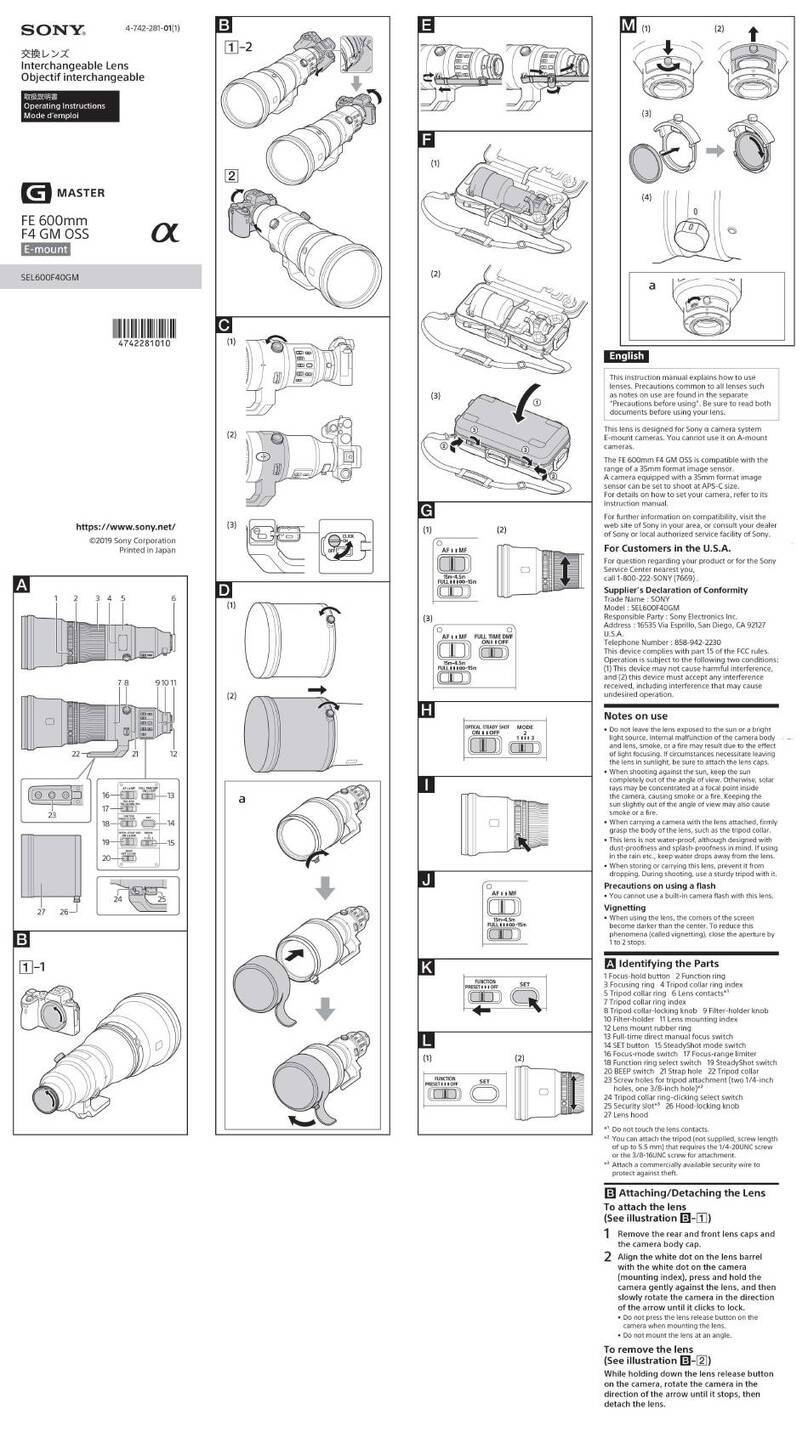
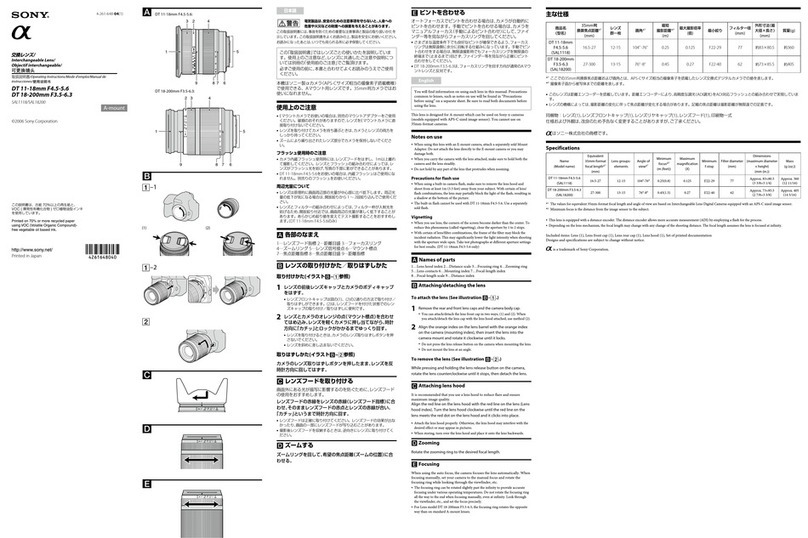
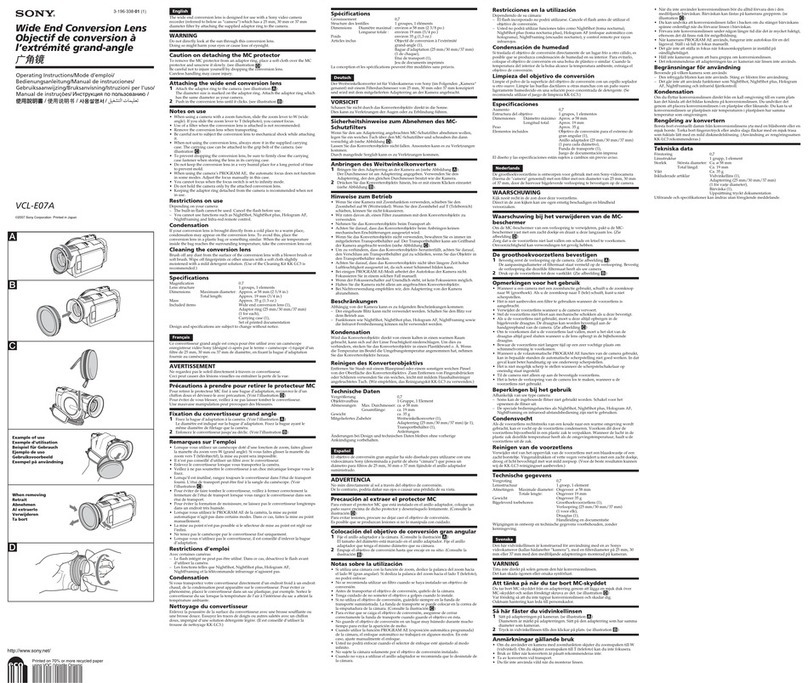
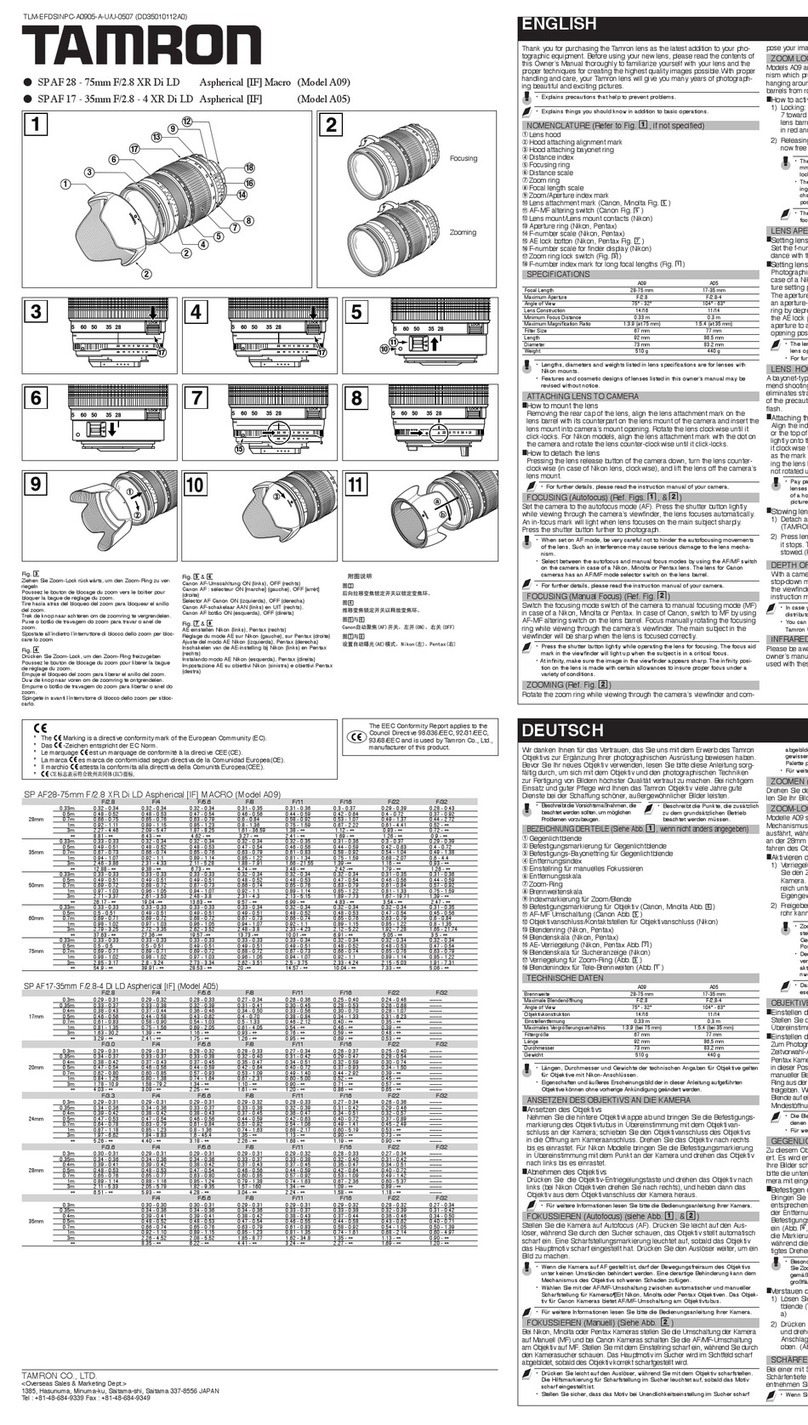
1···Focusing ring 2···Distance index 3···Zooming ring 4···Lens
contacts
5···Mounting
index 6···Distance scale 7···Focus-hold button
8···Focus-mode
swilch
m
Attaching/detaching
the
lens
To
attach the lens (See illustration
IEI-m.)
1Remove the rear and front lens caps and the camera body
cap.
o
You
can attach/detach the front lens cap
in
two ways,
(I)
and (2). When
yOll
allach/detach the lens cap with the lens hood atlached. usc method (2).
2Align the orange index on the lens barrel with the orange
index on the camera (mounting index), then insert the lens
into the camera mount and rotate
it
clockwise until it locks.
•Do not press Ihe lens release
bUllon
on the camera when mounting the lens.
•
Do
nUl
mount the lens at an angle.
To
remove the lens (See illustration
IEI-~.)
While pressing and holding the lens release button on the
camera, rotate the lens counterclockwise until
it
stops, then
detach the lens.
l!J
Attaching
lens
hood
It
is
recommended
that you use alens
hood
to reduce flare and
ensure
maximum
image
quality.
Align the red line on the lens hood with the red dot on the lens.
Turn the hood clockwise until the red dot on the hood meets the
red dot on the lens and
it
clicks into place.
oWhen using abuilt-in camera flash. make sure to remove the tens hood to avoid
blockage
of
the flash light.
oIf am3rking (red line. red dot, etc.)
is
provided. 3uach the lens hood properly.
Otherwisc. the lens hood may interfere with the desired
elTcct
or
may appear
in
pictures.
oWhen storing. tum ovcr the lens hood and place
it
onto the lens backwards.
I!]
Zooming
Rotate the zooming ring to the desired focal length.
lEI
Focusing
To
switch
AF
(auto focus)/MF (manual focus)
Thc
focus
mode
can
be
switched
between
AF
and
MF
on the lens.
For
AF
photogr;lphy. both the
camera
and lens
should
be set
10
AF.
For
MF
photogmphy. either
or
both Ihe
camera
or
Icns
should
be
selto
ME
To
set
the
focus
mode
on
the
lens
(See
illustration
~~[].)
Slide the focus·mode switch to the appropriate mode, AF or
ME
o
In
MF.
tum
the focusing ring to adjust the focus while looking through the
viewfinder (See illustration
~-[gJ).
The focus signal
in
the viewfinder indicates
lhe current condition
of
the focus.
To
use
acamera
equipped
with
an AF/MF
control
button
•Press the AF/MFcOfltrol button 10 switch AF to MF when both the camera and
lens are set loAF.
•Press the AF/MFcontrol bullon 10 switch MF to AF when the camera
is
set to
MF and the lens
is
set loAF.
Direct manual focus (DMF)
Rotate the focusing ring to set
correct
DMF
when
the
focus is locked in
AF-A (automatic
auto
focus)
or
AF-S (single-shot auto focus).
oDMF
is
not available
in
the following cases:
-When the image
is
out
of
focus
-When AF-C (continuous auto focus)
is
selected
-When the focus
is
confinned for the second photo during continuous rccording
inAF·A
Shooting at infinity in
MF
The
focusing
mechanism
turns slightly past infinity to provide
accurate
focusing
under
various operating temperntures.
Always
confirm the
image
sharpness
through
the viewfinder. especially when
the
lens is focused
near
infinilY·
Focus-hold button (See illustration
~--G!J.)
While
the focus-hold bulton
is
pressed.
auto
focus function is
suspended
and
the focus is fixed for shooting.
oThe function
of
the focus-hold bulton can be changed on cameras with custom
function capuhility. Refer to the camera manuals for details.
This
lens is
designed
for
Sonya.
cameras.
This
lens was developed
jointly
by Carl
Zeiss
and
Sony
COl"JX'lnuion
and
designed for
Sonya.
mount
cameras.
This
lens is
produced
according
to the
strict
standards
and
quality
assumnce
system
of
Carl Zeiss.
WARNING
To reduce fire
or
shock hazard.
do
not
expose
the
unil to rain
or
moisture.
Do
nOI
directly look
at
the sun through this lens.
Doing
so
might
hann
your
eyes
or
cause
loss
of
eyesight.
Keep the lens out
of
reach
of
small children.
There
is
danger
of
accident
or
injury.
For
the
customers
in
the
U.S.A.
This
device complies with Part
15
of
the FCC Rules. Operation
is
subject to
the following
two
conditions:
(1)
This
device
may not
cause
harmful interference. and
(2)
this device must
accept
any inlerference received. including interference thai
may
cause
undesired operation.
CAUTION
You
are
cautioned
that any
changes
or
modific:uions not expressly approved
in
thi~
manual
could
void
your
authority
to
operate
this
equipment.
NOTE:
This
equipment has
been
tested and found to
comply
with the limits for a
Class
Bdigital device. pursuant to
Pm1
15
of
the
FCC
Rules.
These
limits
are designed to provide reasonable prolection againsl harmful interference
in
aresidential installation.
This
equipment
generales. uses. and
can
radiate
radio frequency energy and. if not installed and used
in
accordance
with the
instructions. may
cause
harmful interference to radio
communications.
However. there
is
no
guarantee
that interference will not
occur
in
aparticular
inslallation.
If
this
equipment
docs
cause
harmful interference to radio
or
television reception. which
can
be
determined
by turning the
equipment
off
and on. thc user is
encouraged
to try
10
correct the interference by
one
or
more
of
the following measures:
-Reorient
or
relocate the recei\'ing antenna.
-ItlCrcase
th~
sc:paration between
the
equipmem and receiver.
-Connt:cl the equipment into an outlt:t on acircuit different from that
to
which the
receiver
is
connected.
-Consult the dealer
or
an experienced radiolTV technician for help.
For
the
customers
in
Canada
This
Class
Bdigital appar.lIus
complies
wilh
Canadian
ICES-OOJ.
For
the
customers
in
Europe
RDisposal of Old Electrical &Electronic Equipment
(Applicable in the European Union and other
European countries with separate collection
systems)
This
symbol
on the product
or
on
its
packaging
indicates Ihat
_Ihis
product
shall not
be
treated as household waste. Instead it
shall be
handed
over to the
applicable
collection point for Ihe
recycling
of
electrical
and
electronic
equipment.
By
ensuring
this product is
disposed
of
correclly. you will help prevent potential negative
consequences
for the environment and
human
health, which
could
olhern'ise
be
caused
by
inappropriate waste
handling
of
this product.
The
recycling
of
matcrials
will help to
conseryc
natural resources. For more detailed
information
about recycling
of
this product.
please
conlact
your
local
Civic
Office.
your
household waSte disposal
service
or
the
shop
where
you
purchased
the
product.
Notice
for
the
customers
in
the
countries
applying
EU
Directives
The
manufacturer
of
this produl·t
is
SOllY
Corporation.
1-7-1
Konan Millalo-
ku Tokyo. 108-0075 Japan. The Authorized Representative for
EMC
and
product safely
is
Sony
Deutschland
GmbH.
Hedclfinger
Strasse
61. 70327
Stutlgar1. Germany. For any service
or
guarantee matters please refer to Ihe
addresses
given in separate
service
or
guarantee documents.
Notes
on
use
•Do not leave the lens
in
direcl sunlight. Ifsunlighl
is
focused onto anearby
object. it may cause afire. Ifcircum
...
tances necessitate \caving the lens
in
direcl
sunlighl. be sure to attach the lens cap.
o
Be
careful
not
to subjcct the lens to mechanical shock while attaching
it.
oAlways place the lens caps on the lens when storing.
•Do
nOt
keep the lens
in
avery humid place for along period
of
time to prevenl
mold.
oHold both
Ihe
camera and lens. when you carry the camera with the lens
allached.
•Do
not
hold the camera by the lens part extended for zooming.
oDo not touch the lens contacts.
If
dirt. etc
..
gets un the lens contacts,
it
may
interfere or prC\'ent the sending and receiving
of
signals between the lens and the
camera.
rc~ulting
in
operational malfunction.
Precaution
for
flash
use
With certain
of
lens/flash
combinations.
the lens may par1ially block. the light
of
the flash. resulling
in
a
shadow
at the
boltom
of
the picture.
When
using a
buill-in
camera
nash. make sure
10
remove the lens hood.
Vignetting
When
you use lens. Ihe
comers
of
the screen
b..."'Come
darker
than
the
center.
To
reduce this
phenomena
(called vignclting),
close
the aper1ure by Ito 2
SlOpS.
Condensation
If your lens
is
brought directly from a(:old prace to awarm place.
condensation
may
appear
on the lens. To avoid this. place the lens
in
aplastic
bag
or
somelhing
similar.
When
the air temperature inside the bag
reaches
the surrounding lemperalure, t:lke the lens out.
Cleaning
the
lens
oDo not touch the surface
of
the lens direclly.
oIf the lens gets din)'. brush offdusl with a
len:.
blower and wipe with asoft.
dean
doth
(Cleaning Cloth KK-CA (optional)
is
recommended).
oDo not
u.~e
any organic solvent.
,"uch
as thinner
or
benzine. to
dean
the lens
or
Ihe
camer3 cone
..
m
Names
of
parts
1···Focusing ring 2···Distance index 3···Zooming ring 4···Lens
contacts
5···Mounting
index 6···Distance scale 7···Focus-hold button
8···Focus-mode
swilch
m
Attaching/detaching
the
lens
To
attach the lens (See illustration
IEI-m.)
1Remove the rear and front lens caps and the camera body
cap.
o
You
can attach/detach the front lens cap
in
two ways,
(I)
and (2). When
yOll
allach/detach the lens cap with the lens hood atlached. use method (2).
2Align the orange index on the lens barrel with the orange
index on the camera (mounting index), then insert the lens
into the camera mount and rotate
it
clockwise until it locks.
•Do not press Ihe lens release
bUllon
on the camera when mounting the lens.
•
Do
nUl
mount the lens at an angle.
To
remove the lens (See illustration
IEI-~.)
While pressing and holding the lens release button on the
camera, rotate the lens counterclockwise until
it
stops, then
detach the lens.
l!J
Attaching
lens
hood
It
is
recommended
that you use alens
hood
to reduce flare and
ensure
maximum
image
quality.
Align the red line on the lens hood with the red dot on the lens.
Turn the hood clockwise until the red dot on the hood meets the
red dot on the lens and
it
clicks into place.
oWhen using abuilt-in camera flash. make sure to remove the tens hood to avoid
blockage
of
the flash light.
oIf am3rking (red line. red dot, etc.)
is
provided. 3uach the lens hood properly.
Otherwise. the lens hood may interfere with the desired
elTcct
or
may appear
in
pictures.
oWhen storing. tum ovcr the lens hood and place
it
onto the lens backwards.
I!]
Zooming
Rotate the zooming ring to the desired focal length.
lEI
Focusing
To
switch
AF
(auto focus)/MF (manual focus)
Thc
focus
mode
can
be
switched
between
AF
and
MF
on the lens.
For
AF
photogr;lphy. both the
camera
and lens
should
be set
10
AF.
For
MF
photogmphy. either
or
both Ihe
camera
or
Icns
should
be
selto
ME
To
set
the
focus
mode
on
the
lens
(See
illustration
~~[].)
Slide the focus·mode switch to the appropriate mode, AF or
ME
o
In
MF.
tum
the focusing ring to adjust the focus while looking through the
viewfinder (See illustration
~-[gJ).
The focus signal
in
the viewfinder indicates
lhe current condition
of
the focus.
To
use
acamera
equipped
with
an AF/MF
control
button
•Press the AF/MFcOfltrol button 10 switch AF to MF when both the camera and
lens are set loAF.
•Press the AF/MFcontrol bullon 10 switch MF to AF when the camera
is
set to
MF and the lens
is
set loAF.
Direct manual focus (DMF)
Rotate the focusing ring to set
correct
DMF
when
the
focus is locked in
AF-A (automatic
auto
focus)
or
AF-S (single-shot auto focus).
oDMF
is
not available
in
the following cases:
-When the image
is
out
of
focus
-When AF-C (continuous auto focus)
is
selected
-When the focus
is
confinned for the second photo during continuous rccording
inAF·A
Shooting at infinity in
MF
The
focusing
mechanism
turns slightly past infinity to provide
accurate
focusing
under
various operating temperntures.
Always
confirm the
image
sharpness
through
the viewfinder. especially when
the
lens is focused
near
infinily.
Focus-hold button (See illustration
~--G!J.)
While
the focus-hold bulton
is
pressed.
auto
focus function is
suspended
and
the focus is fixed for shooting.
oThe function
of
the focus-hold bulton can be changed on cameras with custom
function capahility. Refer to the camera manuals for details.
