ltmJftBI
This
instruction
manual
explains
how
to
use
lenses. Precautions
common
to
all lenses such
as
notes
on
use are
found
in
the
separate
"Precautions before using".
Be
sure
to
read
both
documents
before
using
your
lens.
This lens is
designed
for
Sony a camera sys
tem
E-mount
cameras. You
cannot
use
it
on
A-mount
cameras.
For
further
information
on
compatibility,
visit
the
web
site
of
Sony in
your
area,
or
consult
your
dealer
of
Sony
or
local authorized service facility
of
Sony.
For Customers in the U.S.A.
For
question
regarding
your
product
or
for
the
Sony
Service Center nearest you,
call 1-800-222-SONY (7669).
Supplier's Declaration
of
Conformity
Trade
Name
:
SONY
Model:
SEL11F18
Responsible
Party:
Sony Electronics Inc.
Address : 16535 Via Esprillo, San Diego,
CA
92127
U.S.A
.
Telephone
Number:
858-942-2230
This device complies
with
part
15
of
the
FCC
rules.
Operation
is subject
to
the
following
two
conditions:
(1)
This device
may
not
cause
harmful
interference,
and
(2)
this
device
must
accept
any
interference
received,
including
interference
that
may
cause
undesired operation.
Notes
on
Use
•
Do
not leave the lens exposed to the
sun
or
a bright
light source. Internal malfunction
of
the camera
body and lens, smoke, or a fire may result due
to
the
effect
of
light focusing.
If
circumstances necessitate
leaving the lens in sunlight, be sure to attach the lens
caps. When shooting against the sun, keep the sun
completely
out
of
the angle
of
view
.
• When carrying a camera with the lens attached,
always firmly hold both the camera and the lens.
• This lens
is
not water-proof, although designed with
dust-proofness and splash-proofness in mind.
If
using
in the rain etc., keep water drops away from the lens.
•
If
the lens alone
is
shaken or
if
a camera with the lens
attached
is
shaken while the camera
is
turned off,
an
internal component
of
the lens may rattle. This,
however, does not indicate a malfunction.
In
addition, while you carry around the lens, your
movement may cause the inte
rn
al
lens groups
to
shake. This, however, does
not
affect the performan
ce
of
the lens groups.
Precautions on using a flash
• With certain combinations
of
le
ns
and flash, the lens
may partially block the light
of
the flash, resulting in
a shadow at the bottom
of
the picture.
In
such a
case,
adjust the focal length or the shooting distance before
shooting.
Vignetting
• When using the lens, the corners
of
the screen
become darker than the center.
To
reduce this
phenomena (called vignetting), close the aperture by
1
to
2 stops.
1 to L stops.
F,.i.1
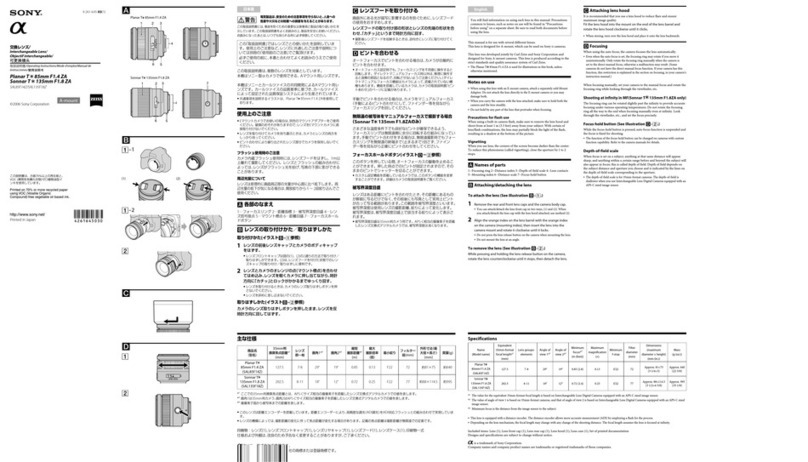
Identifying
the
Parts
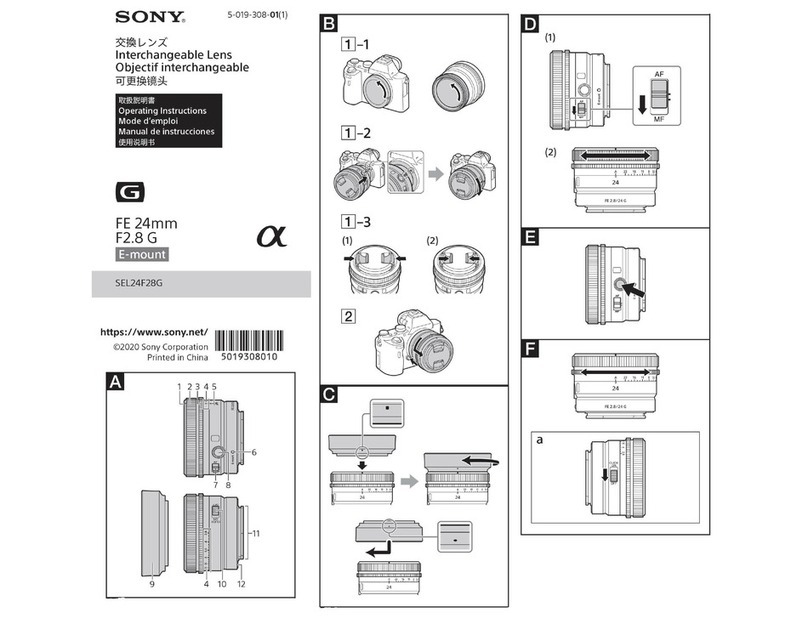
1 Lens
hood
2 Lens
hood
index
3 Focus
ing
ring
4 Lens contacts*
5 Lens
mount
rubber
ring
6 Focus
hold
button
7
Mounting
index
8 Focus
mode
switch
*
Do
not touch the lens contacts.
[El
Attaching
and
Detaching
the
Lens
To
attach the lens
(See illustration ffl-[I].}
1 Remove
the
rear lens cap and the camera
body cap.
2
Align
the
white
index
on
the
lens barrel
with the white index on the camera
(mounting index), then insert the lens
into the camera mount and rotate it
clockwise until it locks.
•
Do
not press t
he
lens release button
on
the
camera when mounting the len
s.
•
Do
not
mount
the
le
ns
at
an
angle.
3 Remove
the
front lens cap.
•
You
can
attach/detach the front lens
cap
in
two
ways,
(1)
and (
2).
When you attach/detach the
lens cap with the lens hood attached, use method
(2).
To
detach
the
lens
1 Attach the front lens cap.
2
While
holding
down
the
lens release
button
on
the
camera, rotate
the
lens
counterclockwise
until
it
stops,
then
detach
the
lens. (See
illustration
l;J-[2].)
[!I
Attaching
the
Lens
Hood
It is
recommended
that
you
use a lens
hood
to
reduce flare
and
ensure
maximum
image
quality.
Align the red line on
the
lens hood with the
red line
on
the
lens (lens hood index), then
insert the lens hood into the lens mount and
rotate it clockwise until it
clicks
into place
and the red
dot
on
the
lens hood
is
aligned
with the red line
on
the
lens.
•
If
the lens hood
is
not rotated until
it
cli
cks
into
place, there
is
a
poss
ibility that a shadow appears on
captured images or the lens hood falls o
ff
.
•
If
the flash light is partially blocked by t he lens hood,
a shadow
ma
y appear
at
the bottom
of
captured
images.
In
such a
case,
remove the lens hood.
• When storing, f
it
the lens hood onto the lens
backwards.
I!]
Focusing
•
The
focus mode switch
of
this lens does n
ot
function
with some camera models.
For
further information on compatibility, visit the web
I!]
Focusing
•
The
focus mode switch
of
this lens does n
ot
function
with some camera models.
For
further information on compatibility, visit the web
site
of
Sony in yo
ur
area, or consult your dealer
of
Sony or lo
ca
l authorized service facility
of
Son
y.
To
switch
AF
(auto focus}/
MF (manual focus}
The focus
mode
can be
switched
betwee
n AF
and
MF
on
the
lens.
For
AF
photograph
y,
both
the
camera and lens
should
be
set
to
AF.
For MF
photography
,
either
or
both
the
camera
or
lens
should
be
set
to
M
F.
To set
the
focus
mode
on
the
lens
Slide the focus mode switch to the
appropriate mode,
AF
or MF
(1).
• Refer to the camera manuals to set the focus mode
of
the camera.
•
In
MF
, turn the focusing ring to adjust the focus
(2)
while looking through the viewfinder, etc.
To use a camera equipped with an
AF/MF
control button
•
By
pressi ng the
AF
/
MF
co
ntrol button during
AF
operation, you can temporarily switch to
MF.
•
Pre
ss
ing the AF/
MF
control bu
tt
on during
MF
operation lets you temporarily switch
to
AF
if
the lens
is
set to
AF
an
d the camera to M
F.
61
Using Focus Hold Button
•
The
focus hold
button
of
this lens does not function
with some came
ra
models.
For
fur
ther information on compatibility, visit the web
site of
Son
y in your area, or consult you r dealer of
Sony or local authorized servi
ce
f
ac
ility
of
Sony.
Press
the
focus
hold
button
in AF t o cancel
AF.
The
focu
s is fixed
and
you
can release
th
e s
hutter
on
the
fixed focus. Release
the
focus
hold
button
wh
ile
pressing
the
shutter
button
halfway
to
start
AF
again.
Specifications
Product name E
11mm
F1.8
(Model name)
(SEL11F18)
Fo
cal length (mm) 11
35mm equivalent
fo
ca
l
16.5
length*1 (
mm
)
Len
s groups-elements 1
1-
12
Angle
of
view*2 104°
Minimum focu
s*
3 (m (feet
))
Auto focus 0.15 (0.5)
Manual focus 0.12 (0.4)
Maximum magnification
(X)
Auto foc
us
0.13
Manual focus 0.20
Minimum aperture f/16
Filter diameter (mm)
55
Dimensions (maximum 66 X
57.5
diameter x height) (2 5/ 8 X 2
3/8)
(a
pprox.,
mm
(in.
))
Mass
(appro
x.,
g (oz))
181
(6.4)
Stead
yS
hot
No
*1
Th
is is the equivalent focal length in 35mm format
when mounted on an Interc
ha
ngeable
Lens
Digital
Camera equipped with
an
APS-C
sized image sensor.
*2 Angle
of
view
is
the
va
lue
fo
r
In
te
rc
hangeable
Le
ns
Dig
ital
Came
r
as
equipped with an
APS-C
sized image
sensor.
*3 Mini
mum
foc
us
is
the distance f rom the image
sensor to the subject.
•
De
pending on the lens me
cha
nism, the focal lengt h
may change with any change in sh
oot
ing distance.
The
fo
ca
l lengths given above
as
sume t
he
lens is
focu
sed
at infinity.
Included
items
(The n
umber
in
parenthese
s
ind
i
ca
te
s
the
number
of
pieces.)
Lens
(1)
, Front le
ns
cap
(1),
Rear lens
ca
p
(1)
,
Lens h
oo
d (1
),
Set
of
printed
docum
en
tation
Design
and
specifications are subject
to
change
without
not
i
ce.
CX.
is
a
trademark
of
Sony
Group
Corporation.


