manuals.online logo
Brands
  1. Home
  2. •
  3. Brands
  4. •
  5. Sony
  6. •
  7. CD Player
  8. •
  9. Sony CDP-C321 User manual

Sony CDP-C321 User manual

Other Sony CD Player manuals

Sony CDP-CX270 - 200 Disc Cd Changer User manual

Sony

Sony CDP-CX270 - 200 Disc Cd Changer User manual

Sony CDP-M33 User manual

Sony

Sony CDP-M33 User manual

Sony CDX-T69 User manual

Sony

Sony CDX-T69 User manual

Sony CFD G505 - Xplod Boombox User manual

Sony

Sony CFD G505 - Xplod Boombox User manual

Sony CDP-CX230 - Compact Disc Changer User manual

Sony

Sony CDP-CX230 - Compact Disc Changer User manual

Sony CDX-C7000X - Fm/am Compact Disc Player User manual

Sony

Sony CDX-C7000X - Fm/am Compact Disc Player User manual

Sony CD Walkman D-CJ500 User manual

Sony

Sony CD Walkman D-CJ500 User manual

Sony CDP-M205 User manual

Sony

Sony CDP-M205 User manual

Sony CD Walkman D-EJ100 User manual

Sony

Sony CD Walkman D-EJ100 User manual

Sony CDP-70 User manual

Sony

Sony CDP-70 User manual

Sony CDP-CE525 - Compact Disc Player User manual

Sony

Sony CDP-CE525 - Compact Disc Player User manual

Sony D-E700 User manual

Sony

Sony D-E700 User manual

Sony BDP-S1 Manual Addendum: Audio Codec Information (firmware ver 2.0 or... User manual

Sony

Sony BDP-S1 Manual Addendum: Audio Codec Information (firmware ver 2.0 or... User manual

Sony CDX-M8805X Operating Instructions (English, Espanol,... Product guide

Sony

Sony CDX-M8805X Operating Instructions (English, Espanol,... Product guide

Sony CDX-GT590UI User manual

Sony

Sony CDX-GT590UI User manual

Sony Walkman D-EJ250 User manual

Sony

Sony Walkman D-EJ250 User manual

Sony CD Walkman D-EJ885 User manual

Sony

Sony CD Walkman D-EJ885 User manual

Sony CDP-970 User manual

Sony

Sony CDP-970 User manual

Sony DVX-100S Product guide

Sony

Sony DVX-100S Product guide

Sony Discman D-170AN User manual

Sony

Sony Discman D-170AN User manual

Sony CDX-GT30RN User manual

Sony

Sony CDX-GT30RN User manual

Sony CDX-G3050UV User manual

Sony

Sony CDX-G3050UV User manual

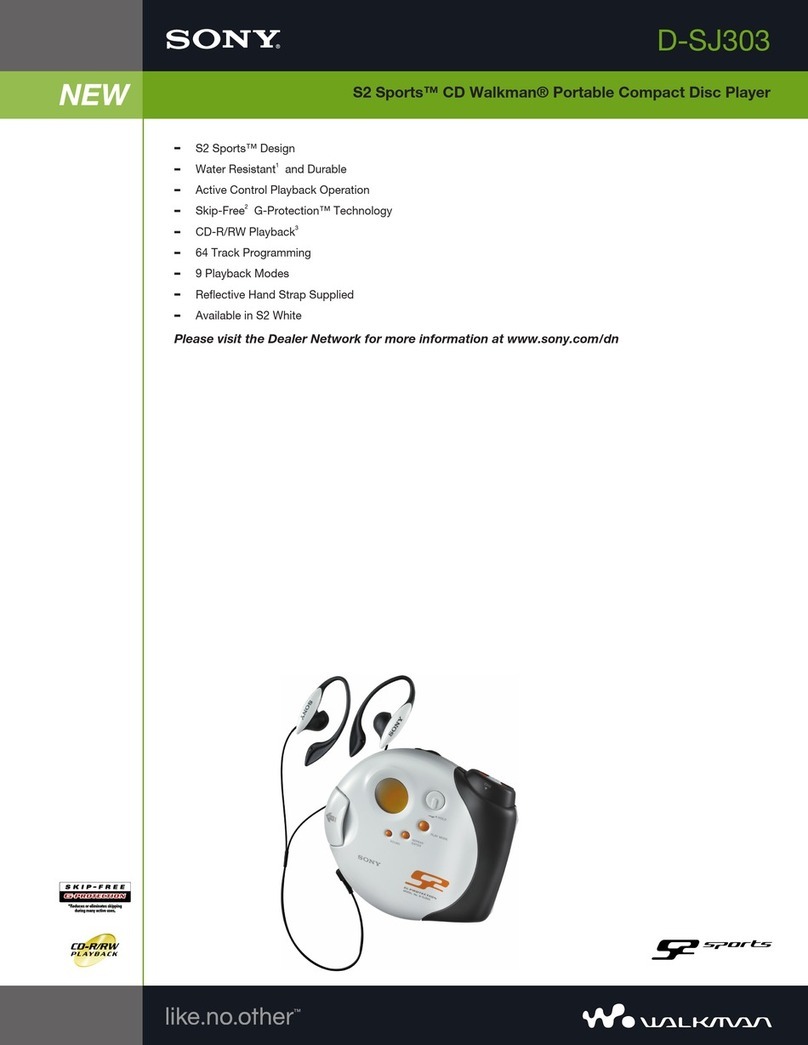
Sony D-SJ303 User manual

Sony

Sony D-SJ303 User manual

Sony CDP-C313M User manual

Sony

Sony CDP-C313M User manual

Popular CD Player manuals by other brands

Arcam CD23 Handbook

Arcam

Arcam CD23 Handbook

Sanyo MCD-Z1F Service manual

Sanyo

Sanyo MCD-Z1F Service manual

JVC RC-ST3SL instructions

JVC

JVC RC-ST3SL instructions

Technics SL-P9066 operating instructions

Technics

Technics SL-P9066 operating instructions

Marantz HD-CD1 quick start guide

Marantz

Marantz HD-CD1 quick start guide

Philips AZ1140 Instrukcja obs?ugi

Philips

Philips AZ1140 Instrukcja obs?ugi

Alpine 7909 owner's manual

Alpine

Alpine 7909 owner's manual

JVC CH-X350 instructions

JVC

JVC CH-X350 instructions

RCA RP-7923 instruction manual

RCA

RCA RP-7923 instruction manual

Pioneer DEH-P3550MP XM Operation manual

Pioneer

Pioneer DEH-P3550MP XM Operation manual

Philips Shockproof AX2102 brochure

Philips

Philips Shockproof AX2102 brochure

Philips CD582 user manual

Philips

Philips CD582 user manual

Philips AZ 6821 operating manual

Philips

Philips AZ 6821 operating manual

Lasonic MSU-2020 user manual

Lasonic

Lasonic MSU-2020 user manual

Denon DCD-1420 Service manual

Denon

Denon DCD-1420 Service manual

Panasonic SJ-MR100 operating instructions

Panasonic

Panasonic SJ-MR100 operating instructions

Onkyo DX-7210 instruction manual

Onkyo

Onkyo DX-7210 instruction manual

Cambridge Audio SONATA CD30 manual 

Cambridge Audio

Cambridge Audio SONATA CD30 manual 

manuals.online logo
manuals.online logoBrands
  • About & Mission
  • Contact us
  • Privacy Policy
  • Terms and Conditions

Copyright 2025 Manuals.Online. All Rights Reserved.

SONY
Compact
Disc
Player
Operating
Instructions
iste
CDP-C321
©
1992
by
Sony
Corporation
Owner’s
Record
The
model
and
serial
numbers
are
located
at
the
rear.
Record
these
numbers
in
the
spaces
provided
below.
Refer
to
these
numbers
whenever
you
call
upon
your
Sony
dealer
regarding
this
product.
Modei
No.
CDP-C321
Serial
No.
To
prevent
fire
or
shock
hazard,
do
not
expose
the
unit
to
rain
or
moisture.
CAUTION
RISK
OF
ELECTRIC
SHOCK
00
NOT
OPEN
CAUTION
TO
REDUCE
THE
RISK
OF
ELECTRIC
SHOCK,
00
NOT
REMOVE
COVER
(OR
BACK).
NO
USER-SERVICEABLE
PARTS
INSIDE.
REFER
SERVICING
TO
QUALIFIED
SERVICE
PERSONNEL.
This
symbol
is
intended
to
alert
the
user
to
the
presence
of
uninsulated
“‘dangerous
voltage”
within
the
product's
enclosure
that
may
be
of
sufficient
magnitude
to
constitute
a
risk
of
electric
shock
to
persons.
This
symbol
is
intended
to
alert
the
user
to
the
presence
of
important
operating
and
maintenance
(servicing)
instructions
in
the
literature
accompanying
the
appliance.
INFORMATION
This
equipment
has
been
tested
and
found
to
comply
with
the
limits
for
a
Class
B
digital
device,
pursuant
to
Part
15
of
the
FCC
Rules.
These
limits
are
designed
to
provide
reasonable
protection
against
harmful
interference
in
a
residential
installation.
This
equipment
generates,
uses,
and
can
radiate
radio
frequency
energy
and,
if
not
installed
and
used
in
accordance
with
the
instructions,
may
cause
harmful
interference
to
radio
communications.
However,
there
is
no
guarantee
that
interference
will
not
occur
in
a
particular
installation.
If
this
equipment
does
cause
harmful
interference
to
radio
or
television
reception,
which
can
be
determined
by
turning
the
equipment
off
and
on,
the
user
is
encouraged
to
try
to
correct
the
interference
by
one
or
more
of
the
following
measures:
~
Reorient
or
relocate
the
receiving
antenna.
~
Increase
the
separation
between
the
equipment
and
receiver.
~
Connect
the
equipment
into
an
outlet
on
a
circuit
different
from
that
to
which
the
receiver
is
connected.
~
Consult
the
dealer
or
an
experienced
radio/TV
technician
for
help.
You
are
cautioned
that
any
changes
or
modifications
not
expressly
approved
in
this
manual
could
void
your
authority
to
operate
this
equipment.
For
the
customers
in
Canada
CAUTION:
TO
PREVENT
ELECTRIC
SHOCK,
DO
NOT
USE
THIS
POLARIZED
AC
PLUG
WITH
AN
EXTENSION
CORD,
RECEPTACLE
OR
OTHER
OUTLET UNLESS
THE
BLADES
CAN
BE
FULLY
INSERTED
TO
PREVENT
BLADE
EXPOSURE.
THIS
APPARATUS
COMPLIES
WITH
THE
CLASS
B
LIMITS
FOR
RADIO
NOISE
EMISSIONS
SET
OUT
IN
RADIO
INTERFERENCE
REGULATIONS.
Table
of
Contents
Tahdgelelereadiela
Playing
a
disc
—~
CONtiNUOUS
PlAY
.......-.ccccccrscccserecsosesereree
7
Information
display
...........s.sssrorsessrsscecssesessseesessssrsssnsers
Selecting
a
desired
disc
2.0...
sescscsssssssresseesseseses
Locating
a
particular
selection
Locating
a
particular
point
in
a
selection
................00
9
Playing
in
a
random
order
-
Shuffle
play
................0..
10
To
play
only
the
desired
discs
in
a
random
order
....
10
Playing
repeatedly
—-
Repeat
play
.......c.ccccccsccrscsscseseeee
14
Playing
in
a
desired
order
=
Program
play
........s000.
12
Designating
the
total
playing
time
-
Time
edit
...........
14
Tips
on
editing
tapes
............... scsivententsens
Scvcesesesets
ctedstevsese
16
Fading
out
after
a
desired
duration
-
Time
fade
......
16
Locating
the
loudest
portion
of
the
disc
m=
PEAK.
SOBICW
:
sicssvsssscessssseccscsasosacecsssesnsdennssssonsusoeadeesenss
16
Maintenance
........cccscrccscreresccsscererersoees
aereeceseceseoes
cere
Cleaning
the
cabinet
.............
sasdesedsacdsvscivusesaste
Cleaning
dISCS
...........csoresssssesssrerserseeses
susteasedasesesiee
es
SPeEclhfiCAtions.
.u......ccccccccsscercccesscseccescrccessereresseresorcesererescceece
WF
Troubleshooting
Quide
..........c.cccccccccserccescscseserererecesecccees
18
This
unit
is
equipped
with
5
disc
trays
which
allow
you
to
choose
from
a
large
number
and
wide
variety
of
selections.
Any
disc
at
any
time
can
be
played
using
the
DISC
1
to
5
buttons.
Enjoy
listening
in
various
playing
modes
You
can
select
the
playing
modes
among
the
following:
Continuous
play
~
The
entire
disc(s)
is
played
(page
7)
once.
Shuffle
play
(page
10)
§—-
Selections
are
played
in
a
random
order.
Repeat
play
(page
11)
|
—-
Single
selection
or
disc(s)
are
played
repeatedly.
Program
play
(page
12)
-
Selections
are
played
in
your
desired
order.
Ed
our
own
tapes
¢
You
can
confirm
the
total
playing
time
while
choosing
the
selections
to
be
programmed.
-
Program
play
(page
12)
¢
The
player
can
program
selections
automatically
to
fit
in
a
desired
duration.
—
Time
edit
(page
14)
¢
You
can
stop
the
play,
fading
out
at
the
desired
time.
-
Time
fade
(page
16)
¢
The
loudest
portion
of
the
disc
will
be
determined
and
played
repeatedly.
-
Peak
search
(page
16)
-to-see
displa
The
selection
number,
the
playing
time,
the
remaining
time
are
displayed
by
pressing
the
TIME
button.
And
also
playing
modes
like
repeat,
shuffle,
program
are
displayed
in
the
display
window.
(page
8)
Note
on
the
Transit
Key
The
transit
key
on
the
bottom
exterior
of
the
unit
protects
the
optical
system
against
shock
during
transportation.
Before
operating
the
CD
player,
be
sure
to
remove
the
key
by
following
the
instructions
on
the
label,
and
store
it
in
a
safe
place.
When
transporting
the
unit,
replace
the
key
in
its
original
hole
and
lock
it
in
place.
ad
a-tor-1Un
ele)
ars)
Taksyeciitchateya
On
safety
¢
Operate
the
unit
only
on
120
V
AC,
60
Hz.
©
Should
any
liquid
or
solid
object
fall
into
the
cabinet.
Unplug
the
unit
and
have
it
checked
by
qualified
personnel
before
operating
it
any
further.
e
Unplug
the
unit
from
the
wail
outlet
if
it
will
not
be
used
for
a
long
time.
To
disconnect
the
cord,
pull
it
out
by
grasping
the
plug.
Never
pull
the
cord
itself.
¢
As
the
laser
beam
used
in
this
compact
disc
player
is
harmful
to
the
eyes,
do
not
attempt
to
disassemble
the
cabinet.
Refer
servicing
to
qualified
personnel!
only.
On
operation
When
the
unit
is
not
used,
turn
the
power
off,
to
conserve
energy
and
to
extend
the
useful
life
of
your
unit.
For
detailed
safety
precautions,
see
the
leaflet
“IMPORTANT
SAFEGUARDS”.
(Model
for
USA)
If
you
have
any
questions
or
problems
concerning
your
unit,
please
contact
you
nearest
Sony
dealer.
laa
FeYed
ale
mm
Moluramelalns
¢
Place
the
unit
in
a
location
with
adequate
air
circulation
to
prevent
internal
heat
buildup
in
the
unit.
¢
Do
not
place
the
unit
on
a
soft
surface,
such
as
a
rug
that
would
block
the
ventilation
holes
on
the
bottom.
¢
Do
not
install
the
unit.
~
near
heat
sources
such
as
radiators
or
air
ducts.
-
in
a
place
subject
to
direct
sunlight,
excessive
dust,
mechanical
vibration
or
shock.
Not
this
way.
On
moisture
condensation
If
the
unit
is
brought
directly
from
a
cold
to
a
warm
tocation,
or
is
placed
in
a
very
damp
room,
moisture
may
condense
on
the
lens
inside
the
unit.
Should
this
occur,
the
player
will
not
operate.
In
this
case,
remove
the
disc
and
leave
the
player
turned
on
for
about
an
hour
until
the
moisture
evaporates.
Ofelalal=zerslelars
For
Correct
Connections
©
Turn
off
the
power
of
each
unit
before
making
¢
Leave
a
little
slack
in
the
connecting
cord
to
allow
for
connections.
inadvertent
shock
and
vibration.
*
Connect
the
AC
power
cord
last.
¢
Cord
plugs
and
jacks
are
color
coded:
Red
plugs
and
¢
Be
sure
to
insert
the
plugs
firmly
into
the
jacks.
Loose
jacks
are
for
the
right
channel!
(R)
and
white
ones
for
the
connection
may
cause
hum
and
noise.
left
channel
(L).
a
Komm
Orolalal-xorancom-lam-Vanleliti(sys
Speaker
system
m>
To
AC
outlet
=>
To
wail
outlet
|Mofer-hilolamel
Mm
Oxelajige)
i=
Front
Panel
[19]
[18}[47)
L16} 115)
Refer
to
the
pages
indicated
in
(_
)
for
details.
[1
]POWER
switch
(page
7)
[2
|DISC
1-5
buttons
(page
7)
|
3
|REPEAT
button
(page
11)
|
4
|
TIME
button
(page
8)
|
5
|Display
window
{6
|EDIT/TIME
FADE
button
(page
14)
[7
|®
(play)
button
(page
7)
|
8
88
(pause)
button
(page
7)
|
9
|
(stop)
button
(page
7)
[10]
OPEN/CLOSE
button
(page
7)
*
AMS
is
the
abbreviation
of
Automatic
Music
Sensor.
oor
SKIP
button
(page
7)
[12]
<4<4/%
(manual
search)
buttons
(page
9)
113]I<4<4/PP1
(AMS*)
buttons
(page
9)
Disc
tray
(page
7)
[15|PEAK
SEARCH
button
(page
16)
[16]
PROGRAM
button
(page
12)
SHUFFLE
button
(page
10)
[18]
CONTINUE
button
(page
7)
|
19|Remote
sensor
Playing
a
Disc
st)
fold
-Mmolthalare
m=
Me|
[emmm
CeldaMmola
mm
cat
=Mrclanle}ibd(
dg
and
set
the
input
selector
to
the
CD
player
-
Continuous
Play
To
play
more
than
one
disc,
place
up
to
4
more
discs
in
the
tray.
Choose
whether
to
play
one
disc
(1
DISC)
or
all
discs
(ALL
DISCS).
CONTINUE
&
ODOO®
[fy
Q
5
When
the
playback
of
all
selections
of
a
disc
has
been
finished,
the
circle
on
the
tray
number
goes
off.
Selection
number
Elapsed
playing
time
position.
To
stop
play
To
stop
for
a
moment
during
play,
press
9.
Press
&
or
§ll
to
resume
play.
To
stop
play,
press
Hl.
To
stop
play
and
open
the
tray,
press
&.
To
start
playing
from
the
immediate
beginning
of
a
selection.
Press
If
in
the
stop
mode.
The
unit
enters
the
pause
mode
at
the
immediate
beginning
of
the
selection.
Press
®
or
Bf
to
start
playing
the
selection
from
the
immediate
beginning.
This
function
is
convenient
when
recording,
as
it
eliminates
the
seconds
prior
to
the
start
of
selections.
You
cannot
use
this
function
in
the
program
play
mode.
Caution
on
adjusting
volume
Do
not
turn
up
the
volume
while
listening
to
a
portion
with
very
low
level
inputs
or
no
audio
signals.
If
you
do
the
speakers
may
be
damaged
when
a
peak
level
portion
is
played.
Note
The
tray
number
of
an
empty
tray
will
be
displayed
until
the
empty
tray
number
is
set
to
play.
Once
it
is
recognized
as
empty,
it
will
disappear.
Notes
on
handling
discs
*
To
keep
the
disc
clean,
handle
the
disc
by
its
edge.
Do
not
touch
the
surface.
¢
Do
not
stick
paper
or
tape
on
the
disc.
¢
Do
not
expose
the
disc
to
direct
sunlight
or
heat
sources
such
as
hot
air
ducts,
or
leave
it
in
a
car
parked
in
direct
sunlight
as
temperature
may
rise
considerably.
¢
After
playing,
store
the
disc
in
its
case.
To
play
an
8
cm
(3-inch)
CD
Place
it
on
the
inner
circle
of
the
tray.
If
the
disc
is
provided
with
an
adaptor,
first
remove
it.
Do
not
put
a
normal
CD
(12
cm/5-inch)
on
top
of
an
8
cm
CD.
What
Is
this
indication?
REE,
Irom
fii
“tof
wth
This
indication
appears
when
there
is
no
disc
at
all
in
the
tray.
Playing
a
DISc
-
Continuous
Play
The
circle
shows
that
the
disc
which
the
playback
has
not
been
finished
yet,
is
loaded.
Music
calendar
&OODO®
|.
=o
OO
ahissd
FE
|
Ee
[ad
Total
playing
time
Shows
the
disc
Total
number
of
the
number
to
be
played
selection
in
the
disc
back
or
being
played
back
Information
Display
When
the
disc
tray
is
closed
by
pressing
&,
the
total
number
of
selections
and
the
total
playing
time
of
the
disc
to
be
played
are
displayed
for
a
few
seconds.
{f
you
press
TIME
during
stop,
the
total
number
of
selections
and
the
total
playing
time
of
the
disc
to
be
played
can
be
displayed.
Each
time
you
press
TIME
during
play,
the
display
changes
to
give
you
the
following
information.
Elapsed
time
in
a
selection
(automatically
displayed
when
play
begins)
Remaining
time
in
the
selection
“.
-,-
-”
indication
will
appear
in
the
display
window
instead
of
the
actual
time,
if
a
selection
numbered
21
or
higher
is
selected.
@
Remaining
time
of
the
disc
Notes
*
Total
remaining
time
is
only
available
during
continuous
mode.
It
will
not
be
displayed
by
pressing
the
TIME
button
during
program
or
shuffle
mode.
¢
Total
remaining
time
will
be
displayed,
if
time
fade
is
set
during
program
or
shuffle
mode.
Selecting
a
Desired
Disc
By
using
the
DISC
1
to
5
buttons
or
the
DISC
SKIP
button
during
play,
you
can
locate
the
beginning
of
any
disc.
To
select
a
particular
disc
Press
the
corresponding
DISC
1
to
5
button.
To
move
to
the
disc
tray
Press
DISC
SKIP
button.
next
to
the
current
one
Locating
a
Particular
Selection
Locating
a
selection
in
sequence
(Automatic
Music
Sensor)
You
can
locate
the
beginning
of
a
selection
on
the
disc
being
played.
To
locate
the
beginning
of
Press
i
once.
the
selection
being
played
To
locate
the
beginning
of
Press
PP
once.
the
next
selection
Continue
to
press
until
the
selection
you
want
is
located.
Locating
a
Particular
Point
in
a
Selection
Locating
a
point
in
sequence
(Manual
Search)
You
can
locate
a
particular
point
during
playback
by
monitoring
the
high-speed
sound.
To
go
back
at
high
speed
Keep
<¢4
pressed.
To
go
ahead
at
high
speed
|
Keep
>
pressed.
Release
the
button
when
you
reach
the
point
you
want.
To
locate
at
higher
speed
Press
<4<f
or
BP
in
the
pause
mode.
Search
speed
will
increase
three
times,
but
there
will
be
no
sound.
Find
the
desired
point
by
watching
the
number
in
the
display.
Playing
in
a
Random
Order
-
Shuffle
Play
1
4
10
Press
&
to
open
the
disc
tray.
Place
a
disc
with
the
label
side
up.
To
play
more
than
one
disc,
press
DISC
SKIP
to
turn
the
disc
tra
and
place
up
to
5
discs.
After
placing
discs,
press
&
to
close
the
disc
tray.
Press
>
to
start
playback.
am
You
can
have
the
selections
(up
to
99)
played
in
a
random
order.
The
unit
will
play
all
the
discs
or
just
one
disc
you
desire.
Once
a
selection
is
played,
it
will
not
be
played
again
until
the
random
order
is
completed.
To
stop
playing
Press
@.
To
cancel
shuffle
play
Press
CONTINUE
and
return
to
the
continuous
playing
mode.
To
change
from
program
or
continuous
play
to
shuffle
play
Press
SHUFFLE
during
program
or
continuous
play.
The
program
mode
will
be
cleared
and
shuffle
play
will
begin
from
the
current
selection
being
played.
What
is
this
indication?
i
=;
This
indication
appears
while
the
player
is
“shuffling”
i
a)
the
selections.
To
Play
only
the
Desired
Disc
in
a
=F
latokelasme@lacl=a
1
Press
SHUFFLE
to
set
to
the
1
DISC
mode.
2
Select
the
desired
disc
number
with
the
DISC
1
to
5
buttons.
The
unit
starts
playback
automatically.
To
cancel
a
disc
which
you
have
selected
Press
the
DISC
1-5
buttons
to
be
canceled.
A
circle
will
disappear
around
the
selected
disc
number.
To
put
back
all
discs
which
you
have
defeted,
press
@
during
stop
mode.
Note
During
shuffle
play
in
ALL
DISCS
mode,
DISC
1-5,
MUSIC
SCAN,
EDIT/TIME
FADE,
and
PEAK
SEARCH
buttons
do
not
function.