Sony Ipela NSR-S10 User manual
Other Sony DVR manuals

Sony
Sony SVR-3000 - Digital Network Recorder User manual

Sony
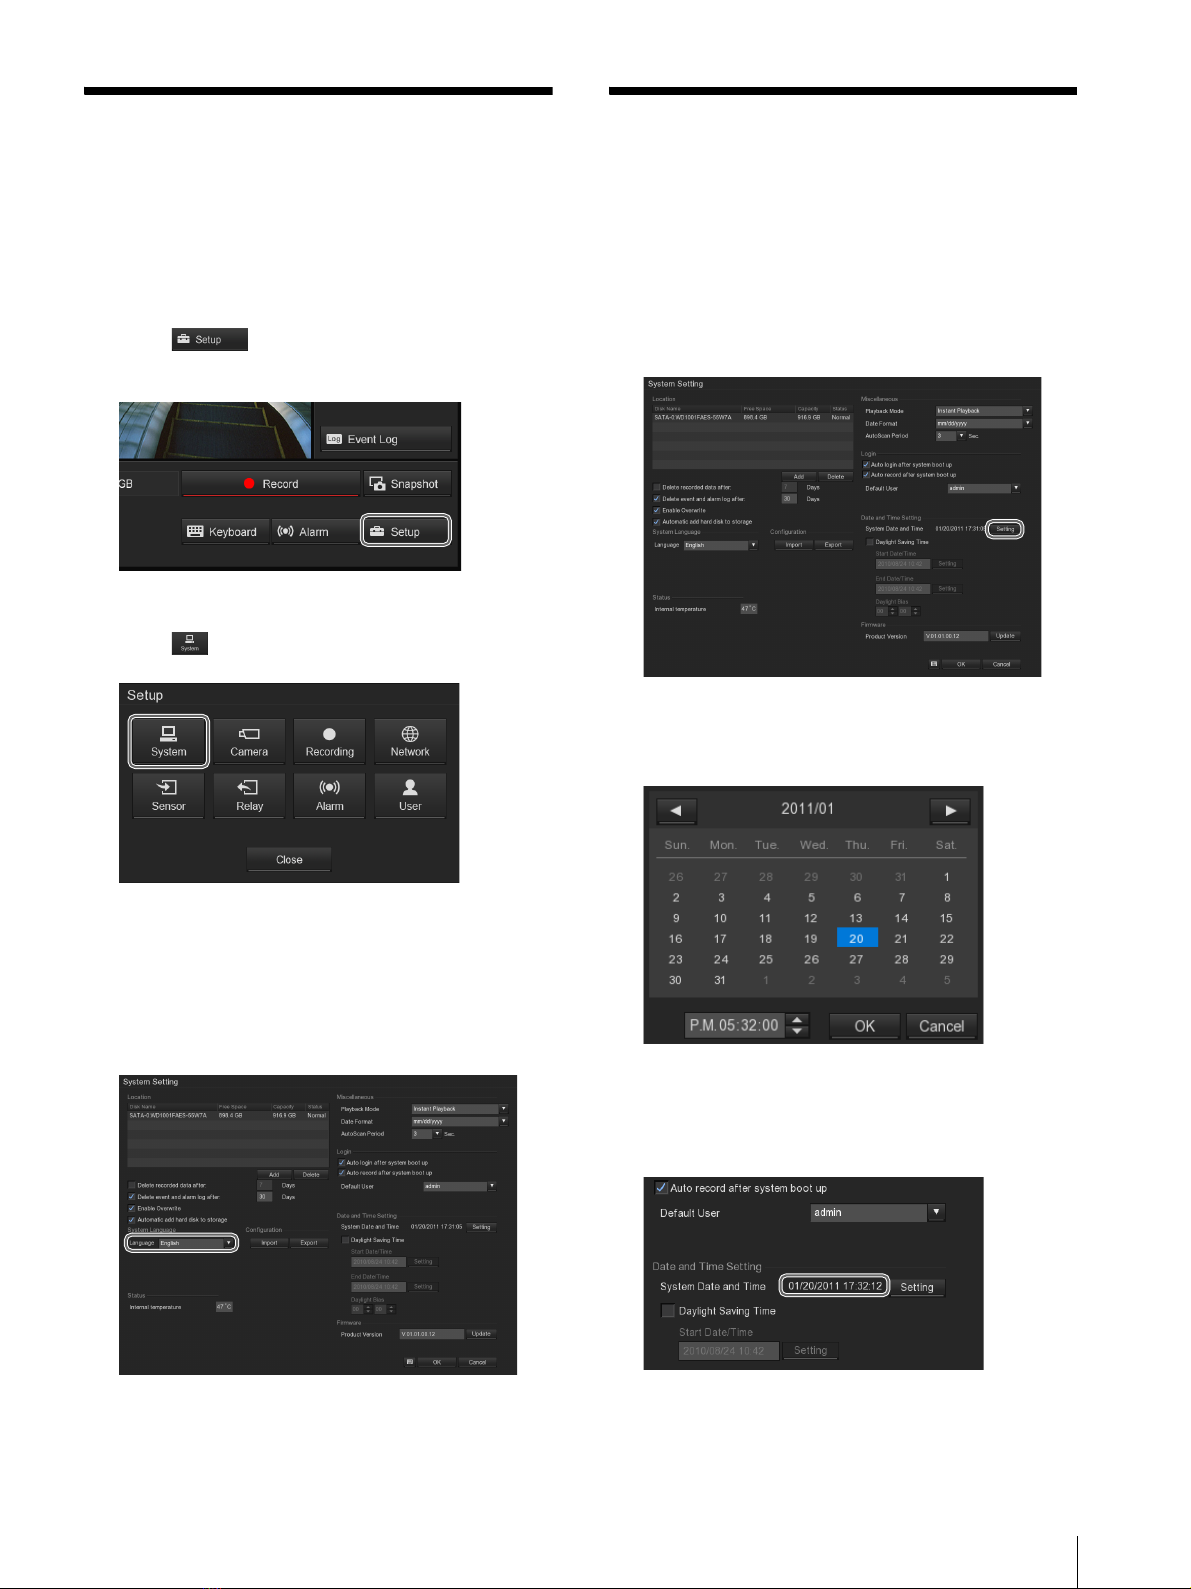
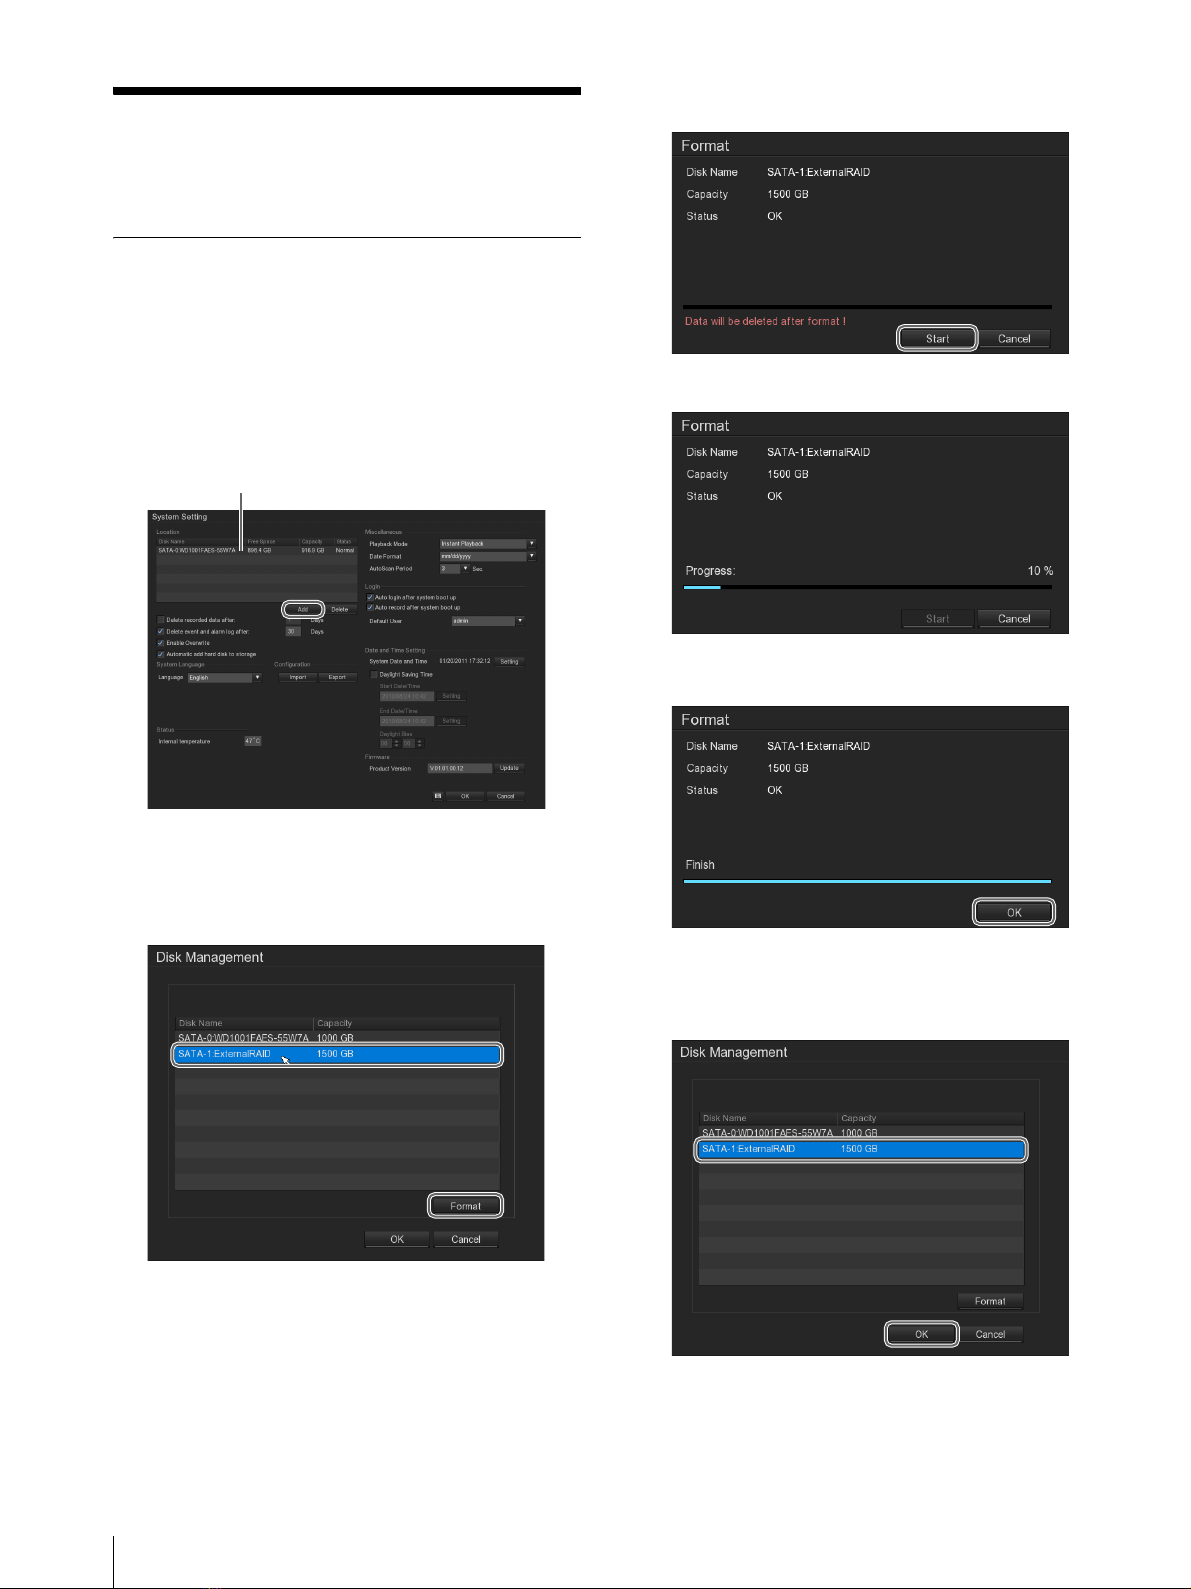
Sony Ipela NSR-S10 User manual

Sony
Sony DSR-45/45P User manual

Sony
Sony Video Walkman GV-M20 User manual

Sony
Sony DHG-HDD250 - 30-Hour High-Definition Digital Video... User manual

Sony
Sony DNW-A100 User manual

Sony
Sony HVO3000MT User manual

Sony
Sony Digital Betacam DVW-2000 User manual

Sony
Sony Handycam HDR-CX240 User manual

Sony
Sony Giga Pocket User manual

Sony
Sony PSX DESR-7500 Technical manual

Sony
Sony DHG-HDD250 - 30-Hour High-Definition Digital Video... User manual

Sony
Sony DSR-1800AP User manual

Sony
Sony NSR-1000 Series How to use

Sony
Sony Walkman GV-8 User manual

Sony
Sony DNW-A100 User manual

Sony
Sony HVO-500MD User manual

Sony
Sony SVR-3000 - Digital Network Recorder User manual

Sony
Sony HSR-X200P User manual

Sony
Sony DCR-TRV19 Manual de instrucciones / Manual de... User manual