Sony MDR-RF4000K User manual

4将耳机插入发射器,使耳机的接触点碰
到发射器的接触针,并确认CHG指示
灯亮起。
电池完全充电需要大约 16 个小时(充
电完成后,CHG 指示灯熄灭)。
将耳机放入发射器时,务必完全插入左
右耳罩。
当发射器的接触针碰到耳机的接触点
时,CHG 指示灯亮红色。
如果CHG指示灯不亮
务必关闭电池舱盖。盖子没有完全关闭
时无法启用电池充电功能。
确认左右耳机已正确插入发射器。
如果耳机的接触点没有碰到发射器的接触
针,指示灯不会亮。这时请取出耳机,再
重新插入发射器,使指示灯亮起。
确认附带的可充电镍氢电池已装入电池
舱。
无法对附带电池以外的其他任何可充电
电池或干电池充电。
使用后对耳机电池充电
使用后将耳机放入发射器。CHG 指示灯亮
起,然后开始充电。
由于充电完成时内置定时器可识别,因此
无需在充电完成后将耳机从发射器中取
出。
注意
电池充电过程中,发射器自动关闭。
出于安全考虑,本系统设计为仅对附带的
BP-HP550-11 类型可充电电池进行充电。请
注意,其他类型的可充电电池无法用本系统
充电。
无法对附带电池以外的其他任何可充电电池
或干电池充电。
请勿试图在其他组件上使用附带的
BP-HP550-11 可充电电池。电池仅限用于本
系统。
请在 0°C 至 40°C 的环境温度下充电。否
则,电池可能无法完全充电。
请勿触摸发射器的接触针。如果接触针变
脏,可能无法充电。
如果发射器的接触针和耳机的接触点有灰
尘,则可能无法完成充电。请用棉签等进行
擦拭。
充电和使用时间
近似充电时间 近似使用时间*2
16 小时*2 7 小时*3
*1 1 kHz、1 mW + 1 mW 输出时
*2 对耗尽电池完全充电的小时数
*3 视温度或使用情况而定,时间可能不同。
查看剩余电池电量
拉起自调节头带,查看右耳罩上的 POWER
指示灯。指示灯亮绿色时表示电池仍然可
供使用。
如果 POWER 指示灯变暗、闪烁或声音失
真或有噪音时,请对可充电电池充电,或
安装新的干电池。
注意
当对可充电镍氢电池进行完全充电后,电池只
持续使用了预计的一半时间,就应该更换新电
池。BP-HP550-11 类型可充电电池无市售。您
可以从购买本系统的商店或从附近的 Sony 经
销商定购电池。
欢迎!
感谢您购买本 Sony MDR-RF4000K 无线立
体声耳机系统。使用本机之前,请先通读
本说明书,并妥善保存以备将来参考。
部分特点:
适用于音乐和电影的无线立体声耳机系
统
2.4 GHz 数字传输高音质
配备高质量封闭型耳机的 40 mm 驱动
单元再现震撼音效
双向发射器设计,便于进行设定
简易电池充电系统
轻巧耳机,便于长时间舒适聆听
耳机实时自动调谐获取最理想的接收信
号
最大 30 米接收范围*
使用附带镍氢充电电池可播放 7 小时
使用附带的音频电缆与电视机/DVD/音
频设备进行简易连接
耳机自动开启/关闭功能以延长电池使
用时间
可自由调节的头带,便于准确舒适佩戴
耳机音量控制功能
* 传输距离视使用情况而异。
准备
检查组件和附件
设定系统前,请检查是否包含所有组件。
发射器 TMR-RF4000(1)
无线立体声耳机 MDR-RF4000(1)
Wireless Stereo
Headphone System
操作
收听节目
收听前
为降低听力受损的风险,请先降低音量。
1打开连接至发射器的AV组件。
如果发射器连接至耳机插孔,将音源组
件的音量控制器尽可能设高,但不要设
定到会出现失真的高度。
2从发射器中取出耳机。
发射器的 POWER 指示灯亮起绿色。
3戴上耳机。
戴上耳机时,耳机电源自动打开。
右耳罩上的 POWER 指示灯亮起。务必
将右耳罩 戴在右耳,将左耳罩
戴在左耳。将耳机垂直戴在头上,以便
自动电源开启功能正确启用。
标有 的耳挂上带有触觉点可辨别
左侧。
触觉点
(位于左侧)
4调节音量。
音量控制器
注意
观看电影时,小心不要在安静场景下将音
量调得太高。否则当播放到响亮场景时可
能会损伤您的耳朵。
当您在取下耳机前从发射器上断开交流电
源适配器的连接时,可能会听到一些噪
音。
射频信号传输区域
距离发射器的射频信号传输区域大约最大
为 30 m。
当从发射器上取下耳机时,发射器会自动
检测最适宜的频率。如果耳机不在射频信
号传输区域范围内,或接收情况不佳,则
声音可能中断。这时,请向发射器靠近。
注意
因为本系统以 2.4 GHz 传输信号,所以如果
出现干扰,则声音可能中断。这是由于无线
电频率的特性所致,并非故障。
视发射器位置和房间情况而定,您通过耳机
听到的噪音可能不同。建议您将发射器放在
能产生最清晰声音的位置。
如果发射器与其他使用 2.4 GHz 频率的无线
装置或微波炉一起使用,则声音可能中断。
如果10分钟没有输入音频信号
当 10 分钟没有输入音频信号,发射器的
射频信号传输自动停止。发射器停止时,
发射器的 POWER 指示灯闪烁绿色 30 秒
钟,然后熄灭。重新输入音频信号时,会
自动传输射频信号。如果输入极低声音约
10 分钟,射频信号传输可能会停止。如
果发生这种情况,请调高所连接 AV 组件
的音量,并调低耳机音量。如果信号噪音
从连接的组件输出至 PHONES IN 插孔,
则射频信号传输可能不会停止。
©2010 索尼公司 中国印刷
Sony Corporation Printed in China
MDR-RF4000K
使用说明书
Operating Instructions
4-186-276-32(1) 交流电源适配器(1)
可充电镍氢电池 BP-HP550-11(1)
连接电缆(立体声迷你插头 针插头
× 2),1 m(1)
通用插头适配器(立体声迷你插孔
立体声耳机插头)(1)
底座(1)
插入附带的可充电镍氢电池
附带的可充电镍氢电池在您首次使用时并
未充电。务必在使用前进行充电。
若要对耳机充电,请将其放在发射器上。
1按左耳罩上的PUSH按钮打开电池舱
盖。
电池舱盖打开。
PUSH按钮
2将附带的可充电镍氢电池插入电池舱,
使电池的端子对准舱内的标
记。
请勿试图用本机对任何其他种类电池进
行充电。
注意
电池舱在 侧有个突起,可以将可充电电池
固定到位。安装可充电电池时,先插入 端
子。
3关闭电池舱盖。
将突起插入左上方的孔中。
关闭盖子直至听到喀嗒声。
简体中文
操作本机之前,请仔细阅读本手册并妥善
保管以备将来参考。
警告
为了减少火灾或触电的危险,切勿让本设
备与雨水接触或受潮。
为了减少火灾或触电的危险,切勿让本设
备受到液体滴溅,并且切勿将花瓶等装有
液体的物品放置在设备上。
切勿将电池(安装的电池或电池组)长时
间暴露在阳光、明火或类似环境下。
为了避免触电,切勿打开机壳。维修工作
只能交给有资格的人员进行。
切勿将本设备安装在书橱或内置式壁橱等
封闭空间内。
由于交流电源适配器的电源插头用于断开
交流电源适配器与电源的连接,请将其连
接至便于插拔的交流电源插座。一旦发现
交流电源适配器有异常情况,请立即断开
其与交流电源插座的连接。
不得擅自更改发射频率、加大发射功率
(包括额外加装射频功率放大器),不得
擅自外接天线或改用其它发射天线
使用时不得对各种合法的无线电通信业务
产生有害干扰;一旦发现有干扰现象时,
应立即停止使用,并采取措施消除干扰后
方可继续使用
使用微功率无线电设备,必须忍受各种无
线电业务的干扰或工业、科学及医疗应用
设备的辐射干扰
不得在飞机和机场附近使用
TMR-RF4000
CMIIT ID: 2010DJ1438
MDR-RF4000
CMIIT ID: 2010DJ1437
用碱性电池(另售)使用耳机
市售(AAA 尺寸)碱性电池也可用于对耳
机供电。按照“插入附带的可充电镍氢电
池”中说明的相同方法安装电池。
装入干电池时,不会启用电池充电功能。
电池使用时间
电池 近似小时数*1
Sony 碱性电池
LR03/AM-4(N)
10 小时*2
*1 1 kHz、1 mW + 1 mW 输出时
*2 视温度或使用情况而定,时间可能不同。
关于电池的注意事项
请勿对干电池充电。
请勿将干电池与硬币或其他金属物体放在一
起携带。如果意外短路电池的正负端子,电
池会产生热量。
如果打算长时间不使用本机,请取出电池以
免电池漏液或腐蚀造成损坏。
连接
设定发射器
1将发射器连接至AV组件。
视插孔类型而定,选择以下其中一种接
线图。
连接至耳机插孔
发射器
左声道(白色)
右声道(红色)
至PHONESIN
插孔
连接线
(附带)
通用插头适
配器
(附带)
至耳机插孔
(立体声耳机
插孔)
至耳机插孔
(立体声迷
你插孔)
WALKMAN®*、
电视机等
连接至 LINE OUT 或 REC OUT 插
孔
发射器
至LINEIN
插孔
右声道(红色)
连接线
(附带)
立体声系统、
录像机等
至LINEOUT或
RECOUT插孔
左声道(白)
* “WALKMAN”和“WALKMAN”标志是 Sony
Corporation 的注册商标。
充电
1将附带的交流电源适配器连接至发射
器。
发射器
交流电源适配器
(附带)
至交流电源插座
至DCIN
5.2V插孔
注意
务必使用附带的交流电源适配器。使用不
同插头极性或其他特性的交流电源适配器
会造成产品故障。
统一极性插头
务必始终使用附带的交流电源适配器。即
使交流电源适配器有相同的电压和插头极
性,但由于电流容量或其他因素,也会损
坏本产品。
将交流电源适配器连接至容易插拔的交流
电源插座。一旦发现交流电源适配器有异
常情况,请立即断开其与交流电源插座的
连接。
2将底座放入发射器。
您可以使用底座将发射器水平或垂直放
置。
关于带底座的发射器和安装表面的注
意事项
不得将底座放于由布覆盖、质软、肮脏
或有灰尘的表面。
撕去底座粘纸(4 角)上的保护膜(透
明)。不撕去粘纸上的保护膜无法安装
底座。
放置发射器时,请将其轻轻按下以稳定
底座。
如果粘纸的粘度变弱
使用稍微蘸湿的软布擦去灰尘。可以使用
蘸有中性清洁溶液的软布擦去手指印或油
脂。粘纸的粘度会恢复以便反复使用。
改变安装位置
用手指扶住底座边缘慢慢移动底座。如果
用力移动则无法撕下粘纸。
3转动左右耳机使其在同一水平面上。
取下耳机时,耳机自动关闭
—自动电源开启/关闭功能
请勿在不使用时拉起自调节头带,否则会
消耗电池电量。
自调节头带
更换耳垫
耳垫可进行更换。如果耳垫变脏或磨损,
请如下图所示进行更换。耳垫无市售。您
可以从购买本系统的商店或从附近的
Sony 经销商定购更换件。
1拉出旧的耳垫。
2将新耳垫装到耳罩周围。
附加信息
故障诊断
如果在使用本耳机系统时出现问题,请使
用以下检查表。如果问题仍然存在,请向
您附近的 Sony 经销商咨询。
没有声音
检查发射器和 AV 组件之间的连接。
打开连接至发射器的 AV 组件,开始播
放。
如果使用耳机插孔将发射器连接至 AV 组
件,请调高所连接 AV 组件上的音量控制
器。
确认您正确佩戴耳机。
调高耳机音量。
耳机的 POWER 指示灯熄灭。
如果可充电电池电量弱,请为电池充
电,或用新的碱性电池更换。如果在为
电池充电后,POWER 指示灯仍然熄灭,
请将耳机交给 Sony 经销商。
声音失真或中断(有时候有噪音)
如果可充电电池电量弱,请为电池充电,
或用新的碱性电池更换。如果在为电池充
电后,POWER 指示灯仍然熄灭,请将耳机
交给 Sony 经销商。
检查附近是否有使用 2.4 GHz 频率的无
线设备,或有微波炉。
改变发射器的位置。
如果使用耳机插孔将发射器连接至 AV 组
件,请调低所连接 AV 组件上的音量控制
器。
声音低
如果使用耳机插孔将发射器连接至 AV 组
件,请调高所连接 AV 组件上的音量控制
器。
调高耳机音量。
环境噪音大
检查附近是否有使用 2.4 GHz 频率的无
线设备,或有微波炉。
如果使用耳机插孔将发射器连接至 AV 组
件,请调高所连接 AV 组件上的音量控制
器。
如果可充电电池电量弱,请为电池充电,
或用新的碱性电池更换。如果在为电池充
电后,POWER 指示灯仍然熄灭,请将耳机
交给 Sony 经销商。
声音中断。
如果 10 分钟没有输入信号,发射器会停
止。
如果使用耳机插孔将发射器连接至 AV
组件,请调高所连接 AV 组件上的音量
控制器。
无法对电池充电。
检查 CHG 指示灯是否点亮。如果不亮,
请将耳机正确放入发射器,以便 CHG 指
示灯亮起。
装入了干电池。
插入附带的可充电镍氢电池。
无线立体声耳机系统
产品中有毒有害物质或元素的名称及含量
使用环境条件:5℃~35℃(:不含有,:含有)
部件名称
有毒有害物质或元素
铅
(Pb)
汞
(Hg)
镉
(Cd)
六价铬
(Cr(VI))
多溴联苯
(PBB)
多溴二苯醚
(PBDE)
内置线路板
外壳
附件
: 表示该有毒有害物质在该部件所有均质材料中的含量均在 SJ/T11363-2006 标准规
定的限量要求以下。
: 表示该有毒有害物质至少在该部件的某一均质材料中的含量超出 SJ/T11363-2006
标准规定的限量要求。
装入了非附带的可充电电池。
插入附带的可充电镍氢电池。
发射器的接触针和耳机的接触点有灰尘。
请用棉签等进行擦拭。
响起重复提示音。
耳机无法从发射器接收信号。
在射频信号传输范围内移动。
检查发射器、交流电源适配器和交流电
源插座的连接。
检查发射器和耳机附近是否有使用 2.4
GHz 频率的无线设备,或有微波炉。
改变发射器的位置。
大约有 10 分钟没有输入音频信号,且没
有传输射频信号。
将音频信号输入至发射器。
本机运行不正常。
重设系统。
将小针等推入发射器的孔中直至听到喀
嗒声。
顶部的 POWER 指示灯开始以绿色闪烁。
只要 POWER 指示灯开始闪烁,就拉起
自调节头带并保持以打开耳机,并将小
针等推入右耳机的孔中直至听到喀嗒
声。
发射器的 POWER 指示灯停止闪烁并保
持绿色常亮。
注意事项
关于安全
请勿掉落、撞击耳机,或使耳机受到任
何种类的强烈震动。否则可能损坏本产
品。
请勿拆解或试图打开本系统的任何部
件。
关于电源和放置
如果打算长时间不使用本系统,请从交
流电源插座上拔掉交流电源适配器的插
头。拔插头时,请抓住交流电源适配
器。
切勿拉电线。
请勿将本系统放在以下任何位置。
– 易受直射阳光、加热器附近,或其他
极高温的场所
– 有灰尘的场所
– 不平稳或倾斜的表面
– 易受经常震动的场所
– 浴室或其他高湿度的场所
关于耳机
顾及他人
音量太高时,声音会从耳机泄漏。请注意
不要将音量调得太高而影响您周围的人。
在嘈杂的地方使用时会有调高音量的倾
向。但是,出于安全原因,建议您将音量
保持在仍能听见周围环境声音的等级。
关于清洁
使用稍微蘸有中性清洁溶液的软布。请勿
使用稀释剂、苯或酒精等溶液,否则可能
会损坏表面。
产品破损时
当产品破损或如果有异物进入本机内
部,请立即关闭电源并咨询您附近的
Sony 经销商。
将系统交给经销商时,务必带好耳机和
发射器。
规格
无线立体声发射器(TMR-RF4000)
调制系统 GFSK
使用频率 2.400 - 2.4835 GHz
等效全向辐射功率(EIRP)
≤ 20 dBm
最大功率谱密度
≤ 20 dBm/MHz(EIRP)
载频容限 20 ppm
传输距离 最长约 30 m
频率响应 10 - 22000 Hz
失真率 1% 或更低(1 kHz)
音频输入 音频插孔(左/右)
立体声迷你插孔
电源要求 DC 5.2 V(附带的交流电源
适配器供电)
尺寸 约 246 × 75 × 120 mm
(长/高/宽)
质量 约 430 g
额定功耗 1.3 W
无线立体声耳机(MDR-RF4000)
播放频率范围
12 - 22000 Hz
电源要求 可充电镍氢电池(附带)或
市售(AAA 尺寸)碱性电池
质量 约 300 g(包括附带的可充
电镍氢电池)
使用频率 2.400 - 2.4835 GHz
等效全向辐射功率(EIRP)
≤ 20 dBm
最大功率谱密度
≤ 20 dBm/MHz(EIRP)
载频容限 20 ppm
随机附件
交流电源适配器(5.2 V)
(1)
可充电镍氢电池
BP-HP550-11 (550 mAh)
(1)
连接电缆
(立体声迷你插头 针
插头 × 2),1 m(1)
通用插头适配器(立体声迷
你插孔 立体声耳机插
头)(1)
底座(1)
质保卡(1)
使用说明书(本手册)
(1)
设计和规格如有变更,恕不另行通知。
仅对于中国市场:
制造商: 索尼公司
地址:
日本国东京都港区港南1-7-1
总经销商:索尼(中国)有限公司
地址: 北京市朝阳区东三环北路霞光
里18号佳程大厦A座25层
原产地: 中国
出版日期:2010年5月

To connect to LINE OUT or REC OUT jack
Transmitter
To LINE IN jack
Right channel (red)
Connecting cord
(supplied)
Stereo system,
VCR, etc.
To LINE OUT or
REC OUT jacks
Left channel (white)
* “WALKMAN” and “WALKMAN” logo are registered trademarks
of Sony Corporation.
Operation
Listening to a programme
Before listening
To reduce the risk of hearing damage, first lower the volume.
1Turn on the AV component connected to the
transmitter.
If the transmitter is connected to the headphone jack, set
the volume control of the audio source component as
high possible but not so high that the audio signal
becomes distorted.
2Remove the headphones from the transmitter.
The transmitter’s POWER indicator lights up in green.
3Put on the headphones.
When you put on the headphones, the headphones’
power turns on automatically.
The POWER indicator on the right housing lights up. Be
sure to put the right housing on your right ear and
the left housing on your left ear. Wear the
headphones vertically on your head so that auto power
on function is properly activated.
There is a tactile dot on the hanger marked to
distinguish the left side.
Tactile dot
(on the left)
4Adjust the volume.
Volume control
Notes
When watching films, be careful not to raise the volume too
high in quiet scenes. You may hurt your ears when a loud scene
is played.
You may hear some noise when you disconnect the AC power
adaptor from the transmitter before removing the headphones.
Inserting the supplied
rechargeable nickel-metal
hydride battery
The supplied rechargeable nickel-metal hydride battery is
not charged from the first time you use it. Be sure to charge
it before use.
To charge the headphones, place them on the transmitter.
1Press the PUSH button of the left housing to open
the battery compartment lid.
The battery compartment lid comes off.
PUSH button
2Insert the supplied rechargeable nickel-metal
hydride battery into the battery compartment,
matching terminal on the battery to the mark
in the compartment.
Do not attempt to charge any other kind of battery with
this unit.
Note
The battery compartment has a tab on the side which holds the
rechargeable battery in place. Insert the terminal first when
installing the rechargeable battery.
3Close the battery compartment lid.
Insert the tab in the hole at the top left.
Close the lid until it clicks.
Charging
1Connect the supplied AC power adaptor to the
transmitter.
Transmitter
AC power adaptor
(supplied)
To an AC outlet
To DC IN
5.2 V jack
The battery cannot be charged.
Check if the CHG indicator turns on. If not, put the headphones
on the transmitter correctly so that the CHG indicator turns on.
Dry batteries are installed.
Insert the supplied rechargeable nickel-metal hydride battery.
Rechargeable batteries other than the supplied are installed.
Insert the supplied rechargeable nickel-metal hydride battery.
The transmitter’s contact pin and headphones’ contact point are
dusty.
Wipe them with a cotton bud, etc.
A repeated beep sounds.
The headphones cannot receive the signal from the transmitter.
Move within the RF signal transmission area.
Check the connection of the transmitter, AC power adaptor,
and AC outlet.
Check if there is any wireless apparatus using 2.4 GHz
frequency, or a microwave oven around the transmitter and
headphones.
Change the position of the transmitter.
There is no audio signal input for about 10 minutes and RF
signals are not transmitted.
Input the audio signal to the transmitter.
The unit does not operate properly.
Reset the system.
Push a small pin, etc., into the hole of the transmitter until you
feel a click.
The POWER indicator on top starts blinking in green.
Once the POWER indicator starts blinking, pull up and hold
the self-adjusting band to turn on the headphones, and push a
small pin, etc., into the hole of the right headphone until you
feel a click.
The POWER indicator of the transmitter stops blinking and
stays lit in green.
Precautions
On safety
Do not drop, hit, or otherwise expose the headphones to
strong shock of any kind. This could damage the product.
Do not disassemble or attempt to open any parts of the
system.
On power sources and placement
If you are not going to use the system for a long time,
unplug the AC power adaptor from the AC outlet. When
removing the plug, grip the AC power adaptor.
Do not pull on the cord.
Do not place the system in any of the following locations.
– Location exposed to direct sunlight, near a heater, or
other extremely high-temperature location
– Dusty location
– On an unsteady or inclined surface
– Location exposed to large amounts of vibration
– Bathroom or other high-humidity locations
On headphones
Act considerately
When the volume is too high, the sound leaks outside the
headphones. Be careful not to raise the volume so high that
it bothers people around you.
There is a tendency to raise the volume when using in noisy
places. However, for reasons of safety, it is advised to keep
the volume at a level whereby you can still hear sounds
around you.
On cleaning
Use a soft cloth slightly moistened with mild detergent
solution. Do not use solvents such as thinner, benzene or
alcohol as these may damage the surface.
When the product breaks
When the product breaks, or if a foreign object gets inside
the unit, immediately turn off the power and consult your
nearest Sony dealer.
When taking the system to a Sony dealer, be sure to take
both the headphones and transmitter.
Specifications
Wireless stereo transmitter (TMR-RF4000)
Modulation System
GFSK
Carrier wave frequency
2.400 - 2.4835 GHz
Transmission distance
Approx. 30 m of longest
Frequency response
10 - 22,000 Hz
Distortion rate
1% or less (1 kHz)
Audio inputs
Phono jacks (left/right)
Stereo mini jack
Power requirements
DC 5.2 V (from the supplied AC power adaptor)
Dimensions
Approx. 246 × 75 × 120 mm (w/h/d)
Mass Approx. 430 g
Rated power consumption
1.3 W
Notes
Be sure to use the supplied AC power adaptor. Using AC
adaptors with different plug polarity or other characteristics
can cause product failure.
Unified polarity plug
Be sure to always use the supplied AC power adaptor. Even AC
power adaptors having the same voltage and plug polarity can
damage this product due to the current capacity or other
factors.
Connect the AC power adaptor to an easily accessible AC
outlet. Should you notice an abnormality in the AC power
adaptor, disconnect it from the AC outlet immediately.
2Put the stand to the transmitter.
You can place the transmitter horizontally or vertically,
using the stand.
Notes on the transmitter with stand and
installation surface
The stand should not be placed on a surface that is cloth-
covered, textured, dirty or dusty.
Peel off the protection films (transparent) on the adhesive
sheets (4 corners) of the stand. The stand cannot be
installed with the protection films on the adhesive sheets.
When placing the transmitter, press it down softly to
steady the stand.
If the power of the adhesive sheets becomes
weak
Use a soft cloth slightly moistened to remove dust. A soft
cloth with mild detergent solution may be used to remove
finger marks or grease. The power of the adhesive sheets will
be restored for repeated use.
To change the installation place
Move the stand slowly with your fingers on the edge of the
stand. The adhesive sheets will not be detached with a sharp
move.
3Turn the left and right headphones so as to be flat.
4Insert the headphones in the transmitter so that
the headphones’ contact point meets the
transmitter’s contact pin, and make sure that the
CHG indicator lights up.
It takes approximate 16 hours to fully charge the battery
(the CHG indicator goes off when charging is complete).
When placing the headphones on the transmitter, be
sure to insert the left and right housings completely.
When the transmitter’s contact pin meets the
headphones’ contact point, the CHG indicator lights up
in red.
If the CHG indicator is not lit
Be sure to close the battery compartment lid. The battery
charge function is not activated when the lid is not fully
closed.
Check that the left and right headphones are inserted in
the transmitter correctly.
English
WARNING
To reduce the risk of fire or electric shock, do not
expose this apparatus to rain or moisture.
To reduce the risk of fire or electric shock, do not expose
this apparatus to dripping or splashing, and do not place
objects filled with liquids, such as vases, on the apparatus.
Do not expose the batteries (battery pack or batteries
installed) to excessive heat such as sunshine, fire or the like
for a long time.
To avoid electrical shock, do not open the cabinet. Refer
servicing to qualified personnel only.
Do not install the appliance in a confined space, such as a
bookcase or built-in cabinet.
As the main plug of AC power adaptor is used to disconnect
the AC power adaptor from the mains, connect it to an
easily accessible AC outlet. Should you notice an
abnormality in it, disconnect it from the AC outlet
immediately.
Welcome!
Thank you for purchasing the Sony MDR-RF4000K Wireless
Stereo Headphone System. Before operating the unit, please
read this manual thoroughly and retain it for future reference.
Some features are:
Wireless stereo headphone system for music and movies
2.4 GHz digital transmission with high quality sound
Impressive sound reproduction with 40 mm driver unit
equipped high quality closed type headphones
2 way transmitter design for convenient setting
Easy battery charging system
Lightweight headphones for long time listening comfort
Real-time automatic tuning on headphones for best
reception of signal
Up to 30 meters reception range*
7 hours playback with supplied Ni-MH rechargeable battery
Easy connection with TV/DVD/audio equipment with
supplied audio cable
Automatic On/Off function on headphones to preserve
battery life
Free adjustable headband for precise and comfortable fit
Volume control function on the headphones
* Transmission distance varies depending on conditions of use.
Preparation
Checking the components and
accessories
Before setting up the system, check that all of the
components are included.
Transmitter TMR-RF4000 (1)
Wireless stereo headphones MDR-RF4000 (1)
AC power adaptor (1)
Rechargeable nickel-metal hydride battery BP-HP550-11 (1)
Connecting cable (stereo mini plug pin plug × 2), 1 m (1)
Unimatch plug adaptor (stereo mini jack stereo phone
plug) (1)
Stand (1)
RF signal transmission area
The approximate RF signal transmission area from the
transmitter is up to 30 m.
The transmitter detects the optimum frequency
automatically when the headphones are removed from the
transmitter. The sound may be interrupted if the
headphones are out of RF signal transmission area or
reception conditions deteriorate. In this case, move closer to
the transmitter.
Notes
Because this system transmits signals at 2.4 GHz, sound may be
interrupted if interference occurs. This is due to radio frequency
characteristics, and is not a malfunction.
Any noise you hear through the headphones may vary depending
on the transmitter position and room conditions. It is
recommended that you place the transmitter in a location that
produces the clearest sound.
Sound may be interrupted if the transmitter is used with other
wireless apparatus using 2.4 GHz frequency, or a microwave oven.
If an audio signal is not input for 10 minutes
RF signal transmission from the transmitter automatically
stops when an audio signal is not input for 10 minutes.
When the transmitter stops, the transmitter’s POWER
indicator blinks in green for 30 seconds and then turns off.
The RF signals are automatically transmitted when an audio
signal is input again. RF signal transmission may stop when
an extremely low sound is input for about 10 minutes. If this
happens, raise the volume of the connected AV component
and lower the volume of the headphones. If signal noise is
output from a component connected to the PHONES IN
jacks, RF signal transmission may not stop.
The headphones automatically turn off when
they are removed
— Auto Power On/Off function
Do not pull up the self-adjusting band when not in use, as
this will consume the battery power.
Self-adjusting
band
Replacing the earpads
The earpads are replaceable. If the earpads become dirty or
worn out, replace them as illustrated below. The earpads are
not commercially available. You can order replacements
from the store where you purchased this system, or at your
nearest Sony dealer.
1Remove the old earpad by pulling it off.
2Place the new earpad around the housing.
Additional information
Troubleshooting
If you run into any problems using this headphone system,
use the following checklist. Should any problem persist,
consult your nearest Sony dealer.
No sound
Check the connection between the transmitter and the AV
component.
Turn on the AV component connected to the transmitter, and
start the playback.
If you connect the transmitter to an AV component using the
headphone jack, raise the volume level on the connected AV
component.
Make sure you are wearing the headphones correctly.
Raise the headphone volume.
The headphones’ POWER indicator goes off.
Charge the rechargeable battery if it is weak, or replace alkaline
batteries with new ones. If the POWER indicator is still off
after charging the battery, take the headphones to a Sony
dealer.
Distorted or intermittent sound
(sometimes with noise)
Charge the rechargeable battery if it is weak, or replace alkaline
batteries with new ones. If the POWER indicator is still off after
charging the battery, take the headphones to a Sony dealer.
Check if there is any wireless apparatus using 2.4 GHz frequency,
or a microwave oven in the vicinity.
Change the position of the transmitter.
If you connect the transmitter to an AV component using the
headphone jack, lower the volume level on the connected AV
component.
Low sound
If you connect the transmitter to an AV component using the
headphone jack, raise the volume level on the connected AV
component.
Raise the headphone volume.
Loud background noise
Check if there is any wireless apparatus using 2.4 GHz frequency,
or a microwave oven in the vicinity.
If you connect the transmitter to an AV component using the
headphone jack, raise the volume level on the connected AV
component.
Charge the rechargeable battery if it is weak, or replace alkaline
batteries with new ones. If the POWER indicator is still off after
charging the battery, take the headphones to a Sony dealer.
The sound cuts off.
The transmitter stops transmitting if no signal is input for 10
minutes.
If you connect the transmitter to an AV component using the
headphone jack, raise the volume level on the connected AV
component.
The indicator will not light up if the headphones’ contact
point does not meet the transmitter’s contact pin. In this
case, remove the headphones and insert them in the
transmitter again so that the indicator lights up.
Make sure that the supplied rechargeable nickel-metal
hydride battery is installed in the battery compartment.
You cannot charge any rechargeable battery or dry-cell
battery other than the supplied battery.
To recharge the headphone battery after use
Place the headphones on the transmitter after use. The CHG
indicator lights up, and then charging starts.
Since the built-in timer recognises when charging is
complete, there is no need to remove the headphones from
the transmitter after charging has completed.
Notes
The transmitter automatically turns off while charging the battery.
This system is designed to charge only the supplied rechargeable
battery, type BP-HP550-11, for safety. Note that other types of
rechargeable battery cannot be charged with this system.
You cannot charge any rechargeable battery or dry-cell battery
other than the supplied battery.
Do not attempt to use the supplied BP-HP550-11 rechargeable
battery with other components. It is for use with this system only.
Charge in an environmental temperature of between 0°C and 40°C.
Otherwise, the battery may not be fully charged.
Do not touch the contact pin of the transmitter. If a contact pin
becomes dirty, charging may not be possible.
Charging may not be completed if the transmitter’s contact pin and
headphones’ contact point are dusty. Wipe them with a cotton bud,
etc.
Charging and usage time
Approx. charging time Approx. usage time*1
16 hours*27 hours*3
*1at 1 kHz, 1 mW + 1 mW output
*2hours required to fully charge an empty battery
*3Time may vary, depending on the temperature or conditions of
use.
Checking the remaining
battery power
Pull up the self-adjusting band and check the POWER
indicator located on the right housing. The battery is still
serviceable when the indicator lights in green.
Charge the rechargeable battery or install new dry-cell
batteries if the POWER indicator light dims, flashes, or the
sound becomes distorted or noisy.
Note
The rechargeable nickel-metal hydride battery should be replaced
with a new one when it lasts only half the expected time, after a full
charge has been performed. The rechargeable battery, type BP-
HP550-11, is not commercially available. You can order the battery
from the store where you purchased this system, or at your nearest
Sony dealer.
Using the headphones with
alkaline batteries (sold
separately)
Commercially available (size AAA) alkaline batteries can
also be used to power the headphones. Install the batteries
in the same manner as described in “Inserting the supplied
rechargeable nickel-metal hydride battery.”
When dry-cell batteries are installed, the battery charge
function is not activated.
Battery life
Battery Approx. hours*1
Sony alkaline batteries
LR03/AM-4(N)
10 hours*2
*1at 1 kHz, 1 mW + 1 mW output
*2Time may vary, depending on the temperature or conditions of
use.
Notes on Batteries
Do not charge a dry-cell battery.
Do not carry a dry-cell battery together with coins or other metallic
objects. Heat can be generated by the battery if its positive and
negative terminals are accidentally shorted.
If you are not going to use the unit for a long time, remove the
batteries to avoid damage from battery leakage or corrosion.
Connection
Setting up the transmitter
1Connect the transmitter to an AV component.
Select one of the hookups below depending on the jack
type:
To connect to a headphones jack
Transmitter
Left channel
(white)
Right channel
(red)
To PHONES IN jacks
Connecting cord
(supplied)
Unimatch plug
adaptor (supplied)
To headphones
jack (Stereo
phone jack)
To headphones jack
(Stereo mini jack)
WALKMAN®*,
TV, etc.
Wireless stereo headphones (MDR-RF4000)
Playback frequency range
12 – 22,000 Hz
Power requirements
Rechargeable nickel-metal hydride battery
(supplied) or commercially available (size AAA)
alkaline batteries
Mass Approx. 300 g (including the supplied
rechargeable nickel-metal hydride battery)
Supplied accessories
AC power adaptor (5.2 V) (1)
Rechargeable nickel-metal hydride battery
BP-HP550-11 (550 mAh) (1)
Connecting cable
(stereo mini plug pin plug × 2), 1 m (1)
Unimatch plug adaptor (stereo mini jack
stereo phone plug) (1)
Stand (1)
Card warranty (1)
Operating Instructions (this manual) (1)
Design and specifications are subject to change without
notice.
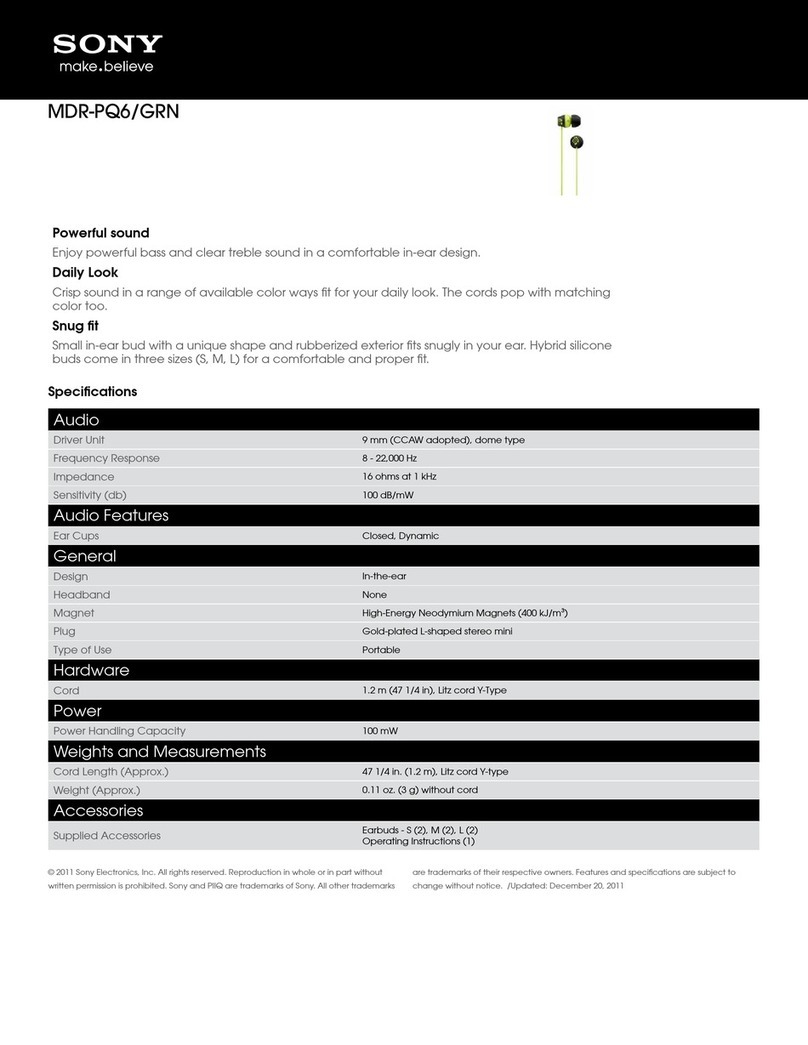
Other manuals for MDR-RF4000K
4
Table of contents
Other Sony Headphones manuals

Sony
Sony MDR-XB600iP User manual

Sony
Sony MDR-AS50G User manual

Sony
Sony WH-1000XM2 User manual

Sony
Sony MDR-V55 User manual

Sony
Sony MDR-EX35LP/RG Owner's manual

Sony
Sony MDR-EX81SL User manual

Sony
Sony MDR V700DJ User manual

Sony
Sony MDR-RF985RK User manual

Sony
Sony MDR NC50 User manual

Sony
Sony DR-BTN200 Reference guide

Sony
Sony MDR-EX100AP Operating instructions

Sony
Sony MDR DS5100 User manual

Sony
Sony MDR MDR 710LP User manual

Sony
Sony MDR-EX52LP User manual

Sony
Sony DR-EX12iP/WHI Owner's manual

Sony
Sony MDR-XB20EX User manual

Sony
Sony MDR-RF4000K User manual

Sony
Sony MDR-1RBT Use and maintenance manual

Sony
Sony MDR-EX32LP Instruction Manual

Sony
Sony MDR-EX1000 User manual