9
(Operating the system
Listening to a program
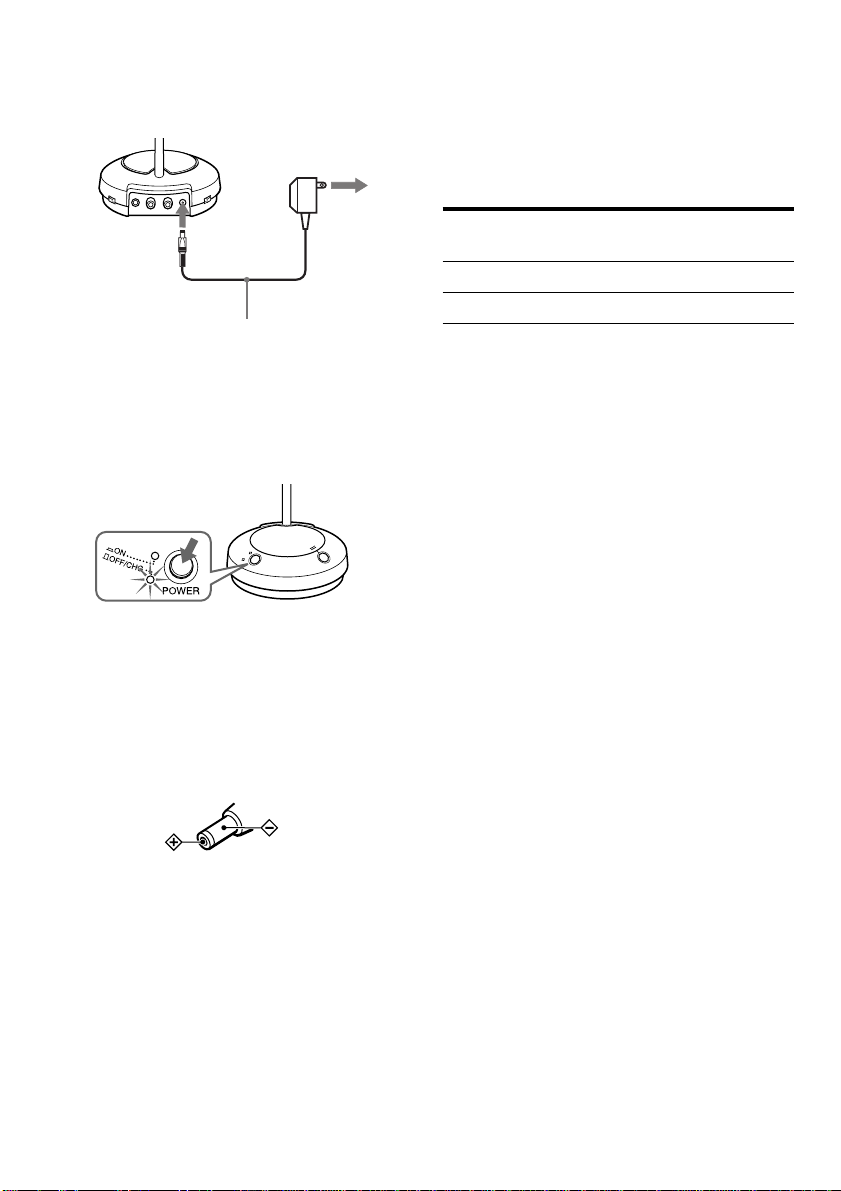
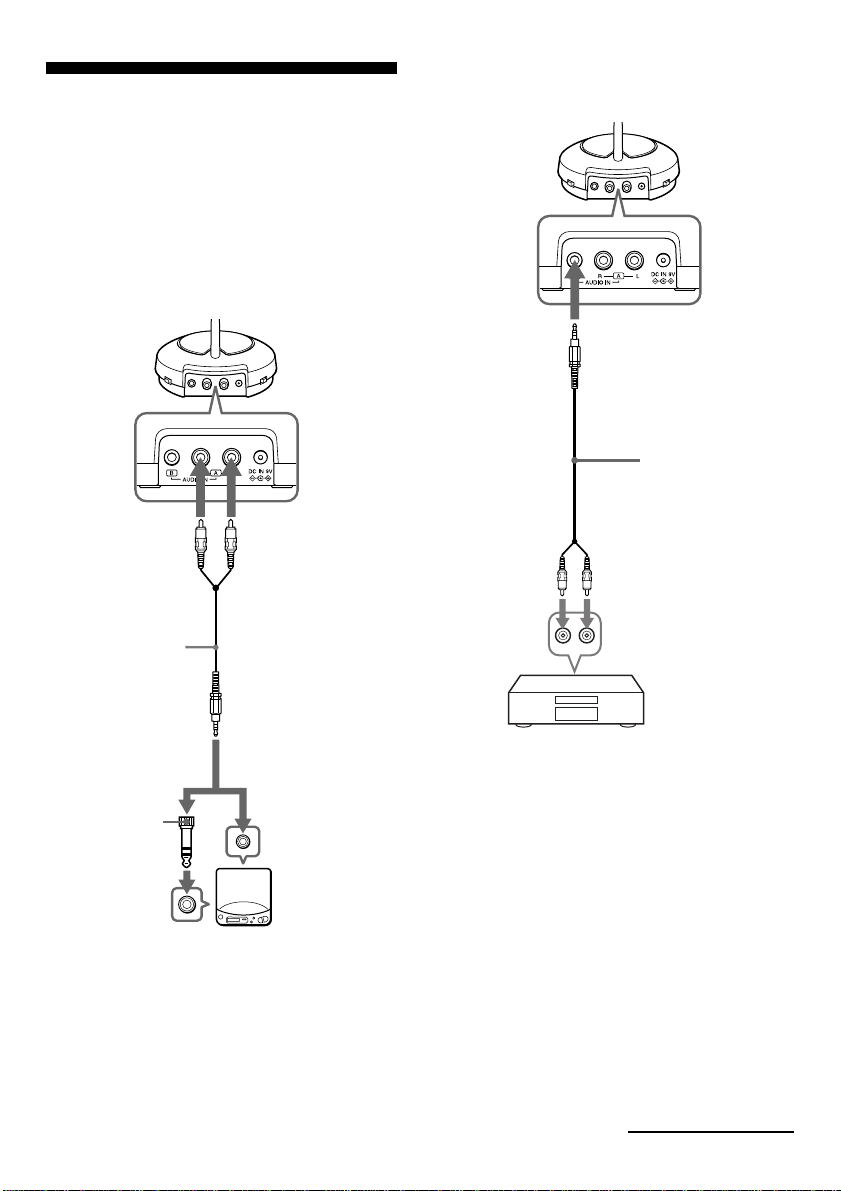
1First turn on the audio/video
equipment, then turn on the
transmitter.
2Select the radio frequency with the
CHANNEL selector switch.
3Put on the headphones and the power
turns on automatically.
4Turn up the volume to a moderate level
with the VOL control, then tune the
headphones in to the frequency of the
transmitter with the TUNING control
until you can hear the audio signal
loud and clear.
1
2
Try the above steps 2 and 4 until the
receiving performance becomes better.
Sending RF signals from the Transmitter
The transmitter starts sending the RF signals
automatically, when it detects audio signals from
the equipments connected.
If it does not detect an audio signal for more than
approximately one minute, the transmitter will
stop sending RF signals.
But the Power indicator remains lighting. When
the transmitter receives an audio signal again, it
starts sending the RF signals.
If the audio signal is very weak, the transmitter
does not send RF signals automatically. In this
case, make sure the volume of the equipments
connected is set to 5 – 6.
You may not hear the beginning of the sound
from the headphones until the transmitter starts
sending the RF signals after detecting an audio
signal.
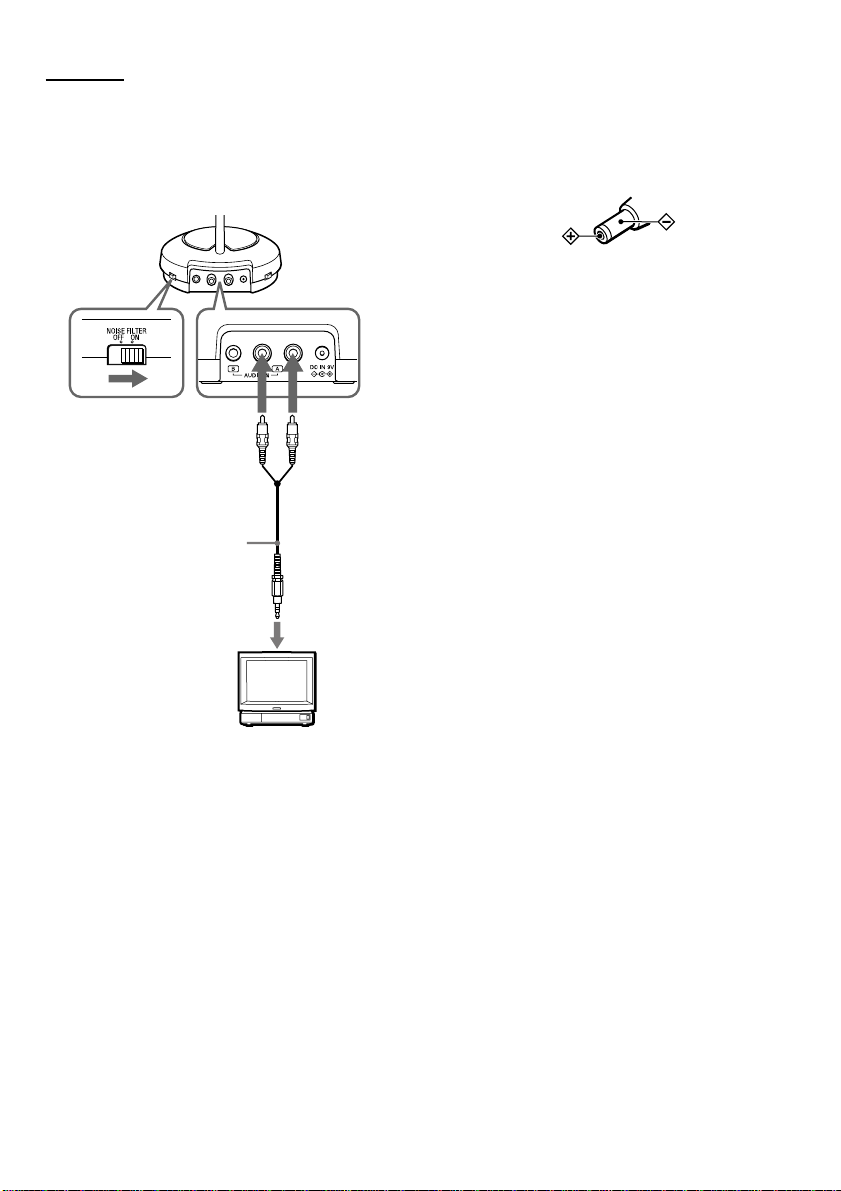
Note
If the transmitter is connected to the headphones jack of
the source equipment, set the volume of that equipment
as high as possible without distorting the audio signal.
Auto power on/off function
When you remove the headphones, the power
turns off automatically. Do not allow the self
adjusting band to be pulled up, otherwise the
headphones will be switched on.
The power turns on. The power turns off.
continue to next page
VOL control
TUNING control