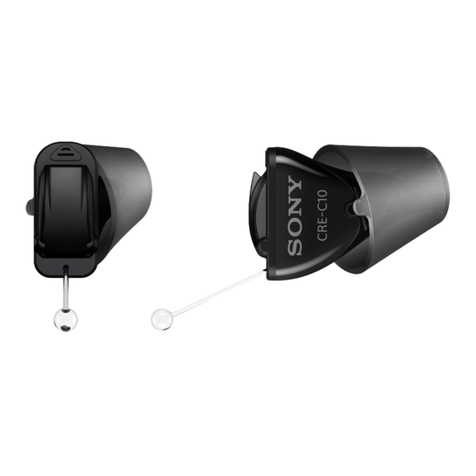
Sony CRE-C10 User manual

2
Content
Intended use 4
How to use QR codes 6
What you’ll nd in the box 9
Get to know your hearing aids 10
Start here 11
How to insert the battery 13
How to power on/o 14
How to insert the hearing aids 15
How to remove the hearing aids 16
How to change Click Sleeves 17

3
Support 22
Country/region specic information 23
Technical information 24

4
Intended use
The self-tting hearing aid is intended to amplify sound for
individuals 18 years of age or older with perceived mild to moderate
hearing impairment. It is adjued by the user to meet the user’s
hearing needs through software tools. The device is intended for
direct-to-consumer sale and use without the assiance of a hearing
care professional.
The Sony | Hearing Control app is intended to support self-tting
and ne-tuning of the hearing aid.

5
NOTICE
XIt is necessary to use the Sony | Hearing Control app to
set up the device.
XThe left and the right hearing aid are intended to be worn
together. They operate as a set.
CAUTION
Read this user guide and the safety and maintenance
information thoroughly and completely to avoid damage and
injury.

6
How to use QR codes
You will nd QR codes* throughout the user guide. These QR
codes will help you to inall the Sony | Hearing Control app or to
view inructional videos.
Follow these simple eps to art using the QR codes in this guide:
1. Open the QR Code reader or smartphone camera on your
phone.
2. Hold your device over the QR Code so that the QR code is
clearly visible within your smartphone’s screen.
3. The phone will automatically scan the QR code. When your
smartphone reads the QR code, a link will appear. Click the link
to go to the video.
* QR Code is registered trademark of DENSO WAVE INCORPORATED.

7
NOTICE
XNot all smartphone readers work the same. Some may
require additional eps.
WARNING
In case you have any doubt whether this device is
appropriate for you, consult a licensed physician before
using this device.

8
For adults 18 years and older with mild to moderate
hearing loss.
WARNING
Contact your primary care provider before using this product
if you currently experience any of these conditions as it may
not be appropriate for you:
Xsevere hearing loss or deafness in at lea one ear
Xa eep decline in hearing ability within the la 90 days in
one or both ears
Xactive discharge within the la 90 days
Xdizziness
Xa visible deformity of the ear
Xpain, or discomfort in the ear
Xsignicant ear wax accumulation

9
What you’ll nd in the box
Left and right hearing aid
Click Sleeve size S attached 1 pack of size
10 batteries Case
Cleaning brush Cleaning cloth Click Sleeves
sizes XS, M, and L
XQuick art card and user guide (this booklet)
XSafety and maintenance information
XLimited warranty

10
Get to know your hearing aids
➊
➋
➌
➍
➎
➊Click Sleeve
➋Microphone
➌Battery door (on/o switch)
➍Removal cord
➎Side and orientation indicator:
arrow should point upwards

11
Start here
It is required to complete all eps in the Sony | Hearing Control app
to setup the hearing aids for your needs. Start now by scanning the
QR code with your smartphone camera or by typing the URL into
your browser.
To receive guidance how to set up your hearing
aids, use the QR code or open the browser on your
smartphone and type in this address:
sony.net/hearing-c10-app
You will be guided through the process. It will take around 10
minutes.
Before arting the process, please do the following:
XEnsure rong internet access (Wi-Fi or cellular) throughout the
cuomization process
XFind a place where you are not diurbed by other loud sounds

12
XUnmute your smartphone
XSet the volume for media sounds of your smartphone to a high
level (about 75%).
Download the Sony | Hearing Control app to personalize your
hearing aids.
sony.net/hearing-c10-app
Follow the Sony | Hearing Control app for inructions.
The following sections are for your reference only.

13
How to insert the battery
Open the blier from the back side
and take out a battery. Place the
hearing aids in front of you on the
table as illurated to the right.
Place the battery inside the battery
compartment.
Remove the yellow icker and close
the battery door*.
* Shown for the left device

14
How to power on/o
There is no on/o button on the hearing aids.
Turning on: Close the battery door.
You will hear a art-up jingle indicating
that the hearing aid is turned on.
Turning o: Fully open the battery door.
Remove hearing aids while sleeping or bathing/swimming.
When you’re not wearing your hearing aids, we recommend leaving
the battery door open to conserve battery life.
The battery life is 70 hours*, or about 5-7 days of normal usage.
When the battery is running low you will hear an alert signal.
* Actual performance varies based on settings, environmental conditions, and usage.

15
How to insert the hearing aids
The right hearing aid is marked with R.
The left hearing aid is marked with L.
Hold the hearing aids with the arrows
pointing upwards and the removal cord
at the bottom. Make sure the battery
door is closed.
Gently push the hearing aid into the ear
canal.

16
WATCH QUICK VIDEO TUTORIAL
sony.net/hearing-c10-insertion
Please refer to the Sony | Hearing Control app to
set up the hearing aids for use.
If the hearing aids do not t comfortably in
your ear, please see the section “How to change
Click Sleeves”.
How to remove the hearing aids
Remove each hearing aid by pulling the removal cord toward the
back of your head.

17
How to change Click Sleeves
The hearing aids come with the size S Click Sleeves pre-attached.
If you do not feel comfortable using this size, you can change the
Click Sleeves.
Please note that left and right ear sizes may dier.
Choose a smaller size if the hearing aid feels tight in your ear.
Choose a larger size if the hearing aid feels loose or makes
whiling noise.
Removing Click Sleeve
Pinch and pull o the Click Sleeve.
Click Sleeves are designed to be discarded after removal from
device.

18
Inalling new Click Sleeve
Make sure that the tab of the Click Sleeve
matches the printed line on the hearing
aid. You will hear and feel a click when it
is fully inalled*.
*Shown for the left device

19
WATCH QUICK VIDEO TUTORIAL
sony.net/hearing-c10-sleeves

20
WARNING
Risk of injury!
Always wear the hearing aid with a Click Sleeve.
XMake sure that the Click Sleeve is completely attached.
You should feel that it snaps into place.
XEnsure that only a single Click Sleeve is attached to each
hearing aid.
XIn the very rare case that the click sleeve gets uck in
the ear canal and you cannot remove it yourself, please
contact a physician.
XDo not insert the Click Sleeves in your ears without the
hearing aid attached.
Other manuals for CRE-C10
3
Table of contents
Other Sony Hearing Aid manuals