manuals.online logo
Brands
  1. Home
  2. •
  3. Brands
  4. •
  5. Sony
  6. •
  7. Home Theater System
  8. •
  9. Sony BDV-E190 User manual

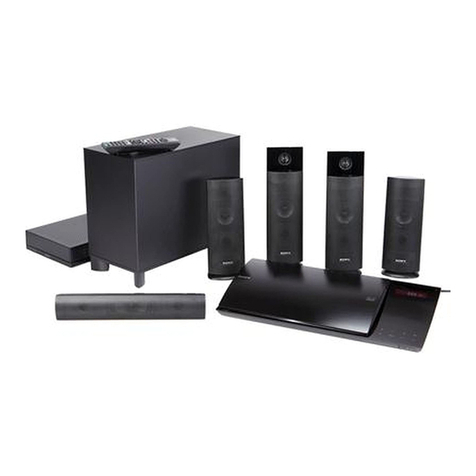
Sony BDV-E190 User manual

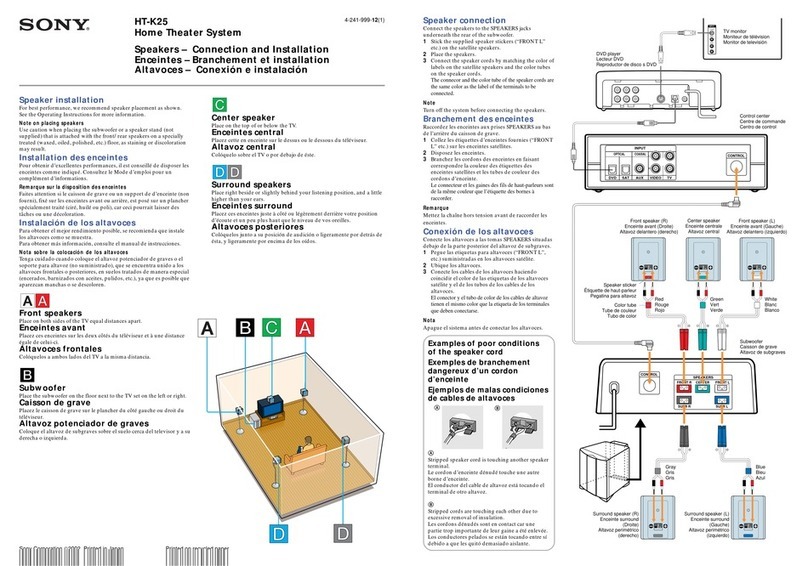
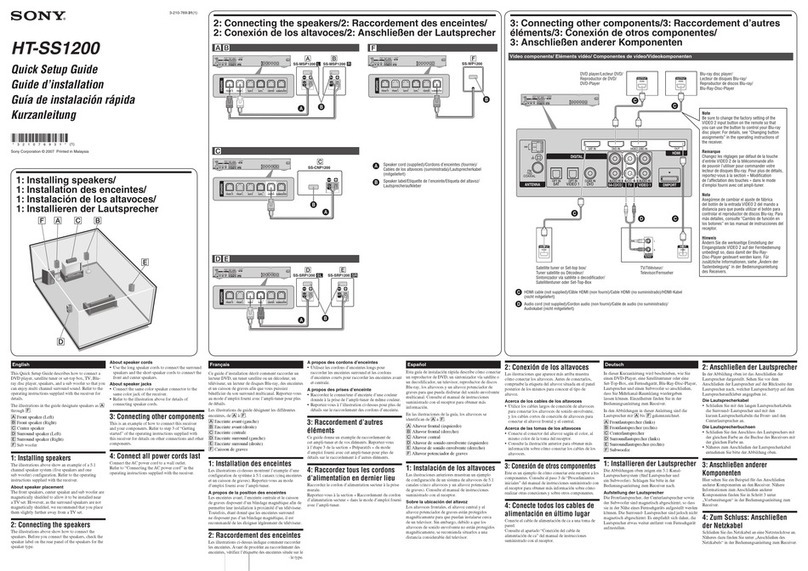
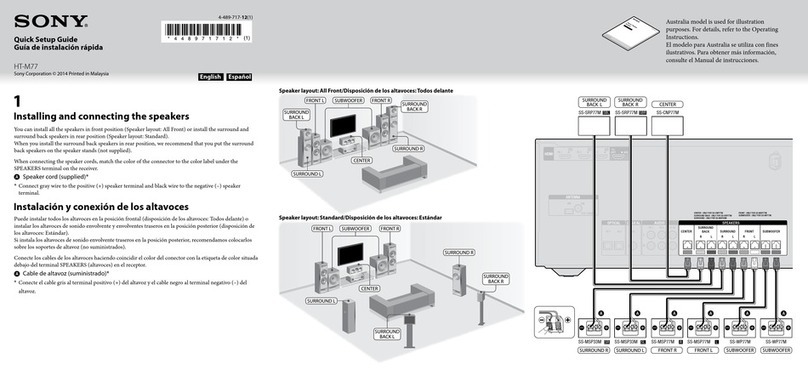
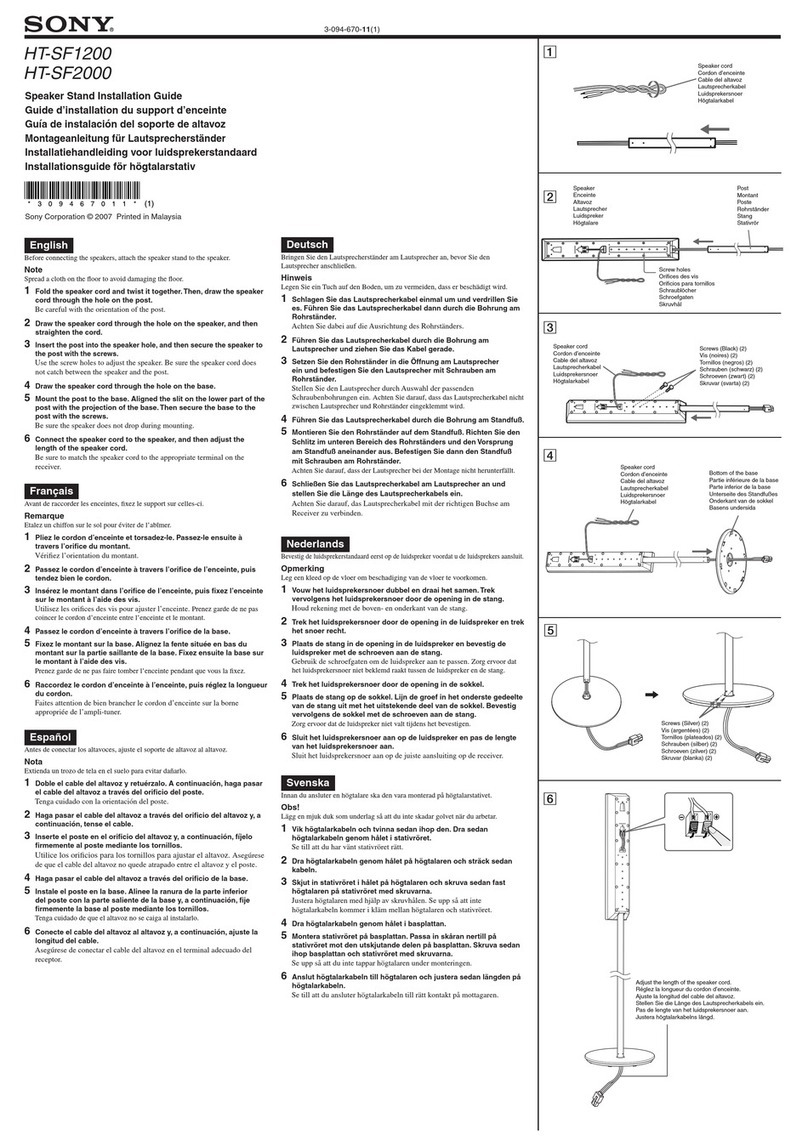
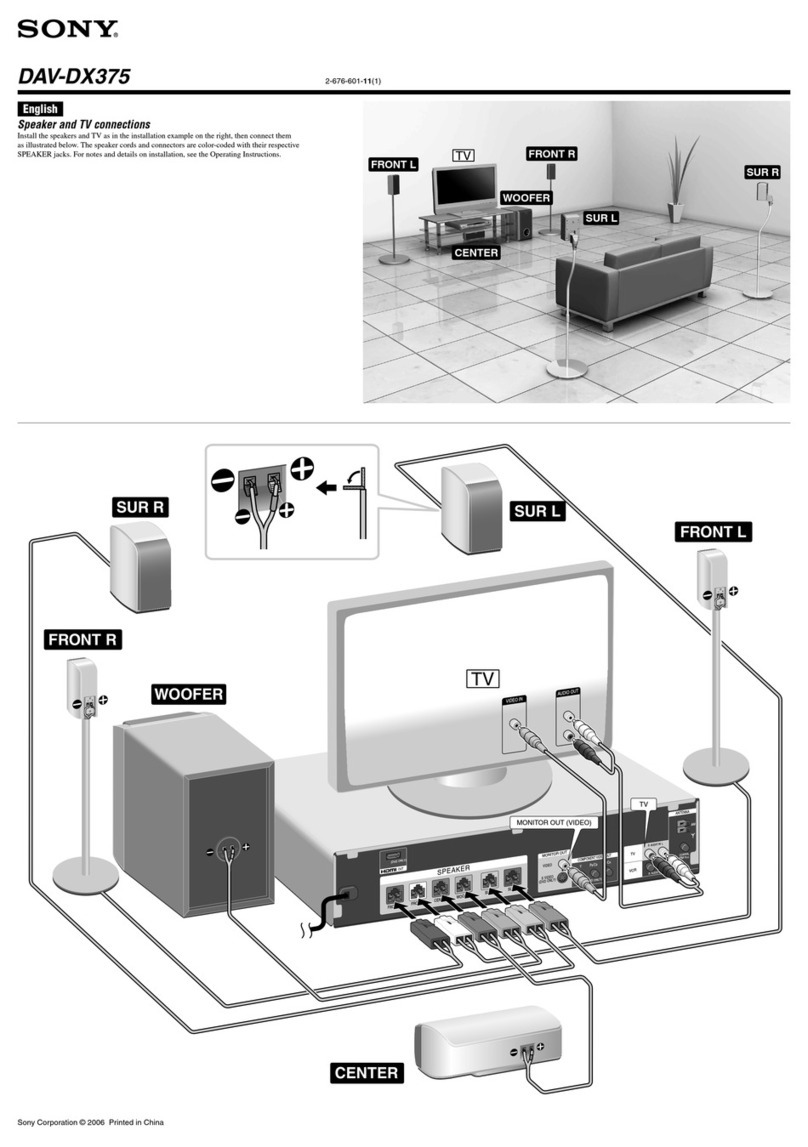
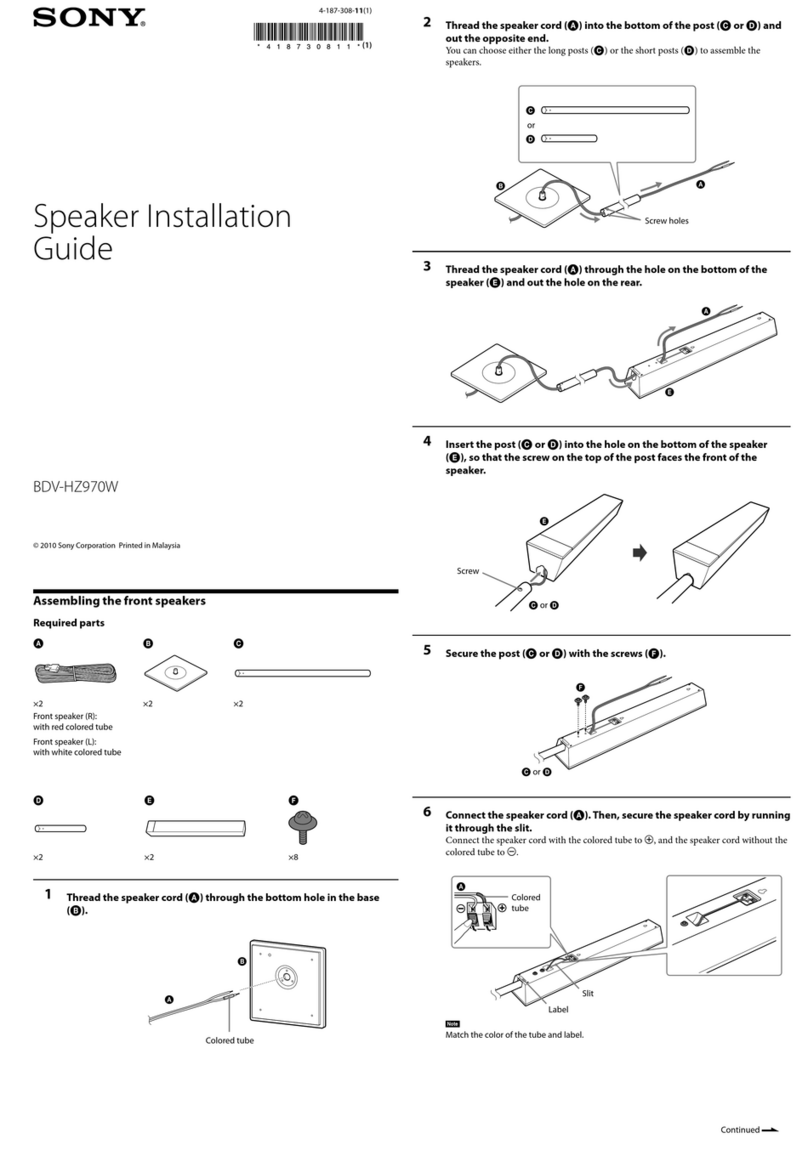
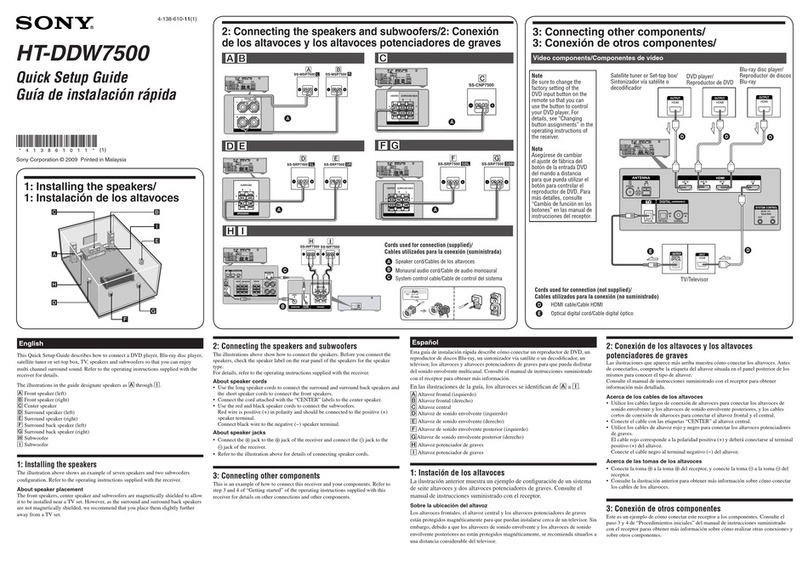
Speaker Installation Guide
Guide d’installation des enceintes
Guía de instalación de los altavoces
Montageanleitung für Lautsprecher
Installatiegids voor de luidspreker
Guida all’installazione dei diffusori
Podręcznik instalacji głośników
Руководство по установке динамиков
Посібник з установки динаміків
揚聲器安裝指南
4-418-870-41(1)
BDV-E190
©2012 Sony Corporation Printed in Malaysia
(1)
English
Caution
Contact a screw shop or installer regarding the wall material or screws to be used.
Use screws that are suitable for the wall material and strength. As a plaster board wall is
especially fragile, attach the screws securely to a beam and fasten them to the wall. Install the
speakers on a vertical and flat wall where reinforcement is applied.
Sony is not responsible for accidents or damage caused by improper installation, insufficient
wall strength or improper screw installation, natural calamity, etc.
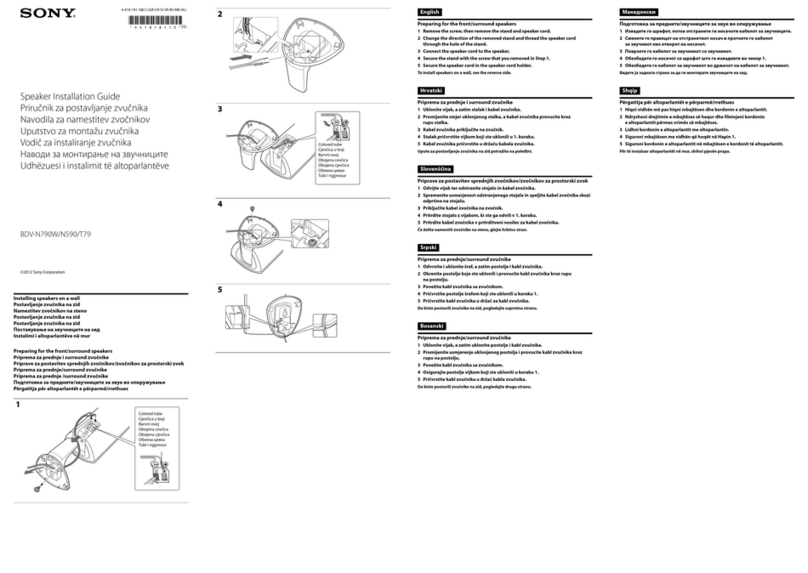
1 Prepare screws (not supplied) that are suitable for the hole on the back of each
speaker.
2 Fasten the screws to the wall.
Leave a space of about 5 mm to 7 mm between the wall and the head of the screw.
3 Hang the speaker on the screw.
Français
Avertissement
Adressez-vous à un quincaillier ou à un installateur pour connaître le matériau du mur ou les
vis à utiliser.
Utilisez des vis adaptées au matériau et à la résistance du mur. Comme les plaques de plâtre
sont particulièrement fragiles, fixez fermement les vis à une poutre et fixez-les au mur.
Installez les enceintes sur une paroi verticale et plane à un endroit où se trouve un
renforcement.
Sony ne peut être tenu responsable de tout accident ou dégât entraîné par une installation
incorrecte, une résistance insuffisante du mur, une mauvaise fixation des vis, une catastrophe
naturelle, etc.
1 Préparez des vis (non fournies) adaptées à l’orifice situé au dos de chaque enceinte.
2 Fixez les vis au mur.
Laissez un espace de 5 mm à 7 mm environ entre le mur et la tête de la vis.
3 Accrochez l’enceinte à la vis.
Español
Precaución
Consulte con una tienda especializada en tornillos o con un instalador acerca del material de
pared o de los tornillos que se deben utilizar.
Utilice tornillos adecuados para el material y la resistencia de la pared. Dado que una pared
de yeso es especialmente frágil, acople los tornillos firmemente a una viga y fíjelos en la pared.
Instale los altavoces en una pared vertical y lisa que esté reforzada.
Sony no se responsabiliza de ningún accidente o daño causado por una instalación
inadecuada, una pared de poca resistencia, una instalación incorrecta de los tornillos, una
catástrofe natural, etc.
1 Prepare unos tornillos (no suministrados) que sean adecuados para el orificio
situado en la parte posterior de cada altavoz.
2 Fije los tornillos en la pared.
Deje un espacio de 5 mm a 7 mm aproximadamente entre la pared y la cabeza del tornillo.
3 Cuelgue el altavoz del tornillo.
Deutsch
Vorsicht
Wenden Sie sich bei Fragen bezüglich des Wandmaterials oder geeigneter Schrauben an einen
Fachmann.
Verwenden Sie Schrauben, die für das Material der Wand und die Wandstärke geeignet sind.
Wände aus Gipskarton sind nicht sehr stabil. Drehen Sie die Schrauben zur Befestigung in
einen Holzträger. Montieren Sie die Lautsprecher an einer senkrechten und ebenen Wand, die
ausreichend verstärkt ist.
Sony haftet nicht für Unfälle oder Schäden, die durch unsachgemäße Montage,
unzureichende Wandstärke, schlechte Schraubenverankerung, Naturkatastrophen usw.
entstehen.
1 Beschaffen Sie Schrauben (nicht mitgeliefert), die sich für die Bohrung an der
Rückseite der einzelnen Lautsprecher eignen.
2 Drehen Sie die Schrauben in die Wand.
Lassen Sie zwischen der Wand und dem Schraubenkopf etwa 5 mm bis 7 mm Platz.
3 Hängen Sie den Lautsprecher an die Schraube.
Nederlands
Opgelet
Contacteer een ijzerhandel of installateur voor meer informatie omtrent het muurmateriaal of
de schroeven die u dient te gebruiken.

Gebruik schroeven die geschikt zijn voor het materiaal en de stevigheid van de muur. Aangezien een
muur in gipsplaat erg zwak is, draait u de schroeven het best in een balk om de luidsprekers te
bevestigen. Bevestig de luidsprekers op een verticale, vlakke en verstevigde muur.
Sony is niet aansprakelijk voor ongevallen noch schade ten gevolge van een ondeskundige
montage, een onvoldoende sterke muur, verkeerd aangebrachte schroeven, natuurrampen
enz.
1 Neem schroeven (niet bijgeleverd) die geschikt zijn voor de opening aan de
achterkant van elke luidspreker.
2 Bevestig de schroeven in de muur.
Laat een ruimte over van ongeveer 5 mm tot 7 mm tussen de muur en de kop van de
schroef.
3 Hang de luidspreker op aan de schroef.
2
3
Installing speakers on a wall
Installation des enceintes au mur
Instalación de los altavoces en una pared
Montage der Lautsprecher an der Wand
De luidsprekers aan een muur bevestigen
1
5 mm (7/32 in / 7/32 po / 7/32 pulg)
10 mm (13/32 in / 13/32 po / 13/32 pulg)
Hole on the back of the speaker
Orifice situé au dos de l’enceinte
Orificio de la parte posterior del altavoz
Bohrung an der Rückseite des
Lautsprechers
Opening aan de achterkant van de
luidspreker
30 mm (1 3/16 in / 1 3/16 po / 1 3/16 pulg)
4 mm (3/16 in / 3/16 po / 3/16 pulg)
5 mm to 7 mm (7/32 in to 9/32 in)
5 mm à 7 mm (7/32 po à 9/32 po)
de 5 mm a 7 mm (7/32 pulg a 9/32 pulg)
5 mm bis 7 mm
5 mm tot 7 mm
Attaching the foot pads to the speakers/subwoofer for floor installation
Fixation des tampons aux enceintes/caisson de graves en vue de leur
installation sur le sol
Colocación de las almohadillas protectoras a los altavoces/altavoz
potenciador de graves para la instalación sobre el suelo
Anbringen der Dämpfer an den Lautsprechern bzw. am
Tiefsttonlautsprecher bei Bodeninstallation
De voetjes bevestigen aan de luidsprekers/subwoofer voor plaatsing op
de grond
English
Before you install the speakers and subwoofer, be sure to attach the supplied foot pads
to prevent vibration or movement, as shown in the illustration.
Français
Avant d’installer les enceintes et le caisson de graves, n’oubliez pas de fixer les tampons
fournis afin d’éviter les vibrations ou les mouvements, comme illustré.
Español
Antes de instalar los altavoces y el altavoz potenciador de graves, asegúrese de colocar
las almohadillas protectoras suministradas para evitar vibraciones o movimientos, tal
como se muestra en la ilustración.
Deutsch
Bringen Sie vor dem Aufstellen der Lautsprecher und des Tiefsttonlautsprechers
unbedingt wie in der Abbildung dargestellt die mitgelieferten Dämpfer an, um
Vibrationen oder ein Verschieben zu verhindern.
Nederlands
Voor u de luidsprekers en de subwoofer installeert, moet u de bijgeleverde voetjes
vastmaken zoals weergegeven op de afbeelding om trillingen of bewegingen te
voorkomen.
For the subwoofer
Pour le caisson de graves
Para el altavoz potenciador
de graves
Beim Tiefsttonlautsprecher
Voor de subwoofer
For other speakers
Pour les autres enceintes
Para otros altavoces
Bei anderen Lautsprechern
Voor de andere luidsprekers
Remove the foot pads from the
sheet.
Détachez les tampons de la feuille.
Extraiga las almohadillas
protectoras de la hoja.
Nehmen Sie die Dämpfer von der
Folie ab.
Maak de voetjes los van het vel.
Front/surround speaker
Enceintes avant/surround
Altavoces frontales/de sonido envolvente
Vorderer/Raumklanglautsprecher
Voorluidsprekers/Surroundluidsprekers
Center speaker
Enceinte centrale
Altavoz central
Mittlerer Lautsprecher
Middenluidspreker
Subwoofer
Caisson de graves
Altavoz potenciador de graves
Tiefsttonlautsprecher
Subwoofer
1
Italiano
Attenzione
Rivolgersi a una ferramenta o un installatore per informazioni sul tipo di materiale della
parete e sul tipo di viti da utilizzare.
Usare viti adatte al tipo di materiale della parete e alla sua robustezza. Nel caso di una parete
di cartongesso, materiale particolarmente fragile, fissare saldamente le viti a una trave, quindi
alla parete. Installare i diffusori su una parete verticale, piatta e rinforzata.
Sony declina qualsiasi responsabilità per eventuali incidenti o danneggiamenti causati da
installazioni non corrette, pareti non sufficientemente robuste o uso improprio delle viti,
calamità naturali, ecc.
1 Preparare delle viti (non in dotazione) adatte ai fori che si trovano nella parte
posteriore di ciascun diffusore.
2 Fissare le viti alla parete.
Lasciare uno spazio di circa 5 mm - 7 mm tra la parete e la testa della vite.
3 Agganciare il diffusore alla vite.
Polski
Ostrzeżenie
Jeśli masz wątpliwości co do rodzaju wkrętów lub materiału, z którego wykonana jest ściana,
skontaktuj się ze sprzedawcą wkrętów lub instalatorem.
Używaj wkrętów odpowiednich do materiału i wytrzymałości ściany. Ponieważ ściana
gipsowa jest wyjątkowo delikatna, najpierw przytwierdź wkręty do deski, a następnie do
ściany. Głośniki należy instalować na płaskich, pionowych i zbrojonych ścianach.
Firma Sony nie ponosi odpowiedzialności za wypadki lub uszkodzenia spowodowane
niewłaściwą instalacją, niewystarczającą wytrzymałością ścian lub nieprawidłowym
wkręceniem wkrętów, klęskami żywiołowymi itd.
1 Przygotuj wkręty (nie wchodzą w skład zestawu) odpowiadające średnicą otworom
w tylnej części każdego z głośników.
2 Zamocuj wkręty w ścianie.
Pozostaw ok. 5 mm do 7 mm odstępu między ścianą i główką wkrętu.
3 Powieś głośnik na wkręcie.
Русский
Внимание!
Консультацию о материале стен и необходимых винтах можно получить в магазине,
где продают металлоизделия, или в компании, занимающейся установкой.
Выбирайте винты, соответствующие материалу и прочности стен. Поскольку стена из
гипсокартона обладает повышенной хрупкостью, вкрутите винты в деревянную
планку и закрепите планку на стене. Установите динамики на плоской вертикальной
стене на закрепленной планке.
Sony не несет ответственности за травмы или поломки вследствие неправильной
установки, недостаточной прочности стен, неправильно подобранных винтов,
стихийного бедствия и т.п.
1 Приготовьте винты (не прилагаются), соответствующие отверстиям на задней
панели динамика.
2 Вкрутите винты в стену.
Оставьте место (приблизительно 5 мм - 7 мм) между стеной и головкой винта.
3 Повесьте динамик на винт.
Українська
Увага

Зверніться до співробітника крамниці із продажу гвинтів або установника для
отримання відомостей щодо матеріалу стіни або гвинтів, які потрібно використовувати.

Використовуйте гвинти, які відповідають матеріалу та міцності стіни. Оскільки стіна із сухої
штукатурки особливо крихка, надійно приєднуйте гвинти до балки та закріплюйте на стіні.
Установлюйте динаміки на вертикальних і рівних стінах, до яких застосовується зміцнення.
Sony не несе відповідальності за нещасні випадки або пошкодження, спричинені
неправильним установленням, недостатньою міцністю стін, неналежним закріпленням
гвинтів, стихійними лихами тощо.
1 Підготуйте гвинти (не додаються), які відповідають діаметру отвору на задній
частині кожного динаміка.
2 Прикріпіть гвинти до стіни.
Залиште вільне місце, п
ри
бл
и
з
но
від 5 мм до 7 мм, між стіною та головкою гвинта.
3 Повісьте динамік на гвинт.
繁體中文
注意
關於使用的牆面材料或螺絲,請聯絡螺絲商店或安裝人員。
使用適合牆面材料和強度的螺絲。由於石膏板牆壁易碎,請將螺絲牢固釘入柱子並旋
入牆壁。將揚聲器安裝在足夠牢固的垂直和平整的牆壁上。
Sony對因不正確安裝、牆壁不夠堅固、不正確安裝螺絲、自然災害等引起的事故或損
壞不承擔責任。
1準備適合各揚聲器背面上孔的螺絲(不提供)。
2將螺絲旋入牆壁。
在牆壁與螺絲頭部之間保留約5mm至7mm的空間。
3將揚聲器懸掛在螺絲上。
注意
關於使用的牆面材料或螺絲,請聯絡螺絲商店或安裝人員。
使用適合牆面材料和強度的螺絲。由於石膏板牆壁易碎,請將螺絲牢固釘入柱子並旋
入牆壁。將揚聲器安裝在足夠牢固的垂直和平整的牆壁上。
Sony對因不正確安裝、牆壁不夠堅固、不正確安裝螺絲、自然災害等引起的事故或損
壞不承擔責任。
1準備適合各揚聲器背面上孔的螺絲(不提供)。
2將螺絲旋入牆壁。
在牆壁與螺絲頭部之間保留約5mm至7mm的空間。
3將揚聲器懸掛在螺絲上。
5 mm
10 mm
Foro nella parte posteriore del diffusore
Otwór w tylnej części głośnika
Отверстие на задней панели
динамика
Отвір на задній стороні динаміка
揚聲器背面上的孔
30 mm
4 mm
2
3
Installazione dei diffusori a parete
Instalowanie głośników na ścianie
Установка динамиков на стену
Установлення динаміків на стіні
將揚聲器安裝到牆壁上
da 5 mm a 7 mm
5 mm do 7 mm
от 5 мм до 7 мм
від 5 мм до 7 мм
5 mm至7 mm
Italiano
Prima di installare i diffusori e il subwoofer, assicurarsi di applicare i cuscinetti in
dotazione per prevenire vibrazioni o movimenti, come illustrato in figura.
Polski
Przed instalacją głośników i subwoofera pamiętaj, aby przymocować dołączone nóżki
głośników zgodnie z ilustracją.
Русский
Прежде чем устанавливать динамики и сабвуфер, во избежание их вибрации и
перемещения обязательно прикрепите прилагаемые ножки, как показано на
рисунке выше.
Українська
Перед установленням динаміків і сабвуфера, переконайтеся, що опорні
підкладки, що додаються, приєднані для запобігання вібрації або руху, як
показано на ілюстрації.
繁體中文
安裝揚聲器和低音揚聲器之前,務必如圖所示先安裝提供的腳墊以防止振動或
移動。
Applicazione dei cuscinetti su diffusori/subwoofer per l’installazione a
pavimento
Mocowanie nóżek głośników do głośników/subwoofera stawianych na
podłodze
Прикрепление ножек к динамикам/cабвуферу для напольной
установки
Приєднання опорних підкладок до динаміків/сабвуфера для
установки на підлозі
將腳墊粘貼到揚聲器/低音揚聲器進行地面安裝
Diffusori anteriori/surround
Głośnik przedni/środkowy
Передний динамик/динамик объемного
звучания
Фронтальний динамік/динамік об’ємного
звучання
前置/後置揚聲器
Diffusore centrale
Głośnik środkowy
Центральный динамик
Центральний динамік
中置揚聲器
Subwoofer
Subwoofer
Сабвуфер
Сабвуфер
低音揚聲器
Per il subwoofer
Dla subwoofera
Для сабвуфера
Для сабвуфера
用於低音揚聲器
Per gli altri diffusori
Dla innych głośników
Для остальных динамиков
Для інших динаміків
用於其他揚聲器
Rimuovere i cuscinetti dalla
pellicola.
Odłączanie nóżek głośników od
arkusza.
Открепите ножки от листа.
Зніміть опорні підкладки з листа.
從貼紙上撕下腳墊。

Other manuals for BDV-E190

7

Other Sony Home Theater System manuals

Sony AVJ-X55 User manual

Sony

Sony AVJ-X55 User manual

Sony NHS-2000 User manual

Sony

Sony NHS-2000 User manual

Sony Digital Duplicator User manual

Sony

Sony Digital Duplicator User manual

Sony HT-K215 User manual

Sony

Sony HT-K215 User manual

Sony HT-XT100 User manual

Sony

Sony HT-XT100 User manual

Sony BDV-HZ970W  (UWA-BR100) User manual

Sony

Sony BDV-HZ970W (UWA-BR100) User manual

Sony HT-DDW660 - Receiver Speaker System Home... User manual

Sony

Sony HT-DDW660 - Receiver Speaker System Home... User manual

Sony BRAVIA DAV-HDX279 User manual

Sony

Sony BRAVIA DAV-HDX279 User manual

Sony HT-XT100 User manual

Sony

Sony HT-XT100 User manual

Sony HT-DDW670T User manual

Sony

Sony HT-DDW670T User manual

Sony HT-DDW890 User manual

Sony

Sony HT-DDW890 User manual

Sony DAV-TZ100 User manual

Sony

Sony DAV-TZ100 User manual

Sony HT-1800DP User manual

Sony

Sony HT-1800DP User manual

Sony SA-VE302 User manual

Sony

Sony SA-VE302 User manual

Sony DAV-DX375 - Integrated Home Theater System Quick start guide

Sony

Sony DAV-DX375 - Integrated Home Theater System Quick start guide

Sony HT-SF1000 User manual

Sony

Sony HT-SF1000 User manual

Sony HT-CT500 User manual

Sony

Sony HT-CT500 User manual

Sony BDV-N590 User manual

Sony

Sony BDV-N590 User manual

Sony HT-C800DP Instruction manual

Sony

Sony HT-C800DP Instruction manual

Sony BDV-E190 User manual

Sony

Sony BDV-E190 User manual

Sony 3-283-375-11(2) User manual

Sony

Sony 3-283-375-11(2) User manual

Sony HT-1800DP User manual

Sony

Sony HT-1800DP User manual

Sony DAV-DZ210D User manual

Sony

Sony DAV-DZ210D User manual

Sony BDV-E6100 User manual

Sony

Sony BDV-E6100 User manual

Popular Home Theater System manuals by other brands

LG S75T1-S owner's manual

LG

LG S75T1-S owner's manual

Philips HTD3200 user manual

Philips

Philips HTD3200 user manual

LG LHD457B owner's manual

LG

LG LHD457B owner's manual

Philips HTD3509 quick start guide

Philips

Philips HTD3509 quick start guide

Philips HTS8141 Specifications

Philips

Philips HTS8141 Specifications

Samsung HT-F4500 user manual

Samsung

Samsung HT-F4500 user manual

Epson dreamio EH-R4000 user guide

Epson

Epson dreamio EH-R4000 user guide

LG LHB953 -  Home Theater System owner's manual

LG

LG LHB953 - Home Theater System owner's manual

Panasonic SCHT440 - RECEIVER operating instructions

Panasonic

Panasonic SCHT440 - RECEIVER operating instructions

High End Systems Dichroic Theatre Series user manual

High End Systems

High End Systems Dichroic Theatre Series user manual

Philips HTS3538 Series user manual

Philips

Philips HTS3538 Series user manual

Panasonic SA-HT340EB Service manual

Panasonic

Panasonic SA-HT340EB Service manual

Philips HES4900/98 quick start guide

Philips

Philips HES4900/98 quick start guide

Emerson AV510 Quick setup guide

Emerson

Emerson AV510 Quick setup guide

LG LHD756 Simple manual

LG

LG LHD756 Simple manual

Onkyo L-DR7 instruction manual

Onkyo

Onkyo L-DR7 instruction manual

Zenith FFH-DV25A Installation and operating guide

Zenith

Zenith FFH-DV25A Installation and operating guide

Samsung HT-C550 user manual

Samsung

Samsung HT-C550 user manual

manuals.online logo
manuals.online logoBrands
  • About & Mission
  • Contact us
  • Privacy Policy
  • Terms and Conditions

Copyright 2025 Manuals.Online. All Rights Reserved.