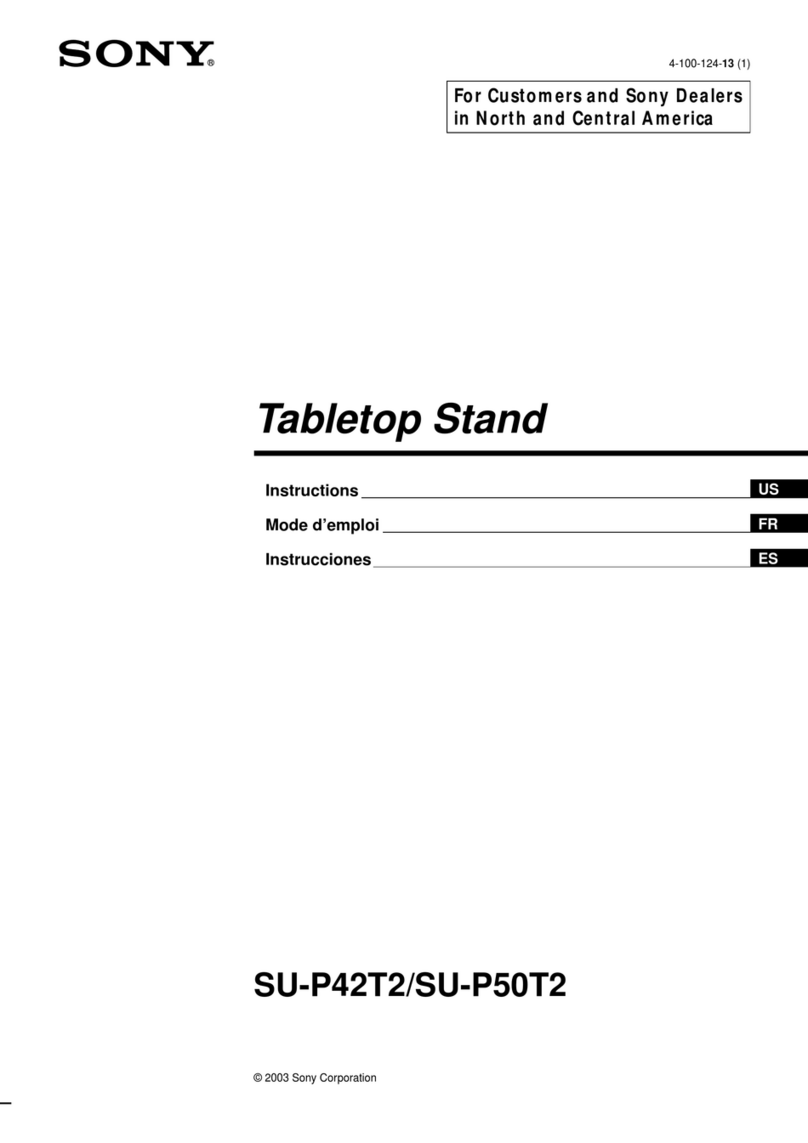
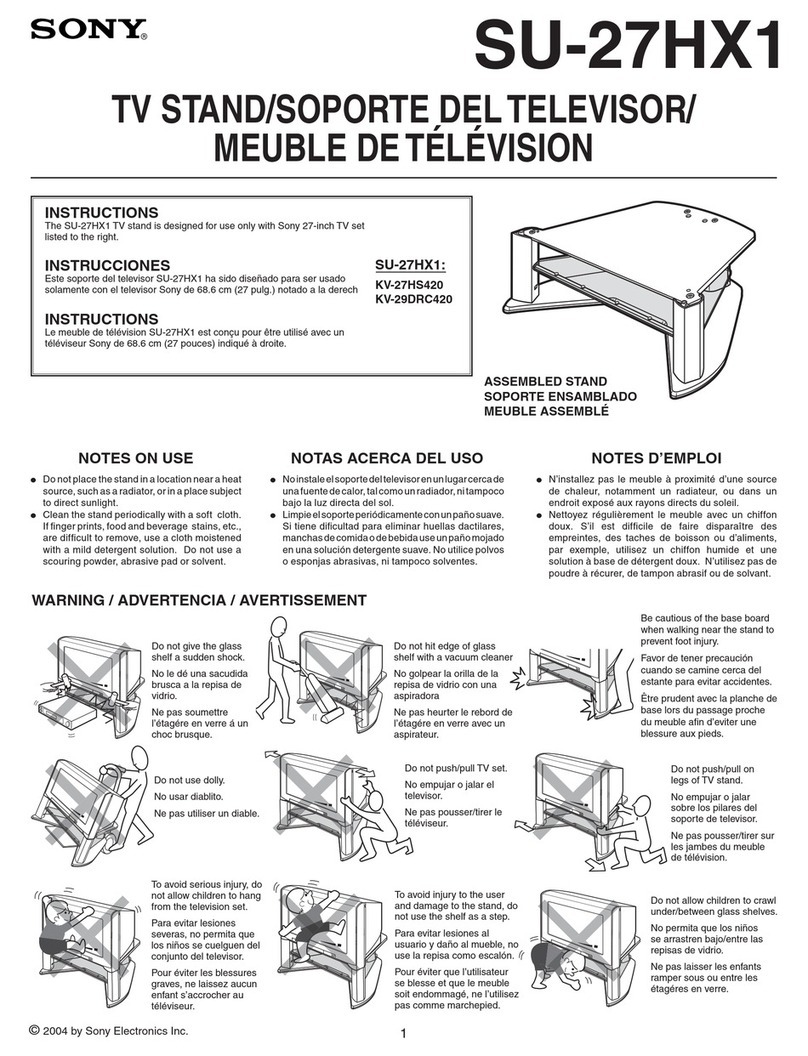
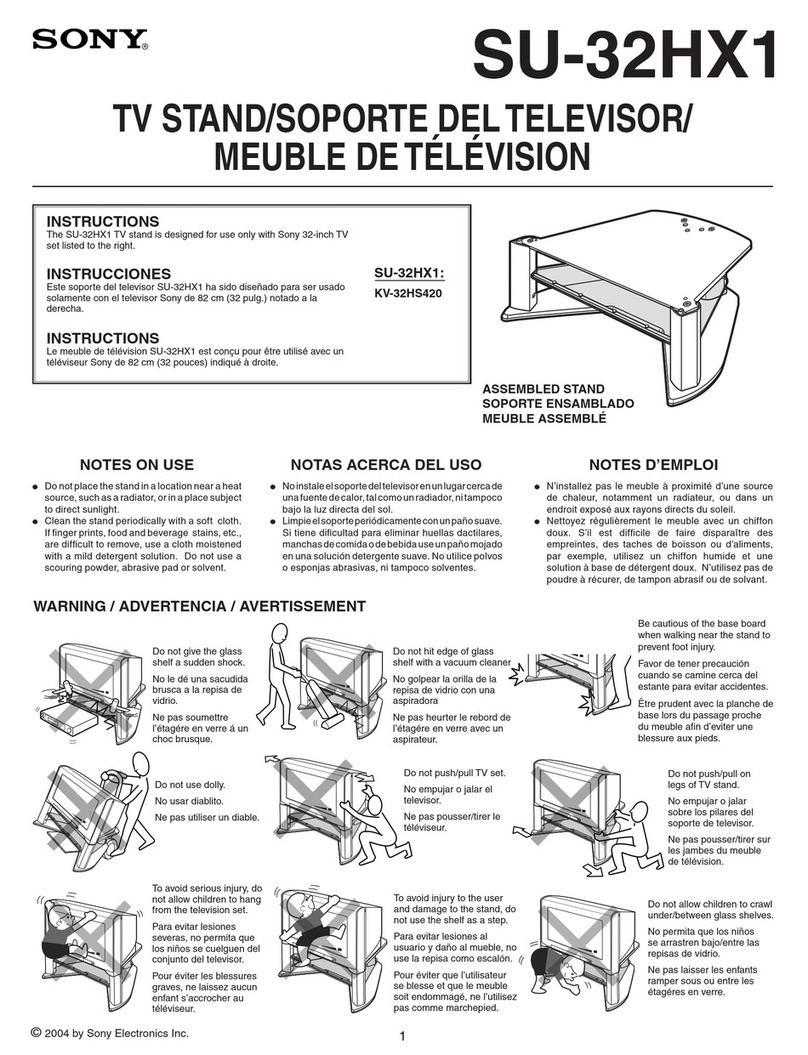
Sony SU-32XBR45 User manual

SONY@
SU-32XBR45
SU-36XBR45
TVSTANDKOPORTEDELTELEVISOR
MEUBLEDETELEVISION
INSTRUCTIONS
The SU32XBR45 TV stand is designed for use with Sony 32-inch TV set.
The SU36XBR45 TV stand is designed for use with Sony 36-inch TV set.
SU-32XBR45:
INSTRUCCIONES
KV-32XBR400
Este soporte de televisor SU-32XBR45 ha sido disehado para ser
usado con un televisor Sony de 32”.
Este soporte de televisor SU36XBR45 ha si$ disenado para ser
usado con un televisor Sony de 36”.
INSTRUCTIONS
KV-32HS20
KV-32XBR450
SU-36XBR45:
KW36XBR400
Le meuble de television SU-32XBR45 TV est conpu pour etre
utilise avec un televiseur Sony de 82 cm (32 pouces).
Le meuble de television SU-36XBR45 TV est conpu pour etre
utilise avec un televiseur Sony de 92 cm (36 pouces).
KV-36HS20
KV-36XBR450
NOTES ON USE
l Do not place the stand in a location near a l No instale el soporte de televisor en un lugar cerca
heat source, such as a radiator, or in a place de un fuente de calor, tal coma un radiador, ni
subject to direct sunlight. tampoco bajo la Iuz directa del sol.
l Clean the stand periodically with a soft cloth.
If finger prints, food and beverage stains, etc.,
are difficult to remove, use a cloth moistened
with a mild detergent solution. Do not use a
scouring powder, abrasive pad or solvent.
l Limpie el mueble periodicamente con un p a h o
suave. Si tiene dificultad para eliminar huellas
dactilares, manchas de comida o de bebida use un
pario mojado en una solution detergente suave.
No utilice polvos o esponjas abrasivas, ni tampoco
solventes.
NOTAS ACERCA DEL US0
ASSEMBLED STAND
SOPORTE ENSAMBLADO
MEUBLE ASSEMBLE
NOTES D’EMPLOI
l N’installez pas le meuble a proximite d’une
source de chaleur, notamment un radiateur, ou dans
un endroit expose aux rayons directs du soleil.
l Nettoyez regulierement le meuble avec un chiffon
doux. S’il est difficile de faire disparaitre des
empreintes, des taches de boisson ou d’aliments,
par exemple, utilisez un chiffon humide et une
solution a base de detergent doux. N’utili
sez pas de poudre a recurer, de tampon abrasif
ou de solvant.
Hold by marked ($ ) locations
when moving TV stand.
Sostener de locaciones marcadas
($) cuando mueva el soporte de
televisor.
Soutenir aux endroits marques
(c) lorsque vous de placez le
meuble de television.
CAUTION: Remove TV set before moving set/stand location. Do not move
I with TV set fixed to TV stand.
PRECAUCION: Remover el televisor antes de mover el mueble. No mover
con el televisor instalado.
ATTENTION: Retirer le televiseur avant de deplacer le meuble de televi-
sion. Ne pas deplacer avec le televiseur fixe sur le meuble de television.
WARNING / ADVERTENCIA / AVERTISSEMENT
Do not use dolly.
No usar diablito.
Ne pas utiliser un diable.
Do not push/pull TV set.
No empujar o jalar
Ne pas poussemirer le
Do not push/pull on legs
of TV stand.
No empujar o jalar sobre
10s pilares de el soporte
de televisor.
Ne pas pousserkirer sur
les jambes du meuble de
television.
To avoid serious injury, do
not allow children to hang
from the television set.
Para evitar lesiones
severas, no permita que 10s
nirios se cuelguen del
conjunto del televisor.
Pour eviter les blessures
graves, ne laissez aucun
enfant s’accrocher au
televiseur.
To avoid injury to the user
and damage to the stand, do
not use the shelf as a step.
Para evitar lesiones al
usuario y dario al mueble, no
use la repisa corn0 escalon.
Pour eviter que I’utilisateur
se blesse et que le meuble
soit endommage, ne I’utilisez
pas comme marchepied.
Do not place hot objects on top of
the stand. Doing so may result in
permanent damage to the
surfaces.
No coloque objetos calientes
arriba del mueble. El hacerlo
puede resultar en daAo
permanente a las superficies.
Ne posez pas d’objets brirlants SUI
le dessus du meuble. Cela
endommagerait irremediablement
sa surface.
@ 2001 by Sony Electronics Inc.

PARTS LIST
LISTA DE PAqTES
LISTE DES PIECES
MODEL:
MODELO:
MODELE:
SU-32XBR4!
SU32XBR4. MODEL:
XW2851 6
WI
W
w 1
ant
I
NC
I
1
1
1
1
2
1
1
1
1
5
4
3
2
2
2
1
2
4
2
2
2
A
1,
so131
Description
Descripci6n
Description
MODELO:
MODELE:
Dowel 08x30
Espiga 08x30
Goujon 08x30
36XBR45
j6XBR45
‘art
No.
b.pWte
V de pi&e
XW288?
XW2864
XW285S
XW2865
XPO084
XPO089
XPOO90
GO346
MO018
so035
so025
BOO77
PO236-1
so030
so130
MO209
so129
MO208
SO132
so135
SI
2
CNc
-
4
-
2
-
1
-
1
-
2
-
4
-
3
-
2
-
4
-
4
-
4
-
4
-
2
-
1
-
32XBR4!
Part No.
vo.parte
V de pi&
XW285
XW285’
XW2861
XPO087
XPOO91
XPOO91
GO346
MO018
SO035
su
zi
ate
-
1
-
1
-
1
-
1
-
2
-
1
-
1
-
1
-
1
-
5
-
4
-
3
-
2
-
2
-
2
-
1
-
2
-
4
-
2
-
2
-
2
-
SO025
BOO77
PO236-’
so030
so130
MO209
so129
MO208
so131
SO132
so135
Descripci6”
Description
Top board
Repisa superior
Panneau sup&ieur
Base board
Repisa inferior
Panneau inf&ieur
0
-
0
Capnut screw @M8x433.5
Tornillo@ M8x433.5
Vis d’&rou borgne @ M8x443.5
0
Rear column
Columna trasera
Colonne arri&e
TV clip holder
Hevilla plastic0
Porte-pince du tel&iseur
@
-
0
Screw@ M4x16
Tornillo@ M4x16
Vis @ M4x16
Screw@ M8x8 (pre-installed)
Tornilloe M8x8 (pre-instalada)
Vise M8x8 (pre-installed)
Back cover
Cubierto trasera
Couvercle arri&e
Front column
Columna frontal
Colonne avant
8
-
0
Side cap (Right)
Tapa de lado (Derecho)
Capuchon lateral (Droit)
Bumpon (preinstalled)
Tope de plastic0 M4x20
Plaque emboitable (pre-installed)
Side cap (Left)
Tapa de lado (Izquierdo)
Capuchon laWal (Gauche)
Cam casting (pre-installed)
Leva moldeada (pre-instalada)
Came (pr&install&)
Support plate (pre-installed)
Placa de sopotte (pre-instalada)
Plaque de support (pr&installbe)
Glass shelf
Repisa de vidrio
Etag&e en verre
Screw@ M4x20 (pre-installed)
Tornilloo M4x20 (pre-instalada) @
Vis @ M4x20 (pr&install&e)
Allen wrench
Llave Alien
CIB Allen
Receptacle (pre-installed)
Receptaculo (pre-instalada)
Prise Blectrique (pr&nstallbe)
Mini ball (pre-installed)
Marco (pre-instalada)
Mini-bille (pr&instaNe) @B
Confirmat screw (He
Tomillo Confirmat
Vis (Hexagonale g t&
Screw 8 M5x.50
yn;llo@~x50 e
Insert nut M6x18 (pre-installed)
Rosca integrada M6x18 (prs-instalada)
Ecrou insert M6x18 (pr&installbe)
Spreading bolt
Esprea moldeada
Boulon d’&artement
Foot guide
Guia de pie
Butoir
Insert nut M8x23 (pre-installed)
Rosca integrada M8x23 (prs-instslada)
Ecrou insert M8x23 (pr&nstall~e)
Glass bracket (pre-installed)
Sostbn de vidrio (pre-instalada)
Support en verre (@-installbe)
SCreW 8 #6X5/8”
Tornilloe #6x5/8”
ViSfB #6X5/8”
Cosmetic screw
Tornillo cosm4ico
Vis esthbtique
Glass shelf support
Soporie de repisa de vidrio
Support d’&ag&-e en verre
Threaded stud M6x35
Tornillo sin cabeza
Goujon filet6 M6X35
Glass shelf rod
Varilla de repisa
Tige d’&ag&-e en verre
Dome head bolt M6x
Pemo M6X40
Vis &t&e en d8me M
Dome head bolt M6x15
Perno M6X15
Vis B t6te en d6me M6X15
Toothed lock washer (M12)
Arandela de llave
Rondelle de blocage dentbe

NOTES ON ASSEMBLY
. You will need a medium size Phillips head screwdriver.
. Assemble the stand only by the method shown in this
instruction sheet.
. Assemble the stand near the location where the stand will be used.
. The circled letters in the illustrations are the same as those in the “PARTS LIST”.
For easier assembly, line up the parts in the order they will be required.
NOTAS ACERCA DEL MONTAJE
. Usted necesitara un desarmador mediano de cruz.
. Ensamble el soporte de televisor siguiendo unicamente el metodo mostrado en
estas instrucciones.
. Haga el montaje cerca del lugar donde se usara.
. Las letras encerradas en circulo en las ilustraciones, son las mismas letras en la
“LISTA DE PARTES”. Para facilitar el montaje alinie las panes en el orden en
que seran usadas.
NOTES D’ASSEMBLAGE
. Vous aurez besoin dun tournevis cruciforrl)le de taille moyenne.
. Assemblez le meuble uniquement selon la methode d&rite dans ce mode d’emploi.
l
Assemblez le meuble pres de I’endroit 00 il sera utilise.
. Les lettres entoureesdans les schemas sont les memes que celles figurant dans la
liste sc LISTE DES PIECES a). Afin de faciliter I’assemblage, alignez les pieces par
ordre de montage.
REPLACEMENT PARTS INFORMATION
(TV
stand parts only)
Review parts
list before assembly.
Please examine all packing material before discarding.
If any parts are missing or damaged, identify and refer to
the instructions on the warrantv Daae.
To purchase replacement parts only, call the telephone
number listed below.
l-619-661 -6136 for residents of the United States.
INFORMACION PARA PARTES DE REEMPLAZO
(Solo para soporte de TV)
Revise la lista de partes antes de ensamblar.
Por favor examine el contenido del empaque antes de tirarlo.
Si alguna pane falta o esta dahada, identifiquela y siga las
instrucciones en la hoia de aarantia.
Para ordenar partes de reemplazo, llame al tel.
l-61 g-661-6136 para residentes de 10s Estados Unidos.
INFORMATIONS SUR LES PI&ES DE RECHANGE
(Concernent uniquement le meuble de television)
Verifiez toutes les pieces avant I’assemblage.
Veuillez examiner tous les emballages avant de les jeter.
Si certaines pieces sont manquantes ou defectueuses, reportez-
vous aux instructions de la paae de aarantie.
‘our I’achat de pieces de rechange uniquement, appelez le numero
ci-dessous.
1-619-661-6136 pour les habitants des ctats-Unis.
WARNING: TO AVOID DANGER OF SUFFOCATION KEEP BAGS AWAY FROM BABIES AND CHILDREN.
ADVERTENCIA: PARA EVITAR EL RIESGO DE ASFIXIA. MANTENGA BOLSAS ALEJADA DE BEBES Y NINOS.
ATTENTION: POUR EVITER TOUT RISQUE DE SUFFOCATION, ME LAVSSEZ PAS LES ENFANTS ET LES BEBES MAMPULER CE SAC.
J
INCORRECT
7-G INCORRECT0
INCORRECT
Arrow direction shows front.
La direction de la flecha indica el frente.
La direction de la fleche indique le devant.
(pre-instalada)
(pre-installee)

BACK VIEW
VISTA POSTERIOR
ARRIliRE VUE
Spreading
bolt hole
Agujero para
la esprea moldeada
Orifice du boulon
d’ecartement
NOTE: The arrow mark on the cam casts
must point towards the edge of board.
NOTA: La flecha sehalada en la “leva moldeada
debe apuntar hacia la orilla de la tabla.
NOTE: La f&he sur les tames doit Qtre pointee
vers le bord du panneau.
Turn clockwise.
Dele vueltas en el
sentido de las
manecillas del reloj.
Tournez dans le
sens des aiguilles.

FOR EASIER ASSEMBLY, USE THESE 2 DOWELS AS
GUIDES.
PARA FACILITAR EL ENSAMBLE, USE LAS DOS ESPIGAS
COMO GUiAS.
POUR FACtLITER UTILISER 2 GOUJONS CdMME GUIDES.
WHEN TIGHTENING THE CAPNUT SCREW @, PLEASE USE A
PHILLIPS HEAD SCREWDRIVER. DO NOT USE AN ELECTRIC
SCREWDRIVER.
CUADO APRIETE ELTORNILLO @, POR FAVOR USE UN
DESARMADOR DE CRUZ. NO UTILIZE UN DESARMADOR
ELiCTRICO.
LORS DU SERRAGE DE LA VIS DE &CROU BORGNE @ ,
UTILISER UN TOURNEVIS ATETE CRUCIFORME. NE PAS
UTILISER DE TOURNEVIS CLECTRIQUE.

CAUTION: GLASS SHELF SUPPORT H MAY HAVE SHARP EDGES.PLEASE HANDLE WITH CARE WHEN ATTACHING
8
IT TO GLASS SHELF ROD J
PRECAUCION: EL SOPORTE @ DE LA REPISA DE VIDRIO PUEDE TENER ORILLAS AFLADESFAVOR DE
MANEJARLO CON CUIDADO CUANDO LO JUNTE A LA VARILLA @ PARA DE LA REPISA DE VIDRIO.
AlTENTION : LE SUPPORT @ D’ETAGkRE EN VERRE PEUT AVOIR DES REBORDS TRANCHANTS. NE LE MANIPULER
QU’AVEC PRECAUTION LORS DE SA FIXATION SUR LA TIGE D’kTAGliRE EN VERRE 0.
PLEASE DECIDE SHELF POSITION BASED ON COMPONENTS TO BE INSTALLED.
(REFER TO PAGE 10 OF THIS MANUAL).
FAVOR DE DECIDIR LA ALTURA DE REPISA DEPENDIENTE A LOS COMPONENTES QUE SE INSTALARAN.
(REFERIRSE A LA PAGINA 10 DE ESTE MANUAL).
PRIkRE DE CHOISIR LA POSITION DE CtTAGERE EN FONCTION DES COMPOSANTS A INSTALLER.
(SE RkFcRER A LA PAGE 10 DE CE MANUEL).
I7
POSITION 1
POSICION 1
POSITION 1
FOR UPPER GLASS SHELF ASSEMBLY:
USE 2 GLASS SHELF RODS 0.
PARA ENSAMBLAR EL DE LA REPISA POSICION SUPERIOR:
UTILIZE 2 VARILLAS @ PARA DE LA REPISA DE VIDRIO.
POUR L’&TAGliRE EN VERRE SUPkRIEURE :
UTILISER 2 TIGES @ D’liTAGkRE EN VERRE.
OR
POSITION 2 II
POSICION 2
POSITION 2
J x4
j:g
I x2
FOR LOWER GLASS SHELF SSEMBLY:
USE 4 GLASS SHELF RODS J WITH THREADED STUD 0.
Q
PARA ENSAMBLAR EL DE LA REPISA POSICION INFERIOR:
UTILIZE 4 VARILLAS @ PARA DE LA REPISA DE VIDRIO CON
EL TORNILLO SIN CABEZA 0.
POUR L’gTAGkRE EN VERRE INFliRIEURE :
UTILISER 4 TIGES @ D’cTAGkRE EN VERRE AVEC LE
GOUJON FILETt 0.
4

POSITION 1
POSICION 1
POSITION 1
POSITION 2
POSICION 2
POSITION 2
&re-instalack)
(pr&install6e) u y x 4 (pre-instalada)
(pr&instaMe)
CAUTION / PRECAUCION / ATTENTION
This glass shelf is made of tempered glass. Although it is
more shock resistant than ordinary glass, tempered glass Cette etagere en verre est constituee de verre trempe. Bien
qu’il resiste mieux aux chocs que le verre ordinaire, le verre
may shatter if it is not used properly. trempe peut se fissurer s’il nest pas correctement utilise.
l
Do not give the glass a sudden shock.
l
Ne sournetter pas le verre a un choc brutal.
l
Do not scratch or hit the glass.
l
Do not sit on the glass or use it as a step.
l
Ne griffez pas et ne frappez pas le verre.
l
Ne vous asseyez pas sur le verre et ne I’utilisez
l
Do not put excess weight on the glass. pas comme marchepied.
l
Ne deposez pas d’objet trop lourd sur le verre.
Este repisa de vidrio esta hecho de vidrio templado. No obstante de
que es m&s resistente a 10s golpes que el vidrio ordinario, el vidrio
templado se puede romper si no se usa adecuadamente.
l
No le de al vidrio una sacudida violenta.
l
No ralle o golpee el vidrio.
l
No sentarse en el vidrio ni lo utilize coma escalon.
l
No ponga peso excesivo en el vidrio.
PLEASE INSTALL GLASS SHELF AFTER THE STAND IS SET AT THE FINAL LOCATION.
REMOVE GLASS SHELF PRIOR TO MOVING THE STAND.
FAVOR DE INSTALAR LA REPISA DE VIDRIO DESPUES DE COLOCAR EL MUEBLE EN SU POSICION FINAL.
QUITE LA REPISA DE VIDRIO ANTES DE MOVER EL MUEBLE.
INSEREZ LES ETAGERE EN VERRE UNE ~01s LE MEUBLE INSTALLC DANS SON EMPLACEMENT DEFINITIF.
RETIREZ LES ETAGERE EN VERRE AVANT DE DEPLACER LE MEUBLE.

TOP VIEW
VISTA SUPERIOR
VUEDEDESSUS
PUSH WITH
FORCE TO LOCK
EMPUJAR CON
FUERZA HASTA
FIJAR POSICION.
FORTEMENT
POUR
u
VERROUILLER
LA POSITION.
INSTALLING THE TV
INSTALACldN DEL TELEVISOR
INSTALLATION DU TliLhISEUR
CAUTION: TO AVOID SERIOUS INJURY TO YOUR HANDS AND FINGERS.
PLEASE ATTACH THE SIDE CAPS @ , @ AFTER PLACING THE TELEVI-
SION ON THE STAND.
TOP VIEW
VISTA SUPERIOR
VUEDEDESSUS \
PRECAUCION: PAVA EVITAR LASTIMADURAS SEVERAS A SUS MANOS Y
DEDOS. POR FAVOR PONGA LOS TAPONES LATERALES @ , @
DESPU& DE COLOCAR ELTELEVISOR EN EL SOPORTE DE TELEVISOR.
A~ENTION : POUR EVITER DES BLESSURES GRAVES AUX MAINS ET AUX
DOIGTS, FIXER LES CAPUCHONS LATERAUX
PLACE DE LA TgLhISION SUR LE SUPPORT. @ , @ APRkS LA MISE EN
I
EMPUJAR CON
-UERZA HASTA
‘IJAR POSICION.
4PPUYER
I
1
I
I
I
PUSH WITH
FORCE TO LOCK
POSITION.
-0RTEMENT
‘OUR VER-
3OUILLER LA
‘OSITION. Q

NOTE:
FOLLOWING STEP
q
WILL INCREASE THE STABILITY OF THE FINAL TELEVISION/STAND UNIT.
NOTA:
SIGUIENTE PASO
q
INCREMENTARA LA ESTABILIDAD DEL COMBINADO TELEVISOR / SOPORTE.
NOTA:
&TAPE
q
Cl-DESSOUS RENFORCE LA STABILITE DE CENSEMBLE TELEVISEUR/MEUBLE.
1 Attach the TV clip holder to the TV with the
screw. Then, insert the buckle into the slot on
the TV clip holder.
Ajuste la hevilla de plastic0 al televisor con el
tornillo. Luego, inserte el cinturon de seguridad
en la ranura de la parte posterior de la hevilla de
plastico.
2 Tighten the strap by
pulling in down-
ward direction.
Fixez le Porte-pince du televiseur au televiseur a
I’aide de la vis. lnserez ensuite la boucle dans la
fente du porte-pince du televiseur.
Apriete la correa jalando
hacia abajo.
(preinstalled)
(pre-instalada)
(pre-installee)
Serrez la courroie en tiran
vers le bas.
Q
x
x2
(pre-installed)
(pre-instalada)
(pre-installhe)
WHEN ATTACHING THE BACK COVER, BE SURE THAT THE
CABLES ARE NOT PINCHED.
CUANDO PONGA LA CUBIERTATRASERA, ASEGirRESE DE
QUE LOS CABLES NO ESTEN PRESIONADOS.
LORS DE LA FIXATION DU COUVERCLE ARRIERE,
S’ASSURER QUE LES CABLES NE SONT PAS PIN&S.

DIMENSIONS
DIMENSIONES
DIMENSIONS
Unit : mm (inches)
Unidad : mm (pulgadas)
Unite : mm (pouces)
Weight: SU-32XBR45 SU-36XBR45
Approx. 31.3 Kg (69 Ibs.) Approx. 34 Kg (75 Ibs.)
Peso : SU-32XBR45 SU-36XBR45
Aprox. 31.3 Kg (69 Ibs.) Aprox. 34 Kg (75 Ibs.)
Poids : SU-32XBR45 SU-36XBR45
Approx. 31.3 Kg (69 Ibs.) Approx. 34 Kg (75 tbs.)
t
I
1 SU32XBR45 1 SU-36XBR45
H 1 153.0 1 6 1 153.0 1 6
I 1 313.0 1 125116 1 313.0 1 12=/16
t J 1 65.0 j 2
g/16 1
65.0 1 2
g/16
1
K 225.0 8
27/32
225.0 8
27132
L 290.0 11 '3/32 315.0 12 13/32
M 416.0 16 310 416.0 16 3/a
N 1 722.0 128 7f~6 755.0 2923132
CARRYING CAPACITY OF EACH SHELF I-
N
RESISTENCIA DE CADA REPISA
CAPACITt DE RESISTANCE DES ETAGCRES ,4
SU-32XBR45 SU-36XBR45
SONY ELECTRONICS INC. PRINTED IN USA
SONY ELECTRONICS INC. IMPRESO EN EUA
SONY ELECTRONICS INC. IMPRIME AUX BTATS-UN~S
Design and specifications subject to change without notice.
Diserio y especificaciones sujetos a cambio sin previo aviso.
Conception et caracteristiques susceptibles d’etre modifiees sans avis prealable.

SONY@
SU-32XBR45
SU-36XBR45
FOR RESIDENTS OF CANADA
POUR LES HABITANTS DU CANADA
PARA RESIDENTES DE CANADIENSES
Please examine all packaging materials before discarding.
7 If any parts are missing or damaged,
please review the parts list found in the assembly manual,
identify the missing or damaged part,
and call the Sony customer service center at
1-877-779-9929.
Veuillez examiner tout I’emballage avant de le jeter.
Si des pieces sont manquantes ou endommagees,
veuillez verifier les pieces qui se trouvent dans le manuel de montage,
identifier les pieces manquantes ou endommagees,
et appeler le service client de Sony au numero:
1-877-779-9929.
Por favor examine todo el material de empaque antes de tirarlo.
Si cualquier pane resulta faltante o esta danada,
por favor revise la lista de partes que se encuentra
en el manual de ensamble, identifique la parte danada o faltante,
y llame al centro servicio al cliente de Sony al
1-877-779-9929.

SONY
SU-32XBR45
SU-36XBR45
FOR RESIDENTS OFTHE UNITED STATES
PARA RESIDENTES DE LOS ESTADOS UNIDOS
POUR LES HABITANTS DES CTATS-UNIS
SONY
1 TV Stand 1
LIMITED WARRANTY
Sony Electronics Inc. (“Sony”) warrants this product against defects in material or workmanship, subject to
any conditions set forth as follows:
1. This warranty is expressly limited to the replacement of Sony TV Stand parts and components.
2. For a period of 30 days from the date of purchase, Sony will supply parts that are determined to be
defective or missing, at no charge, to the original purchaser. After the warranty period, you will be
charged for all orders.
This warranty does not cover damages which occur in shipment or failures due to acts of God, accident,
misuse, abuse, negligence, faulty installation, misapplication, setup, improper maintenance, commercial use,
or modification of, or to any part of the product. This warranty does not cover Products sold AS IS or WITH
ALL FAULTS. This warranty is valid only in the United States.
Proof of purchase in the form of a bill of sale or receipted invoice, which is evidence that the unit is within the
warranty period,
must
be presented to obtain the replacement parts.
REPLACEMENT PARTS AS PROVIDED UNDER THIS WARRANTY ARE THE EXCLUSIVE REM-
EDY OF THE CONSUMER. SONY SHALL NOT BE LIABLE FOR ANY INCIDENTAL OR CONSE-
QUENTIAL DAMAGES FOR BREACH OF ANY EXPRESS OR IMPLIED WARRANTY ON THIS PROD-
UCT. EXCEPT TO THE EXTENT PROHIBITED BY APPLICABLE LAW, ANY IMPLIED WARRANTY
OF MERCHANTABILITY OR FITNESS FOR A PARTICULAR PURPOSE ON THIS PRODUCT IS LIM-
ITED IN DURATION TO THE DURATION OF THIS WARRANTY.
Some states do not allow the exclusion or limitation of incidental or consequential damages, or allow limita-
tions on how long an implied warranty lasts, so the above limitations or exclusions may not apply to you. This
warranty gives you specific legal rights, and you may have other rights which vary from state to state.
In order to obtain replacement parts, you must provide a PROOF OF PURCHASE and complete the informa-
tion on this warranty card. Fax or mail these to:
Tocabi America Corp.
755 Main Street, Cbula Vista, CA 91911
Fax No.: (619) 656-8181
www.tocabi.com
Name:
Address:
City:
Model:
Part No.
State: __ Zip Code: Phone:
Description Quantity Reason
4-064-678-01 Printed in USA
R0819
Other manuals for SU-32XBR45
1
This manual suits for next models
1
Table of contents
Other Sony Indoor Furnishing manuals
Popular Indoor Furnishing manuals by other brands

Regency
Regency LWMS3015 Assembly instructions

Furniture of America
Furniture of America CM7751C Assembly instructions

Safavieh Furniture
Safavieh Furniture Estella CNS5731 manual

PLACES OF STYLE
PLACES OF STYLE Ovalfuss Assembly instruction

Trasman
Trasman 1138 Bo1 Assembly manual

Costway
Costway JV10856 manual