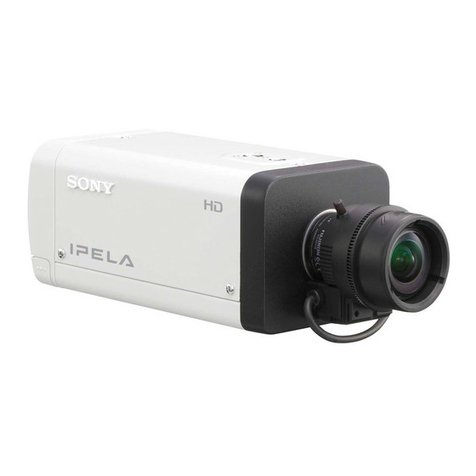
Sony Effio-V User manual

Sony Effio-V HD Day/Night Camera
(Build-in OSD)
User’s Manual
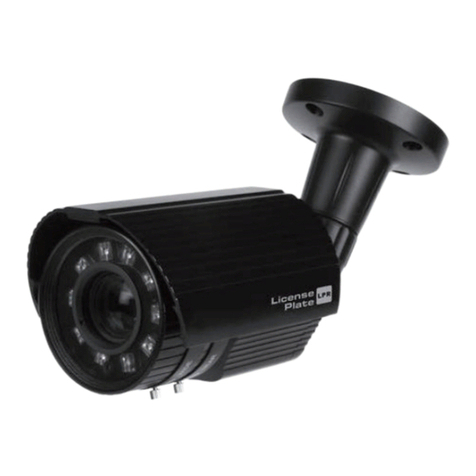
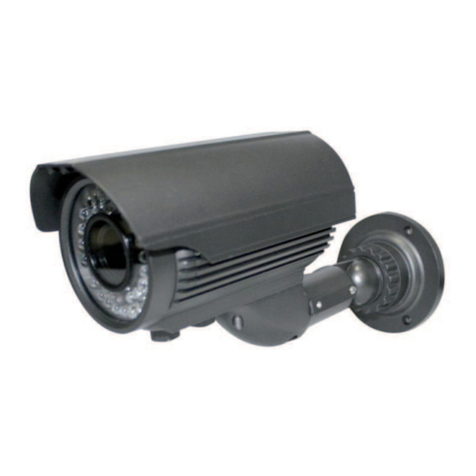
Apply to:Box Camera, IR Waterproof Camera, Dome Camera .
Thank you for pur hasing our produ ts. Please read the manual arefully
before operating
Website: htt ://www.hkvstar.com

Version:VS-ZX414114V01 44#
The limited stated: The information in luded in this arti le is
a ording to the urrent edition ontent establishment, regarding this
ontains, the ontent doesn’t make any statement or the guarantee. In
addition this arti le will possibly not ontain the information whi h
will be hanged, without noti e situation. The ompany has the
revision power to this publi ation.

Safety Precaution
This symbol means that there might exist uninsulated
dangerous voltage inside the ase, be areful of ele tri sho k
This symbol reminds you to pay attention to important
operation and maintenan e instru tions in the a ompanied information
Warning
In order to prevent damage aused by fire or ele tri sho k, please do
not put ameras exposed in the moist environment or rainwater
Please make sure the adapter is onsistent with produ t spe ifi ations,
otherwise it might ause fire, ele tri sho k or damage.
Pay attention to polarity of the adapter, it might ause some a idents
like fires
Pay attention to polarity of the adapter, it might ause some a idents
like fires
Power supply must be firmly fixed so as not to loose to ause fires。
If the devi e gets ″ abnormal smell or smoke”, please stop it
immediately and onta t with our ustomer servi e enter。
Tributor or our maintenan e offi e authorized by our ompany,
otherwise we won’t promise warranty。
Please do not splash water on the produ t omponents when leaning

Notes
Do not make the produ ts under great impa t or stay away from
strong ele tromagneti interferen e and vibration.
There are some sophisti ated parts inside the amera, therefore,
during transportation and installation, please avoid the damage ause by
stress or severe vibration. For the sake of safety, please do not swit h on
power before a omplishing all installation.
Please omply with all ele tri al safety standards during operation,
amera or signal transmission able should maintain a suffi ient distan e
(50 meters) with high-voltage equipment or ables, if ne essary, lighting
and thunder prote tive measures must be taken.
Please install the amera in well-ventilated environment.
Please do not make the amera fa e sunshine or other strong light
dire tly in ase of any damage to the lens and the sensor.
The temperature and humidity range for ameras work are -10 ~ 50
℃
, less than 95% separately, please do not start ameras beyond this range.
To avoid lightning strikes, please make sure the installation of
power supply ground line in a good ondition.
To prevent the equipment from damage by shower or splash of
water, please do not pla e the devi e substan es su h as liquid.

Contents
I、Feature..........................................................................................................6
II、Interfa e ......................................................................................................7
2.1 Interfa e ............................................................................................7
III、OSD ...........................................................................................................8
3.1 S ene sele t.......................................................................................8
3.1.1 Shutter/AGC .......................................................................8
3.1.2 WHITE BAL.....................................................................10
3.1.3 HLI/BLC...........................................................................10
3.1.4 WDR .................................................................................11
3.1.5 DNR..................................................................................12
3.1.6 DAY/NIGHT.....................................................................12
3.1.7 DEFOG .............................................................................14
3.2 PICT ADJUST ................................................................................14
3.3 EZOOM..........................................................................................16
3.4 DIS (Digital image stabilization).....................................................16
3.5 Priva y............................................................................................17
3.6 Motion dete tion .............................................................................17
3.7 SYS Setting.....................................................................................18
3.7.1 Syn Camera .....................................................................19
3.7.2 Lens...................................................................................19
3.7.3 Image flip fun tion............................................................20
3.7.4 Communi ation.................................................................20
3.7.5 Camera ID.........................................................................21
3.8 Language......................................................................................22
3.9 MAINTENANCE ........................................................................22
3.9.1 White Pixel Mask..............................................................23
3.9.2 Camera reset......................................................................23
3.10 EXIT / SAVE ALL ........................................................................24
IV、Spe ifi ation ............................................................................................25
V、FAQ...........................................................................................................27
Page6of28
I、Feature
1. New Generation SONY CCD and DSP
Adopting the latest CCD and DSP, the amera an re eive lear and lu id
images even at ir umstan es with very low illumination.
2. Wide Dynamic Range (WDR)
WDR Camera adopts utting-edge and effe tive te hnology. With this
fun tion it an see all the view both inside the house and outside of the window
with different lighting.
3. High Resolution
Color: 700TVL .
4. D/N Switch
Day & Night ameras an swit h automati ally into olor or B/W
a ording to opti al hanges.
5. 3D DNR
Digital Noise Redu tion Te hnology enhan es the ability to handle with
signal noise ratio, this te hnology makes amera an re eive more lear and
vivid images even under low-light onditions.
6. Motion Detect
Motion dete tion fun tion an trigger alarm or re ording when sensing
moving obje ts, users an set the sensitivity and multiple dete tion zones
7. Privacy Mask
The Priva y Mask an blo k out sensitive areas from view, overing the
areas with a solid blo k of olor, you an adjust the mask position and size
8. OSD
On S reen Display Menu

Page7of28
II、Interface
2.1 Interface
ENTER Push the joysti k down to enter OSD menu
UP/DOWN Sele t the desired feature by using Joysti k
with Up / Down dire tion
1
LEFT/RIGHT Change the status of the sele ted feature by
using Joysti k with Left / Right dire tion
2
VIDEO TEST/
VIDEO OUT Additional video out for installation
3
LED LEVEL Adjusting brightness of IR LEDs

Page8of28
III、OSD
Press“Enter”button for 2s, amera s reen will pop up system main menu.
(eg, pi 1)
3.1 Scene select
Users an sele t different s ene a ording to amera environment,
in luding automati , indoor, outdoor, ba klit, traffi monitoring, user-defined..
3.1.1 Shutter/AGC
Move the ursor to the main menu fun tion "S ene Sele t" menu item , press
the " enter " button to enter the " Advan ed Settings" sub-menu, move the
ursor to " Shutter / AGC " item , this fun tion an be divided into "automati "

Page9of28
ontrol and "manual" ontrol, and "fixed" ontrol, the user an " left and right "
to be set a ording to a tual needs.
a. Sele t "Auto" setting type, press the “Confirm “button to enter the
sub-menu of Automati Control
Inside Auto Iris setting submenu, there have “AE LEVEL", “AGC MAX ",
“SENS UP" three settings.
AGC” an adjust the peak value, the bigger value, the brighter pi ture, but
the noise will be mu h bigger.
In“Sens Up”, there are “on” and “off ” are optional
b. Manual mood
Manual Setup, user an adjust the Shutter Mode Shutter Speed
And AGC

Page10of28
.
3.1.2 WHITE BAL
It an restore the authenti ity of the olor when it is affe ted by the hange
of temperature. The user an hoose different white balan e mode a ordingly,
ATW/PUSH/USER1/USER2/ MANUAL/PUSH LOCK.
Normally, only when you hoose “user defined” setting an adjust the
mood, otherwise the white balan e is fixed
3.1.3 HLI/BLC
In the main menu, press the ursor to “S ene Sele tion”, press “Enter”
button to enter “advan ed settings” sub-menu. In the “HLI/BLC” menu, press
“left” “right” key to sele t “off” “HLI” “BLC”, only the “S ene Sele tion” is
“user defined”, it an sele t “BLC”.

Page11of28
3.1.4 WDR
The WDR feature improves the dynami range and the visibility of
the image by providing the optimal gradation ompensation of the image
in one field. This is a hieved by two ways of image pro essing, luminan e
ompression and ontrast enhan ement, so that the tone an be enhan ed at
highlighted and dark areas
For WDR, there are two sets. One is ontrast , the other is lear fa e.
“Contrast” have three options----“ Low; Mid ; High”
“Clear Fa e” have four options----“Off ; Low; Mid ; High”

Page12of28
.
3.1.5 DNR
In the main menu, press the ursor to “S ene Sele tion”, press “Enter”
button to enter “advan ed settings” sub-menu. In the "noise redu tion" menu
press "enter" button to enter the "noise redu tion" sub-menu, it an adjust the
level of noise redu tion, the bigger the value , the higher the noise redu tion
level .
3.1. DAY/NIGHT
Day/night swit hing fun tion is mainly for the user to use the amera
easily on different o asions. There are three modes of day/night: Day mode,
Night mode, auto mode.

Page13of28
In the main menu, press the ursor to “S ene Sele tion”, press “ENTER”
button to enter “advan ed settings” sub-menu. In the “Day/Night”, press “left”
“right” key to sele t “white mode”, “bla k mode”, “auto mode”.
A. Auto mode
In the “Day/Night” menu, press “left” “right” key to sele t “Auto mode”
and press “ENTER” button to “Auto mode” sub-menu, this fun tion ontrol the
amera output olor or bla k and white image a ording to the strength of the
light, user an set the parameter a ording to the environment.
B. Day mode
Image will always be olor
C. Night
Image will always be bla k and white

Page14of28
3.1.7 DEFOG
You an hoose the Defog fun tion a ording the environment, Defog an
be used to help improve the aptured image in poor weather onditions su h as
smog, fog, or smoke. The visibility of the ameras an be enhan ed in any
weather ondition.
Off/Low/Middle/High sele table and set the best.
3.2 PICT ADJUST
Sele t to bring up the PICT ADJUST sub-menu for further settings

Page15of28
Fun tion Option
BRIGHTNESS 000-255
CONTRAST 000-255
SHARPNESS 000-255
HUE 000-255
COLOR GAIN 000-255

Page16of28
3.3 EZOOM
I
n the OSD main menu to hoose " EZOOM", Press “ENTER” button to bring
up the setup sub-menu, in the EZOOM SETUP, users an do setup a ording to
the needs of area size and position.
3.4 DIS (Digital image stabilization)
Digital image stabilization (DIS) is a family of te hniques used to redu e
blurring asso iated with the motion of a amera during exposure. Spe ifi ally, it
ompensates for pan and tilt (angular movement, equivalent to yaw and pit h)
of a amera or other imaging devi e. It is used in image-stabilized bino ulars,
still and video ameras, and astronomi al teles opes. With still ameras, amera
shake is parti ularly problemati at slow shutter speeds or with long fo al
length (telephoto) lenses.

Page17of28
3.5 Privacy
15 areas optional, user an adjust the size, position, olor, transparen y of
the hosen area
Priva y shield an be setup for 1-15 areas, when mode is setup to open,
users an press the “up” “down” "left" "right" “ENTER” to sele t the parameter
of areas’ DISPLAY, POSITION, COLOR,TRANSP.
3. Motion detection
In the OSD main menu to hoose “MOTION DETECTION "press the
"left" "right" to sele t "On", and press “ENTER” button to bring up the
MOTION DETECTION sub-menu.
In the motion dete tion sub-menu, users an do setup a ording to the
needs of dete tion sense, interval, mask area, monitor area

Page18of28
The dete t sense: 0-127.
Interval:0-127
Blo k DISP: there is on/off two hoi es. There is a diagram displaying
when you hoose on, otherwise, there is not diagram
Mask area: Set whether to parti ipate in the relevant area motion dete tion,
when the blo k sele ted area, this area will be involved in motion dete tion.
Monitoring area: Four visual surveillan e area and users an adjust the
parameter value to adjust the surveillan e area lo ation.
3.7 SYS Setting
Move the ursor to “system setting” press “enter” to set the submenu.

Page19of28
3.7.1 Sync Camera
the system default is "Internal syn hronization" mode
3.7.2 Lens
Lens Type an be set to "Auto” lens, "manual" Lens 2 types, the user an
sele t the type of lens by the menu "left and right”. When using the optional
auto iris lens an sele t "DC / VIDEO" lens type, the user an adjust the
"speed" value to adjust the speed of the auto iris open. The smaller the value,
the slower the aperture opens, the greater the value, the faster the aperture
opens . Auto iris lens adjustment fun tion, move the ursor to “adjust “item,
press the enter button, the amera will automati ally set the relevant parameters
to mat h the different types of lenses.

Page20of28
3.7.3 Image flip function
Move the ursor to "flip" item, press left and right to sele t "off" to "flip"
turn "verti al" "horizontal verti al flip" option.
3.7.4 Communication
In the System Settings sub-menu, move the ursor to the "Communi ation",
press "ENTER" to enter the ommuni ation settings sub-menu, the user an set
up "address", "baud rate" and other settings a ording to their needs.
Table of contents
Other Sony IP Camera manuals

Sony
Sony HDC1500R User manual

Sony
Sony SRG120DH User manual

Sony
Sony SNCEM602R User manual

Sony
Sony BRCSDP16 User manual

Sony
Sony FDR-X3000 Instruction sheet

Sony
Sony Ipela SNC-CH135 User manual

Sony
Sony SNC-ZB550 User manual

Sony
Sony HXC-100 User manual

Sony
Sony HSC300RF User manual

Sony
Sony High Contrast License Plate Capture Camera User manual

Sony
Sony Ipela User guide

Sony
Sony FCB-EX2700P User manual

Sony
Sony IPELA PCSA-CXA55 User manual

Sony
Sony IMX035 User manual

Sony
Sony HDC-X300 User manual

Sony
Sony 3-AXIS INDOOR DOME CAMERA User manual

Sony
Sony HDC2580 User manual

Sony
Sony HDC-X310 User manual

Sony
Sony CCB-WD1 User manual

Sony
Sony HDC1000R User manual