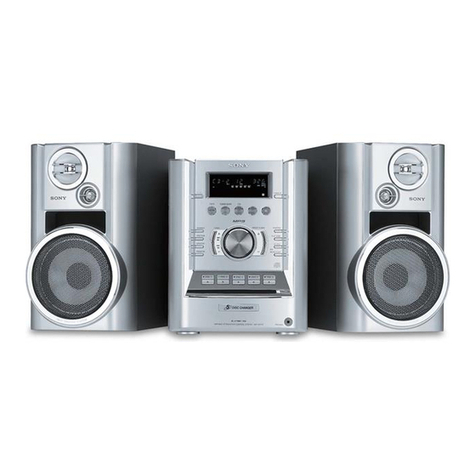
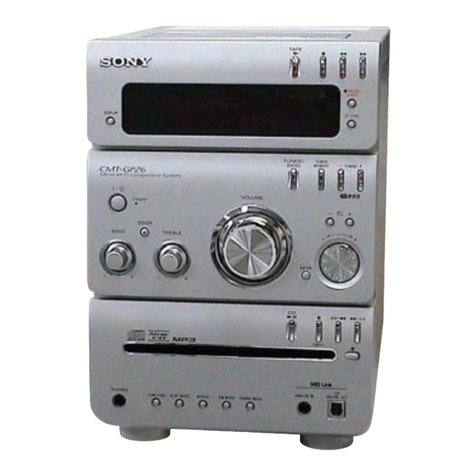
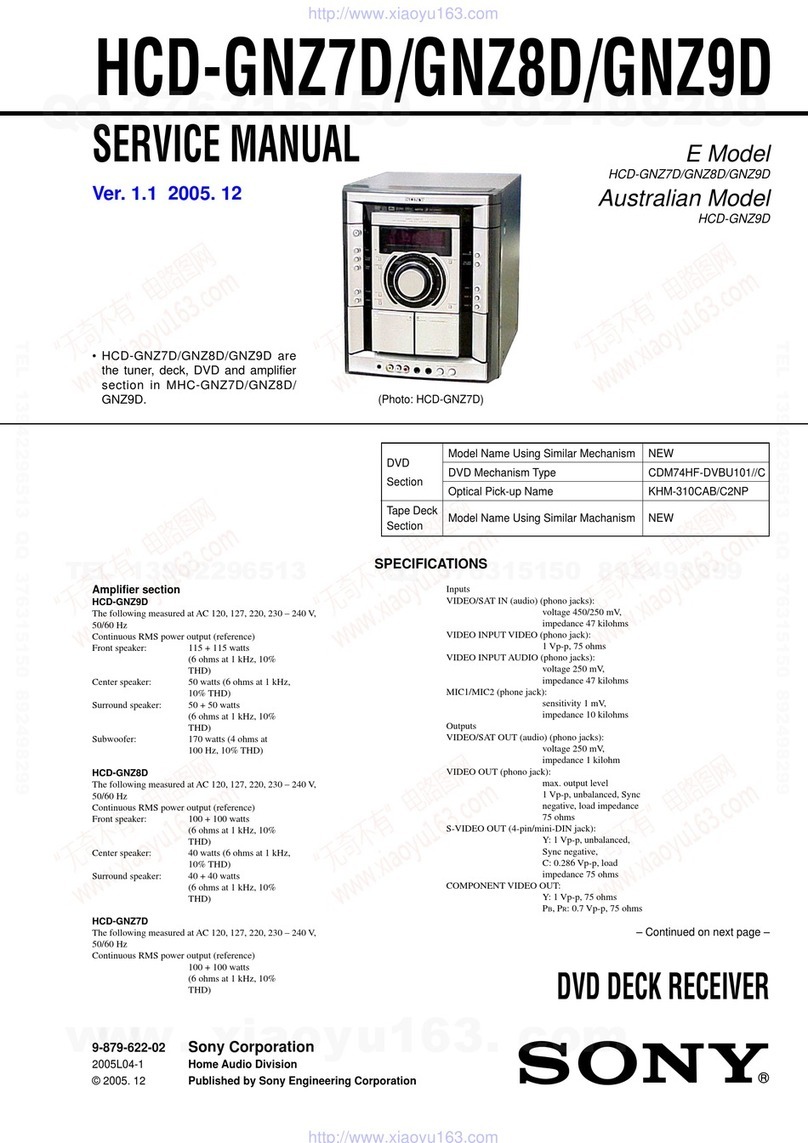
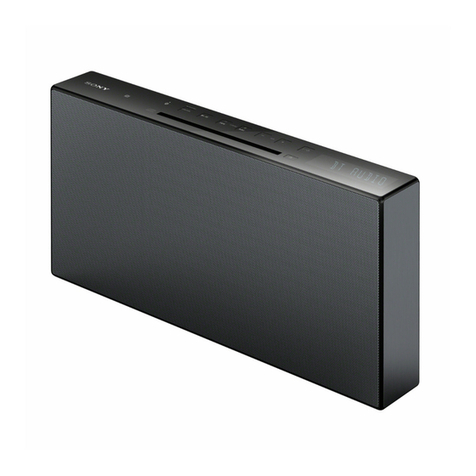
Sony MHC-450 User manual

SONY.
Mint
Hi-Fi
Component
System
Operating
Instructions
lise
FA-B471

To
prevent
fire
or
shock
hazard,
do
not
expose
the
unit
to
rain
or
moisture.
For
the
customers
in
the
U.
S.
A.
CAUTION)
TO
REDUCE
THE
RISK
OF
ELECTRIC
SHOCK
D0
NOT
REMOVE
COVEH
(OF
BACK)
NO
USER
SERVICEABLE
PARTS
(INSIDE
REFER
SERVICING
TO
QUALIFIED
SERVICE
PERSONNEL.
This
symbol
is
intended
to
alert
the
user
to
the
presence
of
uninsulated
“dangerous
voltage”
within
the
product's
enclosure
that
may
be
of
sufficient
magnitude
to
constitute
a
risk
of
electric
shock
to
persons.
This
symbol
is
intended
to
alert
the
user
to
the
presence
of
important
operating
and
maintenance
(servicing)
instructions
in
the
literature
accompanying
the
appliance.
Owner's
Record
The
model
and
serial
numbers
are
located
on
the
rear
panel.
Record
the
serial
number
in
the
space
provided
below.
Refer
to
them
whenever
you
call
upon
your
Sony
dealer
regarding
this
product
Model
No.MHC-450
Serial
No.
INFORMATION
This
equipment
has
been
tested
and
found
to
comply
with
the
limits
for
a
Class
B
digital
device,
pursuant
to
Part
15 of
the
FCC
Rules.
These
limits
are
designed
to
provide
reasonable
protection
against
harmful
interference
in
a
residential
installation.
This
equipment
generates,
uses,
and
can
radiate
radio
frequency
energy
and,
if
not
installed
and
used
in
accordance
with
the
instructions,
may
cause
harmful
interference
to
radio
communications.
However,
there
is
no
guarantee
that
interference
will
not
occur
in
a
particular
installation.
If
this
equipment
does
cause
harmful
interference
to
radio
or
television
reception,
which
can
be
determined
by
turning
the
equipment
off
and
on,
the
user
is
encouraged
to
try
to
correct
the
interference
by
one
or
more
of
the
following
measures:
—
Reorient
or
relocate
the
receiving
antenna.
—
Increase
the
separation
between
the
equipment
and
receiver.
—
Connect
the
equipment
into
an
outlet
on
a
circuit
different
from
that
to
which
the
receiver
is
connected.
—
Consult
the
dealer
or
an
experienced
radio/TV
technician
for
help.
CAUTION
You
are
cautioned
that
any
changes
or
modifications
not
expressly
approved
in
this
manual
could
void
your
authority
to
operate
this
equipment
CAUTION
The
use
of
optical
instruments
with
this
product
will
increase
eye
hazard.
Note
to
CATV
system
installer:
This
reminder
is
provided
to
call
the
CATV
system
installer's
attention
to
Article
820
-
40
of
the
NEC
that
provides
guidelines
for
proper
grounding
and,
in
particular,
specifies
that
the
cable
ground
shall
be
connected
to
the
grounding
system
of
the
building,
as
close
to
the
point
of
cable
entry
as
practical
For
the
Customers
in
Canada
CAUTION:
TO
PREVENT
ELECTRIC
SHOCK,
DO
NOT
USE
THIS
POLARIZED
AC
PLUG
WITH
AN
EXTENSION
CORD,
RECEPTACLE
OR
OTHER
OUTLET
UNLESS
THE
BLADES
CAN
BE
FULLY
INSERTED
TO
PREVENT
BLADE
EXPOSURE.
For
the
customers
except
in
the
U.S.A.
and
Canada.
Laser
component
in
this
product
is
capable
of
emitting
radiation
exceeding
the
limit
for
Class
1.
This
appliance
is
classified
as
a
CLASS
1
LASER
product.
The
CLASS
1
LASER
PRODUCT
MARKING
is
located
on
the
rear
exterior.
CLASS
1
LASER
PRODUCT
LUOKAN
1
LASERLAITE
KLASS
1
LASERAPPARAT
This
caution
label
is
located
inside
the
unit.
}
INVISIBLE
LASER
RADIATION
WHEN
OPEN.
CAUTION
AVOID
EXPOSURE
TO
BEAM,
ADVARSEL
;
CeyMuis
senstniLina
ven
Xana
TR
ADVARSEL
IKKERHEDSAFBRYDERE
ER
UDE
AF
FUNKTION.
tnoaA
\UDS
ZTTELSE
FOR
STRALING.
VARO!
7
AVATTAESSA
JA
SUQUALLKITUS
OHITETTAESSA
DLETALTTIINA
LASERSATENYLLE
VARINING
|
LASERSTRALING
NAR
DENNADEL
AR
OPPNAD
OCH
SPARREN
AR
URKOPPLAD.
iA
|
USYNUIG
LASERSTRALING
NAA
DEKSEL
APNES
ADVARSEL
i
CiNGh
EXSPONERING
FOR
STHALEN
=e
ee
a
ee
Welcome
!
Thank
you
for
putchasing
the
Sony
Mini
Hi-Fi
Component
System
This
stereo
system
is
packed
with
fun
features.
Here
are
just
a
few:
*
DBFB
(Dynamic
Bass
Feedback)
system
that
boosts
low
frequency
range
audio
to
provide
deep,
powerful
bass
through
the
two-way
bass
reflex
speakers
«
A
preset
feature
that
lets
you
store
and
recall
up
to
30
of
your
favorite
radio
stations
A
graphic
equalizer
that
lets
you
adjust
the
audio
quality
*
A
dual
tape
deck
that
lets
you
record
from
the
radio,
CD
player
or
from
the
other
tape
deck
*
A
remote
commander
that
lets
you
control
the
music
from
your
seat
About
This
Manual
The
instructions
in
this
manual
are
for
MHC-450
and
FH-B411
Before
you
start
reading,
check
your
model
number.
MHC-450
is
the
model
used
for
illustration
purposes.
Any
differences
are
clearly
indicated
in
the
text,
for
example,
“FH-B411
only”

I
)e)(-meyi
Contents
Chapter
1:
Setting
Up
Connecting
the
Stereo
4
Inserting
the
Batteries
5
Chapter
2:
the
CD
Player
Playing
a
CD
(normal
play)
6
Playing
Tracks
in
Random
Order
(shuffle
play)
7
Playing
Tracks
in
the
Desired
Order
(program
play)
7
Playing
Tracks
Repeatedly
(repeat
play)
8
Chapter
3:
the
Radio
Listening
to
the
Radio
9
Presetting
Radio
Stations
9
Playing
Preset
Radio
Stations
10
Chapter
4:
the
Tape
Player
Playing
a
Tape
11
RecordingaCD
11
Recording
a
CD:
Specifying
Tape
Length
(time
edit)
12
Recording
a
CD:
Specifying
Track
Order
(program
edit)
12
Recording
From
the
Radio
13
Recording
From
Another
Tape
(dubbing)
13
Chapter
5:
Sound
Adjustment
Adjusting
the
Sound
14
Adjusting
the
Sound
Quality
14
Chapter
6:
Additional
Features
Connecting
Optional
Equipment
15
Microphone
Mixing
(for
FH-B411
only)
15
Karaoke:
Singing
Along
(for
FH-B411
only)
15
For
Your
Information
Precautions
16
Troubleshooting
Guide
16
Maintenance
17
Specifications
17
Index
to
Parts
and
Controls
18
Index
Back
cover

4
Chapter
1:
Connecting
the
Stereo
Inserting
the
Batteries
Chapter
1:
Setting
up
[eee
Connecting
the
Stereo
Use
the
illustrations
below
to
connect
your
stereo.
MHC-450
is
the
model
used
for
the
whole
illustrations
of
the
stereo
in
this
manual,
Connecting
the
Speakers
(MHC-450
only)
1
Twist
the
speaker
cable
coating
and
strip
it
from
the
end
of
the
cable.
a
2
Connect
the
right
speaker
to
the
R
connectors
and
the
left
speaker
to
the
L
connectors.
When
you
attach
the
speakers
to
the
unit
(FH-B411
only)
Slide
the
speaker
box
so
that
it
locks
onto
the
body
of
the
unit.
Connecting
the
Antenna
FM
lead
antenna
(supplied
for
MHC-450)*
AM
loop
antenna
(supplied)
*
Note:
Extend
it
horizontally.
To
improve
the
FM
reception
Connect
an
outdoor
FM
antenna
to
the
FM
75Q
and
+
terminals,
using
a
75-ohm
coaxial
cable.
FM
75Q
tr
ae
tr
75-ohm
coaxial
cable
AM
(not
supplied)
To
improve
the
AM
reception
After
you
connect
the
AM
antenna,
connect
a
6-
to
15-meter
(20-
to
50-feet)
insulated
wire
to
the
AM
terminal.
Connect
the
terminal
to
earth
Important
Ground
the
external
antenna
against
lightning.
To
prevent
explosion,
do
not
connect
the
ground
wire
to
a
gas
pipe.
Insulated
wires
(not
supplied)
Ground
wire

AM
loop
antenna
(supplied)
Right
speaker
to
a
wall
outlet
je
Connecting
the
Power
Connect
the
power
lead
to a
wall
outlet
after
you
have
made
all
the
above
connections.
to
a
wall
outlet
Caution
Before
you
power
on
the
stereo,
turn
VOLUME
control
counterclockwise
to
decrease
sound
level.
Inserting
the
Batteries
Insert
two
size
AA
(R6)
batteries
in
the
supplied
remote
commander
for
remote
control.
1
Open
the
lid.
2
Insert
two
size
AA
(R6)
batteries.
Match
the
+
and
—
indications
with
those
inside
the
battery
compartment.
3
Close
the
lid.
*
This
illustration
shows
MHC-450.
*
The
FH-B411
model
is
equipped
with
a
handle
for
portability.
The
handle
pops
out
when
you
press
PUSH
on
the
top
of
the
unit.
¢
The
FH-B411
model
is
equipped
with
a
Telescopic
antenna
and
speaker
code.
Battery
life
You
can
expect
the
remote
commander
to
operate
for
about
six
months
(using
Sony
SUM-3
(NS)
batteries)
before
the
batteries
run
down,
When
the
batteries
no
longer
operate
the
commander,
replace
all
the
batteries
with
new
ones.
To
avoid
battery
leakage
If
you
are
not
going
to
use
the
commander
for
a
long
time,
remove
the
batteries
to
avoid
damage
caused
by
corrosion
from
battery
leakage.
Chapter
1:
Setting
up

Playing
a
CD
(normal
play)
Playing
Tracks
in
Random
Order
(shuffle
play)
Playing
Tracks
in
the
Desired
Order
(programme
play)
Playing
Tracks
Repeatedly
(repeat
play)
6
Chapter
2:
the
CD
Player
Se
ee
Playing
a
CD
(normal
play)
You
can
play
CDs
in
four
modes:
normal,
shuffle,
programme
and
repeat.
The
mode
decides
which
tracks
(songs)
you
will
listen
to,
in
which
order
and
whether
or
not
they
will
repeat.
You
can
operate
the
stereo
system
on
the
unit
or
from
the
supplied
remote
commander.
Also,
the
CD
player
plays
12
cm
(5
inch)
and
8
cm
(3
inch)
CDs.
If
the
CD
is
supplied
with
an
adaptor,
remove
it
before
playing
the
CD.
Before
you
play
the
CD,
decrease
the
sound
level
by
turning
VOLUME
control
counterclockwise,
not
to
damage
the
speakers.
SYSTEM
POWER-*ON
SYSTEM
POWER
1
Press
CD.
2
Press
2
OPEN/CLOSE
to
open
the
CD
tray.
3
Holding
the
CD
by
its
edge,
place
the
CD
on
the
CD
tray
with
the
label
side
up.
(When
you
play
an
8
cm
CD,
place
it
on
the
inner
circle
of
the
CD
tray.)
4
Press
>
(play)
(B&
on
the
remote
commander)
The
CD
tray
closes
and
play
starts.
Track
number
Playing
time
air
Music
calendar
5
Adjust
the
volume.
Turn
VOLUME
control
clockwise
to
turn
up
the
volume,
or
counterclockwise
to
turn
it
down.
(Or
press
VOL
(+/-)
on
the
remote
commander.)
To
press
Stop
play
a
Pause
O0
(on)
Resume
play
>
or
00
(B
or
18")
Remove
the
CD
&
OPEN/CLOSE
“Remote
commander
To
find
the
beginning
of
a
track
—
Automatic
Music
Sensor
(AMS)
You
can
locate
the
beginning
of
a
track
while
the
track
is
playing
or
while
it
is
in
pause
mode.
To
locate
the
beginning
of
the
current
or
preceeding
track,
press
<<]
(or
K#4
on
the
remote
commander)
repeatedly
until
you
find
the
desired
track.
To
locate
the
beginning
of
the
succeeding
track
,
press
Dl
(or
PPI
on
the
remote
commander)
repeatedly
until
you
find
the
desired
track.
To
find
a
point
in
a
track
You
can
find
a
particular
point
in
a
track
while
the
track
is
playing
or
while
it
is
in
pause
mode.
Use
the
buttons
on
the
unit
to
operate
this
feature.
This
operation
is
not
possible
with
the
remote
commander.
Note
on
pause
mode
The
minute
and
second
indication
appears
in
the
display
and
remains
there
to
indicate
that
the
unit
is
in
the
pause
mode,

To
Do
this
Find
forward
Hold
down
Pi
and
quickly
ina
release
it
at
the
desired
track
point.
Go
backwards
Hold
down
IKK)
and
quickly
ina
release
it
at
the
desired
track
point.
Search
quickly
Press
0
and
hold
down
without
I<
or
DDI.
Press
>
or
listening
OU
again
at
the
desired
point.
To
check
the
remaining
or
total
playing
time
Use
the
TIME
button
on
the
player.
To
check
Press
Remaining
TIME
once
during
play.
time
in
a
track
=
ms
a:
aa
436
ae
Remaining
TIME
twice
during
play
time
inthe
CD
__
of
the
tracks
left.
Total
playing
TIME
in
stop
mode.
time
=
wud
43
ie
appears
for
a
few
seconds
Notes
*
You
can
check
the
remaining
time
during
normal,
shuffle
and
programme
play.
*
The
total
playing
time
and
number
of
tracks
also
appear
in
the
display
when
you
press
&
OPEN/CLOSE
to
close
the
CD
tray.
Notes
on
handling
discs
*To
keep
the
disc
clean,
handle
the
disc
by
its
edge.
Do
not
touch
the
surface.
*
Do
not
stick
paper
or
tape
onto
the
disc.
*
Do
not
expose
the
CD
to
direct
sunlight
or
heat
sources
such
as
hot
air
ducts,
nor
leave
it
in
a
car
parked
in
direct
sunlight
as
there
can
be
a
considerable
rise
in
temperature
inside
the
car.
If
there
is
no
CD
in
the
player
“no
dISC”
appears
in
the
display
when
you
press
>.
es
Playing
Tracks
in
Random
Order
(shuffle
play)
You
can
play
all
the
tracks
on
the
CD
in
random
order.
Use
the
buttons
on
the
unit
to
do
this
operation.
SYSTEM
POWER—-ON
2
Press
SHUFFLE.
“SHUFFLE”
appears
in
the
display.
3
Press
>,
“©”
appears
and
then
all
the
tracks
play
in
random
order.
To
stop
playing
Press
@.
To
cancel
shuffle
play
Press
CONTINUE.
“SHUFFLE”
disappears
from
the
display,
and
tracks
continue
playing
in
their
original
order,
_
Ee
eee
Playing
Tracks
in
the
Desired
Order
(programme
play)
You
can
programme
up
to
24
tracks
to
play
in
any
order
you
choose.
Use
the
buttons
on
the
unit
to
do
this
operation.
SYSTEM
POWER-+ON
1
Press
CD.
2
Press
PROGRAM.
“PROGRAM”
appears
in
the
display.
3
Press
IAC
or
DD!
to
choose
a
track.
The
track
number
and
the
total
playing
time
appear
in
the
display.
If
you
want
to
choose
this
track,
go
to
the
next
step.
If
not,
press
<I
or
D1
again
to
choose
another
track.
Track
number
Total
playing
time
ical
4
Press
PROGRAM.
The
chosen
track
number
and
playing
order
light
up
in
the
music
calendar.
If
the
track
number,
the
playing
order
and
the
total
playing
time
disappear
before
you
press
PROGRAM,
go
back
to
step
3.
Note
If
“--.--"
appears
instead
of
the
total
playing
time
during
programming
or
during
play,
this
means
the
total
programmed
time
has
exceeded
100
minutes.
5
Repeat
steps
3
and
4
to
programme
the
remaining
tracks
you
want
to
be
played
in
the
desired
order.
6
Press
>
(B
on
the
remote
commander).
All
the
tracks
play
in
the
order
you
chose.
To
Press
Check
the
CHECK
repeatedly*.
programme
Programme
a
pause
[0**
(#1)***
Stop
play
a
Cancel
the
CONTINUE****
programme
play
Erase
a
track
from
_
CLEAR
in
stop
mode.
the
end
Erase
a
specific
CHECK
repeatedly
track
so
the
number
of
the
track
lights
up,
and
press
CLEAR.
Erase
the
entire
@
once
in
stop
mode.
programme
@
twice
during
play.
*
—
After
the
last
track
appeared,
“END”
will
appear
in
the
display.
**
“P”
appears
in
the
display
and
the
total
playing
time
is
reset
to
0.
***
Remote
commander
****
The
programme
has
been
erased
and
the
play
continues
in
normal
play
mode.
continue
to
next
page
>
Chapter
2:
the
CD
Player
|
7

>
continued
To
change
the
order
of
programmed
tracks
To
change
the
order,
erase
the
entire
programme
and
create
a
new
one.
To
check
the
total
remaining
time
of
Hi
programmed
tracks
Press
TIME
once
to
see
the
remaining
time
of
the
track
being
played.
2
Press
TIME
again
to
see
the
remaining
play
time
of
the
whole
programme.
3
Press
TIME
once
more
to
return
to
the
initial
display.
Playing
Tracks
Repeatedly
(repeat
play)
You
can
choose
between
two
different
repeat
play
modes,
One
repeats
all
the
tracks
in
the
current
play
mode;
the
other
repeats
a
single
track.
Use
the
buttons
on
the
unit
to
do
this
operation.
SYSTEM
POWER-+ON
Repeating
all
the
tracks
(in
any
play
mode)
1
Press
CD.
2
Press
REPEAT
once
so
that
“REPEAT”
lights
up
in
the
display.
3
Press
>
(®
on
the
remote
commander),
"
Chapter
2:
the
CD
Player
Repeating
a
single
track
(in
normal
play
mode
only)
Press
REPEAT
twice
while
playing
the
desired
track
so
that
“REPEAT
1”
lights
up
in
the
display.
rex
St
Arey
12a
Tee
eee
To
cancel
repeat
play
Press
REPEAT
so
that
“REPEAT”
or
“REPEAT
1”
disappears
from
the
display.

Chapter
3:
the
st
lelle
Listening
to
the
Radio
Presetting
Radio
Stations
Playing
Preset
Radio
Stations
aS
Listening
to
the
Radio
When
you
want
to
play
a
radio
program,
you
can
have
the
tuner
automatically
scan
the
radio
frequencies
and
tune
in
the
stations
with
clear
signals
(except
SW
band).
This
feature
saves
your
time
in
searching
for
stations
with
clear
signals.
However,
stations
with
weak
signals
may
be
skipped
by
automatic
tuning.
Manually
tune
in
the
ones
skipped
by
automatic
tuning
and
SW
band
stations.
SYSTEM
POWER—-ON
1
Press
TUNER
2
Press
BAND
repeatedly
until
the
band
you
want
appears
in
the
display
As
you
press
BAND,
the
band
changes
as
follows:
U.S.
A.
and
Canadian
models:
Sea
|
Australian
model:
preceente
ear
3
Make
sure
that
the
PRESET
indicator
is
off.
If
the
indicator
is
on,
press
PRESET/TUNING
to
turn
off
4
Press
TUNER
(+/-)
more
than
one
second
so
that
“AUTO”
appears
in
the
display.
(When
you
select
SW
in
step
2
“AUTO”
dose
not
appear.
Manually
tune
in
an
SW
band
station.)
The
tuner
starts
scanning
radio
frequencies
automatically,
and
stops
when
it
finds
a
clear
station
5
ir
you
do
not
want
to
listen
to
the
station
selected,
press
TUNER
(+/—)
more
than
one
second
so
that
“AUTO”
appears
in
the
display
The
tuner
starts
scanning
radio
frequencies
automatically,
and
stops
when
it
finds
a
clear
station.
When
the
desired
station
is
not
tuned
in
Automatic
tuning
may
skip
the
station
with
a
weak
signal.
Tune
in
the
station
manually.
Press
TUNER
(+/—)
repeatedly
to
tune
in
your
favorite
station.
To
improve
AM
broadcast
reception
Reorientate
the
supplied
AM
loop
antenna
for
AM
(MW
and
SW)
AM
(MWI/SW)
To
change
the
AM
tuning
interval
The
AM
tuning
interval
is
preset
to
9
kHz
for
Australia,
10
kHz
for
the
United
States
and
Canada
in
the
factory.
If
you
need
to
change
the
interval,
do
as
follows:
1.
Turn
on
the
power.
2
Tune
in
any
AM
station
3
Turn
off
the
power
4
Turn
the
power
back
on
while
pressing
TUNER
(+).
After
changing
the
AM
tuning
interval,
reset
the
preset
AM
stations.
To
reset
the
interval
to
the
factory
setting,
follow
the
same
procedure.
When
an
FM
program
is
not
clear
to
receive
Press
MONO
so
that
“MONO”
appears
in
the
display.
There
will
be
no
stereo
effect,
but
the
reception
will
improve.
Press
MONO
again
to
restore
the
stereo
effect
For
FH-B411
only:
Adjust
the
length
and
direction
of
the
telescopic
antenna
for
FM
————
Se
Presetting
Radio
Stations
You
can
store
radio
frequencies
in
the
tuner’s
memory
to
tune
in
your
favourite
stations
quickly.
You
can
preset
up
to
30
stations
with
FM
and
AM
(MW
and
SW)
collectively
in
any
order
by
specifying
a
code.
The
code
is
a
combination
of
a
letter
(A,
Bor
C)
and
a
number
(0
to
9):
Al,
A2,...ete
J
Use
the
buttons
on
the
unit
for
presetting
stations.
continue
to
next
page
>
Chapter
3;
the
Radio
9

1
Make
sure
that
the
PRESET
indication
is
off.
If
the
indicator
is
on,
press
PRESET
/TUNING
to
turn
off.
2
Press
BAND
to
select
the
desired
band.
3
Press
TUNER(+/~
to
tune
in
the
station
you
want
to
store.
4
Press
MEMORY.
“MEMORY”
and
a
letter
(A,
B
or
C)
appear
in
the
display.
5
Decide
on
a
letter
(A,
B
or
C)
for
the
radio
station,
Press
SHIFT
to
display
the
letter
you
have
decided
on.
The
last
memorized
number
of
the
code
appears.
last
memorized
code
6
Press
MEMORY.
“MEMORY”
disappears,
and
the
station
is
stored
at
the
code
you
have
decided
on.
7
Repeat
steps
2
to
6
for
each
station
you
want
to
store.
To
erase
a
stored
station
Storing
a
new
station
at
a
previously
used
code
will
erase
the
old
station
and
replace
it
with
the
new
station.
If
you
have
trouble storing
a
station
Make
sure
“MEMORY”
is
lit
in
the
display.
If
not,
press
MEMORY
again
so
that
“MEMORY”
lights
up
(for
about
eight
seconds)
in
the
display,
and
then
proceed
with
steps
5
and
6.
10
anal
if
you
made
a
mistake
Press
MEMORY
again
and
then
proceed
with
steps
5
and
6.
ss
Playing
Preset
Radio
Stations
Once
you
have
preset
the
stations,
use
the
PRESET/TUNING
button
to
quickly
tune
in
your
favorite
stations.
SYSTEM
POWER-+ON
1
Press
PRESET/TUNING
to
enter
the
preset
mode.
"PRESET"
and
a
code
appear.
2
Press
SHIFT
to
select
a
desired
letter
of
the
code,
3
Press
TUNER
(+/-)
(or
PRESET
(+/-)
on
the
remote
commander)
to
tune
ina
preset
station.
The
station
frequency
appears
and
the
station
begins
broadcasting.

Playing
a
Tape
Recording
a
CD
Recording
a
CD:
Specifying
Tape
Length
(time
edit)
Recording
a
CD:
Specifying
Track
Order
(program
edit)
Recording
From
the
Radio
Recording
From
Another
Tape
(dubbing)
Playing
a
Tape
SYSTEM
POWER—+ON
3
2
1
Press
TAPE
2
Press
BH
to
open
the
cassette
compartment.
Insert
a
recorded
tape
into
deck
A
or
B
with
the
tape
side
facing
down.
Push
to
close
the
compartment.
3
Press
The
tape
starts
playing
To
Press
Stop
play
as
Pause
ul
(for
deck
B
only)
Resume
play
after
i
pause
(for
deck
B
only)
Fast
forward
Rewind
pi
al¥
Remove
the
cassette
if
you
play
both
decks
at
the
same
time
You
hear
the
sound
from
deck
A
When
listening
to
a
tape
recorded
with
the
Dolby*
B-type
noise
reduction
system
(For
Canadian
models
only)
Set
the
DOLBY
NR
selector
to
ON
The
setting
effects
both
decks.
Dolby
noise
reduction
system
reduces
tape
hiss
noise
in
low-level
high-frequency
signals.
*
Dolby
noise
reduction
manufactured
under
license
from
Dolby
Laboratories
Licensing
Corporation.
“DOLBY”
and
double-D
symbol
DO
are
trademarks
of
Dolby
Laboratories
Licensing
Corporation.
LL
—————
Recording
a
CD
You
can
record
from
a
CD
to
a
tape.
Use
TYPE
I
(normal)
or
TYPE
TI
(CrO2)
tape.
Do
not
use
TYPE
IV
(metal)
tape
for
recording,
To
listen
to
other
sources
while
recording,
you
must
stop
recording,
Recording
a
CD
Manually
You
can
record
a
CD
as
you
like,
for
instance,
by
recording
just
the
songs
you
want
or
record
from
the
middle
of
the
tape.
SYSTEM
POWER-+ON
1
Press
CD
2
Press
2
OPEN/CLOSE
and
place
a
CD
on
the
CD
tray
Then,
press
&
OPEN/CLOSE
again
to
close
the
CD
tray
3
Press
M4
and
insert
a
blank
tape
into
deck
B
Make
sure
the
tabs
on
the
cassette
has
not
been
removed
4
When
you
want
to
reduce
the
hiss
noise
in
low-level
high-frequency
signals,
set
DOLBY
NR
to
ON.
(For
Canadian
models
only)
5
Press
@
(>
is
linked
and
depressed
at
the
same
time)
on
deck
B.
Recording
starts.
continue
to
next
page
>
Chapter
4:
the
Tape
Player
|
4

>
continued
6
Press
>
on
the
CD
player
after
10
seconds.
The
CD
starts
playing.
To
start
recording
more
precisely
1
After
step
2,
press
0D.
2
Press
@
(C
is
linked
and
depressed
at
the
same
time).
3
Press
>
on
the
CD
player.
4
Press
fill
again
at
the
desired
point
to
start
recording.
Adjusting
the
volume
or
the
audio
emphasis
will
not
affect
the
recording
level
But
these
controls
will
change
the
sound
levels
you
hear
through
speakers
or
headphones,
ll
Recording
a
CD:
Specifying
Tape
Length
(time
edit)
You
can
have
the
stereo
system
create
programs
based
on
the
tape
length.
The
CD
player
makes
programs
that
will
fit
the
tape
length.
For
example,
if
you
use
a
40-minute
tape
to
record
a
46-minute
CD,
the
CD
player
will
automatically
choose
tracks
that
will
fit
within
the
40-minutes,
filling
as
much
of
the
tape
as
possible.
You
can
also
program
desired
tracks
by
priority.
In
this
case,
you
can
designate
desired
tracks
beforehand
and
the
remaining
tracks
will
be
programed
to
fit
the
remaining
time.
Use
the
buttons
on
the
unit
to
do
this
operation.
SYSTEM
POWER—ON
4,6,7
512
1
Press
&
OPEN/CLOSE
and
place
a
CD
on
the
CD
tray.
Then,
press
2
OPEN/CLOSE
again
to
close
the
CD
tray.
Chapter
4:
the
Tape
Player
2.
Press
§#
and
insert
a
blank
tape into
deck
B.
Make
sure
the
tabs
on
the
cassette
has
not
been
removed.
3
when
you
want
to
reduce
the
hiss
noise
in
low-level
high-frequency
signals,
set
DOLBY
NR
to.ON.
(For
Canadian
models
only)
4
Press
EDIT.
“EDIT”
appears
in
the
display.
5
Press
iid
or
DDI
to
designate
the
tape
length.
Choose
the
indication
for
tapes
of
a
corresponding
minute
length,
As
you
press
the
button,
the
indication
changes
as
follows:
HALF
C46-e—e
C54
a
(23.00)
(27,
<n)
cso
C060
(@5,00) (37.00)
(30.00)
What
"HALF"
during
time
edit
means
The
CD
player
divides
all
tracks
between
side
A
and
side
B
without
changing
the
order.
You
cannot
select
"HALF"
when
you
designate
desired
tracks
beforehand
or
when
you
want
to
record
a
CD
which
has
more
than
24
tracks.
6
Press
EDIT.
The
CD
player
determines
the
tracks
to
be
recorded
on
side
A
automatically
and
“B"
flashes
in
the
display.
7
when
you
want
to
record
on
both
sides,
press
EDIT
again.
The
CD
player
determines
the
tracks
to
be
recorded
on
side
B.
8
Press
@
on
deck
B.
Recording
starts.
9
Press
>
on
the
CD
player.
The
determined
tracks
for
side
A
starts
playing
and
are
recorded.
After
those
tracks
have
been
recorded,
the
unit
will
pause.
10
set
the
tape
to
the
beginning
of
side
B.
11
Press
@
on
deck
B.
Recording
starts.
112
Press
E>
or
fll
on
the
CD
player.
The
determined
tracks
for
side
B
starts
playing
and
are
recorded.
To
stop
recording
Press
i
on
deck
B.
To
select
the
desired
tracks
beforehand
You
can
place
priority
on
some
tracks
to
be
recorded
by
selecting
them
before
programming
(only
up
to
24
tracks).
See
“Playing
Tracks
in
the
Desired
Order
(program
play)”.
To
check
the
order
Press
CHECK.
Each
time
you
press
CHECK,
the
numbers
of
the
programed
tracks
appear
in
the
display.
To
cancel
time
edit
Before
you
press
EDIT
on
step
6,
press
Bto
cancel.
After
you
pressed
EDIT
on step
6,
press
CONTINUE.
If
programming
takes
too
long
Some
CDs
with
many
tracks
may
take
a
while
for
the
CD
player
to
program.
In
this
case,
press
Ml.
Programming
will
stop.
——EESEE—
SS
Recording
a
CD:
Specifying
Track
Order
(program
edit)
You
can
adjust
the
total
recording
time
to
the
tape
length
while
making
a
program.
Use
the
buttons
on
the
unit
to
do
this
operation.
SYSTEM
POWER-*ON
1
Press
PROGRAM.
“PROGRAM”
appears
in
the
display.
2
Press
IKI]
or
PEI
to
choose
a
track.
The
track
number
and
the
total
playing
time
appear
in
the
display-

3
Press
PROGRAM.
The
chosen
track
number
lights
up
in
the
music
calendar
and
is
memorized.
If
the
track
number
disappears
before
you
press
PROGRAM,
go
back
to
step
2.
4
Repeat
steps
2
and
3
to
program
the
remaining
tracks
you
want
to
record
on
side
A
in
the
order
you
want
them
to
be
recorded.
5
Press
00.
“P”
appears
in
the
display.
The
total
playing
time
“0”
is
displayed.
6
Repeat
steps
2
and
3
to
program
the
remaining
tracks
you
want
to
record
on
side
B
in
the
order
you
want
them
to
be
recorded.
7
Press
@
on
deck
B.
Recording
starts.
8
Press
>
or
00
on
the
CD
player.
The
tracks
for
side
A
are
played
and
recorded
in
the
order
of
your
choice.
After
those
tracks
have
been
recorded,
the
unit
will
pause.
9
Set
the
tape
to
the
beginning
of
side
B.
10
Press
@
on
deck
B.
Recording
starts.
11
Press
>
or
00
on
the
CD
player.
The
tracks
for
side
B
are
played
and
recorded
in
the
order
of
your
choice.
To
stop
recording
Press
B&
on
deck
B.
To
cancel
program
edit
Press
CONTINUE.
aaa
ss
SS
Recording
From
the
Radio
You
can
record
from
the
tuner
onto
the
tape.
Use
TYPE
I
(normal)
or
TYPE
I
(CrO2)
tape.
SYSTEM
POWER—*ON
1
Tune
in
the
radio
station
you
want
to
record.
(See
“Listening
to
the
Radio”,
or
“Playing
Preset
Radio
Stations”
for
details.)
2
Press
M4
and
insert
a
blank
tape
into
deck
B.
3
When
you
want
to
reduce
the
hiss
noise
in
low-level
high-frequency
signals,
set
DOLBY
NR
to
ON.
(For
Canadian
models
only)
4
Press
@
on
deck
B.
Recording
starts.
To
stop
recording
Press
4.
Adjusting
the
volume
or
the
audio
emphasis
will
not
affect
the
recording
level
But
these
controls
will
change
the
sound
levels
you
hear
through
speakers
or
headphones.
You
can
record
the
whole
tape
onto
another.
Use
the
buttons
on
the
unit
and
TYPE
|
(normal)
or
TYPE
I
(CrO2)
tape
for
dubbing.
1
Press
TAPE.
2
Press
and
insert
a
recorded
tape
into
deck
A
and
a
blank
tape
into
deck
B.
3
Press
@
(C
is
linked
and
depressed
at
the
same
time)
on
deck
B.
Recording
starts.
4
Press
>
on
deck
A.
The
tape
on
deck
A
starts
playing.
To
stop
dubbing.
Press
M4
on
deck
B.
Note
If
you
press
CD
or
TUNER
during
dubbing,
the
tape
playback
sound
cannot
be
heard,
however
the
tape
dubbing
continues.
Chapter
4:
the
Tape
Player
|
13

Chapter
5:
Sound
Adjustment
Adjusting
the
Sound
Adjusting
the
Sound
Quality
14
|
Chapter
5:
Sound
Adjustment
Adjusting
the
Sound
To
fully
enjoy
the
sound
coming
from
your
stereo
system,
make
the
following
audio
adjustments.
See
the
following
sections
for
additional
sound
adjustments.
SYSTEM
POWER—ON
VOLUME
HEADPHONES
To
adjust
the
volume
Turn
VOLUME
control
or
press
VOL
(+/—
on
the
remote
commander:
To
reinforce
bass
Press
DBFB*
so
that
the
lamp
lights
up.
To
listen
through
the
headphones
Connect
the
hi
HEADPHON
from
the
speakers.
phones
to
jack.
No
sound
will
come
*DBFB=Dynamic
Bass
Feedback
—
a
Adjusting
the
Sound
Quality
Adjust
the
following
3
band
graphic
equalizer
controls.
Control
Function
100
Hz
Boosts
or
cuts
heavy
bass.
1
kHz
Accentuates
or
subdues
vocals.
12
kHz
Boosts
to
a
sharper
sound
or
reduces
flat
sound.

Chapter
6
fYololidteyar-||
Features
Connecting
Optional
Equipment
Microphone
Mixing
(for
FH-
B411
only)
Karaoke
:Singing
Along
(for
FH-B411
only)
aS
=
SS
Connecting
Optional
Equipment
For
greater
enjoyment
of
your
stereo
system,
you
can
connect
other
components
to
the
stereo.
You
can
connect:
*a
microphone
to
the
MIX
MIC
jack
*
headphones
to
the
HEADPHONES
jack
on
the
front
of
the
CD
player
*a
VCR
to
the
VIDEO/
AUX
jacks
To
connect
a
VCR
You
can
connect
a
VCR
to
the
VIDEO/
AUX
jacks.
To
listen
to
the
VCR
sound,
press
VIDEO,
The
sound
comes
through
the
speakers.
__E
eS
Microphone
Mixing
(for
FH-B411
only)
You
can
“mix”
sounds
by
playing
one
of
the
components
and
singing
or
speaking
into
a
microphone
(not
supplied).
The
mixed
sounds
can
then
be
recorded
on
a
tape.
SYSTEM
POWER-*ON
1
Connect
a
microphone
tg
the
MIX
MIC
jack.
2
Play
your
favorite
sound
source.
3
Sing
or
speak
into
the
microphone.
4
Adjust
VOLUME
control.
If
you
hear
acoustic
feedback,
move
the
microphone
away
from
the
speakers
or
change
the
direction
of
the
microphone.
5
If
you
want
to
record
mixed
sound,
insert
a
tape
in
deck
B
and
start
recording.
To
record
from
the
microphone
only
1
Press
CD
to
select
the
CD
player.
Ifa
CD
is
being
played,
press
Ml
on
the
CD
player
to
stop
playing.
2
Start
recording.
3
Sing
or
speak
into
the
microphone.
When
you
finish
mixing
Disconnect
the
microphone.
=
ee
ee
Karaoke:
Singing
Along
(for
FH-B411
only)
SYSTEM
POWER-+ON
KARAOKE
PON
To
Reduce
the
Vocals
(karaoke
pon)
You
can
minimize
the
singer's
voice,
“vocal
reduction,”
so
you
can
sing
along
with
any
stereo
CD.
When
you
want
to
record
the
sound
of
the
CD
and
your
voice,
operate
steps
below,
then
operate
“Microphone
Mixing”
To
reduce
the
vocals
Press
KARAOKE
PON
so
the
indicator
lights.
The
karaoke
play
sound
will
be
in
monaural.
To
cancel
vocal
reduction,
press
KARAOKE
PON
so
the
indicator
goes
off.
Notes
on
vocal
reduction
The
singer's
voice
may
not
be
reduced
completely
for
the
following
reasons:
*
Monaural
recorded
source
(Instruments
may
also
be
reduced.)
*
Only
a
few
instruments
are
playing
in
the
stereo
recorded
source
«A
duet
is
being
played
*
The
source
has
strong
echoes
or
chorus
*
The
singer's
voice
on
the
source
deviates
from
the
center
*
The
voice
on
the
source
is
singing
in
high
soprano
or
tenor
Chapter
6:
Additional
Features
|
4
5

16
mela
(elelg
Talcelanarelecele
Precautions
Troubleshooting
Guide
Maintenance
Specifications
Index
to
Parts
and
Controls
Index
For
Your
Information
ee
Precautions
If
you
have
any
questions
or
problems
concerning
your
stereo
system,
please
consult
your
nearest
Sony
dealer
On
operating
voltage
Before
operating
the
stereo
system,
check
that
the
operating
voltage
of
your
stereo
system
is
identical
with
the
voltage
of
your
local
power
supply.
U.S.A.
and
Canada
Australia
120
V
AC,
60
Hz
240
V
AC,
50
Hz
On
safety
*
This
unit
is
not
disconnected
from
the
AC
power
source
(mains)
as
long
as
it
is
connected
to
the
wall
outlet,
even
if
the
unit
itself
has
been
turned
off
©
Unplug
the
unit
from
the
wall
outlet
(mains)
if it
is
not
to
be
used
for
an
extended
period
of
time.
To
disconnect
the
cord
(mains
lead),
pull
it
out
by
the
plug.
Never
pull
the
cord
itself
*
Should
any
solid
object
or
liquid
fall
into
the
system
unplug
the
stereo
system
and
have
the
system
checked
by
qualified
personnel
before
operating
it
any
further.
*
AC
power
cord
must
be
changed
only
at
the
qualified
service
shop.
On
installation
Place
the
stereo
system
in.a
location
with
adequate
ventilation
to
prevent
heat
build-
up
in
the
stereo
system.
On
condensation
in
the
CD
player
component
If
the
system
is
brought
directly
from
a
cold
toa
warm
location,
or
is
placed
in
a
very
damp
room,
moisture
may
condense
on
the
lens
inside
the
CD
player.
Should
this
occur,
the
CD
player
will
not
operate
Remove
the
CD
and
leave
the
system
turned
on
for
about
an
hour
until
the
moisture
evaporates.
To
save
a
tape
permanently
To
prevent
a
tape
from
being
accidentally
recorded
over,
break
off
the
cassette
tab
from
side
A
or
Bas
illustrated.
If
you
later
want
to
reuse
the
tape
for
recording,
cover
the
broken
tab
with
adhesive
tape.
Side
A
Tab
of
side
A
Tab
of
side
B
When
you
are
using
a
type
II
(CrO2)
tape,
be
careful
not
to
cover
the
detector
slots
which
allow
the
tape
player
to
automatically
detect
the
type
of
tape.
Detector
slots
For
the
customers
in
the
U.S.A.
¢
As
the
laser
beam
used
in
this
unit
is
harmful
to
the
eyes,
do
not
attempt
to
disassemble
the
cabinet.
Refer
servicing
to
qualified
personnel
only.
¢
For
detailed
safety
precautions,
see
the
leaflet
“IMPORTANT
SAFEGUARDS”
a
Troubleshooting
Guide
If
you
run
into
any
problem
using
the
stereo,
use
the
following
check
list.
And
first
check
the
following
points
¢
The
power
cord
is
connected
firmly
*
The
speakers
are
connected
correctly
and
firmly
Should
any
problem
persist
after
you
have
made
the
checks
below,
consult
your
nearest
Sony
dealer.
Tuner
“TUNED”
flashes
in
the
display.
>
Adjust
the
antenna
“STEREO”
flashes
in
the
display.
>
Adjust
the
antenna
Severe
hum
or
noise.
>
Adjust
the
antenna
>
The
signal
strength
is
too
weak
Connect
the
external
antenna
+>
Connect
the
ground
wire.
The
stereo
FM
program
cannot
be
received
in
stereo.
>
Press
MONO
so
that
“STEREO”
appears
in
the
display

Tape
Player
The
tape
does
not
record.
7
No
tape
in
the
cassette
compartment.
>
The
tab
has
been
removed
from
the
cassette.
>
The
tape
has
reeled
to
the
end.
The
tape
does
not
record
nor
playback
or
there
is
a
decrease
in
sound
level.
>
The
heads
are
dirty.
Clean
them.
>
Magnetic
deposits
have
built-up
on
the
record/
playback
heads.
There
is
excessive
wow
or
flutter,
or
the
sound
drops
out.
>The
capstans
or
pinch
rollers
are
contaminated.
The
tape
does
not
erase
completely.
>
Magnetic
deposits
have
built-up
on
the
record
/
playback
heads:
Noise
increases
or
the
high
frequencies
are
erased.
>
Magnetic
deposits
have
built-up
on
the
record
/
playback
heads.
CD
Player
The
CD
tray
does
not
close.
>
The
CD
is
not
placed
correctly.
The
CD
will
not
play.
>
The
CD
is
dirty.
>
The
CD
is
inserted
label
side
down.
>
The
player
is
in
pause
mode.
~
Moisture
condensation
has
built-
up.
Leave
the
system
turned
on
for
about
an
hour
until
the
moisture
evaporates.
Play
will
not
start
from
the
first
track.
>
The
CD
player
is
in
program
or
shuffle
mode.
Press
CONTINUE.
“. 4”
is
displayed.
>
DDI
was
repeatedly
pressed
at
the
end
of
the
CD.
Press
I<]
(or
Ke
on
the
remote
commander)
to
return
to
the
normal
display.
General
There
is
no
sound.
>
Turn
VOLUME
control
clockwise.
>
The
headphones
are
connected,
Disconnect
them.
Sound
comes
from
one
channel
or
an
unbalanced
left
and
right
volume.
>
Check
the
speaker
connections
of
the
inoperative
channel.
The
left
and
right
sound
are
reversed.
>
Check
the
speaker
connection
and
speaker
placement.
Bass
is
lacking
or
the
location
of
the
musical
instruments
is
apparently
imprecise.
>
Check
the
speaker
connection
for
proper
phasing.
There
is
severe
hum
or
noise.
>The
TV
or
VER
is
too
close
to
the
stereo
system.
Move
the
stereo
system
away
fromthe
TV
or
VCR.
The
remote
commander
does
not
function.
>
The
batteries
have
run
down.
Replace
both
batteries.
>
There
is
an
obstacle
between
the
remote
commander
and
the
system.
Remove
the
obstacle.
a
ar
SS
Maintenance
To
clean
the
tape
heads
and
tape
path
Contaminated
tape
heads
cause
poor
recording
or
sound
drop-out
in
playback.
We
recommend
cleaning
after
every
10
hours
of
operation.
Open
the
cassette
compartment
and
wipe
the
heads,
the
pinch
rollers
and
the
capstans
with
a
cleaning
swab
slightly
moistened
with
cleaning
fluid
or
alcohol.
Wipe
the
parts
shown
below:
Erase
head
Capstan
Pinch
roller
Record/playback
head
Insert
a
tape
after
the
areas
cleaned
are
completely
dry-
To
demagnetize
the
tape
heads
After
20
to
30
hours
of
use,
enough
residual
magnetism
will
have
built
up
on
the
heads
to
begin
to
cause
loss
of
high
frequencies
and
hiss.
At
this
time,
demagnetize
the
heads
and
all
metal
parts
in
the
tape
path
with
a
commercially
available
tape
head
demagnetizer.
Refer
to
the
instructions
of
the
demagnetizer.
To
clean
the
cabinet
Use
a
soft
cloth
slightly
moistened
with
mild
detergent
solution.
To
clean
the
CD
When
a
CD
is
dirty,
clean
it
with
a
cleaning
cloth,
Wipe
the
CD
from
the
center
out.
Notes
on
CD
*
Do
not
use
solvents
such
as
benzene,
thinner,
commercially
available
cleaners,
or
anti-static
spray
intended
for
vinyl
LPs.
*
If
there
is
a
scratch,
dirt
or
fingerprints
on
the
CD,
it
may
cause
a
tracking
error.
Ez
Specifications
AUDIO
POWER
SPECIFICATIONS
(For
the
customers
in
the
U.S.A.)
POWER
OUTPUT
AND
TOTAL
HARMONIC
DISTORTION:
With
6
ohm
loads,
both
channels
driven,
from
60
Hz
—
20
kHz;
rated
10
watts
per
channel
minimum
RMS
power,
with
no
more
than
1
%
total
harmonic
distortion
from
250
milliwatts
to
rated
output.
CD
player
section
System
Compact
disc
digital
audio
system
Laser
Semiconductor
laser
Wavelength
780-790nm
Tuner
section
FM
stereo,
FM/AM
superheterodyne
tuner
FM
tuner
section
Tuning
range
87.5-
108.0
MHz
(100
kHz
step
for
U.S.A.
and
Canada)
(50
kHz
step
for
Australia)
FM
lead
antenna
(for
MHC-450)
Telescopic
antenna
(for
FH-
B411)
Antenna
terminals
75
ohm
unbalanced
Intermediate
frequency
10.7
MHz
Antenna
continue
to
next
page
>
For
Your
Information
|
7

>
continued
AM
(MW,SW)
tuner
section
Tuning
range
U.S.A.
and
Canadian
models:
AM:
530-
1,710
kHz
(10
kHz
step)
531
-
1,710
kHz
(9
KHz
step)
Australian
models:
MW:
531
-
1,602
kHz
(9
kHz
step)
530
-
1,710
kHz
(10
kHz
step)
SW:
5,95
-
17.9
MHz
AM
loop
antenna
External
antenna
terminals
Intermediate
frequency
450
kHz
Antenna
Cassette
deck
section
Recording
system
4-track
2-channel
stereo
Frequency
response
(DOLBY
NR
OFF)
(For
Canadian
models
only)
60
-
13,000
Hz
(+3
dB),
using
TYPE
I
cassette
(Sony
HE-S)
60
—
14,000
Hz
(+3
dB),
using
TYPE
II
cassette
(Sony
UX-S)
Wow
and
flutter
0.1%
WRMS
+0.3%
(DIN)
Amplifier
section
Continuous
RMS
power
output:
16+16
watts
(6
ohms
at
1
kHz,
DIN)
20+20
watts
(6
ohms
at
1
kHz,
5%
THD)
Peak
Music
power
output:
200
W
(6
ohms
at
1
kHz,
10%
THD)
Inputs
MIX
MIC
(mini
jack)
(FH-
B411
only)
Sensitivity
1
mV,
impedance
600
ohms
VIDEO/
AUX:
Sensitivity
450
mV,
impedance
47
kilohms
HEADPHONES
(stereo
mini
jack):
accept
headphones
of
8
ohms
or
more.
SPEAKERS:
accept
impedance
of
6
to
16
ohms.
Outputs
Speaker
section
Speaker
system
2-way
system
3-way
system
(for
U.S.
A.
customers)
18
a
Speaker
units
Woofer:
13
cm
dia.,
cone
Tweeter:
5
cm
dia.,
cone
type
Super
tweeter:
2cm
dia,
dome
(for
U.S.
A.
customers)
Enclosure
Bass
reflex
Frequency
range
65
Hz—
20
kHz
Sensitivity
88.
dB/W/m
Rated
impedance
6
ohms
Approx.
175
x
285
x
240
mm
(7x11
1/4x91/2
inches)
(w/h/d)
Mass
Approx.
2.7
kg
(5
Ib
15.0z.)
net
per
speaker
Dimensions
Supplied
accessories
AM
loop
antenna
(1)
Remote
commander
(1)
Sony
SUM-3
(NS)
batteries
(2)
FM
lead
antenna
(1)
(for
MHC~450
only)
Speaker
cords
(2)
(for
MHC-450
only)
——
Destination
Power
Power
repeeners:
cuasgtion
U.S.A.and
=
120
V
AC,
60
W
Canada
60
Hz
Australia
240
V
AC,
60
W
50
Hz
Dimensions
Approx.
225
x
285
x
275
mm
(9
x
11
1/4x
107/8
inches)
(w/h/d)
incl.
projecting
parts
and
controls
Mass
Approx.
5.2
kg
(11
Ib
7
oz.)
Design
and
specifications
are
subject
to
change
without
notice.
=
Index
to
Parts
and
Controls
Refer
to
the
pages
indicated
in
parentheses
for
how
to
use
the
controls.
Front
Panel
Tuner/Amplifier
[1]
Remote
sensor
[2]
Display
window
(6)
DBFB
button
and
lamp
(14)
Graphic
equalizer
controls
(14)
MEMORY
button
(10)
VOLUME
control
(6
,
14)
PRESET/TUNING
button
(9,
10)
DOLBY
NR
switch
(Canadian
models
only)
(11)
KARAOKE
PON
button
and
lamp
(FH-
B411
only)
(15)
[8]
SYSTEM
POWER
button
(6)
TAPE
button
and
lamp
(11)
1]
CD
button
and
lamp
(6)
TUNER
button
and
lamp
(9)
VIDEO
button
and
lamp
(15)
MONO
button
(9)
TUNER
buttons
(9)
SHIFT
button
(10)
[17]
BAND
button
(9)
(ee
CCIE)

Taj
layer
Rear
Panel
Remote
commander
5
i
=
2
=
3
4
|1|
Cassette
compartments
2]
Tape
operating
buttons
C
(play)
(11)
bP
(fast
forward)
(11)
Se
cewind)
[i]
FM
telescopic
aerial
(FH-B411
only)
4
(stop/eject)
(11)
[2]
FM
759
terminal
(4)
@
(recording)(for
deck
B
only)
(11)
3]
sh
earth
terminal
(4)
Ml
(pause)(for
deck
B
only)
(11)
[4]
AM
terminal
(4)
[5]
VIDEO/
AUX
jacks
(15)
:
CD
player
[1]
CD
operating
buttons
_peoee
—
CD
(CD
mode)
button
(6)
power
cord
¢
>
(play)
(6)
Heed
/
PI
(AMS")
(6)
4
(pause)
(6)
@
(stop)
(6)
*
AMS:
Automatic
Music
Sensor
H
Wi
[2]
Tuner
operating
buttons
Display
indow
TUNER
(TUNER
mode)
button
(9)
SHIFT
button
(10)
PRESET+/-—
buttons
(10)
[3]
TAPE
button
(11)
[4]
VIDEO
button
(15)
SYSTEM
POWER
button
(6)
(1)
CD
tray
(6)
nl
VOL
(volume)
buttons
(6,14)
Hi
a
am
reese
econ
*
PHONO
button
(not
applicable
for
this
>
(play)
(6)
mee
00
(pause)
(6)
@
(stop)
(6)
IKK
/
>>>
(manual
search/
1)
TRACK
number/PRESET
radio
code
__
AMS)
buttons
(6)
indication
(6,
10)
4]
CONTINUE
button
(7)
[2]
MEMORY
indication
(10)
[5]
SHUFFLE
button
(7)
[3]
Tuner
indication
(9)
[6]
PROGRAM
button
(7)
[4]
Time/frequency
indication
(6,
9)
[Z]
REPEAT
button
(8)
[5]
CD
play
mode
indication
(7)
[8]
TIME
button
(7)
lusic
calendar
(6)
[9]
CHECK
button
(7)
Tape
recording
side
indication
(12)
=
Lf
CLEAR
button
(7)
/77
11]
EDIT
button
(12)
[J
MIX
MIC
jack
(15)
(FH-B411
only)
ff
HEADPHONES
jack
(14)
For
Your
Information
|
49

SS
a
Index
Antenna
4
AMS
6
CD
Player
6
Connecting
the
stereo
4
Display
indications
6
Inserting
the
Batteries
5
Karaoke
15
Maintenance
17
Microphone
Mixing
15
Music
calendar
6
Playing
aCD
(normal
play)
6
atape
11
tracks
in
random
order
(shuffle
play)
7
tracks
in
the
desired
order
(program
play)
7
tracks
repeatedly
(repeat
play)
8
Playing
Preset
Radio
Stations
10
Precautions
16
Presetting
Radio
Stations
9
Recording
aCD
it
aCD
Manually
11
from
another
tape
(dubbing)
13
from
the
radio
13
Recording
a
CD
specifying
tape
length
(time
edit)
12
specifying
track
order
(program
edit)
12
Specifications
17
Tape
Player
11
Troubleshooting
Guide
16
Sony
Corporation
Printed
in
Malaysia
This manual suits for next models
1
Table of contents
Other Sony Stereo System manuals

Sony
Sony SHAKE-X70D User manual

Sony
Sony SS-SCL3 User manual

Sony
Sony ST-SP55 User manual

Sony
Sony MHC-GR5 User manual

Sony
Sony HCD-XG100AV User manual

Sony
Sony MHC-V800 User manual

Sony
Sony DHC-MD333 - Mini Hi Fi Component System User manual

Sony
Sony ZS-X3CP Marketing Specifications & Features User manual

Sony
Sony MDS-EX770 User manual

Sony
Sony MHC-W55 User manual