2
This document contains proprietary
information which is protected by
copyright.
All rights reserved. No part of this
document may be photocopied,
reproduced or translated to another
language without prior written consent
of Sony.
The information contained in this
document is subject to change without
notice.
SONY MAKES NO WARRANTY
OF ANY KIND WITH REGARD TO
THIS DOCUMENT.
Sony shall not be liable for error
contained herein, indirect, special,
incidental or consequential damages in
connection with the furnishing,
performance or use of this document.
VORSICHT
Diese Ausrüstung erfüllt die
Europäischen EMC-Bestimmungen für
die Verwendung in folgender /
folgenden Umgebung(en):
• Wohngegenden
• Gewerbegebiete
• Leichtindustriegebiete
(Diese Ausrüstung erfüllt die
Bestimmungen der Norm EN55022,
Klasse B.)
Contents
Introduction .......................................4
Product Features........................4
Precautions ................................5
Installation .........................................6
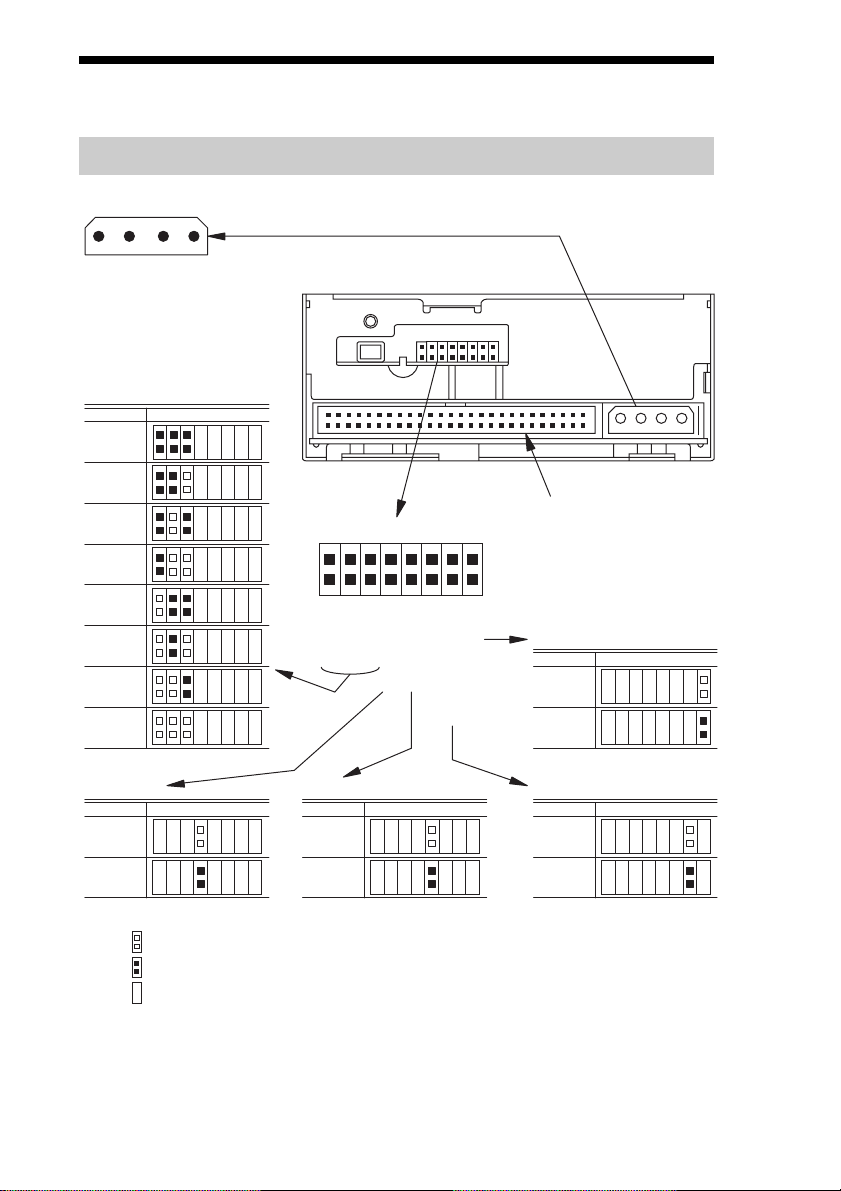
SCSI Connection/Setting the
SCSI ID/Option Switches......6
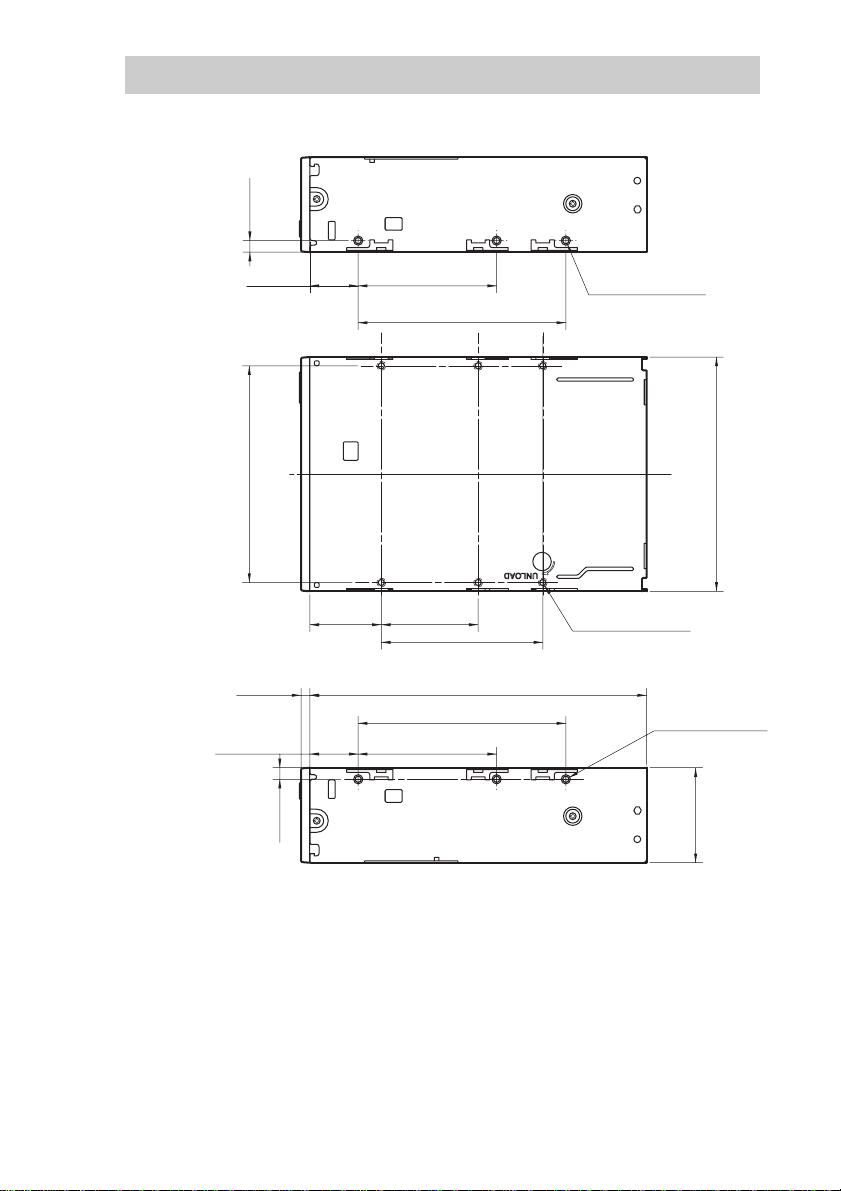
Mounting Holes........................7
Remodeling from 5.25" Model
to 3.5" Model .........................9
Orientation...............................10
Operation .........................................11
Location of 3 LEDs .................11
LED Indication for
Drive Status .........................12
Drive Operation.......................13
Emergency Cassette Removal
Procedure .............................14
Interface Implementation.................16
Supported SCSI Messages ......16
Supported SCSI Commands....16
Specification ....................................17
Product Specifications.............17
Third Party Support Contacts
(In the USA) ...............................19
Sony Contacts ..................................21