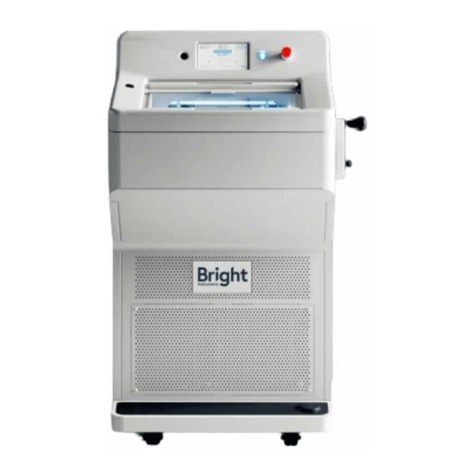
SOPHION BIOSCIENCE QPatch Compact User manual

GUIDE37128-2 1 / 53
QPatch Compact User Manual

GUIDE37128-2 2 / 53
Content
1. Introduction to QPatch Compact ...............................................................................4
1.1 Scope and purpose .................................................................................................................4
1.2 Notes and cautions .................................................................................................................4
1.3 System description .................................................................................................................4
1.4 QPlate 8/8X ...........................................................................................................................5
1.4.1 Shelf life of partially used QPlate 8 ..............................................................................................................5
1.5 System architecture................................................................................................................5
1.6 Pipetting light guidance ...........................................................................................................6
1.6.1 Instrument initialization .............................................................................................................................6
1.6.2 QPlate insertion/removal............................................................................................................................6
1.6.3 Active sites on QPlate ................................................................................................................................6
1.6.4 Intracellular (IC) and extracellular (EC) solution addition................................................................................6
1.6.5 Cell addition .............................................................................................................................................6
1.6.6 Compound addition ...................................................................................................................................6
1.6.7 Compound addition for ligand-gated experiments ..........................................................................................7
1.6.8 Cells and compound additions scheme .........................................................................................................7
1.7 Temperature control ...............................................................................................................7
1.8 Sophion Analyzer software.......................................................................................................8
2. Startup and shutdown procedures ............................................................................9
2.1 Startup .................................................................................................................................9
2.1.1 Power up & initialization.............................................................................................................................9
2.1.2 Logon......................................................................................................................................................9
2.1.3 Temperature control ................................................................................................................................10
2.2 Shutdown procedure .............................................................................................................10
3. Conducting an experiment ......................................................................................11
3.1 Terminating a running protocol ...............................................................................................12
4. Operating the system ..............................................................................................13
4.1 Cells ...................................................................................................................................13
4.2 Saline solution requirements ..................................................................................................13
4.3 QPlate barcodes....................................................................................................................13
4.4 Touch screen monitor user interface ........................................................................................13
4.5 Screening station software (SSS) ............................................................................................13
4.5.1 Sophion logo – easy access to manuals and guides in SSS ............................................................................13
4.5.2 Login screen ...........................................................................................................................................14
4.5.3 Left-side menu bar ..................................................................................................................................15
4.1 Operation ............................................................................................................................16
4.1.1 Preflight Check screen..............................................................................................................................16
4.1.2 Maintenance menu ..................................................................................................................................17
4.1.3 Settings menu ........................................................................................................................................18
4.1.4 Setting up the compound map ..................................................................................................................20
4.1.5 Priming the QPlate...................................................................................................................................22
4.1.6 Live view panel .......................................................................................................................................25
4.1.7 Choosing the voltage protocol and run parameters.......................................................................................25
4.1.8 Job finished ............................................................................................................................................28
4.1.9 Results screen ........................................................................................................................................29
4.1.10 Log out screen ......................................................................................................................................29
5. Instrument cleaning and maintenance ....................................................................31
5.1 Daily cleaning.......................................................................................................................31
5.2 Occasional maintenance.........................................................................................................31
5.2.1 Thermoelectric circulator ..........................................................................................................................31
5.3 How to drain the thermoelectric circulator for water...................................................................31
5.4 How to drain the QPatch Compact for water before shipping .......................................................33
5.5 Decontamination before shipping to Sophion Bioscience .............................................................34
6. Troubleshooting ......................................................................................................35
6.1 Issues during instrument startup ............................................................................................35
Problem: QPatch Compact does not power up and the touch screen monitor remains black? ......................................35
Problem: The login screen does not appear after the instrument is turned on? .........................................................35
Problem: I cannot log into the instrument? .........................................................................................................35

GUIDE37128-2 3 / 53
6.2 Issues during instrument use..................................................................................................36
Problem: Liquid accumulates inside the manifold – removal of manifold ..................................................................36
6.3 Issues when running an experiment on the instrument. .............................................................37
Problem: The instrument rejects the QPlate after attempting to read the barcode.....................................................37
Problem: The priming of the QPlate fails .............................................................................................................37
Problem: The priming of some QPlate sites fails...................................................................................................37
Problem: The positioning of cells fails too often....................................................................................................38
Problem: The success rate is consistently lower than expected ..............................................................................38
6.4 Maintenance menu................................................................................................................38
6.4.1 Temperature control menu .......................................................................................................................38
6.4.2 Manifold menu ........................................................................................................................................39
6.4.3 Move to home position .............................................................................................................................39
6.4.4 Move to transport position ........................................................................................................................39
6.4.5 Recover from a jammed/stuck manifold......................................................................................................40
6.5 Conducting a pressure test.....................................................................................................43
6.6 Conducting an artificial reference QPlate (ARQ) experiment ........................................................44
6.7 Priming a QPlate 8/8X ...........................................................................................................45
7. System requirements & specifications.....................................................................47
7.1 Instrument...........................................................................................................................47
7.2 Handling the instrument and precautions .................................................................................47
7.3 Environmental conditions .......................................................................................................47
7.4 Database .............................................................................................................................48
7.5 Sophion Analyzer software .....................................................................................................48
7.6 QPlate 8 ..............................................................................................................................48
7.7 PolyAmp 4 – Patch Clamp Amplifier .........................................................................................48
8. Legal statement ......................................................................................................50
8.1 Copyright.............................................................................................................................50
8.2 Trademarks..........................................................................................................................50
8.3 Compliance ..........................................................................................................................50
8.4 Disclaimer............................................................................................................................50
9. Terms and abbreviations (appendix I) ....................................................................51
10. Declaration of conformity (appendix II)..................................................................53

Sophion Bioscience A/S
Baltorpvej 154,
2750 Ballerup
Denmark
🕽+45 44 60 88 00
Sophion Bioscience, Inc.
213 Burlington Road, Suite 105,
Bedford, MA 10730
United States
🕽+1 877 898 9010
Sophion Bioscience K. K.
Incubation on Campus Honjo Waseda #V203,
1011 Nishitomoda, Honjo-shi,
Saitama 367-0035, Japan
🕽+81 495 71 8811
Sophion Bioscience (Shanghai) Co., Ltd.
Room 550, Floor 5, Building 21
No. 1-28, Lane 588 Tianxiong Road, Pudong District
Shanghai 201318, China
🕽+86 21 52037529
Sophion.com
1. Introduction to QPatch Compact
1.1 Scope and purpose
QPatch Compact (QPC) performs up to 8 independent, high-fidelity voltage clamp or current clamp
experiments at the same time. The system contains a database for data storage and software for
setting up, executing, and analyzing patch clamp experiments.
As an integral part of the QPatch Compact system, this manual must be easily accessible to users.
This user manual is also accessible from the QPatch Compact screening station software (SSS).
Suggestions for improvements are always welcome; please contact us for your feedback at
1.2 Notes and cautions
Throughout the manual, several notes and cautions are mentioned. These are marked in grey, and
orange boxes, respectively. The purpose of notes, and cautions is shown in the following.
Note! A note contains information that should be paid special attention to. Notes
are typically information which is important for correct assay setup. Failure to
conform to notes may negatively affect performance and data quality.
Caution! A caution contains information that should be followed. Cautions are
typically information that is important for correct system setup and use. Failure to
conform to cautions may lead to permanent loss of data, cells, reagents, and
consumables.
1.3 System description
Caution! We recommend that staff familiarize themselves with risks of electrical
measurements, hazardous and toxic liquids, and related biohazards. Users should
read this manual and especially note the “Safety Guide” which is enclosed with the
instrument in the transport case.
QPC is used for measuring ion channel currents or voltages in living cells employing the planar patch
clamp technique. The experiments are performed on silicon chips with either a single or ten-patch
hole. Eight silicon chips are integrated into a QPlate 8/8X.
The QPlate is a ready-to-use consumable (Figure 1). When cells are applied to the QPlate, they will
be moved to the patch hole by a microfluidics system and captured at the patch hole by suction. The
cells to be patched are randomly selected. Therefore, the cells in the sample applied to the patch
clamp chip must be of high quality and uniformly single cell suspended.

GUIDE37128-2 5 / 53
Figure 1 Schematic view of one recording site in a QPlate 8
1.4 QPlate 8/8X
Caution! QPlates must be stored at 4-8°C in the protective bag under vacuum in
which they were shipped. QPlates should not be placed back at 4-8°C after the bag
is opened. This is to avoid condensation on the QPlates, which can disturb the
electrical circuit.
Each measurement site contains two microfluidic flow channels, one for the extracellular and one for
the intracellular solution (Figure 1) and the liquids are driven by fluid pressure. It is important that
both the positive and negative pressure is within the recommended range – see chapter 7.
QPlate 8 are single-hole QPlates and QPlate 8X are the corresponding multi-hole QPlates.
The QPlate 8/8X is a single-use consumable, hence the QPlate recording sites are only once and
cannot be reused.
The extracellular solution is collected in the waste reservoir inside the QPlate 8 and has a volume of
250 µL. It is important to comply with the volume guidance from the system for it to keep track of
the liquid level in the waste reservoir. It is the only container for biological and potentially hazardous
waste and must be disposed of accordingly. Please see our “Safety Guide” which is enclosed with the
instrument in the transport case for more information.
A pair of measurement electrodes are placed at each of the 8 sites and connected to individual
amplifiers.
1.4.1 Shelf life of partially used QPlate 8
Once you start using a QPlate 8, it can be used for one week. When not actually in use, partially used
QPlates 8 should be kept in a desiccator.
1.5 System architecture
QPatch Compact consists of:
•The instrument which handles the QPlate, cells,
compounds, and performs the actual experiments. This
includes the electrothermic circulator which ensures
temperature control.
•The internal Oracle database, used for storing
experimental parameters and measured data.
Figure 2 QPatch Compact

GUIDE37128-2 6 / 53
•The Sophion Analyzer software, used for planning experiments, executing, and analyzing
the data.
The QPC instrument is commanded via the touch screen using the Screening Station Software
(SSS).
The Oracle database stores all recorded data and other information in the system. The database is
the software device used for storage of assay definitions, experiment data and user settings. The
database ensures that the measured data cannot be deleted accidentally. This also applies to all
information on experiment settings and execution. Users must login, and the system records which
users performed which actions in the system. QPatch Compact is delivered with a pre-configured and
pre-installed database which is ready to operate with the instrument.
1.6 Pipetting light guidance
The pipetting light and audio guidance is an assistive feature to the cell and liquid addition steps. It
was incorporated to help guide the user during liquid addition for more accurate timing and a better
user experience.
The light guidance features several functions depending on the particular step in the patch clamp
setup process.
1.6.1 Instrument initialization
During instrument initialization the light guidance will always show an downward-upward flash
sequence. This indicates that the light guidance works as expected.
1.6.2 QPlate insertion/removal
The pipetting light guidance indicates when to insert and remove the QPlates and in which direction
to move the QPlate.
1.6.3 Active sites on QPlate
The active sites which are indicated on the touch screen as the user selects the sites on which to
record are also highlighted with white light next to the manifold.
1.6.4 Intracellular (IC) and extracellular (EC) solution addition
During IC and EC addition, the light guidance shows which sites to pipette into indicated by blue
light.
1.6.5 Cell addition
During cell addition, the light guidance will indicate the next site in which to pipette by a blue light.
The user must wait without inserting the pipette tip into the manifold until the blue light turns orange
while preparing to insert the pipette tip and dispense the liquid. As soon as the blue light turns orange
the user inserts the pipette tip and dispenses the liquid in one clean motion. The next site in which
to pipette will then turn blue and the process repeats with site.
1.6.6 Compound addition
During compound addition, the light guidance will point to the next site in which to pipette indicated
by a blue light like the cell addition step. The user must wait without inserting the tip until the blue
light turns orange. Once it has turned orange the user must insert the tip into the manifold as far as
it will go making sure the tip collar rests on the manifold shoulder and dispense the liquid in one

GUIDE37128-2 7 / 53
clean motion and then remove the tip without aspirating. Please consult our video tutorials “How to
prepare cells for QPatch Compact” and “How to start your experiment on QPatch Compact” available
on our self-learning QPC support site.
1.6.7 Compound addition for ligand-gated experiments
During compound addition, the light guidance will point to the next site in which to pipette indicated
by a blue light similar to cell addition. The user must wait without inserting the tip until the blue light
turns orange.
The washout of the compound is also indicated by a blue light and the moment the blue light turns
orange, the user must insert the tip into the manifold as far as it will go making sure the tip collar
rests on the manifold shoulder and dispense the liquid in one clean motion and then remove the tip
without aspirating.
1.6.8 Cells and compound additions scheme
1.7 Temperature control
The temperature control ensures temperature stabilization at the recording site throughout the
experiment with a temperature accuracy of ±0.5˚C.
The temperature stabilization interval ranges from 18˚C/64˚F to 40˚C/104˚F.
The temperature control is enabled by the thermoelectric circulator Loop100 (Lauda), connected to
QPC through insulated tubing and a data cable. An ambient temperature sensor on QPC enables
temperature stabilization independent of the ambient temperature.
The thermoelectric circulator heats and cools decalcified water and pumps it through the bed of nails
(BON) inside QPC and thereby stabilizes the recording temperature. The circulator is filled with
decalcified water including an anti-fungal and antibacterial agent through an opening on the top of
the circulator. Instructions on how to fill/empty the thermoelectric circulator is described in section
5.3.
The thermoelectric circulator may display a different temperature on its display compared to the
target temperature indicated in the SSS depending on the ambient temperature and the absolute
temperature indicated. This is expected as the temperature control also takes the ambient
temperature into consideration.
The circulator has an independent power inlet and must be activated in the SSS on the QPC touch
screen to actively stabilize temperature at the recording site. This is explained in a subsequent
section.
Before starting an experiment, the QPC must be activated, and the temperature control dial set to
the desired temperature for 1 hour prior to starting any experiments.
Color
Instruction
Blue
Await orange light without inserting pipette tip
Orange
Dock & dispense, then remove the tip without aspirating

GUIDE37128-2 8 / 53
1.8 Sophion Analyzer software
The Sophion Analyzer software is used for designing and planning experiments and for analyzing
recorded data. It is used to design voltage protocols and whole cell protocols (pressure protocols) as
well as documenting the cell type and ion channel studied. These protocols cannot be modified during
the recording experiment.
It comes pre-installed on the QPC instrument PC or it is downloaded and installed on one or more
office PCs simultaneously, connected to the same network as the instrument in order to access the
Oracle database in the instrument PC.
Both raw data and analyzed data can be displayed. The analysis comprises all elements relevant for
patch clamp data like IV relation, mono- and bi-exponential fit to kinetic parameters as well as
pharmacological quantification.

GUIDE37128-2 9 / 53
2. Startup and shutdown procedures
2.1 Startup
Please see the installation guide (available on: QPatch Compact self-support - Sophion, scan QR
upper right hand corner for access) for details on setting up the instrument.
Before the system is powered up, ensure that the pressure and vacuum inlets are connected and
that the pressure and vacuum levels are within the specified range (see chapter 6 for installation
tests and chapter 7 for instrument specifications).
Make sure the thermoelectric circulator is filled with decalcified water incl. an anti-fungal and anti-
bacterial agent, and that the water circulator is connected to QPC. Inspect the system and ensure
the instrument is clean and dry.
2.1.1 Power up & initialization
Turn on the circulator by pressing the power button on the back of the device. The circulator will
automatically enter standby mode (visible on circulator display).
Then turn on QPatch Compact by pressing the power button on the left side of the instrument, a
white ring will illuminate as long as it is turned on. The touch screen will activate and QPC will start
initializing.
During initialization, the QPC manifold mechanism will move and automatically release the red
transport plate which sits in the QPlate slot during transport. This may take a couple of minutes.
Caution! As the insulated tubing fills with water the low volume circulator container
will drain slightly. Make sure that the container is refilled with decalcified water as
this ensures optimal heating/cooling properties of the temperature control.
2.1.2 Logon
The screening station login screen will appear, and the user must log in with their credentials and
password. New user accounts are set up in the Sophion Analyzer software, using the administrator
logon - consult our Sophion Analyzer user manual for more information.

GUIDE37128-2 10 / 53
Once logged in, the Pre-flight screen will appear and the QPlate icon appears indicating to insert the
QPlate. The light guidance next to the manifold will indicate the direction in which to insert the QPlate.
Figure 3 QPatch Compact preflight screen
2.1.3 Temperature control
Press the temperature control icon in the lower right corner to enter the temperature control settings.
Activate the temperature control by toggling the button and set the desired target temperature for
your next experiment, see Figure 4. Exit the temperature control settings.
We recommend powering up the system 1 hour with the
temperature activated and the target temperature set before
conducting any experiments. This ensures that the
instrument has reached a steady temperature level before
conducting any experiments and will ensure optimal
temperature recording conditions.
Once the QPlate is inserted, the QPlate color and barcode is
shown on the touch screen and the instrument is ready to set
up the experiments.
2.2 Shutdown procedure
On the touch screen monitor click on “Logout” to return to the login screen. Click on “X” in the upper
right corner to shut down the application. It takes a couple of seconds for the touch screen to
respond. You can now turn off the power to the system by clicking the power button on the left-hand
side of the instrument.
Note! To access the database from another laptop through a network connection,
you must leave the instrument turned on.
Figure 4 Temperature control dial

GUIDE37128-2 11 / 53
3. Conducting an experiment
Each step below is described in general terms. We presume the instrument was properly cleaned
after previous use.
1. Set up the protocols
Define a whole-cell protocol and the relevant voltage protocols using Sophion
Analyzer software.
Please refer to the QPatch Compact Assay Setup Guide to learn how to
set up protocols.
2. Prepare the QPlate
Acclimatize the QPlate (while it is still in the vacuum-packed plastic pocket)
at room temperature for at least 1 hour before use.
3. Start up the QPC
Turn on the instrument (on the left-hand side) and the thermoelectric water
circulator. Log on via the touch screen monitor.
Notice: Username and password are valid also for the QPatch Compact
database.
4. Prepare the cells
Harvest the cells and pour the cell suspensions into
vials.
Please refer to the QPC video tutorial “How to harvest
cells for QPatch Compact”, “How to prepare cells for
QPatch Compact” and the QPatch Compact Guide for
Preparation of Cells and Solutions to learn how to
handle cells for this instrument. Scan the QR code to
access our online self-service support material.
5. Preflight the QPC
Activate the temperature control (if not activated) and set the target
temperature at the recording sites for your experiment. We recommend
allowing 1 hour to stabilize the recording temperature at the recording site.
Cut the vacuum-packed plastic pocket and remove the QPlate. Insert the
QPlate into the QPC. QPlate test sites now appear on the screen including
the barcode.
Select how many recording sites you want to execute.
Select the “Whole-cell protocol” you want to use. Define settings for
“Sampling filter”, “Pipetting”, “Cell type”, “Ion channel type”, and
“Compound map”.
Please refer to the QPC video tutorial “How to start an experiment on QPatch
Compact” for further information available on our online self-service support
site.
6. Start experiments
Click on “Start” to begin your experiments. The touch screen monitor will
now give you instructions for the next steps described in more detail below.
Notice: we recommend always use reverse pipetting for all pipetting steps.
How to reverse the pipette:
•Set up the pipette to the applicable volume

GUIDE37128-2 12 / 53
•Depress the plunger completely – go past the first stop to the second
stop
•Immerse the tip in the liquid. Slowly release the plunger to full extension
•Dispense by pressing to the first stop
•When using the included motorized pipettes, make sure the pipette is
set to “reverse pipetting” mode
Please refer to our QPC video tutorial “How to reverse pipette with QPatch
Compact”.
If you would like to make additional changes to a protocol or set up a new
protocol, go to the Analyzer software.
7. Protocol finished
The “GO” button changes color to green once your experiments are
completed.
8. Analyze data
To analyze your data, open the Sophion Analyzer software. Consult the
Sophion Analyzer user manual for more information.
3.1 Terminating a running protocol
If you want to terminate or abort a running experiment, click on “End all Experiments”. A dialog box
will appear. Confirm that you wish to stop the experiment.
All data acquired until aborting the run is stored and is accessed from the Sophion Analyzer software.

GUIDE37128-2 13 / 53
4. Operating the system
4.1 Cells
The success rate for experiments on QPatch Compact highly depends on the cell quality. QPatch
Compact is optimized for using immortalized cell lines sub-cultured as adherent cell lines. The optimal
harvesting procedure for obtaining viable and single cells in suspension should be determined for
each cell line.
Note! Please refer to the QPatch Compact Cells & Solutions Guide to learn how to
handle cells for QPatch Compact. Also consult our QPC video tutorials “How to
harvest cells for QPatch Compact” and “How to prepare cells for QPatch Compact”
4.2 Saline solution requirements
The saline solutions (also known as Ringer’s solutions and buffer solutions) used for extra- and
intracellular liquids must include at least 10 mM chloride.
Furthermore, it must have conductivity in the range of 0.5–2.0 S/m measured at the same ambient
temperature as that used for the experiments. This is a requirement for the QPlates to operate
properly. The required conductivity corresponds to the common physiological saline solution.
In addition, the solutions should be filtered using a microparticle filter. Microparticles may block the
patch clamp orifice and thus reduce the experimental success rate.
4.3 QPlate barcodes
The onboard barcode reader decodes the QPlate barcode, which is specific for each QPlate. The
instrument will reject the QPlate, if the barcode is missing, the QPlate is completely used up or if the
barcode is unreadable.
Caution! QPlates are always shipped with a barcode that contains important
production information. Do not replace this barcode with your own.
4.4 Touch screen monitor user interface
QPatch Compact is operated from an external touch screen monitor, which responds to directly
touching the buttons on the screen. When you need to enter numbers or letters, an on-screen
keyboard appears.
4.5 Screening station software (SSS)
4.5.1 Sophion logo – easy access to manuals and guides in SSS
User manuals and guides are easily available by always clicking the Sophion logo in the upper left-
hand corner.

GUIDE37128-2 14 / 53
4.5.2 Login screen
The database field provides information on which database is used. If there is more than one
database available, a drop-down list will appear upon clicking the blue arrow on the right side of the
database field (Figure 5).
Figure 5 QPatch Compact logon screen
Touch the username field and an on-screen keyboard will pop up in which you can enter your
username. Click “Enter”. Do the same steps for the password field.
Click on “Login” when you are done. The username and password entered are checked in the
database. If no match is found, a “Login failed” message will appear.
Shutdown by clicking the “x”.
Note! The on-screen keyboard does not have special characters (such as #, @ or
$). Therefore, when you choose a username and password, please ensure it can be
entered using the on-screen keyboard. The username and password validation are
not case-sensitive.

GUIDE37128-2 15 / 53
4.5.3 Left-side menu bar
In the instrument software a left-side menu is always visible when logged in. The menu allows easy
navigation between the functions.
Table 1 Software button explanations
Click the button to enter preflight mode.
In this window you can initiate and set up your experiments.
Not applicable
Click the button to open maintenance mode.
In this window you can perform maintenance tasks such as setting the
temperature control settings etc.
Click the button to view completed results.
Click the button to get system information and to log out of the instrument.

GUIDE37128-2 16 / 53
4.1 Operation
By pressing the “Operation icon” the Preflight Check window will appear. This is where each patch
clamp run is set up.
4.1.1 Preflight Check screen
The Preflight Check screen opens after login or when selecting the ‘operation’ button, located at the
top of the left-side menu bar.
Figure 6 Preflight Check screen

GUIDE37128-2 17 / 53
4.1.2 Maintenance menu
While in Preflight Check and before setting up a run, the user can enter the maintenance menu by
clicking the Maintenance icon on the left-hand side of the menu bar (Figure 7).
Figure 7 Maintenance menu
Here’s access to the Settings menu, the Temperature control and the Manifold menu. IN the setting
menu, user can preset default settings before a run and the Temperature control menu and Manifold
menu are mainly for performance tests and troubleshooting purposes. The 2 latter menus are
described in the Troubleshooting section.

GUIDE37128-2 18 / 53
4.1.3 Settings menu
The settings menu allows the user to preset 3 user defined settings, see Figure 8. These settings are
not accessible during a run and must be preset before the run starts to be applied.
1) The minimum dispense delay for liquid addition
2) Whether the Repeat protocol setting when applying voltage protocols should be on or off by
default
3) Activation of the audio cue (single beep) at dock & dispense during liquid addition
Figure 8 Settings menu
4.1.3.1 Minimum dispense delay
This setting allows the user to adjust the minimum dispense delay, which is the minimum delay from
the user clicks OK at a site until that compound is dispensed. This delay is aimed at giving the user
sufficient time to prepare for dispensing into sites.
4.1.3.2 Repeat voltage protocols
When the user chooses a voltage protocol in the voltage gated mode the default setting of “repeat
protocol” whether it be on or off is set here. After choosing a voltage protocol the user can always
revert back to this default setting of the repeat voltage protocol.
4.1.3.3 Beep on dispense
If left on, the instrument will emit a beep when the user must insert the pipette tip and dispense into
the well the moment the blue light turns orange.
To return to the Preflight check screen press the Operation button.

GUIDE37128-2 19 / 53
Once the QPlate has been inserted the QPlate color and barcode will appear. The user indicates which
sites to record from by selecting the sites on the touch screen. The sites are highlighted accordingly
by white light on the QPatch Compact next to the manifold (see Figure 9).
Figure 9 Preflight check – select the recording sites you want to record in your experiment
Table 2 Preflight parameter definitions for touch screen interface
QPlate
Once the QPlate is inserted, the well status is displayed:
•Blue wells = selected
•White wells = can be selected
•Greyed out = inactive/previously used
Whole-cell protocol
Choose the protocol you wish to use for your experiment. The
protocols are modifiable using Sophion Analyzer software prior
to the run.
Pipetting
Toggle between voltage- or ligand gated ion channels.
Sampling filter
Set up criteria for the digital filtering.
Cell type
Choose the cell type to be used in the experiment.
Ion channel
Choose the ion channel to be used in the experiment.
Compound map
Set up the compound map.
Start
Click this button to start the experiment.

GUIDE37128-2 20 / 53
4.1.4 Setting up the compound map
The compound map is set up by entering the compound map overview as seen below:
Figure 10 Compound map
Any serial dilution of the compound is set up by entering the name, the compound stock
concentration, the number of dilution steps per compound and the dilution factor between each step.
You can assign a particular compound to a specific color (Figure 11).
Figure 11 Serial dilutions are generated in the Compound map
Other manuals for QPatch Compact
2
Table of contents
Popular Laboratory Equipment manuals by other brands
CAB
CAB A1000 Operator's manual
HAVER & BOECKER
HAVER & BOECKER USC 200 S operating instructions

Agilent Technologies
Agilent Technologies Labware MiniHub G5584A user guide
THORLABS
THORLABS VEG110 user manual
REITEL
REITEL ERGORET MINI operating instructions
VWR International
VWR International 1915A-2 Installation and operation manual
