Soundbyte Solutions Parrotplus User manual
1
Parrotplus
Parrotplus 2
Instructions
Version 3.02
Soundbyte Solutions (UK) Ltd
The Old Stores
Leigh
Dorset
DT9 6HW
Tel: 0845 123 5342
sales@soundbytesolutions.co.uk
www.soundbytesolutions.co.uk

2

3
Introduction
These instructions are for the Parrotplus units with the firmware Revision
P+ 3.02 and speech file version 300.
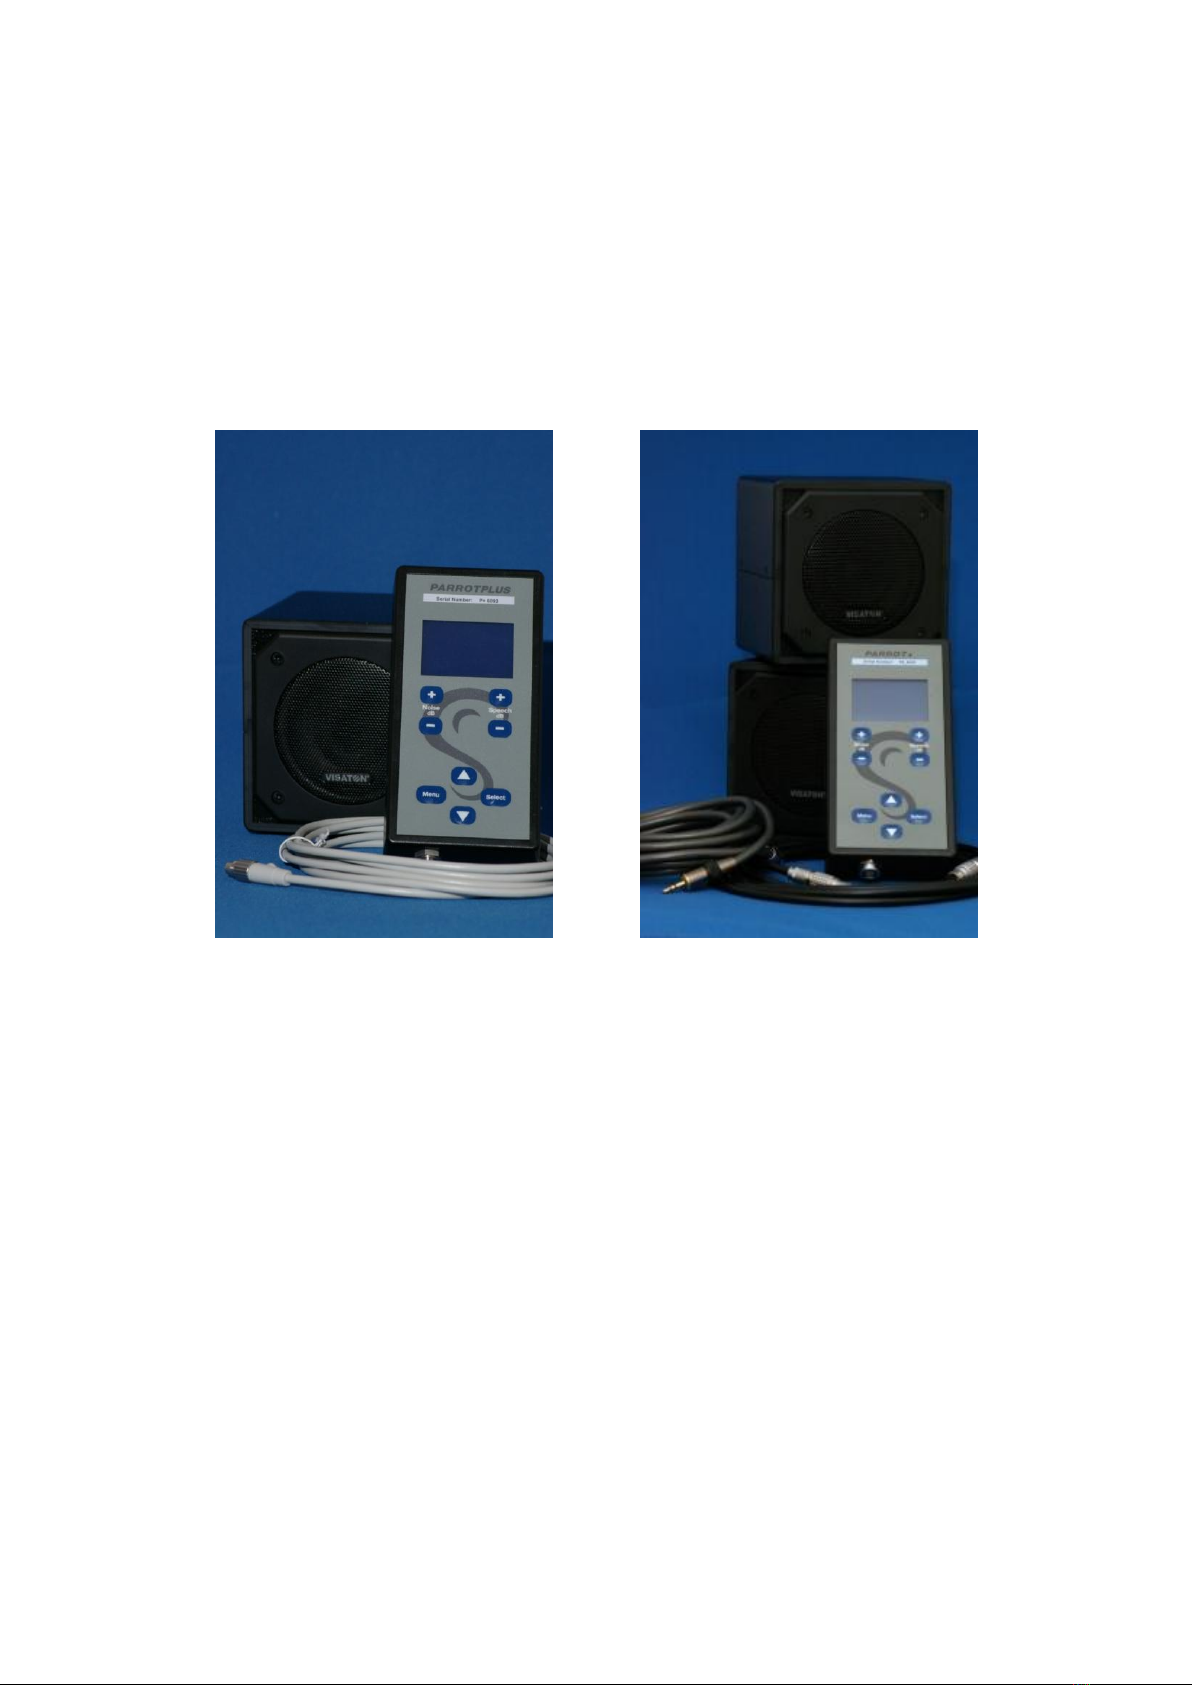
Setup for earlier Parrotplus units
The main connecting lead between speaker and handset has a male and
female end. The male end connects to the speaker and the female end
connects to the handset. The connectors have a keyway to prevent
incorrect alignment, but it important that you do not try to force the
connector if not aligned correctly. To help with this, we have added some
gold markers to the cable and the equipment to aid in aligning them
correctly. When the connectors are inserted correctly, you must then use
the locking ring to secure then at each end.
The connecting lead has a pair of markers to act as a calibration distance
guide..
The rechargeable battery is housed inside the speaker and is charged by
connecting the battery charger into the charging socket at the back of the
speaker. This allows the Parrot to be used whilst charging the battery.
The calibration distance for speaker (speech and noise) is 75cms.
4
Setup for Parrotplus and Parrotplus 2
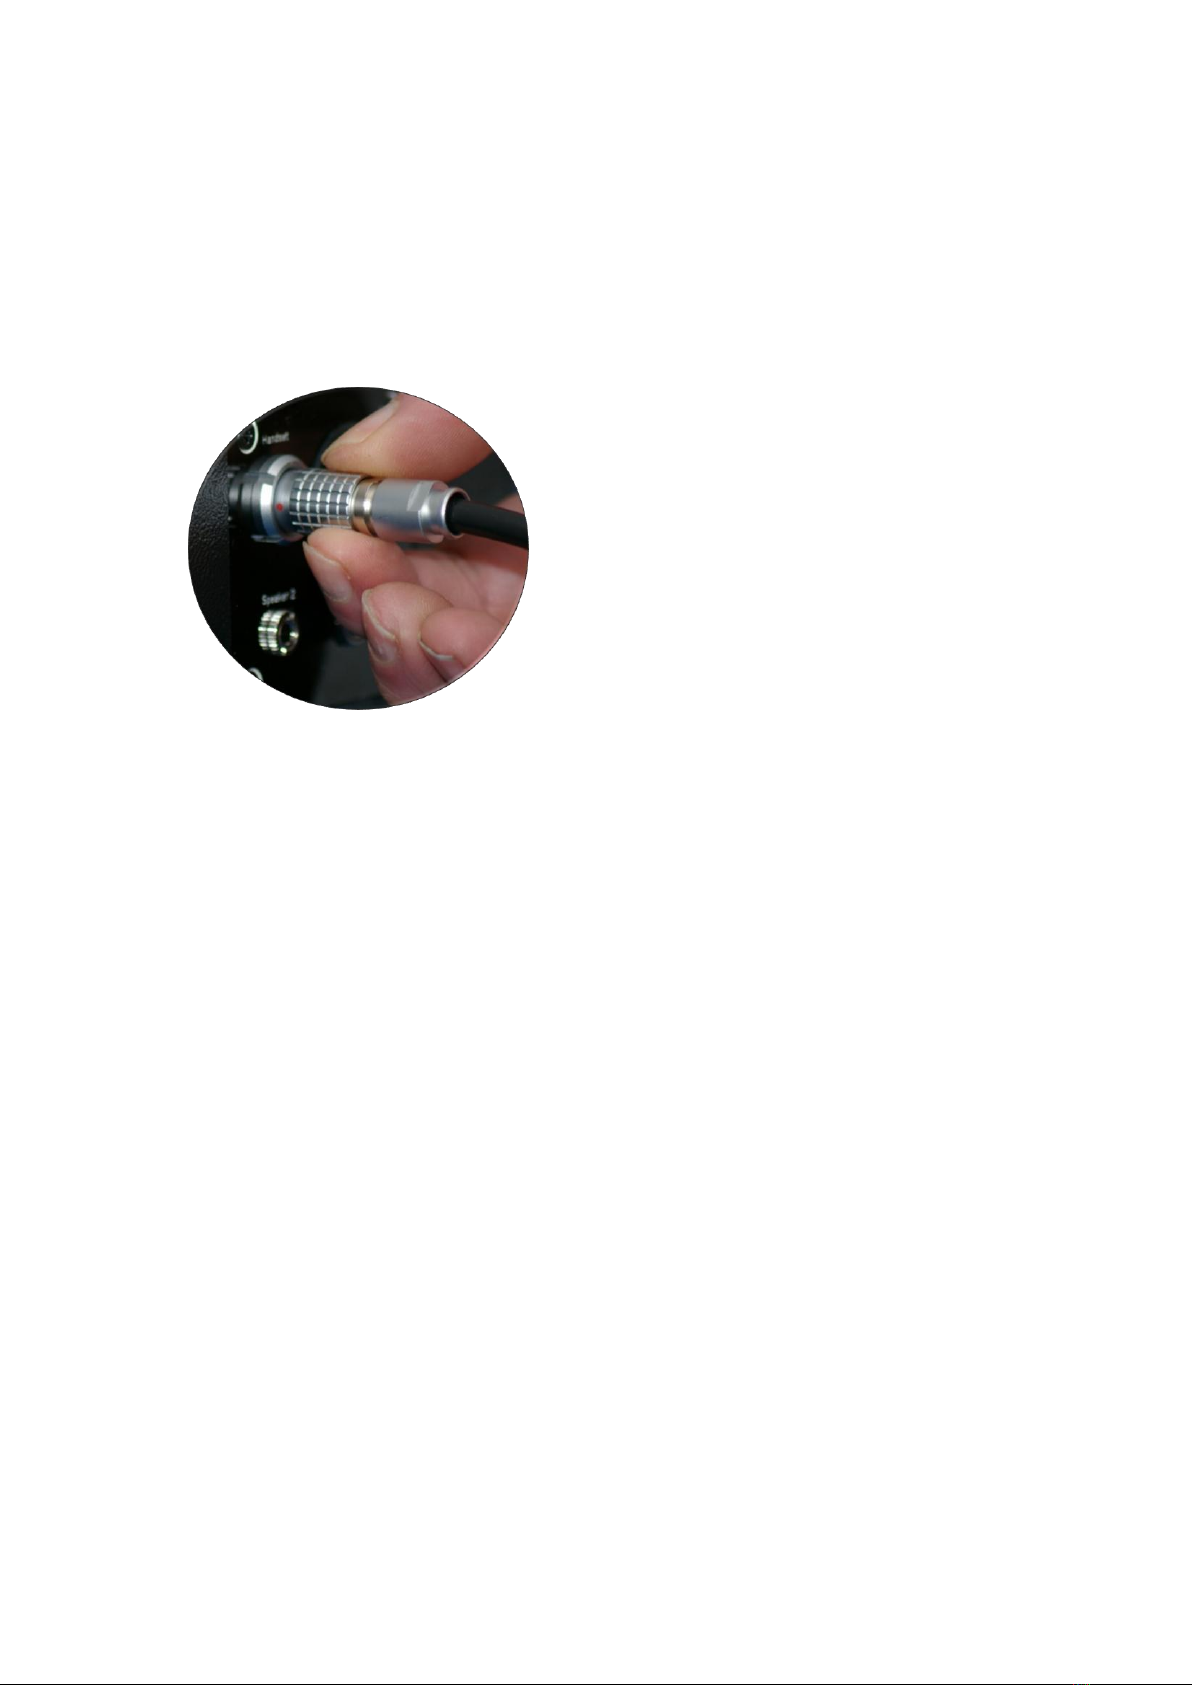
The latest Parrotplus version uses a push in latching connector which is
much easier to align than the previous cable type. Three are red dots on
the connectors to indicate alignment, To insert the connector, hold it by
the knurled ring, and insert it into the socket, rotate until you feel the
alignment lock into place and then push it fully in. To remove the plug,
simply hold the outer knurled ring and pull it out.
The connecting lead has a pair of markers to act as a calibration distance
guide..
A second cable is provided to connect the main speaker to speaker 2. This
uses 3.5mm jack connectors and simply pushes in to the connection
sockets.
In use, the speech output will always be presented from the main
speaker, and the noise output (if required) will be presented from speaker
2.
The rechargeable battery is housed inside the main speaker and is
charged by connecting the battery charger into the charging socket at the
back of the speaker. This allows the Parrot to be used whilst charging the
battery.
The calibration distance for both the both the main speaker (speech) and
speaker 2(noise) is 75cms by default. Users can now select an option to
set the noise calibration distance to 100 cm using the test option menu.
5
The Parrotplus is able to produce speech and noise outputs in the
following range:
Speech max 75 dB (A)
Speech min 30 dB (A)
Noise max 75 dB (A)
Noise min 30 dB (A)
All measured at 75 cm.
The Parrotplus is a menu driven device and is far more flexible than
previous Parrots. It also has much greater data storage capabilities
allowing us to include a variety of tests on a single handset. We can also
present each available test in a variety of background noises.
At present we are able to include the following tests:
McCormick Toy Test
EAL Toy Test
Manchester Picture Test
Chear APT test
Chear CCT test
Manchester Junior Word List
AB Short Word List (lists 2,5,6,8,11,13,14,15)
Ling Test
WARNING
This is a Class A product. In a domestic environment this product may
cause radio interference in which case the user may be required to take
adequate measures.
WARNING
Your Parrotplus is supplied with a Lawtronics 6V 300mA SLA480M
charging unit to recharge the battery. Do not use any other DC power
source with the Parrotplus, as this will damage the battery and may
damage the Parrotplus handset. If you lose the charger please contact us
for a replacement.

6
Using the Parrotplus
These instructions apply to both the Parrotplus and Parrotplus2. Where
differences occur these will be referred to in the text.
Ensure that the switch on the rear of the speaker is in the OFF position.
Connect the handset to the speaker using the lead provided, and turn the
Parrotplus ‘ON’ using the switch.
The graphical display should light up and the Parrotplus will run a self test
as shown below.
Parrot+ Self Test
Initialising Hardware
File System OK
DSP System OK
And this should be immediately followed by the Serial number and
firmware revision display screen.
PARROT PLUS
P+ 3.01
COPYRIGHT
Soundbyte Solutions
2007 - 2011
This screen remains visible for a short time, the unit will then display the
menu for selecting a test group.

7
Select a test group
This is the first menu and allows the user to select a particular test group
from those available. The current option is highlighted by reversing the
text and background colours.
Use the [up] and [down] keys to change the highlighted option.
Use the [Select] key to select the highlighted option.
The symbol at the bottom of the screen indicates that there are further
options available if you scroll down. A symbol at the top of the screen
indicates that more options are available if you scroll up.
SELECT A TEST
McCormick Toy Test
EAL Toy Test
MPT
Chear CCT
Chear APT
Select a test
This is the second menu and enables you to select a specific test within a
group.
Use the [up] and [down] keys to change the highlighted option.
Use the [Select] key to select the highlighted option.
Use the [Menu] key to return to the Select a Test Group menu.
SELECT NOISE TYPE
McTT in Quiet
McTT in WB noise
McTT in Adult Babble
McTT in Class Babble

8
Running the McCormick Toy Test (MTT)
Also applies to the English as an Additional Language
(EAL) Toy Test
This section describes the options available for running the McCormick Toy
Test in Wideband noise. The procedure is the same for MTT in Quiet
except that the noise level is set to 0dB and is not displayed. MTT in
Babble noise is the same except babble noise is substituted for Wideband
noise during playback.
McTT in WB noise
Noise
Male
Voice
40
60
Level
Level
Setup test
Setup test
This screen is displayed when the test is selected. In Setup test you can
perform the following operations:
Adjust the noise level with the [noise up] and [noise down] keys.
(The noise level can be adjusted in 5 dB steps from 75 dB to 30 dB and then to 0
dB if you wish to temporarily remove the background noise)
Adjust the speech level with the [speech up] and [speech down] keys.
Enter the [Toytest Options] menu using the [Menu] key (see page 7).
Run the Toytest using the [Select] key.
Pressing the [Select] key will cause the handset to begin playing the 14
words of the MTT. The display will change slightly in play mode as shown
below.

9
McTT in WB noise
Noise
Male
Voice
40
FORK
60
Level
1 OF 14
Level
[Select] to pause
The following information is being displayed.
Name of test = MTT in WB noise
Noise level = 40 dB
Speech level = 60 dB
Selected voice = Male
Current word = Fork
Progress = test word 1 from a possible 14
The Parrot will now play all 14 of the Toytest words in the randomised
sequence at the levels set.
Pressing the [Select] key during playback will pause the test until you
press the [Select] key again.
During this pause, you can scan through the sequence of test items using
the [up] and [down] keys. This is useful if you need to repeat the last
item or items. You can also skip through some of the items if required.
Pressing the [Menu] key either during playback or when paused will return
to the Setup test screen.
Toytest Menus
Toytest Options menu
This is the options menu for the EAL and McCormick Toy Tests.
Use the [up] and [down] keys to change the highlighted option.
Use the [Select] key to select the highlighted option.
Use the [Menu] key to return to the Setup test screen.

10
Toytest Options
Cal Check
Available Toys
Voice
Test mode
Noise Type
Screen 1
Toytest Options
Noise Type
Carrier Phrase
Return
Exit Test
Noise Cal Distance
Screen 2
Cal Check
This option will play a calibration test noise at 60 dB(a) measured at 75
cms from the main speaker. For the Parrotplus2 , if a test in noise is
selected, you will be required to press any key after the first burst of
noise. This will give you the opportunity to re-align your sound level
meter. The unit will then play a burst of noise through speaker 2. This
will again be at 60 dB(a) measured at 75 cms ( or 100cms if selected)
from the speaker.
Select Toys
This menu enables you to remove the pairs of toys you do not wish to be
included in the test.
The symbol at the bottom of the screen indicates that there are further
options available if you scroll down. A symbol at the top of the screen
indicates that more options are available if you scroll up.

11
Select Toys
Tree / Key #
Shoe / Spoon
Cow / House
Horse / Fork
Man / Lamb
Press [Select] to toggle the highlighted toy pair between enabled and
disabled. If a ‘#’ character appears after the toy pair, they are disabled
and will not be included in the test.
[Menu] returns you to the previous menu.
Selecting [Return] from the menu will also return you to the previous
menu.
Select Voice
This brings up a sub-menu enabling you to select male or female voice.
Select Voice
Male Voice
Female Voice
Use the [up] and [down] keys to change the highlighted option.
Use the [Select] key to select the highlighted option and return to the
previous menu.
Use the [Menu] key to return to the previous menu.
Test Mode
This menu allows you to change the playback test mode from auto to
manual. In Manual Test mode you will have to press the [Select] key each
time a new word is to be spoken. In Auto Test mode, the test will
automatically run through a complete sequence without intervention.

12
Noise Type
This option returns you to the select a test menu
SELECT A TEST
MTT in Quiet
MTT in WB noise
MTT in Adult Babble
MTT in Class Babble
This allows you to change the type of noise the test is presented in at any
time. Use the [Menu] key in this menu to exit the test completely and
return to the select a test group menu.
Return
Selecting this option will return you to the selected Setup test screen.
(see page 7).
Exit Test
Selecting this option will return you to the initial Select a test group menu.
(see page 7).
Noise Cal Distance
Select this option to change the calibration distance for speaker 2 on the
Parrotplus 2 only. The calibration distance for the noise source can be
changed from 75cm to 100 cm and remains set until you select this menu
option again, or power the unit down.
Set Noise Distance
75 cms
100 cms

13
Running the Manchester Picture Test
Also applies to Manchester Junior Word List (MJWL) and
AB Short Word List (ABSWL)
The Manchester Picture Test uses 6 lists of 6 words. The MJWL and ABSWL
tests use 8 lists of 10 words.
Selecting the Manchester Picture Test from the main menu will display the
following test options.
SELECT A TEST
MPT in Quiet
MPT in WB noise
MPT in Adult Babble
MPT in Class Babble
This section describes the options available for running the Manchester
Picture Test in Wideband noise. The procedure is the same for MPT in
Quiet except that the noise level is set to 0dB and is not displayed. MPT in
Babble noise is the same except Babble noise is substituted for Wideband
noise during playback.
MPT in WB noise
Noise
Male
Voice
40
60
Level
List 2
Level
Setup test
Setup test
This is the main screen as displayed when the test is selected. In Setup
test you can perform the following operations:
Adjust the noise level with the [noise up] and [noise down] keys.
(The noise level can be adjusted in 5 dB steps from 75 dB to 30 dB and then to 0
dB if you wish to temporarily remove the background noise)

14
Adjust the speech level with the [speech up] and [speech down] keys.
Enter the [MPT Options] menu using the [Menu] key.
Run the MPT using the [Select] key.
Change the selected list using the [up] and [down] keys.
When you have selected the required list and set the speech and noise
levels, Press [Select] to play the list.
MPT in WB noise
Noise
Male
Voice
40
DOG
60
Level
1 of 6
Level
[Select] to pause
The following information is being displayed.
Name of test = MPT in WB noise
Noise Level = 40 dB
Speech level = 60 dB
Selected voice = Male
Current word = Dog (from list 2)
Progress = test word 1 from a possible 6
The Parrot will now play all 6 of the selected list at the levels set.
Pressing the [Select] key during playback will pause the test until you
press the [Select] key again.
During this pause, you can scan through the sequence of test items using
the [up] and [down] keys. This is useful if you need to repeat the last
item or items. You can also skip through some of the items if required.
Pressing the [Menu] key either during playback or when paused will return
to the Setup test screen.

15
MPT Options Menu
Use the [up] and [down] keys to change the highlighted option.
Use the [Select] key to select the highlighted option.
Use the [Menu] key to return to the Setup test screen (see page 10).
MPT Options
Cal Check
Voice
Test Mode
Noise Type
Return
Cal Check
This option will play a calibration test noise at 60 dB(a) measured at 75
cms from the main speaker. For the Parrotplus2 , if a test in noise is
selected, you will be required to press any key after the first burst of
noise. This will give you the opportunity to re-align your sound level
meter. The unit will then play a burst of noise through speaker 2. This
will again be at 60 dB(a) measured at 75 cms ( or 100cms if selected)
from the speaker.
Voice
This brings up a sub-menu enabling you to select male or female voice.
Select Voice
Male Voice
Female Voice
Use the [up] and [down] keys to change the highlighted option.
Use the [Select] key to select the highlighted option and return to the
previous menu.

16
Use the [Menu] key to return to the previous menu.
Test Mode
This menu allows you to change the playback test mode from auto to
manual. In Manual Test mode you will have to press the [Select] key each
time a new word is to be spoken. In Auto Test mode, the test will
automatically run through a complete sequence without intervention.
Noise Type
This option returns you to the select a test menu
SELECT A TEST
MPT in Quiet
MPT in WB noise
MPT in Adult Babble
MPT in Class Babble
This allows you to change the type of noise the test is presented in at any
time. Use the [Menu] key in this menu to exit the test completely and
return to the select a test group menu.
Return
Selecting this option will return you to the selected test Setup test screen
(see page 10).
Exit Test
Selecting this option will return you to the initial Select a test group menu.
(see page 7).
Noise Cal Distance
Select this option to change the calibration distance for speaker 2 on the
Parrotplus 2 only. The calibration distance for the noise source can be
changed from 75cm to 100 cm and remains set until you select this menu
option again, or power the unit down.

17
Set Noise Distance
75 cms
100 cms

18
Running the Chear Test (CCT and APT)
The Chear Tests use 10 lists of 4 words. Each list is presented in a series
of 6 presentations with two of the words selected at random to be
repeated and inserted into random positions within the sequence.
Selecting the Chear CCT from the main menu will display the following
test options.
SELECT A TEST
Chear CCT in Quiet
Chear CCT in noise
This section describes the options available for running the Chear CCT in
noise. The procedure is the same for CCT in Quiet except that the noise
level is set to 0dB and is not displayed.
Chear CCT in noise
Noise
Female
Voice
40
60
Level
Page 2
Level
Setup test
Setup test
This is the main screen as displayed when the test is selected. In Setup
test you can perform the following operations:
Adjust the noise level with the [noise up] and [noise down] keys.
(The noise level can be adjusted in 5 dB steps from 75 dB to 30 dB and then to 0
dB if you wish to temporarily remove the background noise)
Adjust the speech level with the [speech up] and [speech down] keys.

19
Enter the [Chear Test Options] menu using the [Menu] key.
Run the Chear test using the [Select] key.
Change the selected Page using the [up] and [down] keys.
When you have selected the required list and set the speech and noise
levels, Press [Select] to play the list.
Chear CCT in noise
Noise
Male
Voice
40
HOUSE
60
Level
1 of 6
Level
[Select] to pause
The following information is being displayed.
Name of test = Chear CCT in noise
Noise Level = 40 dB
Speech level = 60 dB
Selected voice = Male
Current word = House (from page 1)
Progress = test word 1 from a possible 6
The Parrot will now play all 6 of the selected list at the levels set.
Pressing the [Select] key during playback will pause the test until you
press the [Select] key again.
During this pause, you can scan through the sequence of test items using
the [up] and [down] keys. This is useful if you need to repeat the last
item or items. You can also skip through some of the items if required.
Pressing the [Menu] key either during playback or when paused will return
to the Setup test screen.

20
Chear Test Options Menu
Use the [up] and [down] keys to change the highlighted option.
Use the [Select] key to select the highlighted option.
Use the [Menu] key to return to the Setup test screen (see page 10).
MPT Options
Cal Check
Test Mode
Noise Type
Return
Exit Test
Cal Check
This option will play a calibration test noise at 60 dB(a) measured at 75
cms from the main speaker. For the Parrotplus 2 , if a test in noise is
selected, you will be required to press any key after the first burst of
noise. This will give you the opportunity to re-align your sound level
meter. The unit will then play a burst of noise through speaker 2. This
will again be at 60 dB(a) measured at 75 cms ( or 100cms if selected)
from the speaker.
Test Mode
This menu allows you to change the playback test mode from auto to
manual. In Manual Test mode you will have to press the [Select] key each
time a new word is to be spoken. In Auto Test mode, the test will
automatically run through a complete sequence without intervention.
Noise type
This option allows the user to change the type of noise the test is
presented in.
SELECT A TEST
Chear CCT in Quiet
Chear CCT in noise
This manual suits for next models
1
Table of contents


