Unplug the negative (-) terminal of
the battery before proceeding with
any electrical installation in the
vehicle to avoid fire starts, wounds
or damage to the amplifier.
You should never connect or
disconnect RCA cables with the
amplifier on, because it may
damage the headunit or the
amplifier.
Eletrical Dimensioning
For proper operation your amplifier needs the correct
size of cables and batteries.
The protection fuse or circuit
breaker must be installed at a max
distance of 30 cm (1 foot) from the
battery.
Use good quality cables (copper if possible) for the
connections to the amplifier. CCAW cables should be
double the size (see table above).
Installation Tips
The ground cable should be the shortest possible
and should be connected to the chassis of the
vehicle. The surface should be sanded at the
contact point to create a clean, metal-to-metal
connecti o n between the ch a ss i s and th e
termination of the ground wire.
Keep the RCA cables together, but away from the
power or the audio output cables and away from
electric equipment such as electronic fuel injection
centrals, electric engines, etc.
When passing cables through metallic walls, use
rubber grommets to avoid damage to the cable and
short circuits.
Minimum capacity of the battery
Recommend capacity of the battery
Fuse/circuit breaker size
Size of recommended cable
Warning!
Warning!
INSTALLATION
Warning!
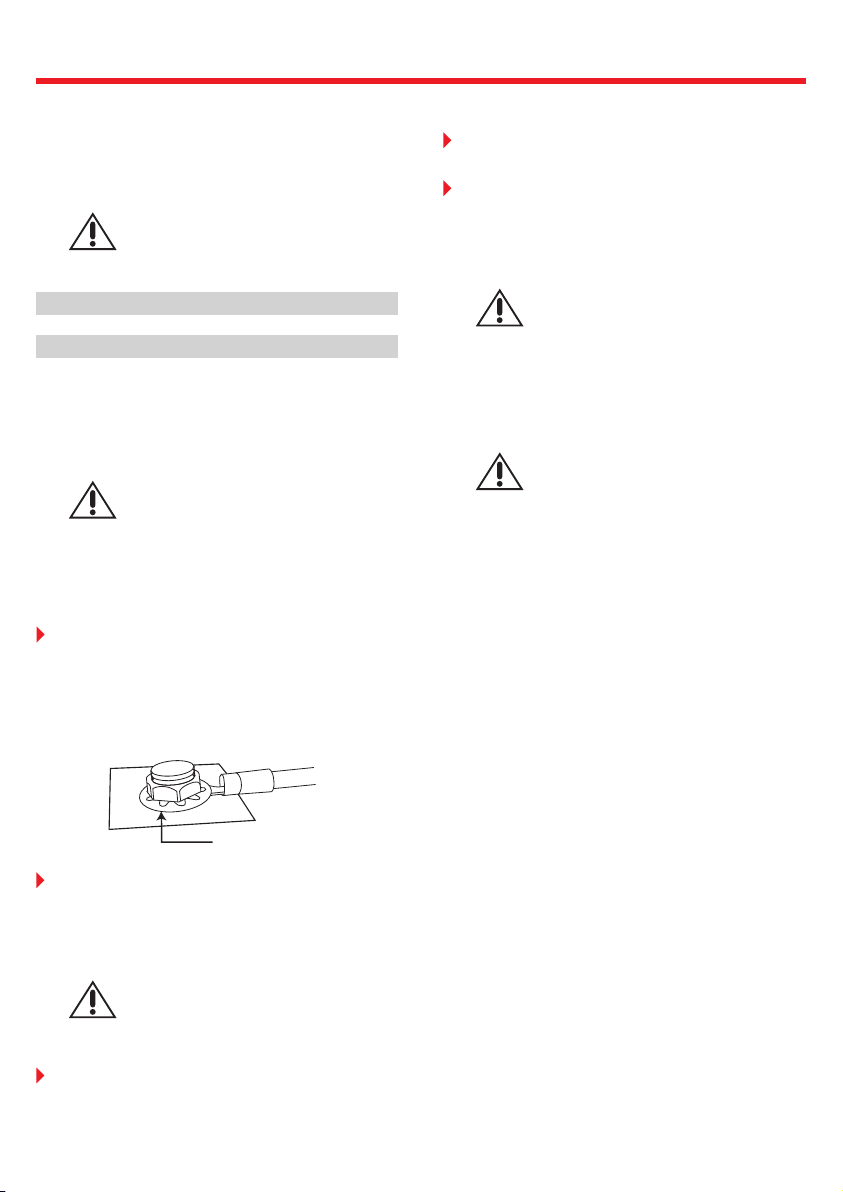
Remove de paint between
the terminal and chassis
Be careful when drilling holes in
the vehicle. Verify if you're not
drilling holes in the fuel tank,
brake lines or electrical cables of
the vehicle.
N e v e r u s e s p e a k e r s w i t h
impedance under the nominal
impedance of the amplifier or you
may damage it.
Securely mount the amplifier so that it does not
come loose in the event of a collision or a sudden jolt
to the vehicle. Avoid mounting it on metallic parts of
the vehicle, because it may cause an earth loop (you
might have noise issues).
Use speakers accordingly to the power and impedance
of the amplifier. Verify if the adjustment filters can be
used to increase the performance of the equipment.
Choose a proper place to install the amplifier and
avoid blocking the side ventilation panels.
The SounDigital amplifiers are micro controlled and
have an electronic monitoring of all of their functions,
offering useful information to the user through their
leds.
Blue LED
- When constantly on, indicates the amplifier is
working.
- When the audio is cut off and it blinks 10 times, it
indicates the eletric tension is under 8.9V or over 16V.
Red LED
- When it blinks during the audio reproduction, it
indicates the input tension is under 9.5 volts.
- When the audio is cut off and the led is constantly on,
it indicates the amplifier is in protection due to high
temperature. Turn the amplifier off until it gets to its
working temperature.
- When the audio is cut off and the LED blinks, it means it
is defective and must be sent to one of our technical
repair centers.
Yellow LED
- During the audio reproduction, it makes the sound
distortion monitoring. When it turns on, the speakers
are receiving distorted signal. So, you should turn
down the amplifier's gain or the headunit volume.
- When the audio is cut off and it blinks 10 times, it
means a short-circuit or low impedance in the audio
output.
Warning!
Warning!
0 AWG/50mm²
209Ah
418Ah
200A
4


