Soundmachines (arches) User manual
soundmachines
(arches)
Universal Tactile Interface
OWNER'S MANUAL
Version 2.1.0
Tinkered, designed and developed in Italy


owner's manual
(arches) 3
TABLE OF CONTENTS
INTRODUCTION............................................................................................................................................ 5
BOX CONTENT .............................................................................................................................................. 6
CARE AND FEEDING –IMPORTANT INFORMATION! .................................................................................. 6
DESCRIPTION................................................................................................................................................ 7
The Tactile Surface:.........................................................................................................................7
The User Interface: .........................................................................................................................8
The patch (or jack) bay....................................................................................................................8
The Back Panel................................................................................................................................9
QUICKSTART............................................................................................................................................... 10
THE ELEMENTS ........................................................................................................................................... 12
Upper buttons: ............................................................................................................................. 12
Lightstrips:.................................................................................................................................... 12
Sliders: ......................................................................................................................................... 13
Thumb pads:................................................................................................................................. 13
USER INTERFACE: ....................................................................................................................................... 15
The Surface Map and Encoder:...................................................................................................... 15
The Button group:......................................................................................................................... 16
OLED display and Function Navigation: ......................................................................................... 17
Changing Elements configuration:................................................................................................. 18
TRIGGER button:................................................................................................................................. 19
NOTE button:...................................................................................................................................... 19
AUX button:........................................................................................................................................ 20
FUNCTION f() button:......................................................................................................................... 20
General configuration and function buttons.................................................................................. 21
trans(pose) button:............................................................................................................................. 22
arp button:.......................................................................................................................................... 22
play button: ........................................................................................................................................ 23
config/MIDI button:............................................................................................................................ 24
bpm button:........................................................................................................................................ 25
KEYBOARDS................................................................................................................................................ 26
SEQUENCERS .............................................................................................................................................. 28
STEP SEQUENCER.......................................................................................................................... 28
TRIGGER SEQUENCER.................................................................................................................... 31

owner's manual
(arches) 4
REPLACING THE OVERLAY.......................................................................................................................... 33
INSTALLING (ARCHES) IN A EURORACK SYSTEM....................................................................................... 33
UPDATING THE FIRMWARE ....................................................................................................................... 36
ORIGINAL PRESETS:.................................................................................................................................... 38
PATTERN EDITOR........................................................................................................................................ 42
KICKSTARTER CAMPAIGN CONTRIBUTORS............................................................................................... 44
CONTACTS .................................................................................................................................................. 45
REGULATORY:............................................................................................................................... 45
Be sure to check our website's (arches) page for the latest version of this manual!
www.sound-machines.it/product/arches

owner's manual
(arches) 5
INTRODUCTION
One of every musician’s most rewarding experience is the connection with his/her instruments. Talking
about electronic musical instruments, decades of technological innovations led the way to a top-level
potential in terms of sound generation, sculpting and processing, but the feeling, the familiarity and the
immediacy in playing an instrument became more and more difficult to achieve, as the instrument itself
grew into a really complex machine and with a wide set of functions.
This is even more true for the modular synthesizer, both hardware and software, that faced an incredible
renaissance in the last two decades. It’s not uncommon to have multiple voices, built by connecting many
different modules, going on at once during a performance or in the studio.
More and more, the chromatic keyboard, even augmented with pressure sensitivity and other expressive
feature, is becoming a limitation, especially when parts of the performance are more sound-design
oriented than melodic. Being able to play notes, configure sequencers and arpeggiators, and changing
subtle features in the ongoing sound from a single physical interface, is the key motivation that led us to
the development of (arches).
(arches) is not the first (and won’t be the last!) of this kind of interfaces, but has many unique features
that builds up a definitive tool for the performer or the electronic studio musician.
Putting together keyboards, control surfaces, CV and MIDI interface capabilities all at once, involved a
very deep hardware and software development. Single and complex functions are available to the
musician at the same time and the full and deep configurability of the product, puts (arches) in its own
category.
(arches) is a stand-alone multi surface, multi-standard control interface that can connect with eurorack,
Buchla and V/Hz synthesizer as much as MIDI devices (even wirelessly, through MIDI BLE protocol)
implementing many different elements, such as ‘control strips’, 3-axis thumbpads and pressure sensitive
buttons into keyboards, arpeggiators and sequencers.
You can instantiate up to three ‘virtual keyboards’ at once, each with its own notes, CV and GATE outputs
and MIDI channels information. You can receive or generate clock signals to be in close sync with every
kind of systems.
For the ones out there that already knows our product line, you will find yourself familiar with “lightstrips”
and “lightplanes”. The basic functionalities of those elements are just the base for a rich configurability
and “aggregation” of elements in something suited to your playing needs.
The (arches) puts in your hands 32 CV/GATE outputs and MIDI potential at the same time, making possible
the integration of a wide range of machines, synthesizers and sound-generation platforms. You can
control two different voices on your modular setup plus one MIDI expander, or a PC/MAC running a Max
or Pure Data patch configurable via MIDI CC’s. Or integrate an Eurorack system with a Buchla Easel and a
Korg MS-20 via the configurable CV interface.
The extremely configurable surface of the (arches) comes with a handy and intuitive ‘map’ of the
controller’s elements that allows you to quickly choose and edit each variable on the OLED display.

owner's manual
(arches) 6
BOX CONTENT
(arches) tactile universal interface with pre-loaded micro SD card
Power supply unit (wide range input, European plug)
Printed manual
Replacement vinyl overlay
CARE AND FEEDING –IMPORTANT INFORMATION!
(arches) needs just a little of your love. Just be gentle with his surface and avoid deep scratches and
bumps! Don’t push the encoders and the buttons too much, and avoid this happening during transport.
Just put the (arches) in a soft bag with added padding while you are traveling with it. The OLED screen is
protected by a plastic screen. This one can be scratched if misused, but not more than any other kind of
plastic lenses. Don’t push too hard on the screen.
To clean the surface, use a dry cloth or a dust remover brush only. Please be gentle with the (arches)
surface, as the overlay is removable (you can substitute it with a new one)!
As you may know, pitch information that comes out of the patch bay can be negatively influenced by the
quality and length of cables. As the pitch output of (arches) is very precise, if you hear detuning or
fluctuating VCOs in your system you may do the following:
use better quality or shorter cables
try to connect the (arches) to your modular system with more than one patch cable. This will lower
the return signal’s impedance (GND) and achieve a more robust connection.
(arches) should be powered with the bundled power supply unit. If lost or broken, you can substitute the
power supply with an equivalent one. The PSU main characteristics are:
12Vdc, 1A
5.5/2.1mm jack with center positive connection
(arches) is supplied with a European plug, wide range input power supply. You can use the bundled power
supply in any country, even with different voltage and frequency specs, just by having at hand an adapter.
To know more about other usage scenario, i.e. inside of your eurorack system case, please refer to the
relevant chapter.
Do not hesitate to contact us if you need more information on this and other topics.
owner's manual
(arches) 7
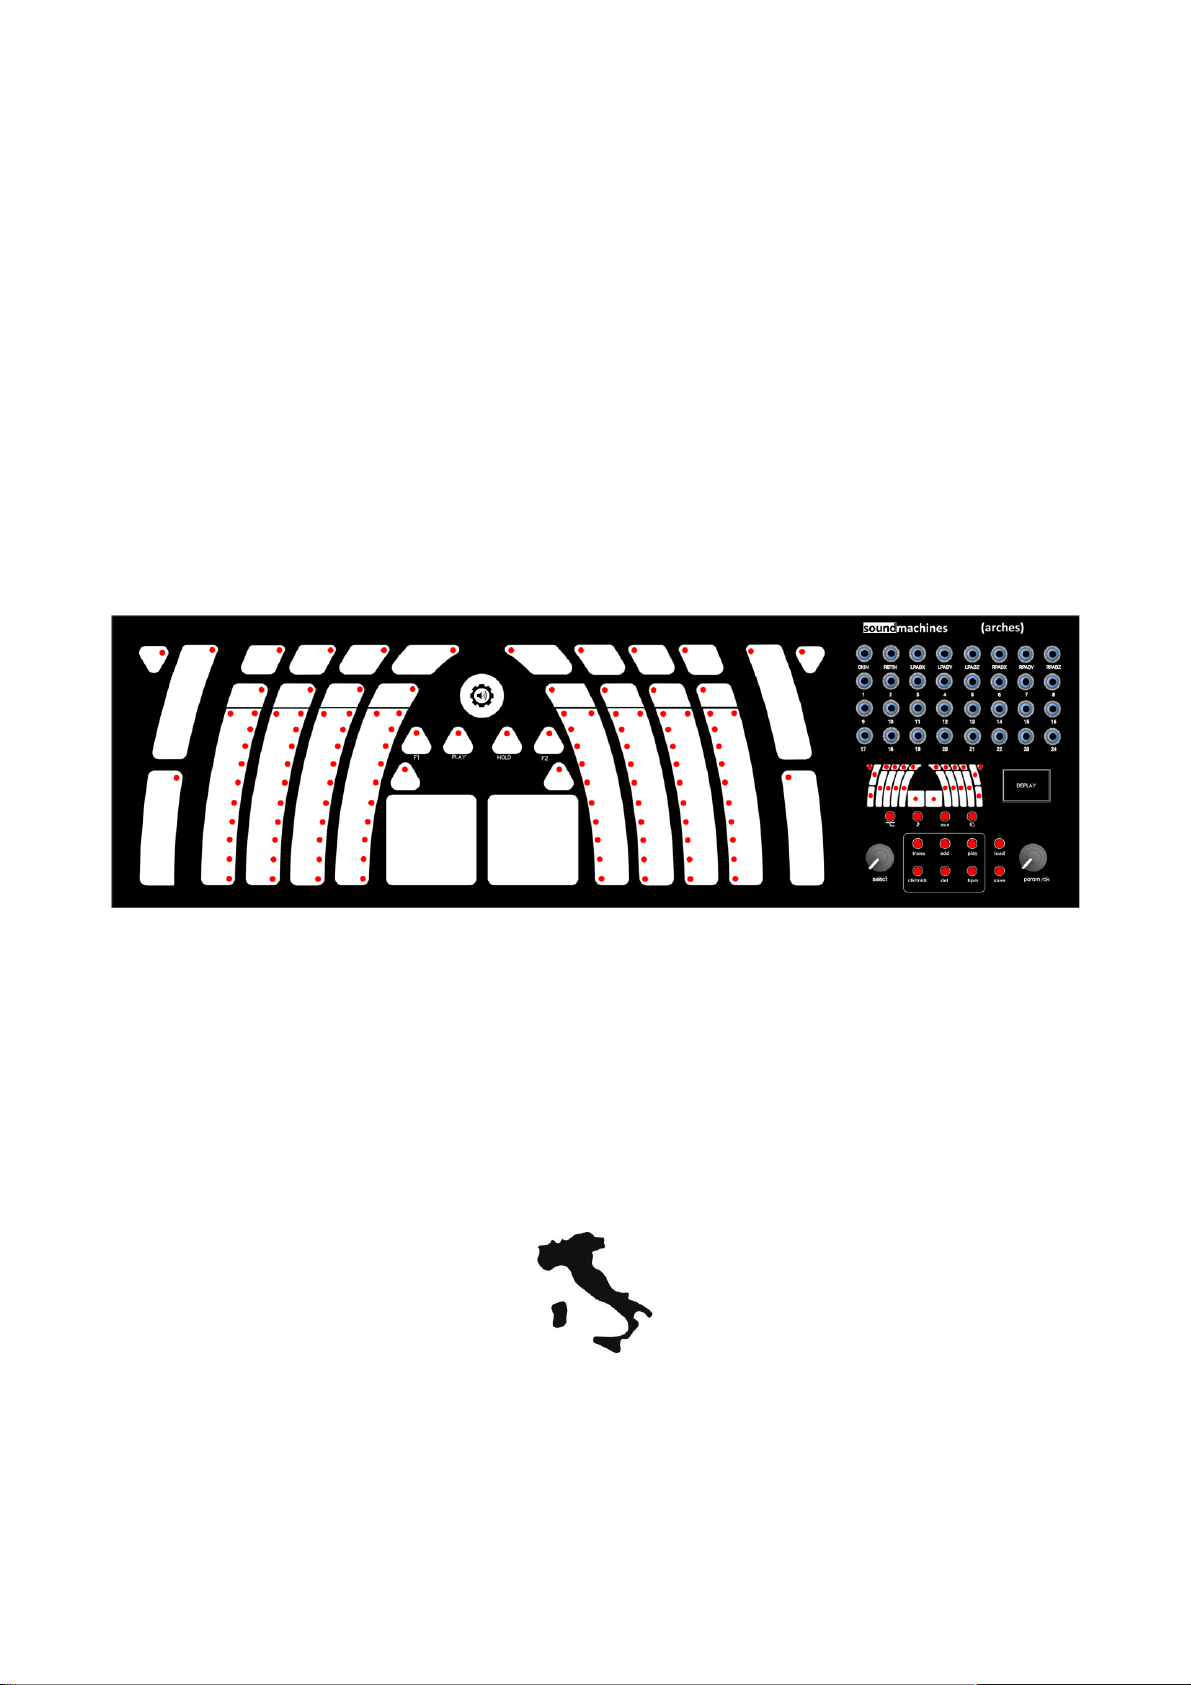
DESCRIPTION
The panel of (arches) is divided in three main functional parts: the tactile surface, the user interface and
the patch-bay. The rest of the connectors (MIDI, power, etc..) are on the back of the case.
The Tactile Surface:
The tactile surface, highlighted in the picture above, comprises many elements and buttons to be used in
your performance. Lightstrips, pressure sensitive buttons and thumbpads are the key sets of feature that
you can configure and associate to create your own control and expression device. Great sensitivity and
robustness is the signature of soundmachines touch interfaces and (arches) take this background to the
next level by incorporating a rich environment for programming and a first class connectivity either analog
and digital. You can see that the tactile surface is partially covered by a thin plastic overlay. This serves
two main purposes: giving the user a tactile ‘perimeter’ for each control and protecting the upper surface
of the product (that is made from the same printed circuit board that hosts some components and tracks!).
The overlay is removable and you also have two white stripes where you can write down some notes
regarding your patch. If you use a non-permanent pen, you can delete and rewrite it. The adhesive keeps
the removable characteristic for not more than one year. After this period of time it can leave some traces
when removed. Nothing serious, as you can easily clean them, but you’d better substitute the overlay
with the replacement one after 10 months or so. Email us for additional overlay packs!

owner's manual
(arches) 8
The User Interface:
(arches) includes a complete user interface based on the (arches) mini map, two encoders, a graphical
OLED display and pushbuttons.
You will have to get familiar with the user-friendly interface as this is the center to quickly configure and
navigating the setup. The user interface is clearly divided in different elements that we will describe in
chapter 7.
The patch (or jack) bay
On the top right side, you have the 32 3,5mm jacks that are going to be the many umbilical cords from
the controller to the system.
The 2nd, 3rd and 4th rows are configurable, while the 1st one is almost fixed with respect to the meaning of
outputs. The first jack, CKIN, actually doubles as a Clock Out!

owner's manual
(arches) 9
The Back Panel
Looking at the rear panel of (arches) you find, from left to right, the following ports:
Expansion panel.
USB device port for MIDI
MIDI IN
MIDI OUT
Power Supply jack
The MIDI ports are MIDI IN and MIDI OUT from left to right

owner's manual
(arches) 10
QUICKSTART
This small chapter tells you how to quickly configure a playing/performance environment with your
(arches). The example configuration is built around a pretty common scenario: your (arches) will control
two voices of an eurorack system (here, for simplicity, indicated with our MODULӦR114) and a MIDI
synth connected through standard MIDI cable. By using the first preset available (pat001.arc) you can
start immediately with this configuration.
The following picture indicates the connection that you need to do with your patch and MIDI cables in
order to achieve the full control of the system.
Following the configuration of pat001.arc preset, you have two CV/GATE virtual keyboards (KB1 and
KB3, respectively the upper buttons keyboard and the left hand keyboard) that output their signals on
jack triplets 17, 18, 19 and 1, 2, 3. The order is: Expression-Pitch-Gate.
In this picture we simply connect KB1 outputs to the PWM and PITCH of VCO1 and to the ENVelope
GATE input. KB3, on the other hand, controls another voice based on VCF cutoff, VCO2 pitch and VCA CV
input.
The last connection, to the EMU Proteus synth expander, is done via MIDI cable and the KB4 will output
MIDI messages on channel #3.

owner's manual
(arches) 11
In general, you have concurrent MIDI and CV/GATE outputs on the (arches). In the case above, you
could actually use the jack outputs 9, 10 and 11 as the outputs of KB4. In this case you can drive to
unison (or not!) another analog voice with the same notes that you send to the Proteus via MIDI. This is
a quick example, just take it as a starting point!
owner's manual
(arches) 12
THE ELEMENTS
Tactile elements are the basic building blocks for your controller configuration. As already said, you can
use them alone or in groups, and associate higher level functions such as keyboards, arpeggiators,
sequencers etc.
You have several types of elements on the (arches), please read the following with attention!
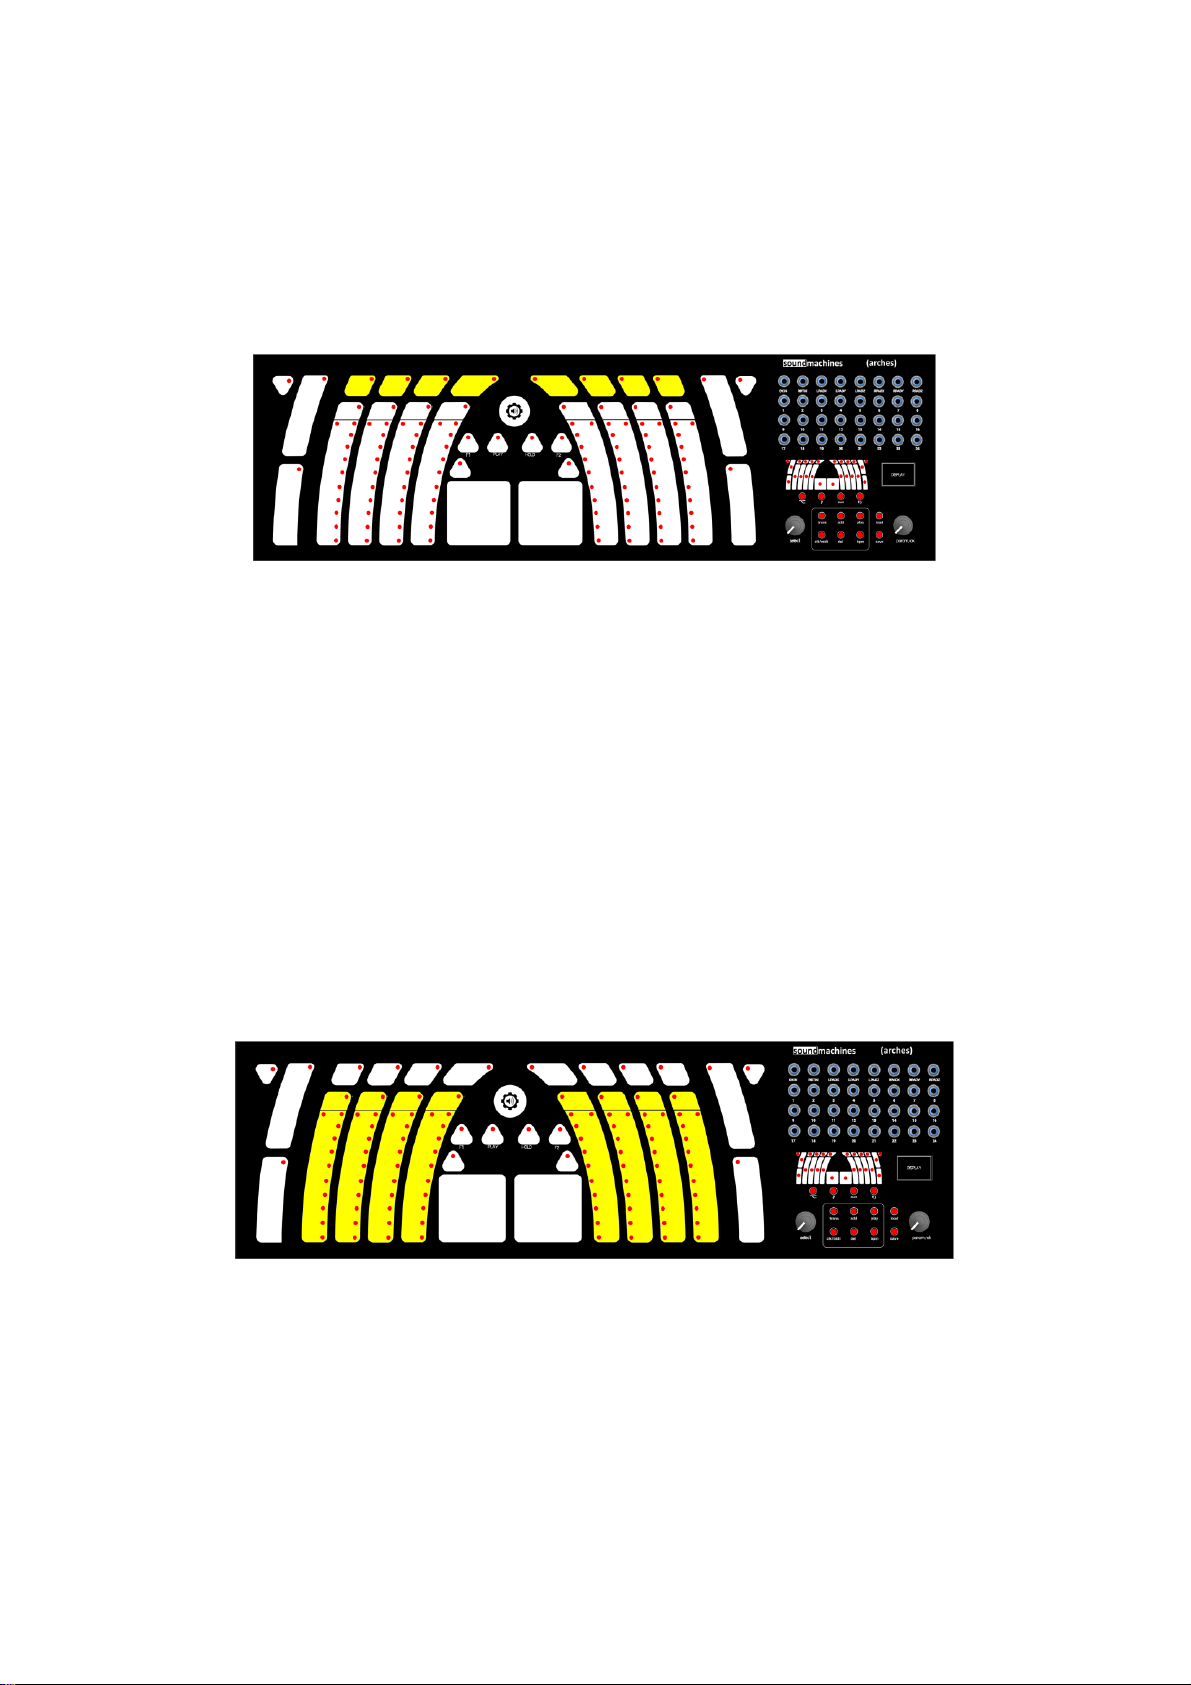
Upper buttons:
The upper buttons are 8 pressure sensitive touch buttons that can generate pitch, gates and expression
by moving your finger around the center of the button. As every other element of (arches) there is a LED
associated with every button: this indicates the detected touch and the arpeggiator activity on that
particular button. As you can see at a close inspection, the button is made with two different touch
sensitive parts. The algorithm that we implemented is optimized to take into account the small surface of
the pads and it’s very sensitive to the position and pressure of your finger. This keyboard will need a little
bit of training to be operated correctly but we are sure that it won’t take more than few tens of minutes
playing! You can set those buttons to operate alone, generating a couple of CV/GATE on the outputs, or
group them in KB1 and set the pitch of each button.
Lightstrips:
Taken from soundmachines catalog, we covered (arches) in lots of LS1lightstrips!
A lightstrip is a CV / GATE generator with the possibility to hold the value and record the movement of
the finger. Each strip can record and loop up to 20 seconds at a sampling frequency of 15ms max. To
record something with the lightstrips operate as follows: with the finger already on the surface you press
and keep pressed the top button as long as you want to record. Once recording start you can also record

owner's manual
(arches) 13
finger lifting and re-positioning. If you exceed the 20 seconds of recording time, (arches) will automatically
interrupt the recording process and start to loop. As with the LS1lightstrip you can override cv looping by
putting your finger again on the surface. To stop (and erase looping memory) just hit the top slider button
again. This allows you to have 8 standard LS1lightstrips in your system with a double time length! The top
part of each lightstrip is the HOLD button that, when used a stand-alone element, will maintain the last
finger position (and then the output CV) that you imposed. Every lightstrip shows the value of the position
with a scale of ten LEDs, so you can have the situation at a glance. The lightstrips are also representing
the steps of the sequencers, both trigger and step sequencers (see appropriate chapter).
Sliders:
The four sliders at the extremes are lightstrips that cannot record or loop finger movements or show their
position. The triangular buttons near the sliders work as HOLD functions for both strips. Resolution and
integration capabilities are the same.
Thumb pads:
At the very center of the (arches) there are two small square sensitive areas. Those are just under your
thumbs and you can use them to output signal relative to X, Y and Z (pressure). Their behavior is mirrored,
so, while the left pad origin (0 Volts, 0 Volts) is at the bottom left, the right pad has the origin at bottom
right. On the other hand, Y and Z axis share the same behavior. Unlike the other elements, the two thumb
pads were deemed so useful that we reserved a permanent set of outputs for them on the first row of
the jack bay.

owner's manual
(arches) 14
By default, the pads also generate GATE signals that are routed to outputs 4 and 5. You can disable this
by configuring the element with the User Interface. Thumb pads are also configured to output MIDI CC
for X/Y/Z axis, you can configure each CC and the MIDI channel for each thumb pad. If you don’t need
MIDI output for the thumb pads, you can (as with any other element) select the midi channel “- -“to
disable CC traffic on the MIDI channel.
Just a quick note, since thumbpads carry 3 CCs associated to the X, Y and Z axis, you cannot view directly
on the screen the CCs, you have to enter the NOTE Menu to cycle between them, to see and edit them.
The thumb pads have also their individual HOLD buttons that are the triangular surfaces on top of them.

owner's manual
(arches) 15
USER INTERFACE:
You will have to get familiar with the user-friendly interface of (arches) as this is the center for quickly
configuring and navigating the setup.
The user interface is clearly divided in few elements that we will describe in the next paragraph:
The Surface Map and Encoder:
The map is a miniature representation of all the active elements on the (arches), each with its own LED
indicator and underlined with a row of four buttons.
At any moment, pushing the ‘select’ (left) encoder, will lit up the first led on the map. At this point you
are free to rotate the encoder to select anyone of the elements, while the OLED display shows the current
configuration dynamically.
The four buttons are linked to the four ‘categories’ of functions on the same element. Those are:
owner's manual
(arches) 16
Gate/Trigger configuration
Note/Standard configuration
Aux/Expression configuration
Function configuration (free element, virtual keyboard)
When the element is selected, by pushing one of the four buttons described before, you can modify the
element’s or keyboard’s behavior and parameters. You can cycle through different configuration pages
by repeatedly pushing the same button. Not all the configuration categories are available for all the
elements; when this happens you will be prompted with an ‘Empty’ text.
For example, you can “create” one of the several virtual keyboards or, on the other hand, free the
elements as single control surfaces and send their CV/GATE or MIDI output to the patch bay or to a MIDI
channel. You can change the range of the GATE signal and invert it, or modify the CV standard for a
particular virtual keyboard, for example from Eurorack to Buchla.
By pushing at the same time both encoders the (arches) will output an ‘all notes off’ on every MIDI channel.
An important function of every MIDI controller is the ‘panic’ button. When something is going wrong in
the connection or the MIDI device miss some messages, some notes could remain active (or ‘STUCK’). The
short pressing of both encoders will solve this situation.
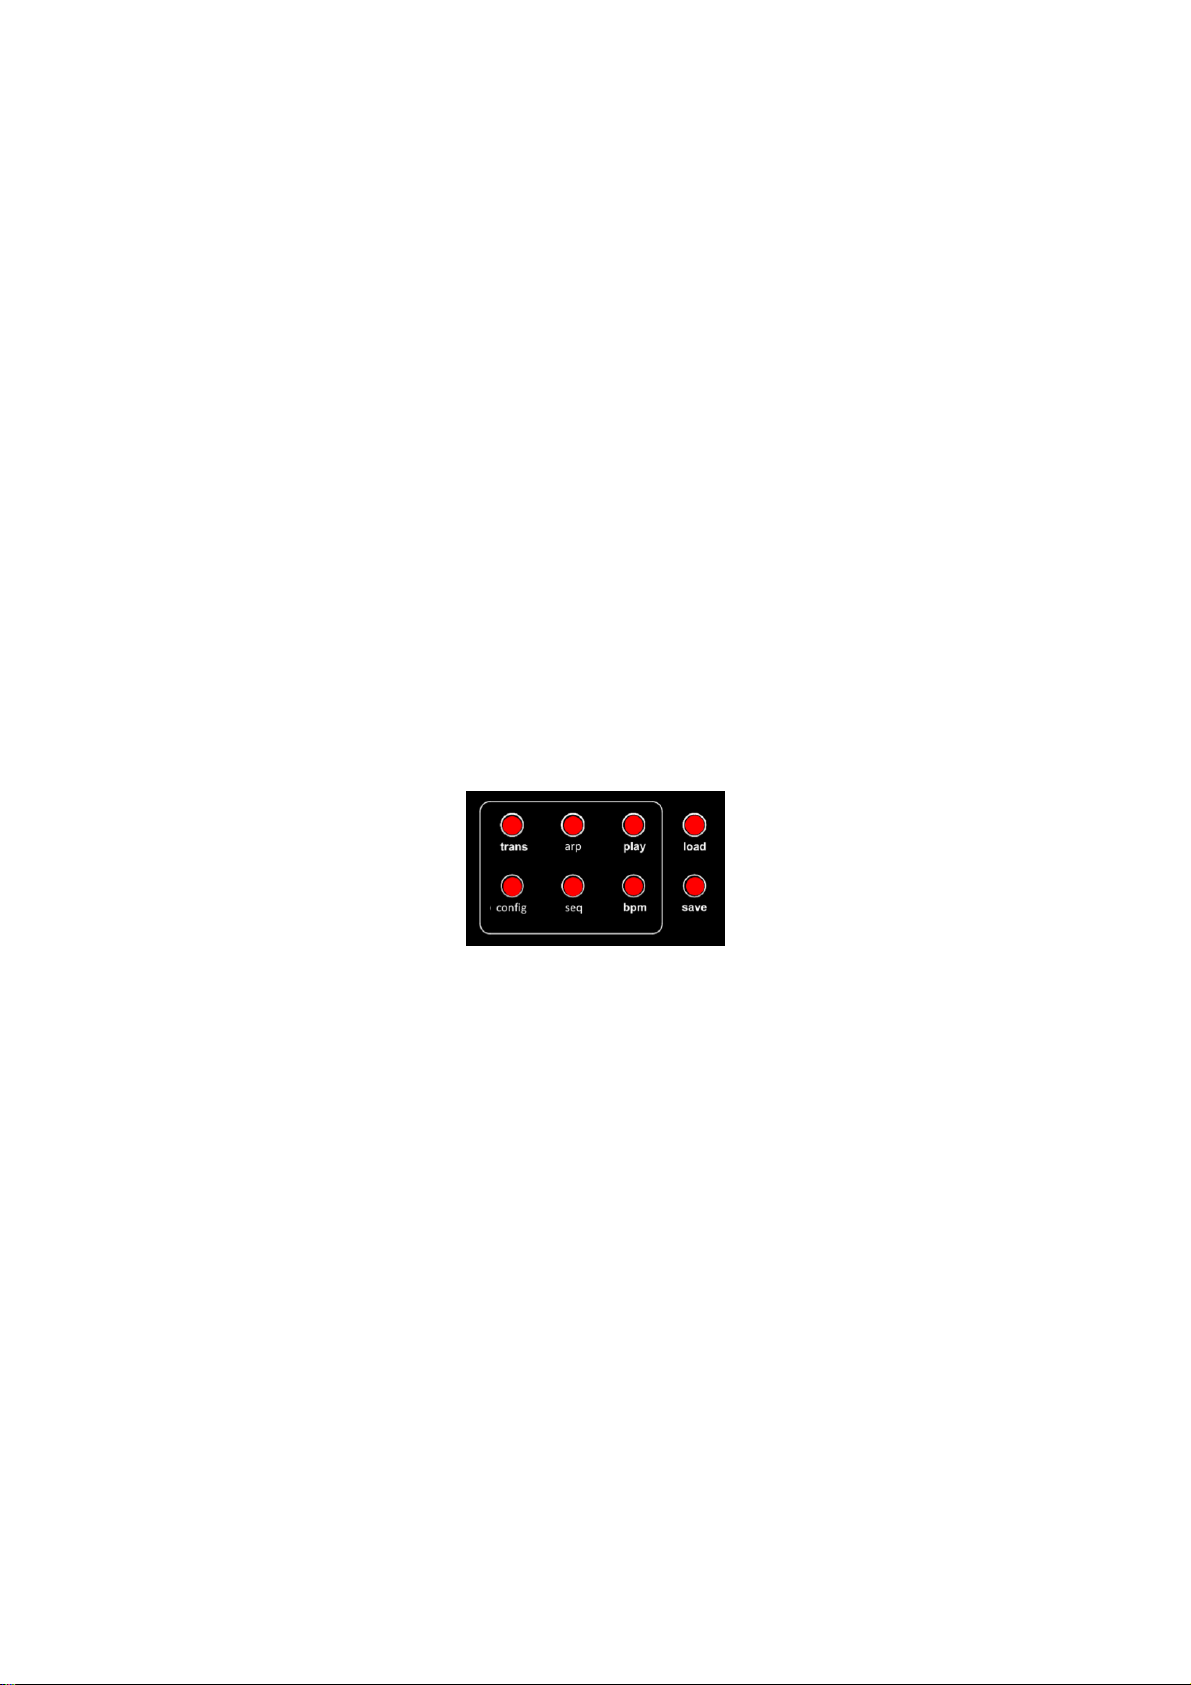
The Button group:
Under the map/OLED, you can see a group of six red buttons inside of a rectangular white lined box plus
two more buttons to the right. Starting from the last cited, by pressing load and save you can play with
‘presets’, or full surface configurations, that you can store and recall at any time.
The preset includes the settings for each element, both single and in groups, arpeggiators and sequencer
settings, the BPM value and all the other information that you can modify with the interface.
Please remember that the status of the arps and seqs is not restored, so when you load a pattern the
machine will stay still until you touch the keys.
The other buttons are shortcuts to the main configuration and performance functions of the (arches):
Transpose tool, Arpeggiator settings, Play/Pause button, MIDI & Clock Settings, Step and Trigger
Sequencers configuration and Internal BPMs.
Button ‘cycling’:
In general, every setting accessible through the buttons may have different pages, accessible by cycling
pressing the same button.

owner's manual
(arches) 17
For example, if you configured three keyboards (the maximum allowed) you will be able to change the
config, enable or disable the arpeggiators pressing the ‘arp’ until you see the keyboard you intend to
operate upon.
Ex:
(button press) ARP –KB1 (button press) ARP –KB3 (button press) ARP –KB4 (button press)
ARP –KB1 …….
The same applies to the sequencers. You will always cycle through the step sequencer and the trigger
sequencer’s tracks by pushing the ‘seq’ button.
Ex:
(button press) STEP SEQ (button press) TRIG SEQ –1 (button press) TRIG SEQ –2 (button press)
TRIG SEQ—3 (button press) TRIG SEQ –4 (button press) TRIG SEQ—5 (button press) STEP SEQ
……….
OLED display and Function Navigation:
On the right-hand part of the instrument, near the map of the surface, you will find a graphic OLED display
that shows the information about the active selection of the user interface.
The splash screen will show the firmware version. You will be contacted, as a user,
about any new firmware release. Be sure, anyway, to check the product page on
www.sound-machines.it to be sure that you are updated with any new features
or bug fixes.
The OLED display will show different information depending on the context. During configuration
operations and map navigation you will see the page shown below:
This is the time to learn some notations so you can always have the situation at a glance. While you are
navigating the map with the left encoder, you will see the above information changing for each of the
element that you are scanning. The format is common and in the next picture there’s a simple explanation
for this important page of the menus:
N
38/10 S/C EU
T
GPos11 V5
A
NN/9 FKB4 5
(arches)
FW v. x.yy.zz

owner's manual
(arches) 18
The display is divided in three rows referred to the same info that you can set with the four buttons: pitch,
gate, auxiliary and aggregate functions. The following picture explains the meaning of each information
block:
Now, let’s go a little bit deeper into the functionalities of the (arches), just to be able to understand the
main page of the display.
(arches) elements could be used alone or in groups. It’s pretty obvious that some configurations and
information will change as you switch the mode of functioning. Keep in mind that, when the element that
you highlighted is a part of a keyboard, the first row will show the MIDI note number associated with that
element. On the other hand, if the selected element is not a part of a keyboard, it won’t have a note
information, because it will output a CV on the selected output jack and a corresponding CC# message on
MIDI. In the latter case you will see the first row as: N--/10 S/C 23 telling you that the selected
element is not a part of a keyboard, the CV output is routed to jack number 10 and the CC# associated
with the position or the pressure is the number 23.
Changing Elements configuration:
This is the most useful and common functionality that you will use on the (arches) while configuring it for
your performance preset.
Please note that some of those menus are different depending on some setting that you choose.
You start by cycling through the elements on the mini map by rotating the left encoder, and when you
reached your point of interest you push one of the map button.
By pushing the following buttons, you will cycle through the different screens for each parameter.
owner's manual
(arches) 19
TRIGGER button:
When possible, you can change the values shown by rotating the right encoder and confirming by pushing
it.
For the TRIGGER menu, you can set the following behaviors of the gate/trigger:
G-POS: gate signal, positive
G-NEG: gate signal, negative
P-POS: 10ms pulse signal, positive
P-NEG: 10ms pulse signal, negative
NONE
The gate or the pulse will be activated on the OUTPUT jack that you select and the with the VOLTAGE that
you configure.
Note: If you want to disable the Gate output, set the “output” parameter to ‘- -‘.
NOTE button:
In a keyboard:
In a FREE slider (standalone element):
MIDI CHANNEL
1
NOTE
G1#-32
STANDARD
EURO
MIDI AFT.
OFF
OUTPUT
3
TYPE
G-POS
VOLTAGE
5
MIDI CHANNEL
1
CC#
25
VOLTAGE
5
owner's manual
(arches) 20
If the element that you are modifying is part of a keyboard, the first screen is relative to the note value in
text and MIDI notation. You can go from C1 (MIDI note 24) to B8 (MIDI note 119). On the other end, when
you are configuring a stand-alone element, the first screen will show the CC# associated with the value of
the control element (position or pressure!). The second screen sets the MIDI CHANNEL relative either to
the single elements or the virtual keyboard. Finally, the third one configures the type of CV output
standard that you want to use: EURO (1V/oct), BUCHLA (1.2V/oct) or HERTZ (linear V/Hz) or, when a single
element is chosen, the VOLTAGE RANGE of the CV output.
A small note about the V/Hertz output. (arches) will output about four octaves and a half in this standard.
As the output will top at 10V we are limited to this range.
AUX button:
The AUX button can prompt you with an ‘Empty Menu’ message or with an OUTPUT, depending on the
status of the element. If the element is part of a keyboard, there is nothing you can associate to the
auxiliary function and the system will tell you that this is, actually, a useless menu voice. On the other
hand, when the element is stand-alone, you can set its output, for both pressure and position (read as CV
or Gate!).
Associated to the previously described button (NOTE), you can now configure the output of the element
either as a MIDI and a CV entity, concurrently. This open up really complex control strategies for mixed
systems.
FUNCTION f() button:
This button will prompt the user with the choice between a single element, a quantized single element,
and an instantiation of a virtual keyboard.
The FUNC TYPE page will show the following items, depending on which element we are working:
FREE
KB1 (available only while selecting one of the top row pressure sensors)
KB2
KB3 (available only while selecting one of the left-hand side sliders)
KB4 (available only while selecting one of the right-hand side sliders)
OUTPUT
12
Empty
FUNC TYPE
FREE
LOOP RST
DISABLE
Other manuals for (arches)
1
Table of contents
Other Soundmachines Recording Equipment manuals


