SP Diagnostics 1410 User manual

1410 – SPi Electronic Service & Diagnostic Tool
Please read this information carefully before using your new SPi Handset
Thank you for purchasing your SPi diagnostic and service tool. We at SP Diagnostics believe
that you will have many years of successful business as a result of your investment and it is our
aim to ensure that you will remain as up-to-date as possible. Please refer to these instructions
when using the tool, if you experience any difficulties then please contact the technical help line
on the number below:
TECHNICAL HELP LINE NO. 0844 561 7861
Please register your product with SP Diagnostics by completing the registration card that came
with your product. (please remember to affix stamp before posting), you can also register on-line
by selecting the following link: www.spsupport.com which will give you exclusive access to the
SPi support area!
By registering your product you can take advantage of the following:
•SP Diagnostics product and technical updates via email
SP Diagnostics will keep you up to date with new products, special offers and
technical information
•Notification of application updates for your new SPi tool
Your new SPi Tool is updateable. When updates are available notifications will be
sent to all registered users and a posting will be made on the SP Diagnostics
support website www.spsupport.com
Updating your SPi Tool
When you receive notification of an update, you can log on to the SPi support area of the SP
Diagnostic Support web site and follow the instructions. Updates are easy to install and keep
you up to date with the very latest software available at all times.
We are always keen to hear back from customers regarding our products, and what you would
like to see included. If you have any specific thoughts, please feel free to contact our Technical
Support Help line on 0844 561 7861 and discuss them with the team. Also, don’t forget to log in
to the SP Diagnostics Support Forum where you can share experiences and ask questions to
SP Diagnostics technical staff and other SP Diagnostics customers. Check the SP Diagnostics
Support website www.spsupport.com for regular updates and product news.
Training
SP Diagnostics can provide access to several training courses. Please contact customer
services on 0845 6016510 for details.

Features:
Covers over 30 Vehicle Manufacturers plus EOBD
Consolidates existing ACR4 & G2 technology
Use of just one J1962 harness to cover all 16Pin applications
No more Pods required, Just 1 SD Card
Integrated Applications List
Large Multi-Functional graphics display with dual screen options
High Visibility Back Lit Display
Split Screen function to allow analogue and ECU data at the same time*
Monthly Internet or four monthly SD card updates
New soft touch case with improved ergonomic design
Easy to navigate keypad and menu systems with SP-Icons
Full product support helpline backup
ZigBee wireless ready, enables communications with optional add-on modules for voltage/current &
temperature measurement.*
Future Proof design incorporates upgradeable communications protocol hardware allowing for cost
effective updates if and when required.
Fully updateable multiplexed vehicle communications eliminating the need for additional adaptors and
cables for 16Pin vehicles.
High performance processor and re-programmable hardware, via the internet or SD Card.
Specifications:
J1850 VPW / PWM
ISO High & Low Speed
CAN
Single Wire CAN
LIN
Fault Tolerant CAN
5v Rosco Systems
User ID:
Serial Number & PIN:
* Functionality will be added with updates – Modules available Q3 2009
1410LL September 2009
Vehicle Harness
Connector
USB Connector
Status LED
LCD Display
Multi-Functional
Keypad
SD Card Slot
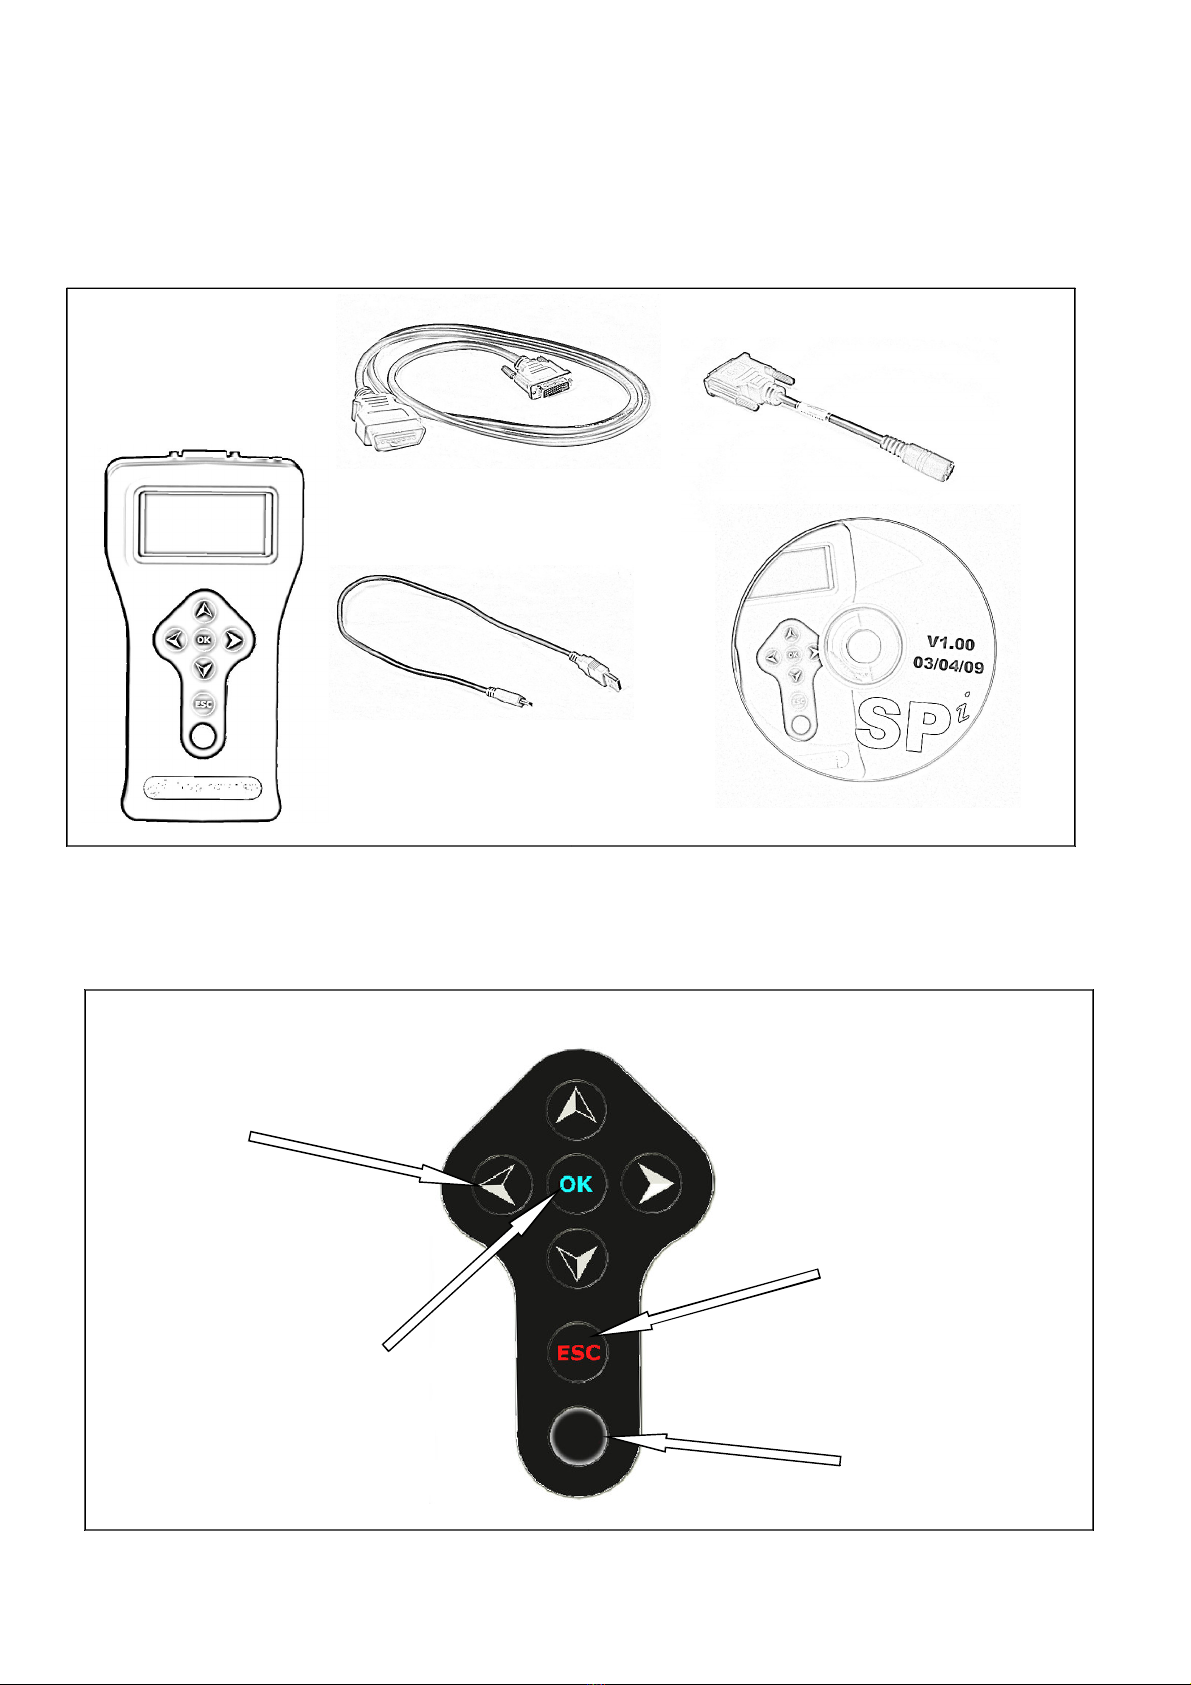
Kit Contents
1. SPi Handset (30550100)
2. SPi 16Pin Diagnostic Cable (30220300)
3. SPi Legacy Harness Adapter
4. PC/SPi USB Data Cable (USBSPi)
5. SPi Applications CD (CDSPi)
SPi Navigation
1410LL September 2009
3. Legacy
Harness Adapter
2. 16Pin Diagnostic
Cable
1. SPi Handset
5. SPi Applications CD
4. PC/SPi USB
Cable
Arrows control the
cursor around the
screen
OK Button confirms
the selected option
ESC Button cancels an
operation or returns
from a menu
Button used for special
functions
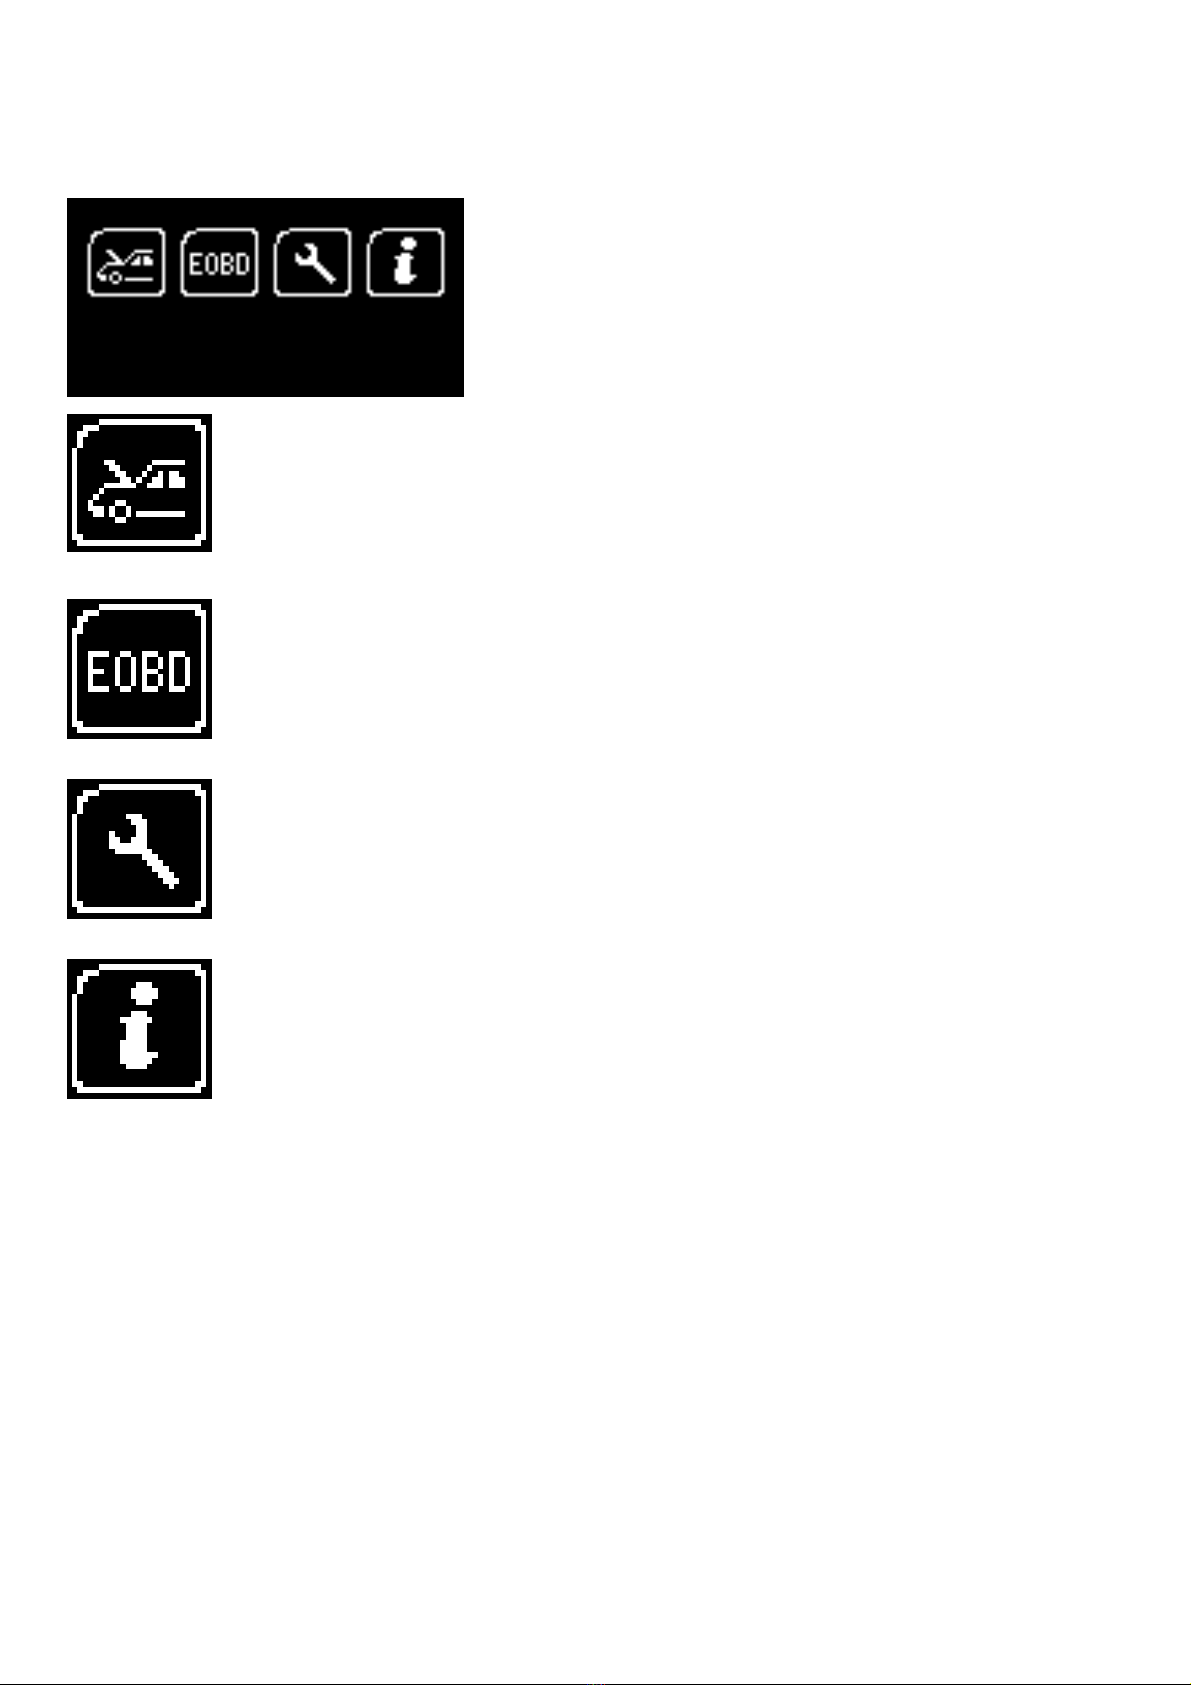
Menu & Icons
Main Menu
1410LL September 2009
Manufacturer Icon – Select this to start Vehicle
Specific Serial Diagnostics
EOBD Icon – Select this to start Generic Diagnostics functions with Graphing
Capability. Remember to select manufacturer for OEM specific EOBD
Descriptions!
System Setup Icon – Select this to configure the
various settings of the SPi
Information Icon – Select this to display
software and hardware version information

System Setup Menu
1410LL September 2009
Contrast Icon – Select this to adjust the display
contrast. Use the up and down arrows to adjust
and press OK to save the settings
Clock Icon – Select this to change the date and
time of the SPi
Garage Information Icon – Select this to display
your user details. This is changed through the
PC Suite
SPi Test Icon – Select this to carry out
hardware tests on the SPi if requested by SP
Support
Volume Icon – Select this to adjust the sounder
volume using the left and right arrow keys and
press OK to save the setting
Application Unlock Icon – Select this to unlock
application packages available to you
depending on your subscription
‘Back’ Icon – Select this to return to the
previous menu

First Time Use Procedure
Your SPi arrives to you in a locked state. This is for security and registration purposes. To use
your new SPi first you are required to unlock your unit. Please follow the instructions below to
obtain your “Registration Code”:
Plug the SPi in to the diagnostic socket on any available car
with a 16Pin socket, or if you have an ACR4 power supply you
can use this in conjunction with the “Legacy Harness Adapter”.
The handset will now boot up and you will be presented with
the main menu.
Using the arrow keys, navigate to the “System Setup Icon” and
press OK to enter the “Setup” menu.
Using the arrow keys again, navigate to the “Application
Unlock” icon and press OK to enter the unlock screen.
Record the Serial Number and the Registration Code on the
screen and then call Technical Support on 0844 561 7861.
You will be asked to provide your customer details including
an up to date email address. This is important so as we can
keep you informed of any software updates.
Technical Support will now use this information to generate an
“Unlock Code” and when asked please press the OK button to
proceed to the next step.
1410LL September 2009

“ENTER”
Technical Support will provide you with the unlock code.
Using the arrows to navigate around the on screen keyboard,
enter your code provided by Customer Services. Mistakes can
be deleted by using the ESC key. When you have entered
your code you can confirm by navigating to the “Enter” button
on the screen and pressing OK on the keypad.
Check your code if you have any problems and start again by
disconnecting and re-connecting your SPi.
Your SPi is now ready for use!
Web Site Registration
It is important that you take the time to register on the SP Diagnostics Support web site at
www.spsupport.com . To do this click on the “Register” text at the top right hand of the screen
and follow the instructions. Make a note of your ……….
Username _______________ and Password ( or reminder) ______________ here.
When you then “Log In” to the site you can keep an eye on the SPi updates page as well as the
forum for handy hints and tips as well as general automotive diagnostics chat with other SP
Diagnostics Customers.
1410LL September 2009

Quick Start Guide
Now you are ready to start using the SPi to diagnose faults and also carry out service functions
on the range of cars covered. Remember you can look at the complete Applications List on the
CD provided, simply put the disk in to your laptop or desktop PC and you will be presented with
a menu to choose from the Application Guides.
Connect the SPi to a vehicle using the required harness. The
SPi will then power up and take you to the Main Menu screen.
Using the keypad, navigate to the Manufacturer Icon and press
OK.
Using the keypad to navigate up and down the menus you will
be given the following options:
Select the Manufacturer
Select the Model
Select the Type of System ( ABS, AirBag, Engine etc..)
Select the Size of the engine
Select the Fuel type
Select the Year of the vehicle
Select the Variant of the vehicle
Select the Engine Code
And finally you will be shown the System or Systems fitted to
that choice of vehicle
The SPi will now load the correct software and establish
communications with the vehicle!
Remember you can always call our Product Support
Helpline on 0844 561 7861 for further assistance or speak
to us about subscribing to the Vehicle Technical Support
Helpline
1410LL September 2009

Saved Screens
Overview of Saved Screens
The saved screens functionality allows you to record an image of what is displayed on the SPi
handset for viewing later. This can be used to record fault codes and descriptions or
component readings without needing to write them down.
Screens that you save using the SPi are stored on the SD memory card and so are retained
after the SPi is powered off. You can save as many screens as there is space for on the SD
memory card (several hundred can be stored on the 2GB SD memory card provided as
standard with the SPi).
Once screens have been saved on the SPi they can be transferred to your PC (computer) for
viewing using the SPi Suite PC software (available from www.spsupport.com). These screens
can then be saved on to your computer’s hard drive as standard image files or printed out.
Saved screens remain stored on the SD memory card until they are deleted through the SPi
Suite PC software.
Saving screens on the SPi handset
1. When the SPi handset is displaying a screen you wish to save press the Special
Function button (located below the ESC key on the handset keypad).
2. The SPi will then briefly display
SAVING SCREEN
in the top left corner of the screen
3. If the screen has saved successfully the message
SAVING SCREEN
will disappear and a short double beep will be audible.
4. If the screen does not save successfully a message
FAILED TO SAVE SCREEN
will be displayed. If this occurs then it could be that the SD memory card is full.
1410LL September 2009

Accessing screens saved on the SPi handset
1. Start the SPi Suite using either the SP Diagnostics SPi Suite icon on your desktop or on
your start menu (Start > All Programs > SP Diagnostics > SPi Suite).
2. From the main screen click:
3. Connect your SPi as shown and click
1410LL September 2009
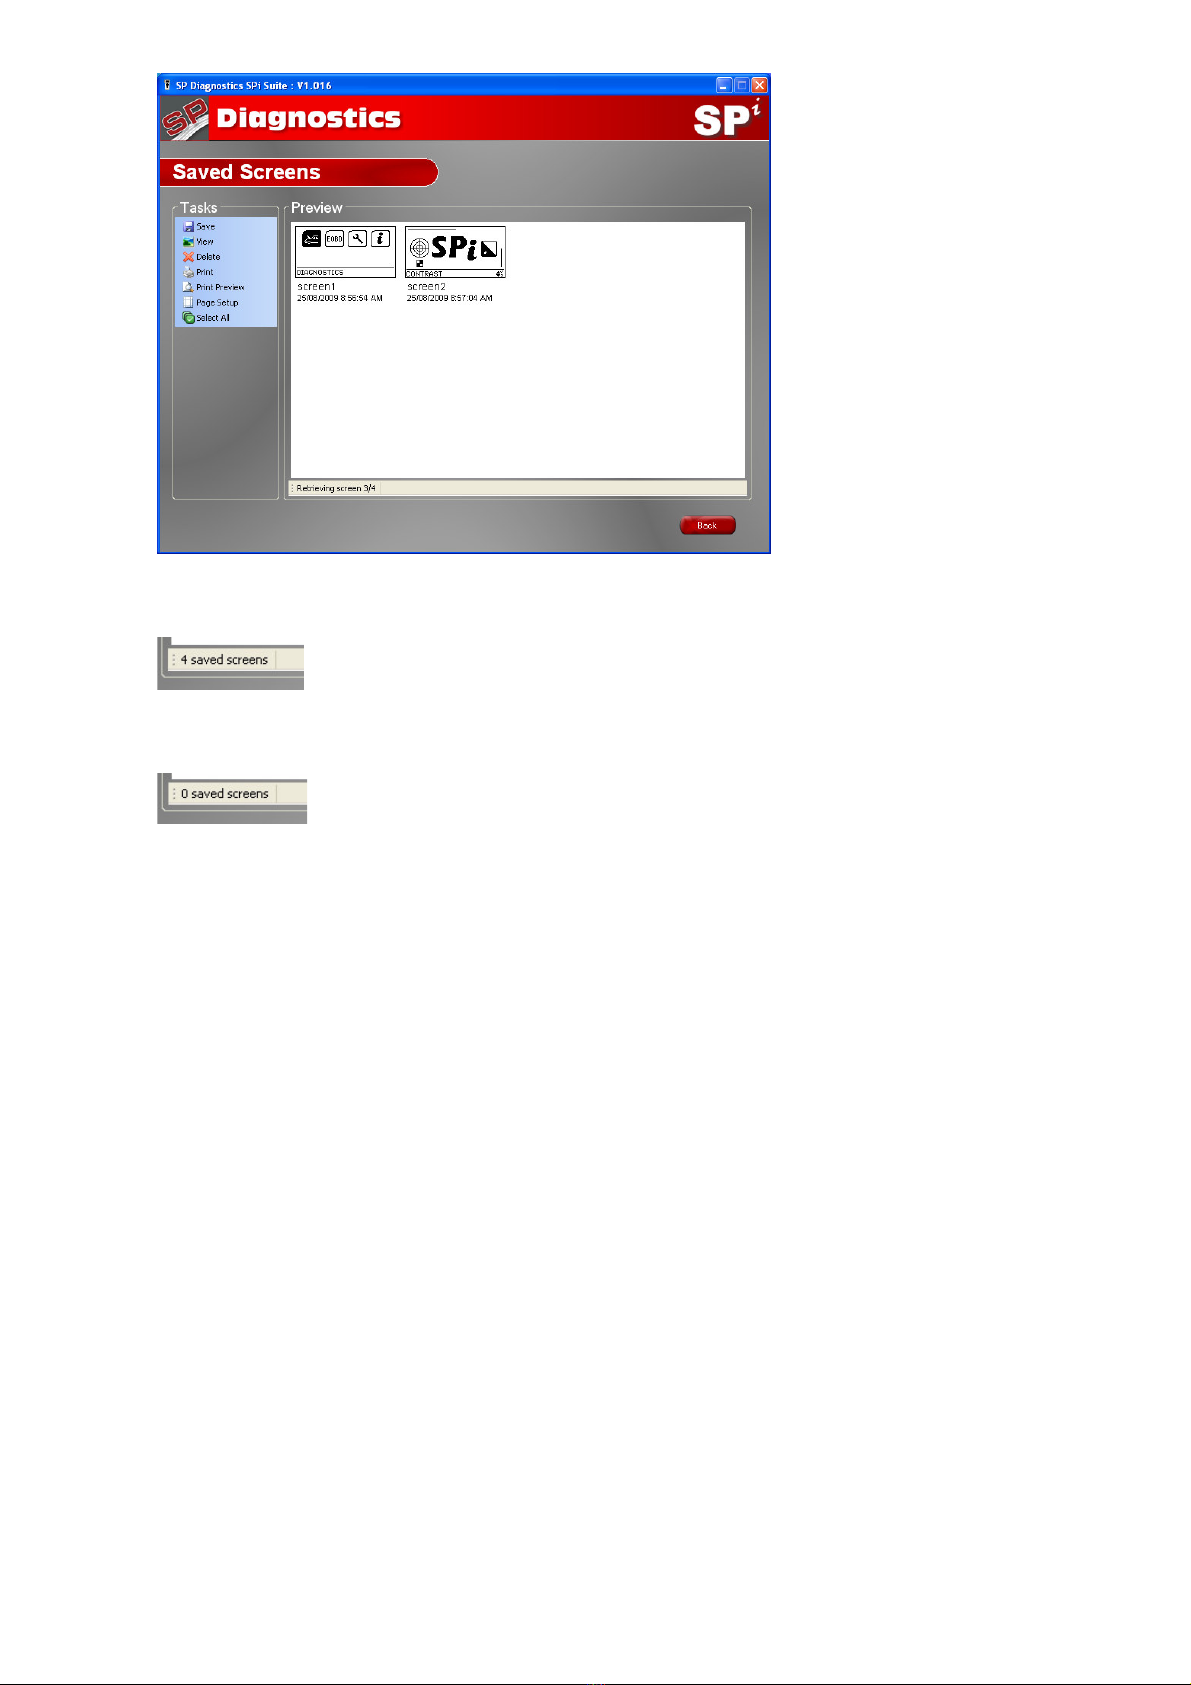
4. The screen below will be displayed and any screens saved on the SPi will be loaded one
at a time into the Preview area.
5. Once all the screens have loaded the status bar will display the number of screens
loaded:
6. If there are no screens saved on the SPi handset the Preview area will remain blank and
the status bar will display:
1410LL September 2009

Saving a single screen
1. Right click on the screen you wish to save, a menu will appear:
2. Click
3. Choose a location and filename for the screen and click
Screen images can be saved in four possible formats by changing the ‘Save as type’
setting:
Bitmap (*.bmp)
GIF (*.gif)
JPEG (*.jpg;*.jpeg)
PNG (*.png)
1410LL September 2009
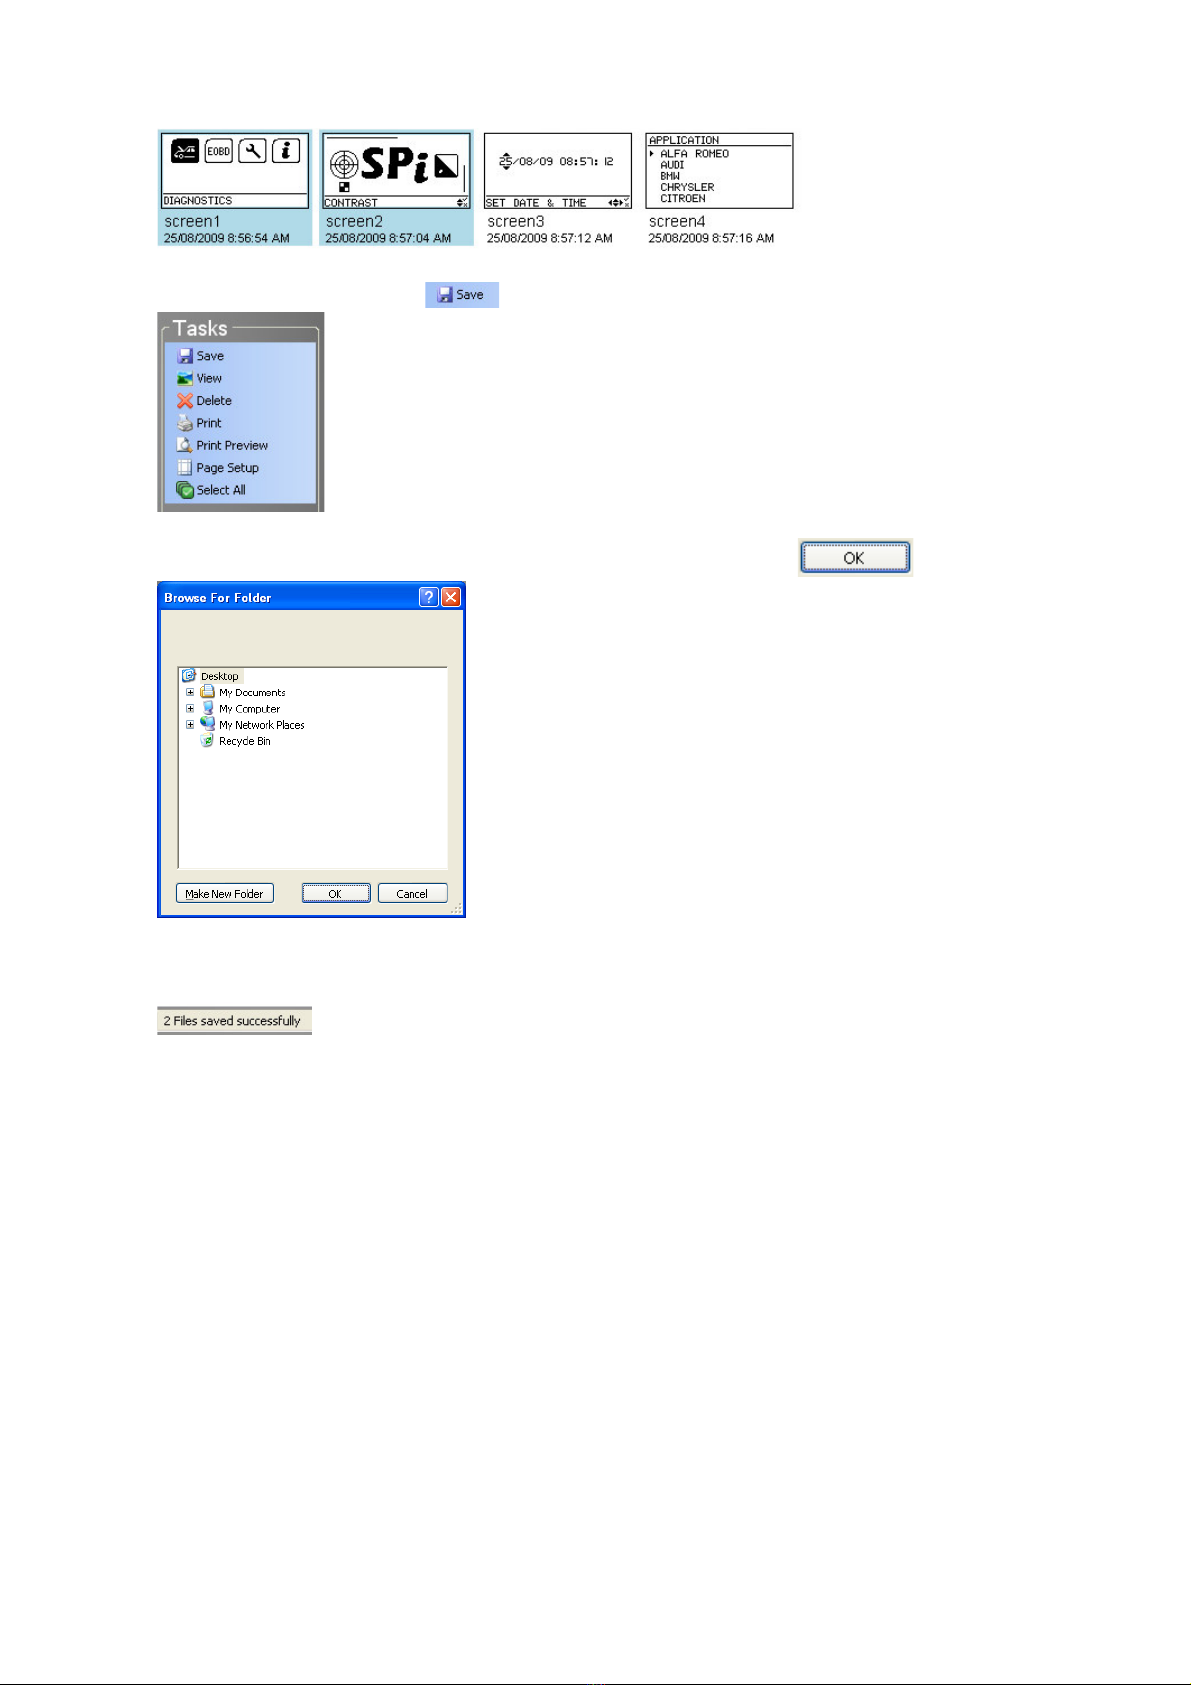
Saving multiple screens
1. Select the screens that you wish to save by clicking on them, those that are selected will
be highlighted:
2. In the ‘Tasks’ menu click
3. Select a folder in which to save the screen images and click
4. The status bar text will then indicate how many of the selected screens were successfully
saved:
1410LL September 2009
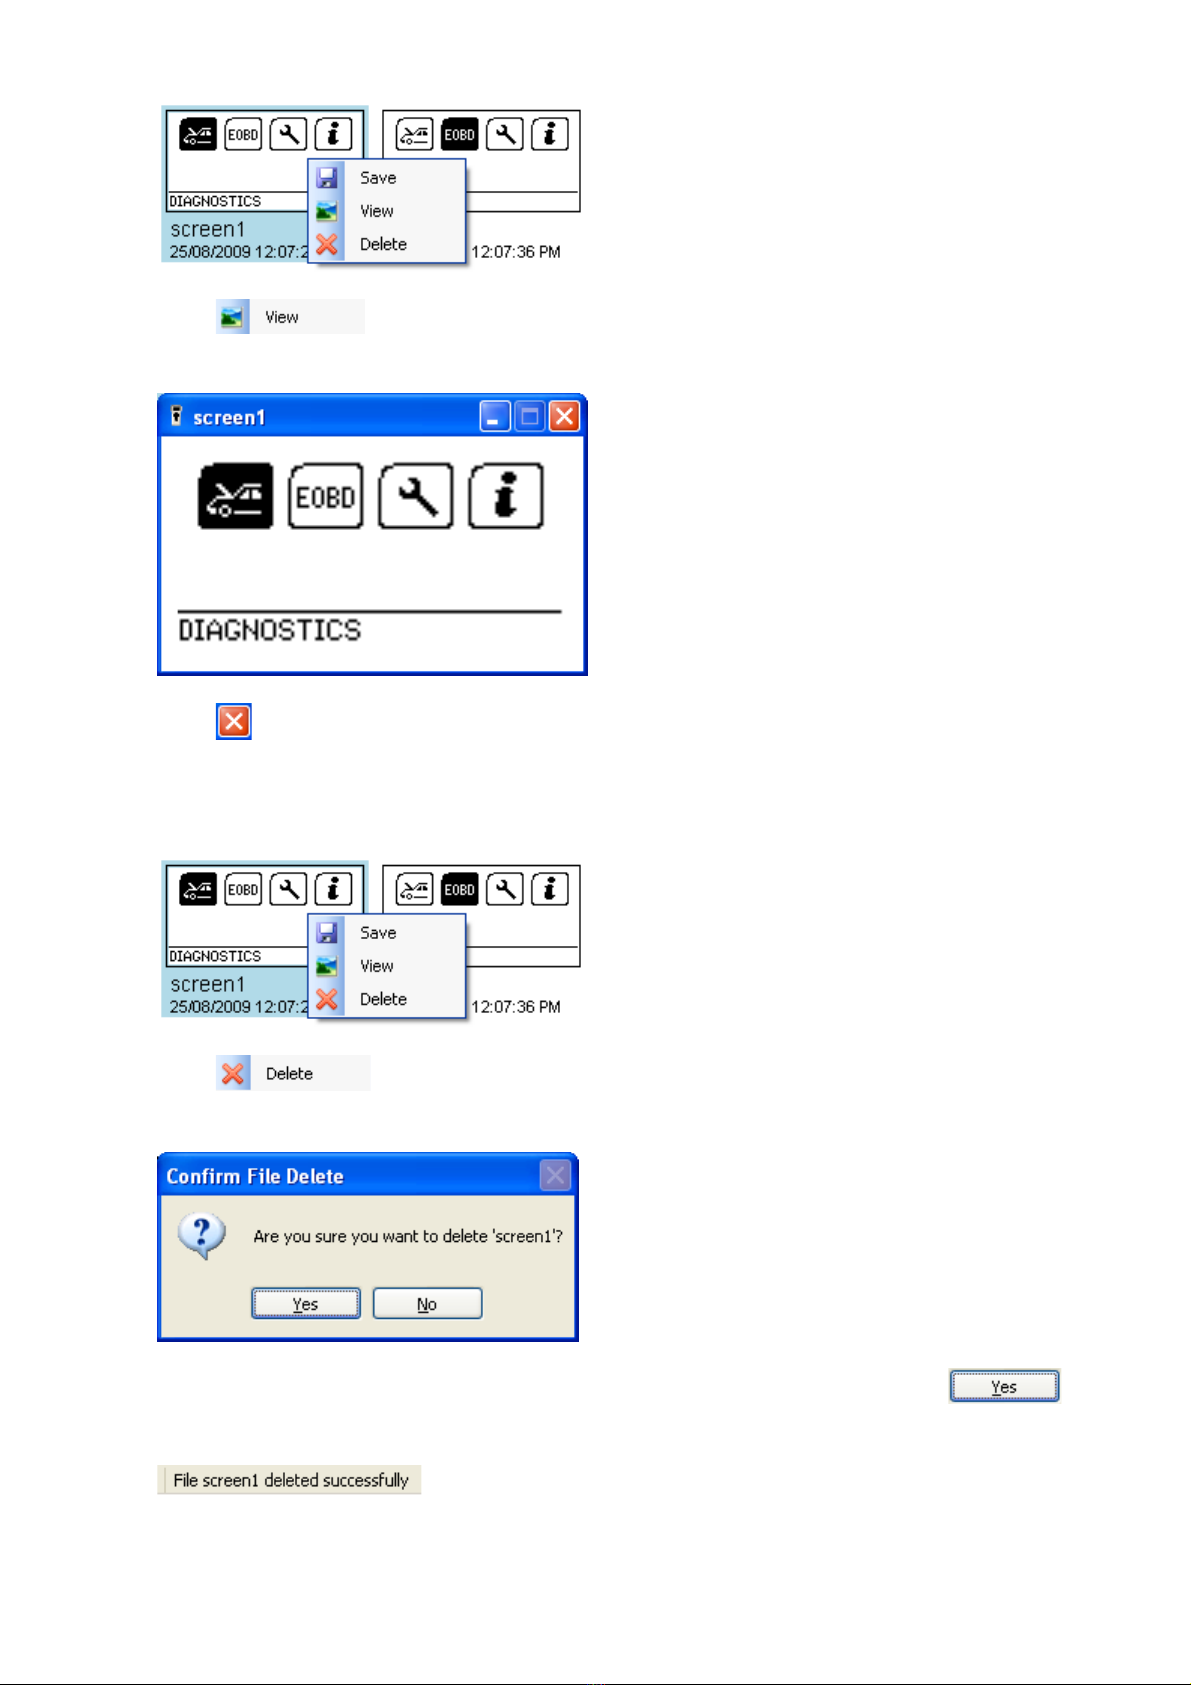
Viewing a single screen
1. Right click on the screen you wish to view, a menu will appear:
2. Click
3. A new window will appear showing you a larger version of the screen image:
4. Click when you have finished viewing the screen to close the window.
Deleting a single screen
1. Right click on the screen you wish to view, a menu will appear:
2. Click
3. You will be asked to confirm you wish to delete the screen:
4. If you are certain you wish to delete this screen from the SPi handset click
5. If the screen deleted successfully the status bar text will briefly confirm this:
6. The Preview area will then be updated to show the remaining saved screens.
1410LL September 2009
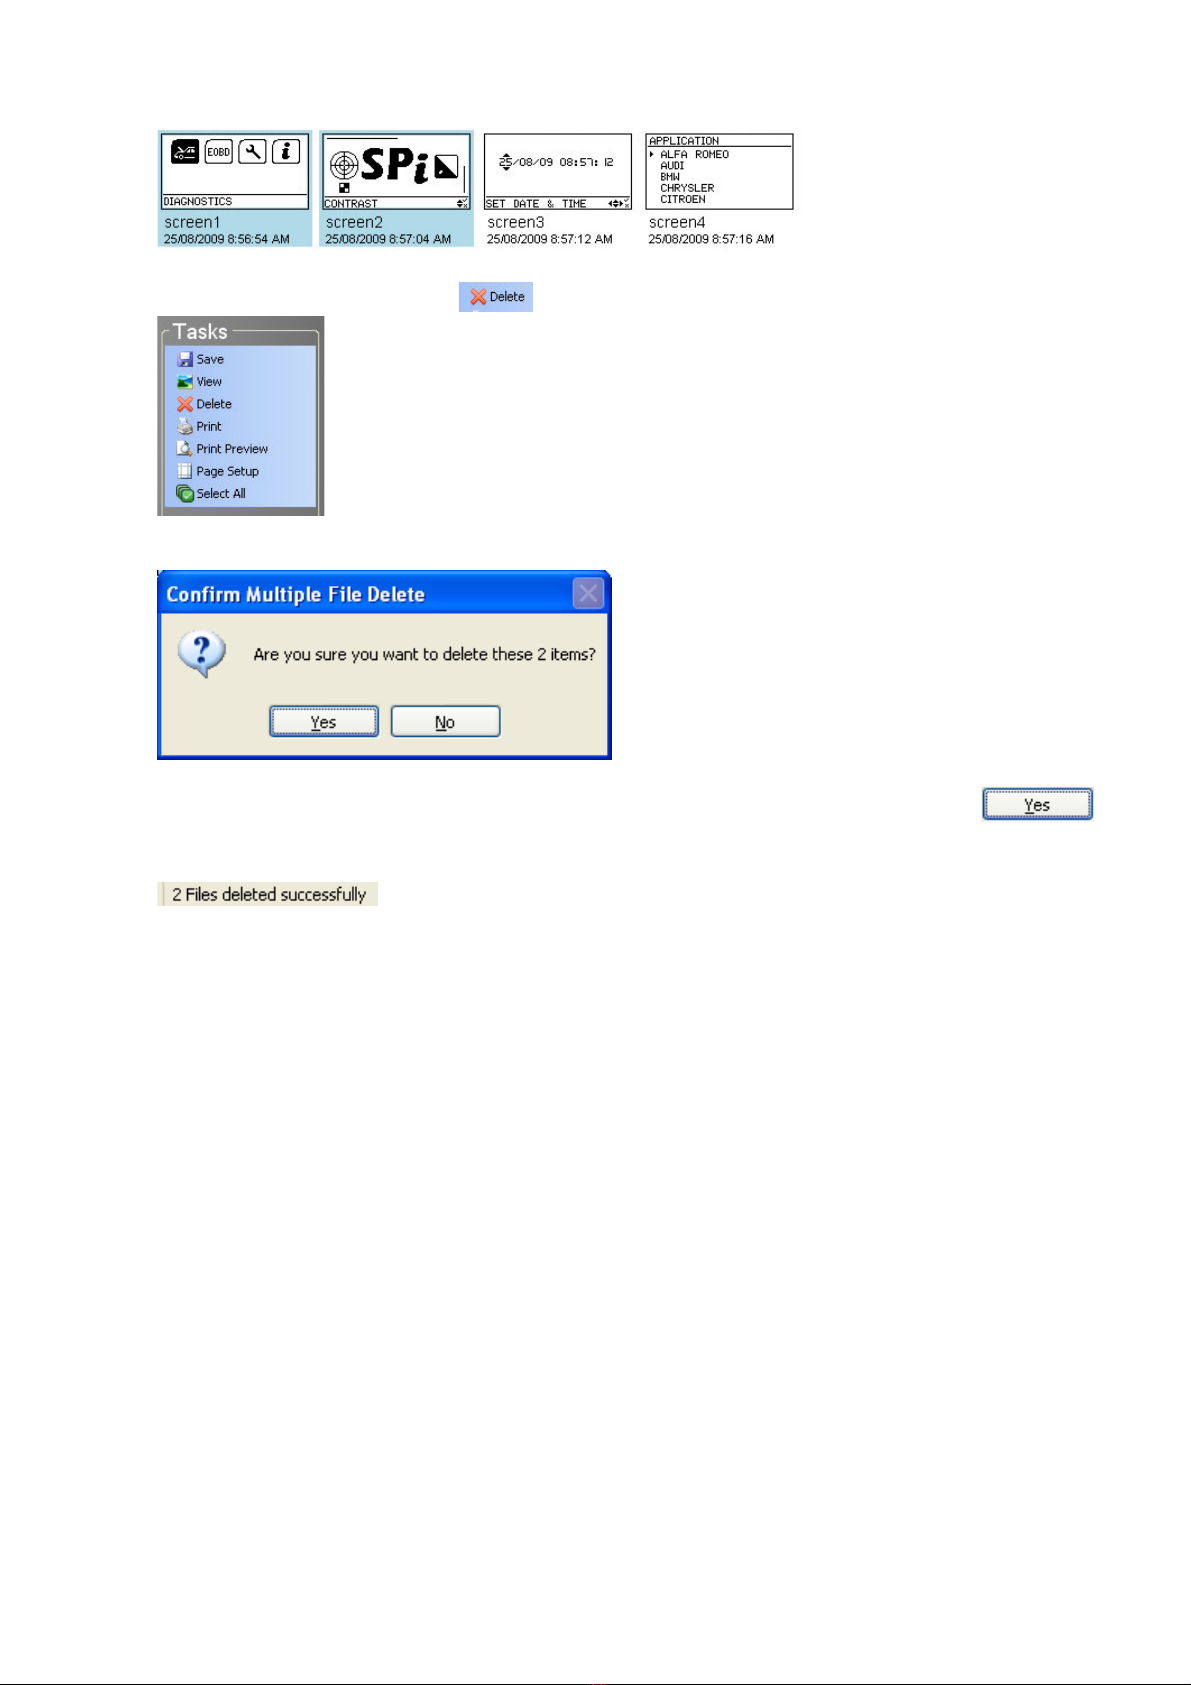
Deleting multiple screens
1. Select the screens that you wish to delete by clicking on them, those that are selected
will be highlighted:
2. In the ‘Tasks’ menu click
3. You will be asked to confirm you wish to delete the selected screens:
4. If you are certain you wish to delete these screens from the SPi handset click
5. If the screens deleted successfully the status bar text will confirm this:
6. The Preview area will then be updated to show the remaining saved screens.
1410LL September 2009
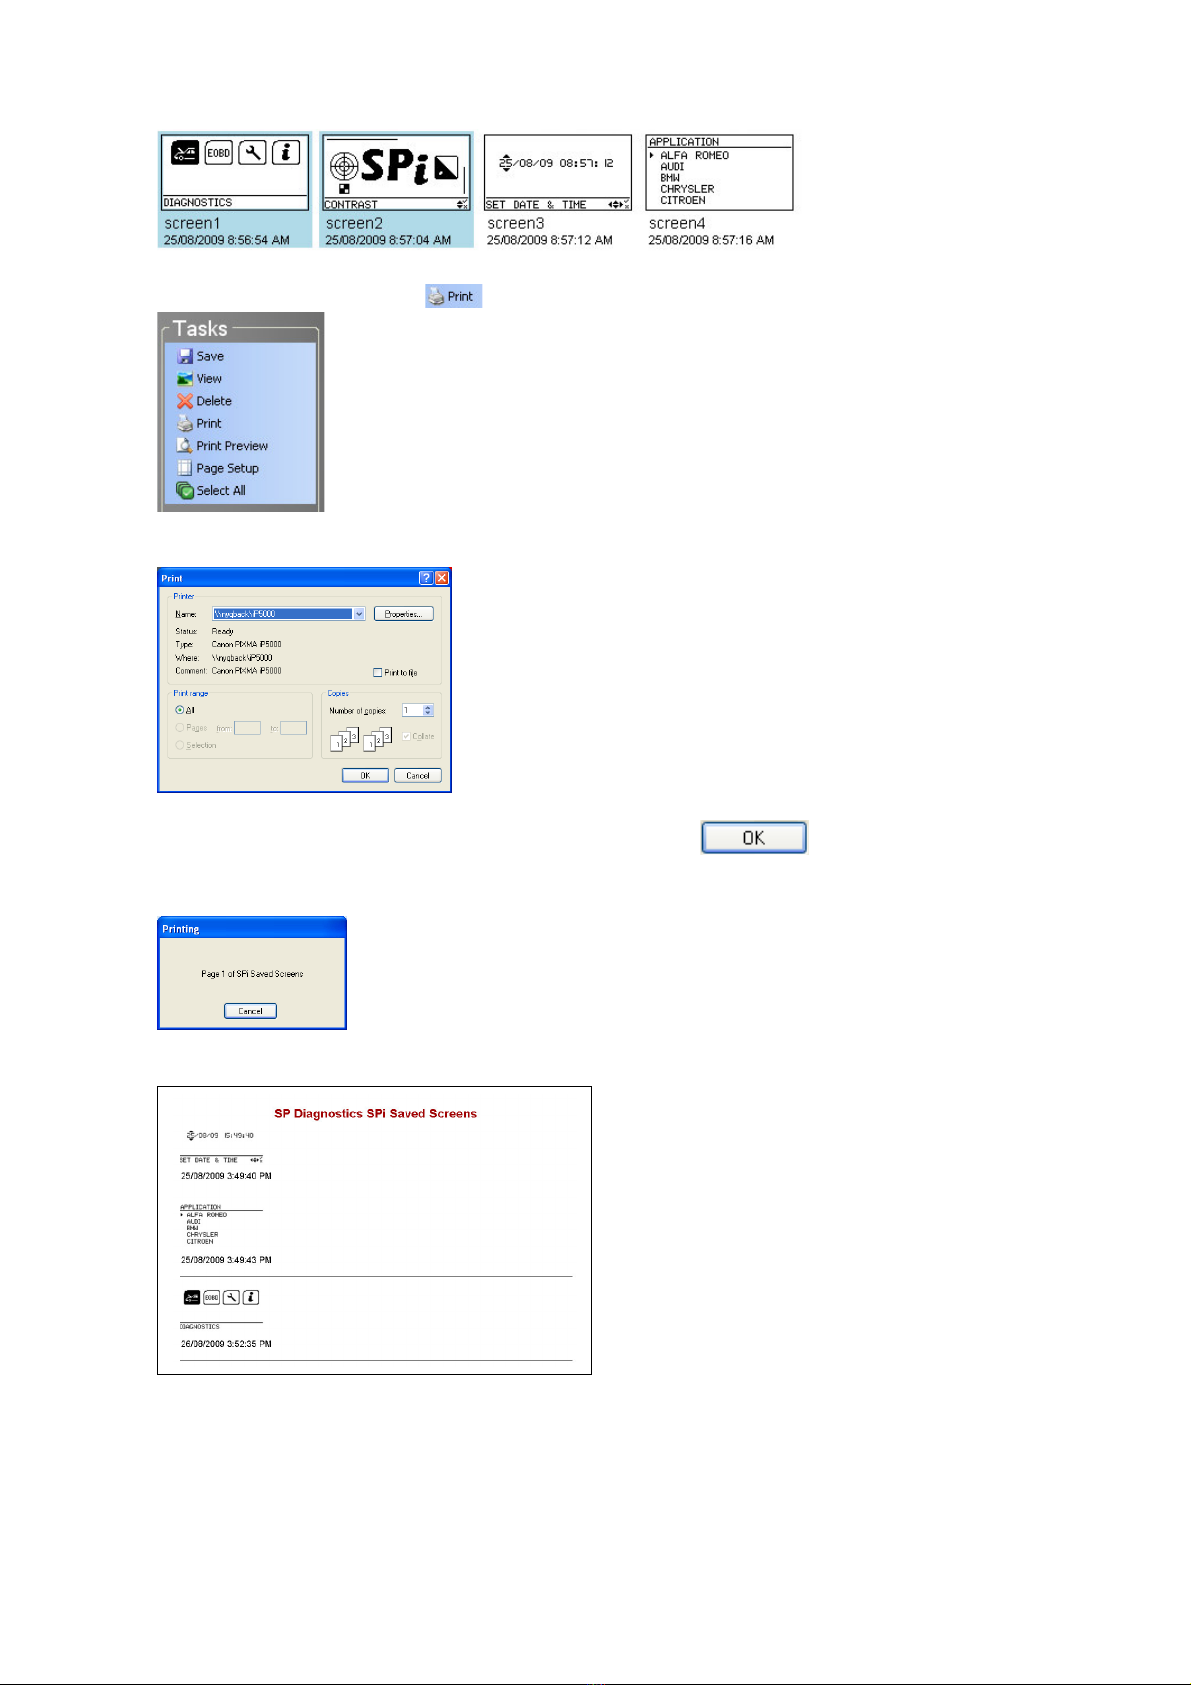
Printing screens
1. Select the screens that you wish to print by clicking on them, those that are selected will
be highlighted:
2. In the ‘Tasks’ menu click
3. The standard windows Print dialog will appear:
4. Select the printer and options you desire then click
5. The printing progress will then be displayed and the selected screens printed:
6. The page(s) printed should resemble this example:
1410LL September 2009

Print Preview
You can use the print preview function to see what the printed pages will look like before they
are sent to the printer. This can be useful to be certain you have selected the correct saved
screens.
1. Select the screens that you wish to print preview by clicking on them, those that are
selected will be highlighted:
2. In the ‘Tasks’ menu click
3. The Print preview window will then be displayed to show you how the printed document
will look:
4. From this screen you can:
click to print the document
use to zoom in and out
use to show different number of pages on the screen
click to exit print preview
use to navigate between the pages in a multi-page document
1410LL September 2009

Page Setup
The page setup screen is used to configure printing preferences for paper size and margins.
1. In the ‘Tasks’ menu click
2. The Page Setup window will be displayed:
3. Once you have made any necessary adjustments to the printing settings press
to save the changes or to discard the changes.
1410LL September 2009
This manual suits for next models
1
Table of contents
Other SP Diagnostics Diagnostic Equipment manuals


