manuals.online logo
Brands
  1. Home
  2. •
  3. Brands
  4. •
  5. Spacetronik
  6. •
  7. Intercom System
  8. •
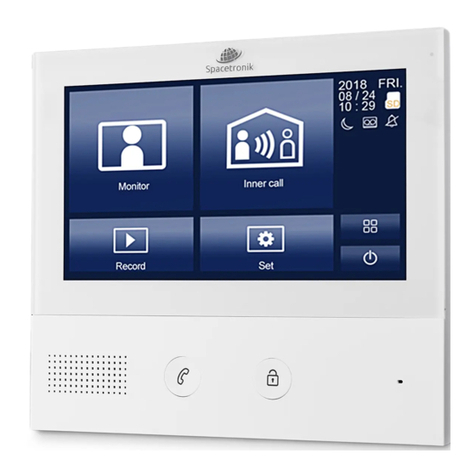
  9. Spacetronik SPD-M433 User manual

Spacetronik SPD-M433 User manual

-5-
-4-
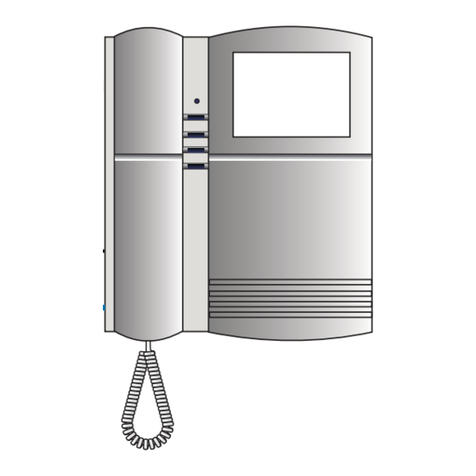
VIDEO DOOR PHONE
USER MANUAL
Please read this manual carefully before using the product .
-5-
1 2 3 4 5
ONON DIPDIP
6 7
Monitor NOT at the end of the line Monitor at the end of the line
1 2 3 4 5
ONON DIPDIP
6 7
-4-
5. User Codes (Monitor bit codes) Setup
Every room station must have an ID, set through the bit
codes(list right)
 Bit-1 to Bit-5 are used to configure the room ID.
 Bit-6 is the line-terminal switch, set the LAST monitor
 to ON, otherwise set OFF.
 Bit-7 is to turn the ringtone at the door station ON/OFF.
 You can have a Max of 4 monitors per button/code.
c

Inner Call
User can call other apartments by pressing
button.
To start the Inner call, first you need to setup a dia
l
number on the monitor.
How to setup the dial number on the monitor?
Keep pressing button until you hear a long beep.
Start setting 2 digit dial number.
button refers to first digit 1~9 .
button refers to 0 / confirm.
Eg. Set the dial number to 09.
press (Long beep) – press – press 9 times –
press .
Set the dial number to 10.
press (Long beep) – press 1 time – press –press
Set the dial number to 12
press (Long beep) – press 1 times – pres
s press
2 times -press .
How to change the ring tone?
Keep pressing button until you hear a lon
g beep,
current ring tone will be displayed.
There are 9 ring tones to choose from, press b
ut
ton
to choose the ring tone you want.
Press button again to save and exit.
p
2222
T
T
1122334455
ONON DIPDIP
1122334455
ONON DIPDIP
1122334455
ONON DIPDIP
1122334455
ONON DIPDIP
1122334455
ONON DIPDIP
1122334455
ONON DIPDIP
1122334455
ONON DIPDIP
1122334455
ONON DIPDIP
1122334455
ONON DIPDIP
1122334455
ONON DIPDIP
1122334455
ONON DIPDIP
6677
6677
6677
6677
6677
6677
6677
6677
6677
6677
6677
1122334455
ONON DIPDIP
1122334455
ONON DIPDIP
1122334455
ONON DIPDIP
1122334455
ONON DIPDIP
1122334455
ONON DIPDIP
1122334455
ONON DIPDIP
1122334455
ONON DIPDIP
1122334455
ONON DIPDIP
1122334455
ONON DIPDIP
1122334455
ONON DIPDIP
1122334455
ONON DIPDIP
6677
6677
6677
6677
6677
6677
6677
6677
6677
6677
6677
1122334455
ONON DIPDIP
1122334455
ONON DIPDIP
1122334455
ONON DIPDIP
1122334455
ONON DIPDIP
1122334455
ONON DIPDIP
1122334455
ONON DIPDIP
1122334455
ONON DIPDIP
1122334455
ONON DIPDIP
1122334455
ONON DIPDIP
1122334455
ONON DIPDIP
6677
6677
6677
6677
6677
6677
6677
6677
6677
6677
Code=2
Code=1
Code=3
Code=4
Code=5
Code=7
Code=9
Code=6
Code=8
Code=10
Code=11
Code=12 Code=23
Code=13
Code=14
Code=15
Code=16
Code=18
Code=20
Code=17
Code=19
Code=21
Code=22
Code=25
Code=26
Code=27
Code=29
Code=31
Code=28
Code=30
Code=32
Code=24
User Code
Bit state User Code
Bit state User Code
Bit state
Power supply:
Power consumption:
Wiring
DC 24V (supplied by adaptor)
Standby 15mA, working 350mA
2 wires, non-polarity
6. Specification Setup
Spacetronik SPD-M433
1. Parts and Functions
BUS terminal
Bell connection port
IP Connection port
1
1 2 3 4 5 6 7
DIP switches
Volume
Brightness
Color
Ringtone
ON DIP
-1-
1 2 3 4 5 6 7
ON DIP
(6:CALL)
(8:GND)
(7:VI)
(4:SP)
(3:ISK)
(2:IJK)
(1:IDJ)
IP Connection port
(5:MIC)
2. Monitor Mounting
3. Basic Wringing (With IP module)
2 . Connecting the system correctly, then hang the monitor on
the mounting bracket firmly.
1 . Using the screws to fix the mounting bracket on the wall.
Router
Power Supply
CAT 5 IP Module
Mobile phone
2
Monitor
Door station
2
AC
Door Release
During the conversation with the visitor, press button to
unlock the door.
Monitoring
Keep pressing button while in standby mode you will be
able to see the view of outdoor station camera.Keep
pressing button to switch between door station and extra
camera. (firstly you should have finish setting door station
camera and extra camera, see bellow).
How to set door station camera and extra camera?
Keep pressing and button until you hear a long beep.
Start setting state of multiple door station and extra camera.
Press as many times as the quantity of specific code of
door state.
For example :
There are 3 door stations, 2 door station with extra camera,
specific code of door state is 8.
Keep pressing and (Long beep) – press 8 time-
press .
There are 1 door stations,0 door station with extra camera,
specific code of door state is 1.
Keep pressing and (Long beep) – press 1time-
press .
The form of the special code of the door state is as follows:
88
-3-
Door state Door state
Specifi code Specific code
1 Door
0 Cam
3 Door
2 Cam
Code=1 Code=8
1 Door
1 Cam
3 Door
3 Cam
Code=2 Code=9
2 Door
0 Cam
4 Door
0 Cam
Code=3 Code=10
2 Door
1 Cam
4 Door
1 Cam
Code=4 Code=11
2 Door
2 Cam
4 Door
2 Cam
Code=5 Code=12
3 Door
0 Cam
4 Door
3 Cam
Code=6 Code=13
3 Door
1 Cam
4 Door
4 Cam
Code=7 Code=14
-2-
Answering a door call
Press CALL button on door station, the monitor rings, the
visitor can be seen on the monitor screen. If nobody answers
the call, the screen will automatically turn off in 30 seconds.
To answer an incoming call, press to answer, calls last for
90 seconds - Press again to end the conversation. If the
system connects with two or more monitors, answering any
monitor, the others will turn off automatically.
If there is an extra camera, during and incoming call, keep
pressing switch to see the view of extra camera.
4. Operation Instructions
UNLOCK Button
1 2
NO
Speaker
TALK Button
Microphone
1
145 - 160 cm
Other Spacetronik Intercom System manuals

Spacetronik SPD-M772T User manual

Spacetronik

Spacetronik SPD-M772T User manual

Spacetronik SPD-M777T User manual

Spacetronik

Spacetronik SPD-M777T User manual

Spacetronik SPD-M434T User manual

Spacetronik

Spacetronik SPD-M434T User manual

Spacetronik SPD-M771 User manual

Spacetronik

Spacetronik SPD-M771 User manual

Spacetronik DIO SPD-DS81 Series User manual

Spacetronik

Spacetronik DIO SPD-DS81 Series User manual

Spacetronik SPD-D1M1 User manual

Spacetronik

Spacetronik SPD-D1M1 User manual

Popular Intercom System manuals by other brands

Bticino 367511 Instructions for use

Bticino

Bticino 367511 Instructions for use

Zumimall P8 quick start guide

Zumimall

Zumimall P8 quick start guide

3M C960 Parts and Service

3M

3M C960 Parts and Service

AES global PRIME6-PROX-IMPK-PE-4GA installation instructions

AES global

AES global PRIME6-PROX-IMPK-PE-4GA installation instructions

Blyss Jelbi manual

Blyss

Blyss Jelbi manual

golmar T631/PLUS instruction manual

golmar

golmar T631/PLUS instruction manual

Orno OR-DOM-AT-930/W Installation and operation manual

Orno

Orno OR-DOM-AT-930/W Installation and operation manual

Rosslare AYC-E60 Installation and programming manual

Rosslare

Rosslare AYC-E60 Installation and programming manual

Vitalinq 94A-07 Operation and installation manual

Vitalinq

Vitalinq 94A-07 Operation and installation manual

Alecto VDP-500 user manual

Alecto

Alecto VDP-500 user manual

Jupiter Avionics wi JAC2-T32 operating manual

Jupiter Avionics

Jupiter Avionics wi JAC2-T32 operating manual

Auta AC-900 manual

Auta

Auta AC-900 manual

golmar IP 6502/G+ Installer manual

golmar

golmar IP 6502/G+ Installer manual

Hero Electronix Qubo QBOOK ULTRA user manual

Hero Electronix

Hero Electronix Qubo QBOOK ULTRA user manual

CyberData 11186 Operation guide

CyberData

CyberData 11186 Operation guide

Telex Communications RadioCom BTR-24 Features & specifications

Telex Communications

Telex Communications RadioCom BTR-24 Features & specifications

Bpt BAK01 installation instructions

Bpt

Bpt BAK01 installation instructions

Fermax FVQ-6040APP KIT Installer manual

Fermax

Fermax FVQ-6040APP KIT Installer manual

manuals.online logo
manuals.online logoBrands
  • About & Mission
  • Contact us
  • Privacy Policy
  • Terms and Conditions

Copyright 2025 Manuals.Online. All Rights Reserved.