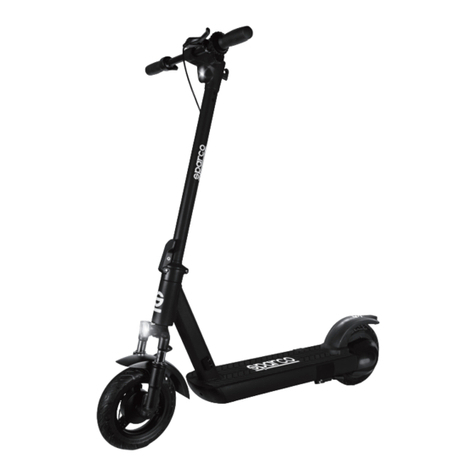
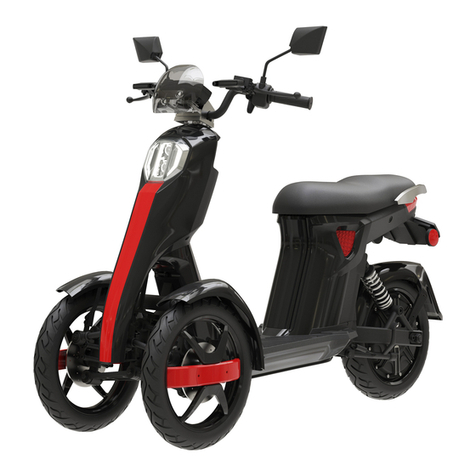
Spar SEM1 User manual

ENGLISH
USER MANUAL
ESPAÑOL ITALIANOFRANÇAIS
DEUTSCH PORTUGUÊSNEDERLANDS

2
ENGLISH
PLEASE CAREFULLY READ THE USER MANUAL
AND WARRANTY BOOK BEFORE USING
Whenever you ride the SEM1 electric two wheel scooter, you risk serious injuries from collisions, falls or loss of control.
To ride safely, YOU MUST READ AND FOLLOW ALL INSTRUCTIONS AND WARNINGS IN THIS MANUAL.
Check local laws and regulations to see where and how you may use your scooter legally.
Obey to all applicable laws for vehicles and pedestrians.
This manual includes basic operational instructions for the scooter.
It cannot cover all situations where injury or death may occur.
OPERATORS MUST USE GOOD JUDGMENT AND COMMON SENSE TO DETECT AND AVOID HAZARDS AND DANGERS
that they may encounter when riding the scooter.
By using the scooter, you accept the inherent risks of operating this product.
FAILURE TO USE COMMON SENSE, GOOD JUDGMENTS AND HEED COULD LEAD TO SERIOUS INJURIES.
USE AT YOUR OWN RISK AND WITH APPROPRIATE AND SERIOUS ATTENTION TOWARD A SAFE OPERATION.
USE CAUTION AT ALL TIMES.
WARNING

3
ENGLISH
CONTENTS
SAFETY .....................................................................4
MAIN PARTS .............................................................5
PRODUCT ..................................................................6
First step .............................................................................6
Unfolding steps .................................................................6
Folding steps ......................................................................7
LCD DISPLAY ..........................................................8
Introduction of LCD display ...........................................8
Operating instructions ....................................................8
Icon description ................................................................8
RIDING OPERATION ................................................9
Turn ON/OFF...................................................................... 9
Brake ................................................................................... 9
APPLICATION/ADJUSTING BRAKE .....................10
BATTERY AND CHARGER .....................................11
Battery ...............................................................................11
Charger ..............................................................................11
Charging ............................................................................11
MAINTENANCE .....................................................12
Battery ...............................................................................12
Storage and daily care ..................................................12
PRODUCT SPECIFICATION SHEET .......................13
WARRANTY ...........................................................14

4
ENGLISH
SAFETY
1. The product is for adults only, limited for one adult. Please do not carry
two adults at the same time. Is not suitable for minors. It is forbidden
to ride with children.
2. Always inspect the scooter prior to use. Properly inspecting and maintaining
your product can reduce the risk of injury.
3. Please wear your safety helmet and other protective equipment when riding.
4. Do not ride in trac lanes or unsafe roads and do not break local regulations.
5. Please exercise in wide areas, do not ride on trac lanes and make sure to
only ride on the streets after you feel comfortable enough with the scooter.
6. Do not make any dangerous actions when riding or riding with one hand.
Keep your feet on the scooter.
7. Do not attempt to ride the scooter on stairs that are higher then 3 cm, it may
overturn and cause injuries and/or damages to the rider and/or scooter.
8. Maximum speed limit is 25 Km/h. For your safety, please limit the speed
to 20 km/h. Please try to avoid using it at night, tho if needed please limit
the speed to 15 Km/h or less and turn on the lights.
9. Do not use the scooter when the outside temperature is lower than 0ºC.
10. Please slow down or get o from the scooter when riding in poor road conditions.
11. Do not ride the scooter in oily, icy or snowy surface terrain.
12. Please adjust the handlebar according to your height to ensure a safe riding.
13. To avoid damages of the electrical parts of the vehicle please do not immerse
the scooter in the water with the depth of more than 4 cm and do not wash
it with water under pressure.
14. For protection please do not ride the scooter in bad weather such as heavy
rain and high winds.
15. Do not drink alcohol and ride the electric scooter.
16. Do not listen to music when riding the electric scooter.

5
ENGLISH
MAIN PARTS
BOX INCLUDED :
- 1x SPARCO SEM1 or SEM1 PRO electric scooter
- 1x User manual
- 1x Charger
- 4x Hex wrench (Dia. 2, 3, 4, 5 (mm))
Front Tire
Front Fender
Front Fork
Steering Pipe
Height Adjustment Lever
Rear Fender
Rear Tire
Kick Stand
Foot Pedal
Li-ion Battery
Controller
Drum Brake
Motor
Tail Light
Folding Button
LCD Display
Front Light
Thumb Accelerator
Handle Sleeve
Rear Wheel Brake Lever

6
ENGLISH
Battery-Connector
The battery-connector will be unplugged before
the transport to avoid any damage on the battery.
Simply grab both ends of the 2 cables and stick
them together via the direction printed on
both connector-ends.
1
Check all screws
Before starting the scooter make sure that all
screws are tightened. Especially the screws for
the accelerator + the brake can loosen up a bit
during the transport. All screws can be checked
with a conventional screwdriver + hexagon.
2
UNFOLDING STEPSFIRST STEP
Release the folding lever
Lift the steering pipe slightly and press the
folding button at the same time. The direction
is indicated on the above picture.
Raise the steering pipe until the location
pin reaches the location shown on the above
picture.
Push the handlebar in the direction of the
arrows. The folding lock locks automatically
when reaching the 90º angle.
After assembling the handlebars, make sure
that the folding locks on both sides are fully
inserted.
1Unfolde the handlebars
2
A
B
A
B

7
ENGLISH
FOLDING STEPS
Fold the handlebars
Pull the folding locks out and fold the
handlebars down in the direction of the arrow.
Open the QR lever and press the handlebar parts
with your hand to lower the height.
Lock the QR lever so that it does not move.
Fold the handle post
Use your foot to press the folding button,
the use your hand to push the handlebars and
steering pipe forward so that the location pin
releases from the locked position. Then drop
the steering pipe until the location on pin reaches
another locked location of folding.
Once you have folded the scooter it should
look like the above picture.
Folding result
2
Folding
Button
1 2
3
1
A A
A
B
Unlock the QR lever and pull the handlebar
up to adjust to the height of the user.
Depending on the size of the rider, pull the
handlebar to the desired height in the direction
shown below.
The height adjustment lever (QR lever) must
be locked properly for safe driving after adjusting
the height.
Lever QR
Adjust the height
3
A
B
C

8
ENGLISH
OPERATION + DISPLAY
Introduction of LCD display
Operating instructions
1. Press the “ON/OFF” button for about 3 seconds to turn on the power, the buzzer will then
make a long beep.
2. In the power on status, short press the “ON/OFF” button to change the speed level.
3. In the power on status, double-press the "ON/OFF" button, the headlights and tail lights
will then light up simultaneously.
4. When the vehicle fails, the buzzer will make a continuous alarm sound of beep-beep-beep.
5. In the power on status, press the “ON/OFF” button for about 3 seconds to turn o the power.
6. In the power on status, if no operation is performed within 10 minutes, the system will shut
down automatically.
Icon description
“ON/OFF”
button
Blue Tooth
The Blue Tooth icon flashes when Blue Tooth is not
connected. The Bluetooth icon is always on after the
connection is successful.
Speed
When there is no fault, it shows the value
of the speed
Speed unit
Turn on icons for dierent speed units according
to dierent settings.
Battery Level
Four small squares display the battery power, a small
square is on behalf of 25% power, and the first
small square starts to flash when the battery power
is below 9%.
Error
When the vehicle fails, it displays the error code and
the buzzer sounds a continuous alarm beep-beep-beep,
the wrench icon will flash.
Error Code:
01: Hall 08: Motor 40: Brake
02: Accelerator 10: Controller
04: Battery 20: Communication
Speed Level
(white) : ECO Mode.
(orange) : NORMAL Mode.
(red) : SPORT Mode.
Light
When the vehicle turns on the light, the icon lights up,
and when the light is o, the icon does not light up.
KM/HMPH
S
MPH
KM/H S
KM/HMPH
S
S
S
S
BLUE
TOOTH

9
ENGLISH
RIDING OPERATION
Start
Press the "ON/OFF" button for about 3 seconds
to turn on the power.
One foot on the scooter
Place one foot on the scooter, keep the other on the
ground. This electric scooter is set to a non-zero
start, so you have to start by sliding like a normal
scooter. Push the scooter for 1m forward with the
foot on the ground then press the accelerator.
After that the function will be normal.
Press the right thumb v with your thumb of right
hand, the greater the angle you press, the faster
it will be.
Press the right thumb
1 2 3
Use of the lights
In the power on status, double-press the “ON/OFF”
button, the headlights and tail lights will light up
simultaneously.
Brake
Under normal circumstances, your hand grips the brake
lever firmly, and the scooter will decelerate immediately
and then stop. When the driver grips tighter, the brakes
will become more powerful.When braking, do not use
too much force, it is very dangerous.
4 5

10
ENGLISH
APPLICATION
ADJUSTING THE BRAKES
Brake adjustment method
QR Code Application
2
Download the APP
via QR Code or in
the APP Store:
“Sparco eMobility”
Once downloaded
click on the APP Icon.
Click on “Scooter” - If the green tick
shows up you successfully paired your
scooter - Click on the indicator on the
left top to get back to the dashboard.
To connect the scooter to
your phone, click on the
bluetooth symbol on the left
top to scan nearby devices.
When you see the above,
turn on Bluetooth
and press Start.
When you see the above,
turn on the Scooter
and swipe left.
To adjust the brake to it’s fully smoothness, screw or unscrew
the bolt at the end of the cable to tighten the spring and the brake.
To make it stronger, tighten the bolt more. To make it softer,
untighten the bolt a bit.
Make sure that the adjustment is still strong enough to brake
accordingly and without any danger towards you and every
other passenger.
FIRST TIME PASSWORD
000000

11
ENGLISH
BATTERY AND CHARGER
Each electric scooter is equipped with a special lithium polymer battery and a special smart charger. These accessories that come with each scooter
have a dedicated number, please do not use the chargers from other brands. If the battery or charger will be damaged owing to these, our company
can not be responsible.
Battery
When you get the electric scooter for the first time, please charge the battery fully before using it. The battery can be charged at any time in order to
ensure that the battery has power during which the battery will not get any damage.
WARNING: DO NOT USE BATTERIES FROM OTHER BRANDS, IT WILL NOT WORK WITH THE SCOOTER.
Please charge the battery once every three months if stop using the scooter. Water immersion, collisions, and other abnormal factors will lead to a battery
damage, which is not covered under warranty.
Charger
The company provides a dedicated charger which has a charging protection function. When the battery is 100% charged, the charger will automatically
stop charging. Water immersion, collisions, and other abnormal factors can lead to a charger damage which is not covered under warranty.
Charging Description
Open the charging hole rubber protective cover and put
the charger connector into the charging hole.
Connect the charger plug into the power socket.
It is charging when the charger light is red.
The charger light turns green when the battery is fully charged.
The batteries or accumulators are labelled in accordance with Directive 2006/66/EC of the European Parliament, on batteries and accumulators and waste batteries and
accumulators. The Directive determines the framework for taking back and recycling used batteries and accumulators, as it is determined in the European Union. This label
is used on various types of batteries to indicate that they must not be thrown out, rather they must be recycled at the end of their life cycle, as it is stipulated in this Directive.
In accordance with Directive 2006/66/EC of the European Parliament, batteries and accumulators are labelled to indicate that they must be collected separately and be
recycled at the end of their life cycle. The battery label must include a chemical symbol of the metals that the batteries contain (indicate the materials of the batteries).
Users of batteries and accumulators must not throw them out as unsorted municipal waste, rather they must make use of the framework of collection that is available to
customers for the return, recycling and processing of batteries and accumulators to find out how to act in this regard. The collaboration of customers is important for reducing
any possible eect that batteries and accumulators could cause to the environment or to health due to the presence of hazardous substances.

12
ENGLISH
MAINTENANCE
Battery
Please do not put the battery in a high temperature of more than 50ºC or lower than -20ºC. Don't put the battery in the fire, otherwise it may lead to
battery failure, overheating or even fire risk. Avoid full depletion of the battery. Please make sure to charge the battery frequently and in regular intervals
in order to extend its lifetime. In addition, the battery can be used at room temperature. With high mileage and performance, the battery life and performance
will decline if it is used below 0ºC. Under typical conditions, at -20ºC centigrade environment, mileage may be only half or lower. After the temperature rises,
the battery mileage will resume.
NOTE: Fully charged about 60~90 days after the use of its stored power consumption; incomplete power consumption in about 20~40 days after
the power consumption. If you do not charge in time, it is likely to cause excessive discharge of the battery and damage. This damage is not recoverable,
due to no charging for a long time. Damage caused by none charging can lead to being unable to recharge and can not enjoy any warranty.
Placement and daily care
Do not expose the scooter under the sun or wet places for too long. Please keep the scooter clean and dry. For cleaning use a damp cloth and a mild
detergent. Do not use alcohol, gasoline, kerosene or other corrosive, volatile chemical solvents to clean, otherwise it will damage the appearance and
internal structure of the body. When the scooter is not in use, put it in a dry and cool storage to avoid prolonged storage outdoors.
Sun exposure/overheated/over cooled outdoor environments will accelerate the appearance and aging of tires and reduce the service life of batteries.
Safety instructions
Products are forbidden to minors (motor vehicle lane): It is your responsibility to inquire about local legislation.
Wearing the helmet is mandatory.
The use of a smartphone or a phone is prohibited during the use of the product.
Assurance
In accordance with the law, we remind you that an insurance third party liability is mandatory for this type of vehicle.

13
ENGLISH
PRODUCT SPECIFICATION SHEET
1000 x 170 x 370 mm
1150 x 595 x 1135 mm
1100 x 240 x 420 mm
14.3 kg
120 kg
25 km/h
Up to 25 km
15º (full speed)
0ºC - 40ºC
0ºC - 40ºC
36 V
18650 Lithium battery 7.5 Ah
36 V Brushless DC motor
350 W
100-240 V
42 V
1.5 A
4-6 hours
1000 x 170 x 370 mm
1150 x 595 x 1135 mm
1100 x 240 x 420 mm
15.8 kg
120 kg
25 km/h
Up to 35 km
15º (full speed)
0ºC - 40ºC
0ºC - 40ºC
36 V
18650 Lithium battery 12.5 Ah
36 V Brushless DC motor
350 W
100-240 V
42 V
1.5 A
6-8 hours
Specification
Folding Size
Unfolding Size
Carton Size
Net Weight
Maximum Load
Maximum Speed*
Maximum Distance (full charged)*
Grade Ability
Working Temperature
Storage Temperature
Rated voltage
Battery Capacity
Motor Type
Motor Power
Rated input Voltage
Rated output Voltage
Rated Current
Charging Time
Capability
Storage
Electric
Parameters
*60 kgs tester
SEM1 PROSEM1

14
ENGLISH
SPARCO SEM1 + SEM1 PRO E-SCOOTER
Product : Model : Serial Number : Date of Purchase :
Notes :
WARRANTY CONDITIONS
Dear customer, thank you for purchasing our Sparco SEM1 product. In order to protect your rights, please read these conditions carefully.
For more information, please visit our website: www.sparco-emobility.com
1. This warranty falls on the product identified on the back and will only be valid for that product.
2. The guarantee covers all of your legal rights as a consumer and user established in the General Law for the Defense of Consumers and Users (Royal Legislative Decree 1/2007, of November 16) and in
the other legal provisions applicable in case of lack of conformity of the product with the contract.
3. The warranty oered for your product covers the following clauses:
a) 2-year warranty for the main product as long as the guarantee regime is applied.
a.1) If the defect or lack of conformity arises in the first 6 months, it is presumed that it already existed when the defect was delivered (product or factory defect of origin).
It will be the selling party that must demonstrate that the defect or lack of conformity is not of origin, but that it is due for example to a misuse or maintenance given by the consuming party.
a.2) If the defect or lack of conformity arises from the first 6 months and up to two years, the consumer must continue to address the selling party to be able to repair the lack of conformity of the
product, but in this case the presumption that the defect comes from the factory does not exist.
b) 6 months warranty for the battery and charger originally packaged with the product.
c) The legal guarantee period for this product starts from the date that appears on the ticket or invoice, or the delivery note if the delivery is later.
We not exclude, limit or suspend the minimum legal guarantee period imposed by applicable law.
WARRANTY
We are trying our best to produce our SEM1 Scooter in a way that it is as eortless as possible for you. Nevertheless it can always happen that
something goes wrong, in this case you can contact your store with your question / complain / situation + the following necessary information:
- Full Name - Telephone Number - Serial Number of the Product
- Email Address - Full Address for the eventual Pick Up - Original Receipt/Payment Slip
Please fill out the below Warranty Card with all necessary information and contact your next Store.
BELGIUM, FRANCE, LUxEMBURG,
NETHERLANDS
EXALTO Benelux sa/nv
Avenue Landaslaan 23
1480 SAINTES / TUBIZE - BELGIUM
ECUADOR
EDMONZAR. Cia Ltda
Av. González Suárez 2-94
or Gonzalo Zaldumbide - Esquina
CUENCA - ECUADOR
ITALY
Essevu Elettronica c/o My Plus s.r.l.s.
Strada Statale 28, Km.131
18027 CHIUSANICO (IM) - ITALY
Whatsapp: +39 3478985281
SPAIN
CD MANTENIMIENTO INTEGRAL Y RECAMBIOS
C/ Pintor Sorolla 57 bajo
46113 MONCADA - SPAIN
Tel: 960 039 515 / Whatsapp: 633 509 704

ITALIANO
MANUALE UTENTE
15

16
ITALIANO
LEGGERE ATTENTAMENTE IL MANUALE UTENTE
E IL LIBRETTO DI GARANZIA PRIMA DELL'USO
Ogni volta che si utilizza il monopattino elettrico SEM1 esiste il rischio di lesioni gravi dovute a collisione,
caduta o perdita di controllo.
Per guidare in modo sicuro, LEGGERE E SEGUIRE TUTTE LE ISTRUZIONI E LE AVVERTENZE INCLUSE IN QUESTO
MANUALE.
Controllare le leggi e le normative locali per sapere dove e come è consentito utilizzare il monopattino.
Rispettare le leggi vigenti per i veicoli e i pedoni.
Questo manuale include le istruzioni operative di base del monopattino.
Non illustra tuttavia tutti i casi in cui potrebbero verificarsi lesioni o incidenti mortali.
GLI UTENTI DEVONO UTILIZZARE BUON SENSO E CAPACITÀ DI GIUDIZIO PER RICONOSCERE ED EVITARE RISCHI E
PERICOLI che potrebbero incontrare durante la guida del monopattino.
Utilizzando il monopattino, si accettano i rischi intrinseci all'utilizzo dello stesso.
IL MANCATO RICORSO A BUON SENSO E CAPACITÀ DI GIUDIZIO PUÒ PORTARE A LESIONI GRAVI.
L'USO DEL MONOPATTINO AVVIENE A RISCHIO E PERICOLO DEL CONDUCENTE, CHE DEVE PRESTARE ATTENZIONE
ALLA SICUREZZA. PRESTARE SEMPRE LA DOVUTA ATTENZIONE.
AVVERTENZA

17
ITALIANO
INDICE DEI CONTENUTI
SICUREZZA .............................................................18
PARTI PRINCIPALI ..................................................19
PRODOTTO ..............................................................20
Fase 1 ................................................................................20
Apertura del monopattino ...........................................20
Chiusura del monopattino ...........................................21
DISPLAY LCD ..........................................................22
Introduzione al display LCD ........................................ 22
Istruzioni ...........................................................................22
Descrizione delle icone ................................................22
GUIDA DEL MONOPATTINO ...................................23
Accensione/spegnimento ...........................................23
Freni .................................................................................. 23
APP/REGOLAZIONE DEI FRENI .............................24
BATTERIA E CARICABATTERIE .............................25
Batteria .............................................................................25
Caricabatterie .................................................................25
Ricarica .............................................................................25
MANUTENZIONE ....................................................26
Batteria .............................................................................26
Conservazione e cura quotidiana .............................26
SCHEDA TECNICA DEL PRODOTTO ......................27
GARANZIA ...............................................................28

18
ITALIANO
SICUREZZA
1. Il prodotto è destinato esclusivamente a persone adulte e può trasportare
un solo adulto alla volta. Evitare di trasportare due adulti allo stesso tempo.
Non adatto ai minori. È vietato condurre il monopattino trasportando i
bambini.
2. Ispezionare sempre il monopattino prima dell'uso. Ispezionare e sottoporre
a manutenzione il prodotto aiuta a ridurre il rischio di lesioni.
3. Indossare il casco e altri dispositivi di protezione durante la guida.
4. Non guidare su strade tracate o non sicure e non violare il codice della
strada locale.
5. Utilizzare in aree spaziose, non guidare su strade tracate e utilizzare sulla
strada soltanto dopo aver acquisito dimestichezza con il monopattino.
6. Non compiere azioni pericolose durante la guida e non guidare con una
sola mano. Tenere entrambi i piedi sul monopattino.
7. Non tentare di guidare il monopattino su gradini alti più di 3 cm, altrimenti
si ribalterà con conseguenti danni per il conducente e il monopattino.
8. Il limite di velocità massimo è di 25 km/h. Per ragioni di sicurezza, non
superare la velocità di 20 km/h. Se possibile, evitare di usare il monopattino
di notte; se inevitabile, limitare la velocità a 15 km/h e accendere le luci.
9. Non utilizzare il monopattino se la temperatura esterna è inferiore a 0 °C.
10. Rallentare o scendere dal monopattino se il manto stradale non è in buone
condizioni.
11. Non guidare il monopattino su superfici oleose, ghiacciate o ricoperte di neve.
12. Regolare il manubrio in base alla propria altezza per una guida sicura.
13. Per evitare danni ai componenti elettrici del veicolo, non immergere
monopattino in acqua profonda più di 4 cm e non lavarlo con dispositivi
che utilizzano acqua sotto pressione.
14. Per ragioni di sicurezza, non utilizzare il monopattino in condizioni
climatiche avverse, come pioggia battente e forte vento.
15. Non guidare il monopattino elettrico sotto l'eetto dell'alcol.
16. Non guidare il monopattino ascoltando musica.

19
ITALIANO
PARTI PRINCIPALI
La confezione comprende:
- 1x SPARCO SEM1 or SEM1 PRO scooter elettrico
- 1x manuale utente
- 1x caricatore
- 4x chiave esagonale (Dia. 2, 3, 4, 5 (mm))
Pneumatico anteriore
Parafango anteriore
Forcella anteriore
Piantone del manubrio
Leva per la regolazione dell’altezza
Parafango posteriore
Pneumatico posteriore
Cavalletto
Pedale controller
con batteria agli
ioni di litio
Freno a tamburo
Motore
Luce posteriore
Pulsante di chiusura
Display LCD
Luce anteriore
Acceleratore a mano
Manopola
Leva del freno della ruota posteriore

20
ITALIANO
Connettore della batteria
Scollegare il connettore prima di trasportare il monopattino
per evitare danni alla batteria. Prendere entrambe
le estremità dei 2 cavi e collegarli nel senso della
freccia stampigliata sulle estremità dei connettori.
1
Controllare tutte le viti
Prima di avviare il monopattino assicurarsi che tutte
le le viti siano serrate. Soprattutto le viti dell'acceleratore
e del freno possono allentarsi leggermente durante
il trasporto. Per controllare le viti è possibile usare un
normale cacciavite + chiave esagonale.
2
CHIUSURA DEL MONOPATTINOFASE 1
Sbloccare la leva di chiusura
Sollevare leggermente il piantone del manubrio e
premere il pulsante di chiusura allo stesso tempo.
La direzione è indicata nell'immagine qui sopra.
Sollevare il piantone del manubrio fino quando il
perno di bloccaggio raggiunge la posizione mostrata
nell'immagine qui sopra.
Spingere il manubrio in direzione delle frecce.
Il perno di bloccaggio si blocca automaticamente
quando raggiunge un angolo di 90º.
Dopo aver montato il manubrio, assicurarsi che i
perni di bloccaggio su entrambi i lati siano completamente
inseriti.
1Apertura del manubrio
2
A
B
A
B
This manual suits for next models
1
Table of contents
Languages:
Other Spar Scooter manuals
