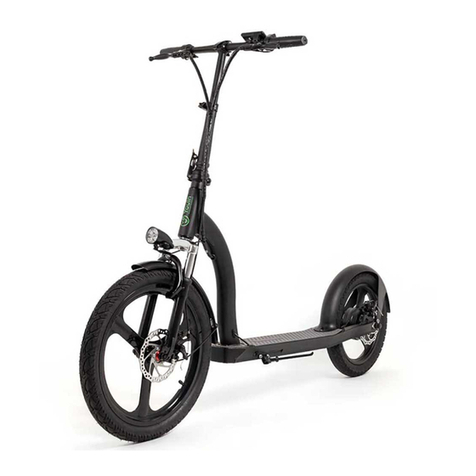
Youin BARCELONA User manual

YOU-RIDE BARCELONA
AN ELECTRIC
URBAN BIKE
BARCELONA
INSIDE
User manual · Manual de usuario
Manuel de l’Utilisateur
Manuale d’uso · Manual do usuário
BK1300

2
YOU-RIDE BARCELONA
Thanks for choosing our product.
Have fun with this electric bike.
2
YOUmove
YOUup
YOUdown
YOUfold
YOUtravel
YOUrule
YOU-RIDE BARCELONA Images may dier from the final version of the product

3
ENGLISH
1. General Warning . . . . . . . . . . . . . . . . . . . . . . . . . . . . . . . . . . . . . . . . . . . . . . . . . . . . . . 4
2. Before Riding . . . . . . . . . . . . . . . . . . . . . . . . . . . . . . . . . . . . . . . . . . . . . . . . . . . . . . . . 5
A. Bike fit . . . . . . . . . . . . . . . . . . . . . . . . . . . . . . . . . . . . . . . . . . . . . . . . . . . . . . . . . . . . . . . 6
B. Safety first . . . . . . . . . . . . . . . . . . . . . . . . . . . . . . . . . . . . . . . . . . . . . . . . . . . . . . . . . . . . 6
C. Mechanical safety check . . . . . . . . . . . . . . . . . . . . . . . . . . . . . . . . . . . . . . . . . . . . . . . 6
D. First ride . . . . . . . . . . . . . . . . . . . . . . . . . . . . . . . . . . . . . . . . . . . . . . . . . . . . . . . . . . . . . . 7
3. Safety . . . . . . . . . . . . . . . . . . . . . . . . . . . . . . . . . . . . . . . . . . . . . . . . . . . . . . . . . . . . . . 8
3.1 Basics . . . . . . . . . . . . . . . . . . . . . . . . . . . . . . . . . . . . . . . . . . . . . . . . . . . . . . . . . . . . . . . 8
3.2 Riding Safety . . . . . . . . . . . . . . . . . . . . . . . . . . . . . . . . . . . . . . . . . . . . . . . . . . . . . . . . . 8
3.3 Wet Weather Riding . . . . . . . . . . . . . . . . . . . . . . . . . . . . . . . . . . . . . . . . . . . . . . . . . . . 9
3.4 Night Riding . . . . . . . . . . . . . . . . . . . . . . . . . . . . . . . . . . . . . . . . . . . . . . . . . . . . . . . . . 10
4. Fit . . . . . . . . . . . . . . . . . . . . . . . . . . . . . . . . . . . . . . . . . . . . . . . . . . . . . . . . . . . . . . . . 10
4.1 Pedals . . . . . . . . . . . . . . . . . . . . . . . . . . . . . . . . . . . . . . . . . . . . . . . . . . . . . . . . . . . . . . 10
4.2 Stand over height . . . . . . . . . . . . . . . . . . . . . . . . . . . . . . . . . . . . . . . . . . . . . . . . . . . . 10
4.3 Saddle position . . . . . . . . . . . . . . . . . . . . . . . . . . . . . . . . . . . . . . . . . . . . . . . . . . . . . . 11
5. Introduction . . . . . . . . . . . . . . . . . . . . . . . . . . . . . . . . . . . . . . . . . . . . . . . . . . . . . . . . 12
5.1 Power Assistant System . . . . . . . . . . . . . . . . . . . . . . . . . . . . . . . . . . . . . . . . . . . . . . . 12
5.2 Battery Pack . . . . . . . . . . . . . . . . . . . . . . . . . . . . . . . . . . . . . . . . . . . . . . . . . . . . . . . . . 13
5.3 Battery Charger . . . . . . . . . . . . . . . . . . . . . . . . . . . . . . . . . . . . . . . . . . . . . . . . . . . . . . 13
5.4 Power On Display . . . . . . . . . . . . . . . . . . . . . . . . . . . . . . . . . . . . . . . . . . . . . . . . . . . . 13
5.5 Motor . . . . . . . . . . . . . . . . . . . . . . . . . . . . . . . . . . . . . . . . . . . . . . . . . . . . . . . . . . . . . . . 13
5.6 Controller . . . . . . . . . . . . . . . . . . . . . . . . . . . . . . . . . . . . . . . . . . . . . . . . . . . . . . . . . . . 13
5.7 Brake . . . . . . . . . . . . . . . . . . . . . . . . . . . . . . . . . . . . . . . . . . . . . . . . . . . . . . . . . . . . . . . 14
5.8 Gear . . . . . . . . . . . . . . . . . . . . . . . . . . . . . . . . . . . . . . . . . . . . . . . . . . . . . . . . . . . . . . . . 14
5.9 Instrument Panel . . . . . . . . . . . . . . . . . . . . . . . . . . . . . . . . . . . . . . . . . . . . . . . . . . . . 14
6. Specifications . . . . . . . . . . . . . . . . . . . . . . . . . . . . . . . . . . . . . . . . . . . . . . . . . . . . . . . 14
7. Tech . . . . . . . . . . . . . . . . . . . . . . . . . . . . . . . . . . . . . . . . . . . . . . . . . . . . . . . . . . . . . . . 16
7.1 Wheels . . . . . . . . . . . . . . . . . . . . . . . . . . . . . . . . . . . . . . . . . . . . . . . . . . . . . . . . . . . . . . 16
7.2 Seat post Quick Release . . . . . . . . . . . . . . . . . . . . . . . . . . . . . . . . . . . . . . . . . . . . . . 16
7.3 Brakes . . . . . . . . . . . . . . . . . . . . . . . . . . . . . . . . . . . . . . . . . . . . . . . . . . . . . . . . . . . . . . 16
7.4 Shifting gears . . . . . . . . . . . . . . . . . . . . . . . . . . . . . . . . . . . . . . . . . . . . . . . . . . . . . . . . 16
7.5 Tires and Tubes . . . . . . . . . . . . . . . . . . . . . . . . . . . . . . . . . . . . . . . . . . . . . . . . . . . . . . 19
8. LCD Display . . . . . . . . . . . . . . . . . . . . . . . . . . . . . . . . . . . . . . . . . . . . . . . . . . . . . . . . . 19
8.1 Specification . . . . . . . . . . . . . . . . . . . . . . . . . . . . . . . . . . . . . . . . . . . . . . . . . . . . . . . . . 19
8.2 Function Summary and Button Definition . . . . . . . . . . . . . . . . . . . . . . . . . . . . . . . 20
8.3 General Operation . . . . . . . . . . . . . . . . . . . . . . . . . . . . . . . . . . . . . . . . . . . . . . . . . . . . 21
8.4 General Setting . . . . . . . . . . . . . . . . . . . . . . . . . . . . . . . . . . . . . . . . . . . . . . . . . . . . . . 23
8.5 Warnings . . . . . . . . . . . . . . . . . . . . . . . . . . . . . . . . . . . . . . . . . . . . . . . . . . . . . . . . . . . 25
8.6 Error code definition . . . . . . . . . . . . . . . . . . . . . . . . . . . . . . . . . . . . . . . . . . . . . . . . . 25
8.7 Functions corresponding to display icon . . . . . . . . . . . . . . . . . . . . . . . . . . . . . . . . 26
9. Service . . . . . . . . . . . . . . . . . . . . . . . . . . . . . . . . . . . . . . . . . . . . . . . . . . . . . . . . . . . . 26
10. Warranty . . . . . . . . . . . . . . . . . . . . . . . . . . . . . . . . . . . . . . . . . . . . . . . . . . . . . . . . . . 27
Contents

4
YOU-RIDE BARCELONA
1. General Warning
Like any sport, bicycling involves risk of injury and damage. By choosing to ride an
electric bicycle, you assume the responsibility for that risk, so you need to know (and
to practice) the rules of safe and responsible riding and proper use and maintenance.
Proper use and maintenance of your electric bicycle reduces risk of injury.
This Manual contains many “Warnings” and “Cautions” concerning the consequences
of failure to maintain or inspect your electric bicycle and of failure to follow safe
cycling practices.
• The combination of the safety alert symbol and the word WARNING indicates
a potentially hazardous situation which, if not avoided, could result in serious injury
or death.
• The combination of the safety alert symbol and the word CAUTION indicates a
potentially hazardous situation which, if not avoided, may result in minor or moderate
injury, or is an alert against unsafe practices.
• The word CAUTION used without the safety alert symbol indicates a situation
which, if not avoided, could result in serious damage to the bicycle or the voiding of
your warranty.
Many of the Warnings and Cautions say “you may lose control and fall”.
Because any fall can result in serious injury or even death, we do not always
repeat the warning of possible injury or death. Because it is impossible to anticipate
every situation or condition which can occur while riding, this manual makes no
representation about the safe use of the bicycle under all conditions. There are risks
associated with the use of any bicycle which cannot be predicted or avoided, and
which are the sole responsibility of the rider.
• Please wear a safety helmet to avoid injury. Personal protective equipment is
required.
• Please observe your local trac laws and regulations when driving the electric bike.
• If the charger cord is damaged, have it repaired by the manufacturer, its service or
a similarly qualified person in order to avoid any hazard.
• The cord should always be readily accessible.
• The device is not intended for use by persons (including children) with reduced
physical, sensory or mental capacity. Persons who have not read the manual,
unless they have received explanations by a person responsible for their safety and
supervision should not use this unit.
• Children should be monitored to ensure that they do not play with the device.
• The charger is not intended for use by persons (including children) with reduced
physical, sensory or mental capacity. Persons who have not read the manual,
unless they have received explanations by a person responsible for their safety and
supervision should not use this unit.
• Children should be monitored to ensure that they do not play with the charger.
CAUTION: Danger of explosion if battery is incorrectly replaced or not replaced by the

5
ENGLISH
1. General Warning
2. Before Riding
same type or equivalent.
• The battery should not be exposed to excessive heat such as sunshine, fire or
similar.
• The battery must be installed according to the polarity.
• The battery must be disposed of safely. Always use the collection bins provided
(check with your dealer) to protect the environment.
• The battery can’t be replaced by the user, but only by the maker of this product, the
after sales department or a qualified person.
• Caution: the use of this product requires special precautions, please refer to the
regulations applicable in your country
A special note for parents:
The use of this product is recommended for people over 14 years of age.
As a parent or guardian, you are responsible for the activities and safety of your
minor child, and that includes making sure that the electric bicycle is properly fitted
to the child; that it is in good repair and safe operating condition; that you and your
child have learned and understand the safe operation of the electric bicycle; and that
you and your child have learned, understand and obey not only the applicable local
motor vehicle, bicycle and trac laws, but also the common sense rules of safe and
responsible bicycling. As a parent, you should read this manual, as well as review
its warnings and the electric bicycle’s functions and operating procedures with your
child, before letting your child ride the electric bicycle.
NOTE: We strongly urge you to read this Manual in its entirety before your first
ride; but at the very least, read and make sure that you understand each point
in this section, and refer to the cited sections on any issue which you don’t
completely understand.

6
YOU-RIDE BARCELONA
2. Before Riding
A. Bike fit
1. Is your bike the right size? To check, see Section 4.2. If your electric bicycle is too
large or too small for you, you may lose control and fall.
2. Is the saddle at the right height? To check, see Section 4.3. If you adjust your saddle
height, make sure that you follow the Minimum Insertion instructions in Section 4.3.
3. Are saddle and seat post securely clamped? A correctly tightened saddle will allow
no saddle movement in any direction. See Section 4.3 for details.
4. Can you comfortably operate the brakes? If not, you may be able to adjust their
angle and reach.
B. Safety first
1. It’s your responsibility to familiarize yourself with the laws of the areas where you
ride, and to comply with all applicable laws.
2. Do you know how to check wheel. The bolts and nuts should be good tightened.
Riding with an improperly adjusted wheel can cause the wheel to wobble or disengage
from the bicycle, and cause serious injury or death.
3. If your bike has toe clips and straps or clipless (“step-in”) pedals, make sure you
know how they work. These pedals require special techniques and skills. Follow the
pedal manufacturer’s instructions for use, adjustment and care.
4. Does your bike have suspension? Suspension can change the way a bicycle performs.
Follow the suspension manufacturer’s instructions for use, adjustment and care.
C. Mechanical safety check
Routinely check the condition of your bicycle before every ride.
Nuts, bolts & straps: Make sure nothing is loose. Lift the front wheel o the ground
by two or three inches, then let it bounce on the ground. Anything sound, feel
or look loose? Do a quick visual and tactile inspection of the whole bike. Any
loose parts or accessories? If so, secure them. If you’re not sure, ask someone with
experience to check.
Tires & Wheels: Make sure tires are correctly inflated (see Section 7.5). Check by
putting one hand on the saddle, one on the intersection of the handlebars and stem,
then bouncing your weight on the bike while looking at tire deflection. Compare what
you see with how it looks when you know the tires are correctly inflated; and
adjust if necessary. Tires in good shape? Spin each wheel slowly and look for cuts
in the tread and sidewall. Replace damaged tires before riding the bike.
Wheels true? Spin each wheel and check for brake clearance and side-to-side wobble.
If a wheel wobbles side to side even slightly, or rubs against or hits the brake pads,
take the bike to a qualified bike shop to have the wheel trued.

7
ENGLISH
2. Before Riding
CAUTION: Wheels must be true for the brakes to work eectively.
Wheel truing is a skill which requires special tools and experience. Do not attempt
to true a wheel unless you have the knowledge, experience and tools needed to
do the job correctly.
Brakes: Check the brakes for proper operation (see Sections 7.3). Squeeze the brake
levers. Are the brake quick-releases closed? All control cables seated and securely
engaged? Do the brake pads touch the wheel rim within an inch of brake lever
movement? Can you apply full braking force at the levers without having them touch
the handlebar? If not, your brakes need adjustment.
Do not ride the bike until the brakes are properly adjusted.
Quick Releases: Make sure the front wheel, rear wheel and seat post quick releases
are properly adjusted and in the locked position.
Handlebar and saddle alignment: Make sure the saddle and handlebar stem
are parallel to the bike’s center line and clamped tight enough so that you
can’t twist them out of alignment. If not, align and tighten them.
Handlebar ends: Make sure the handlebar grips are secure and in good condition. If
not, replace them.
If the handlebars have bar end extensions, make sure they are clamped tight enough
so you can’t twist them. If not, tighten them.
WARNING: Loose or damaged handlebar grips or extensions can cause you to lose
control and fall. Unplugged handlebars or extensions can cut your body and can
cause serious injury in an otherwise minor accident.
D. First ride
When you buckle on your helmet and go for your first familiarization ride on your
new bicycle, be sure to pick a controlled environment, away from cars, other cyclists,
obstacles or other hazards. Ride to become familiar with the controls, features and
performance of your new bike.
Familiarize yourself with the braking action of the bike (see Section 7.3). Test the
brakes at slow speed, putting your weight toward the rear and gently applying the
brakes, rear brake first.
Sudden or excessive application of the front brake could pitch you over the handlebars.
Applying brakes too hard can lock up a wheel, which could cause you to lose control
and fall.

8
YOU-RIDE BARCELONA
2. Before Riding
3. Safety
If your bicycle has toeclips or clipless pedals, practice getting in and out of
the pedals.
If your bike has suspension, familiarize yourself with how the suspension
responds to brake application and rider weight shifts.
Practice shifting the gears (see Section 7.4).
Remember to never move the shifter while pedaling backward, nor pedal backwards
after having moved the shifter. This could jam the chain and cause serious
damage to the bicycle and may cause you to lose control and fall.
3.1 Basics
1. Always do the Mechanical Safety Check (Section 2.C) before you get on a bike.
2. Be thoroughly familiar with the controls of your bicycle: brakes (Section 7.3); pedals
(Section 4.1); shifting (Section 7.4)
3. Be careful to keep body parts and other objects away from the sharp teeth of
chainings; the moving chain; the turning pedals and cranks; and the spinning wheels
of your electric bicycle.
4. Always wear:
• Shoes that will stay on your feet and will grip the pedals. Never ride barefoot or
while wearing sandals.
• Bright, visible clothing that is not so loose that it can be tangled in the bicycle or
snagged by objects at the side of the road or trail.
• Protective eyewear, to protect against airborne dirt, dust and bugs (tinted when the
sun is bright, clear when it’s not).
5. Ride at a speed appropriate for conditions. Increased speed means higher risk.
3.2 Riding Safety
1. Observe all local bicycle laws and regulations. Observe regulations about licensing
of bicycles, riding on sidewalks, laws regulating bike path and trail use, and so on.
2. You are sharing the road or the path with others: motorists, pedestrians and other
cyclists. Respect their rights.
3. Ride defensively. Always assume that others do not see you.
4. Look ahead, and be ready to avoid:
• Vehicles slowing or turning, entering the road or your lane ahead of you, or coming
up behind you.

9
ENGLISH
3. Safety
• Parked car doors opening.
• Pedestrians stepping out.
• Children or pets playing near the road
• Pot holes, sewer grating, railroad tracks, expansion joints, road or sidewalk
construction, debris and other obstructions that could cause you to swerve into
trac, catch your wheel or otherwise cause you to lose control and have an accident.
• The many other hazards and distractions which can occur on a bicycle ride.
5. Ride in designated bike lanes, on designated bike paths or as close to the edge of
the road as is safely possible, in the direction of the trac flow or as directed by local
laws.
6. Stop at stop signs and trac lights; slow down and look both ways at street
intersections. Remember that a bicycle always loses in a collision with a motor
vehicle, so be prepared to yield even if you have the right of way.
7. Use approved hand signals for turning and stopping.
8. Never ride with headphones. They mask trac sounds and emergency vehicle
sirens, distract you from concentrating on what’s going on around you, and their wires
can tangle in the moving parts of the electric bicycle, causing you to lose control.
9. Never carry a passenger, unless it is a small child wearing an approved helmet and
secured in a correctly mounted child carrier or a child-carrying trailer. Follow the child
carrier or child carrying trailer’s manufacturer’s recommendations regarding weight
limits.
10. Never carry anything which obstructs your vision or your complete control of the
electric bicycle, or which could become entangled in the moving parts of the electric
bicycle.
11. Do not hold onto another vehicle.
12. Don’t do stunts, wheelies or jumps. They can cause you injury and damage your
E-bike.
13. Don’t weave through trac or make any moves that may surprise people with
whom you are sharing the road.
14. Observe and yield the right of way.
15. Never ride your bicycle while under the influence of alcohol or drugs.
16. If possible, avoid riding in bad weather, when visibility is obscured, at dusk or in the
dark, or when extremely tired. Each of these conditions increases the risk of accident.
3.3 Wet Weather Riding
WARNING: Wet weather impairs traction, braking and visibility, both for the
bicyclist and for other vehicles sharing the road. The risk of an accident is
dramatically increased in wet conditions.
Under wet conditions, the stopping power of your brakes (as well as the brakes of
other vehicles sharing the road) is dramatically reduced and your tires don’t grip
nearly as well. This makes it harder to control speed and easier to lose control. To
make sure that you can slow down and stop safely in wet conditions, ride more slowly

10
YOU-RIDE BARCELONA
3. Safety
4. Fit
and apply your brakes earlier and more gradually than you would under normal, dry
conditions.
3.4 Night Riding
Riding a bicycle at night is many times more dangerous than riding during the day. A
bicyclist is very dicult for motorists and pedestrians to see.
WARNING: Reflectors are not a substitute for required lights. Riding at dawn,
at dusk, at night or at other times of poor visibility without an adequate
bicycle lighting system and without reflectors is dangerous and may result in
serious injury.
Bicycle reflectors are designed to pick up and reflect street lights and car lights in a
way that may help you to be seen and recognized as a moving bicyclist.
CAUTION: Check reflectors and their mounting brackets regularly to make sure
that they are clean, straight, unbroken and securely mounted.
While riding at dawn, at dusk or at night:
• Ride slowly.
• Avoid dark areas and areas of heavy or fast-moving trac.
• Avoid road hazards.
• If possible, ride on familiar routes.
4.1 Pedals
Before you start, you need to mount the pedals. Make sure the good pedal is attached
to the good side of the bike.
1. LEFT SIDE: Attach pedal turning in an anti-clockwise direction.
2. RIGHT SIDE: (Chainwheel Side) Attach pedal turning in a clockwise direction.
4.2 Stand over height
Stand over height is the basic element of bike fit (see fig. 1). It is the distance from

11
ENGLISH
4. Fit
the ground to the top of the bicycle’s frame at that point where your crotch would
be if you were straddling the bike and standing half way between the saddle and the
handlebars. To check for correct stand over height, straddle the bike while wearing
the kind of shoes in which you’ll be riding, and bounce vigorously on your heels. If
your crotch touches the frame, the bike is too big for you. Don’t even ride the bike
around the block. A bike which you ride only on paved surfaces and never take o-
road should give you a minimum stand over height clearance of five centimeters. A
bike that you’ll ride on unpaved surfaces should give you a minimum of seven and
a half centimeters of stand over height clearance. And a bike that you’ll use for real
mountain biking on dicult, rough terrain should give you ten centimeters or more
of clearance.
fig. 1 fig. 2
4.3 Saddle position
Correct saddle adjustment is an important factor in getting the most performance
and comfort from your bicycle. The saddle can be adjusted in three directions:
1. Up and down adjustment. To check for correct saddle height (fig. 2):
• sit on the saddle;
• place one heel on a pedal;
• rotate the crank until the pedal with your heel on it is in the down position and the
crank arm is stretched.
If your leg is not completely straight and just touching the center of the pedal, your
saddle height needs to be adjusted. If your hips must rock for the heel to reach the
pedal, the saddle is too high.
If your leg is bent at the knee with your heel on the pedal, the saddle is too low.
WARNING: If your seat post projects from the frame beyond the Minimum
Insertion or Maximum Extension mark (see fig. 3) or you cannot touch the bottom

12
YOU-RIDE BARCELONA
4. Fit
5. Introduction
of the seat post through the bottom of the interrupted seat tube with the tip of
your finger without inserting your finger beyond its first knuckle (see fig. 4), the
seat post may break, which could cause you to lose control and fall.
fig. 3 fig. 4
2. Front and back adjustment. The saddle can be adjusted forward or back to
help you get the optimal position on the bike.
5.1 Power Assistant System
This is a power assistant bicycle. It equips 1:1 speed type power assistant transducer
to control the rotation of power system.

13ENGLISH
5. Introduction
5.2 Battery Pack
The electric bicycle equipped Li-ion battery pack (Li-ion 36V/9.6Ah) for 20” folding bike.
5.3 Battery Charger
Warning:
Please use original battery charger for charging the battery otherwise will aect
or damage the battery service life.
When charge the battery charger and the battery should be bigger than 10
centimeters to the wall distance.
While charging the battery please follow the steps orderly:
1) Connecting the charger cable output plug into battery input socket.
2) Connecting the charger cable input plug into city electrical output socket.
3) Charging the battery and the charger red light on.
4) When the green light is lighted the battery is fully charged.
5) Unplug the cable.
5.4 Power On Display
When the power level lower than 50%, please
charge in time. Otherwise, the service life of
battery will be aected because over discharged.
5.5 Motor
36V 250W rear hub speed motor.
5.6 Controller
The controller controls motor speed.

14
YOU-RIDE BARCELONA
5. Introduction
6. Specifications
5.7 Brake
Mechanical disc-brake.
Front brake: disc brake / Rear brake: disc brake
Warning:
Do not lubricate the brake & brake disc!
Checking brake wire constantly; if the wore out or broken it must replace new
one immediately.
5.8 Gear
REAR: SHIMANO 6 speeds
5.9 Instrument Panel
LCD display, manipulate all control system (on/o, help system) on this display,
accessories details as professional display manual.
A. General
1 Dimension: L. x W. x H. 1450×240×900 mm
2Wheel base distance 1005 mm
3Weight 20 kg
4Max. loading 120 kg
5Max. speed ≤25 km/h
6Max. riding distance PAS≥80 km
7Consumption max <250W
B. Battery Pack
1Battery cell Li-ion
2Volume 36V/9.6Ah
3Voltage 36V

15
ENGLISH
6. Specifications
C. Motor
1Motor Rear hub speed Motor
2Power 250W
3Voltage 36V
4Rated Speed (RPM) 200
5Torque 30 N.m
D. Controller
1Low voltage protection 31V ±0.5V
2Max current protection 20A ±1A
E. Battery Charger
1Input voltage AC 100V-240V~1.8A 47-63Hz
2Output voltage DC 42.0V 2.0A
3Charging time 5-6 hours
F. Frame
1Material Alloy
2Size 20
3Height 350 mm
G. Suspension
1Material Alloy
2Size 20
H. Brake
1Model Disc-brake
2Material Alloy
3Brake-Lever Outage

16
YOU-RIDE BARCELONA
7. Tech
7.1 Wheels
Please do not change the wheel by yourself. It needs proper tools and skillful persons.
WARNING: Failure to properly adjust the wheel can cause the wheel to wobble or
disengage, which could cause you to loose control and fall, resulting in serious
injury or death.
7.2 Seat post Quick Release
Some E-bike are equipped with a quick-release seat post binder. The seat post quick-
release binder. While a quick release looks like a long bolt with a lever on one end and
a nut on the other, the quick release uses a cam action to firmly clamp the seat post.
WARNING: Riding with an improperly tightened seat post can allow the saddle to
turn or move and cause you to lose control and fall.
7.3 Brakes
WARNING:
1. Riding with improperly adjusted brakes or worn brake pads is dangerous and can
result in serious injury or death.
2. Applying brakes too hard or too suddenly can lock up a wheel, which could cause
you to lose control and fall. Sudden or excessive application of the front brake may
pitch the rider over the handlebars, which may result in serious injury or death.
3. Some bicycle brakes, such as disc brakes and linear-pull brakes, are extremely
powerful. Take extra care in becoming familiar with these brakes and exercise
particular care when using them.
4. Disc brakes can get extremely hot with extended use. Be careful not to touch a disc
brake until it has had plenty of time to cool.
7.4 Shifting gears
Your multi-speed bicycle will have a derailleur drive train (see 2. below), an
internal gear hub drive train (see 3. below) or, in some special cases, a combination
of the two.
1. HOW A DERAILLEUR DRIVE TRAIN WORKS
If your bicycle has a derailleur drive train, the gear-changing mechanism will have:
• a rear cassette or freewheel sprocket cluster
• a rear derailleur
• usually a front derailleur
• one or two shifters

17
ENGLISH
7. Tech
• one, two or three front sprockets called chainrings
• a drive chain
A. Shifting Gears
Identify the shifters on your bike before reading on. The vocabulary of shifting can be
pretty confusing. A downshift is a shift to a “slower” gear, one which is easier to pedal.
An up shift is a shift to a “faster”, harder to pedal gear. What’s confusing is that
what’s happening at the front derailleur is the opposite of what’s happening at the
rear derailleur (for details, read the instructions on Shifting the Rear Derailleur and
Shifting the Front Derailleur below). For example, you can select a gear which will
make pedaling easier on a hill (make a downshift) in one of two ways: shift the chain
down the gear “steps” to a smaller gear at the front, or up the gear “steps” to a larger
gear at the rear. So, at the rear gear cluster, what is called a downshift looks like an
up shift. The way to keep things straight is to remember that shifting the chain in
towards the centerline of the bike is for accelerating and climbing and is called a
downshift. Moving the chain out or away from the centerline of the bike is for speed
and is called an up shift.
Whether up shifting or downshifting, the bicycle derailleur system design requires that
the drive chain be moving forward and be under at least some tension. A derailleur
will shift only if you are pedaling forward.
Caution: Never move the shifter while pedaling backward, nor pedal backwards
after having moved the shifter. This could jam the chain and cause serious
damage to the bicycle and may cause you to lose control and fall.
B. Shifting the Rear Derailleur
The rear derailleur is controlled by the right shifter. The function of the rear derailleur
is to move the drive chain from one gear sprocket to another. The smaller sprockets
on the gear cluster produce higher gear ratios. Pedaling in the higher gears requires
greater pedaling eort, but takes you a greater distance with each revolution of the
pedal cranks. The larger sprockets produce lower gear ratios. Using them requires
less pedaling eort, but takes you a shorter distance with each pedal crank revolution.
Moving the chain from a smaller sprocket of the gear cluster to a larger sprocket
results in a downshift. Moving the chain from a larger sprocket to a smaller
sprocket results in an upshift. In order for the derailleur to move the chain from one
sprocket to another, the rider must be pedaling forward.
C. Shifting the Front Derailleur:
The front derailleur, which is controlled by the left shifter, shifts the chain between
the larger and smaller chain rings. Shifting the chain onto a smaller chain ring
makes pedaling easier (a downshift). Shifting to a larger chain ring makes pedaling
harder (an up shift).
D. Which gear should I be in?
The combination of largest rear and smallest front gears is for the steepest hills.

18
YOU-RIDE BARCELONA
7. Tech
The smallest rear and largest front combination is for the greatest speed. It is not
necessary to shift gears in sequence. Instead, find the “starting gear” which is right for
your level of ability (a gear which is hard enough for quick acceleration but easy
enough to let you start from a stop without wobbling) and experiment with
upshifting and downshifting to get a feel for the dierent gear combinations. At first,
practice shifting where there are no obstacles, hazards orother trac, until you’ve
built up your confidence. If you have diculties with shifting, the problem could be
mechanical adjustment.
WARNING: Never shift a derailleur onto the largest or the smallest sprocket if the
derailleur is not shifting smoothly. The derailleur may be out of adjustment and
the chain could jam, causing you to lose control and fall.
2. HOW AN INTERNAL GEAR HUB DRIVE TRAIN WORKS
If your bicycle has an internal gear hub drive train, the gear changing mechanism will
consist of:
• a 3, 5, 7 or possibly 12 speed internal gear hub
• one, or sometimes two shifters
• one front sprocket called a chain ring
• a drive chain
A. Shifting internal gear hub gears
Shifting with an internal gear hub drive train is simply a matter of moving the
shifter to the indicated position for the desired gear.
After you have moved the shifter to the gear position of your choice, ease
the pressure on the pedals for an instant to allow the hub to complete the shift.
B. Which gear should I be in?
The numerically lowest gear (1) is for the steepest hills. The numerically largest gear
(3, 5, 7 or 12, depending on the number of speeds of your hub) is for the greatest
speed. Shifting from an easier,
“slower” gear (like 1) to a harder, “faster” gear (like 2 or 3) is called an up shift. Shifting
from a harder, “faster” gear to an easier, “slower” gear is called a downshift. It is not
necessary to shift gears in sequence. Instead, find the “starting gear” for the
conditions — a gear which is hard enough for quick acceleration but easy enough
to let you start from a stop without wobbling — and experiment with up shifting and
downshifting to get a feel for the dierent gears. At first, practice shifting where there
are no obstacles, hazards or other trac, until you’ve built up your confidence. If you
have diculties with shifting, the problem could be mechanical adjustment.

19
ENGLISH
7. Tech
8. LCD Display
7.5 Tires and Tubes
1. Tires
Electric bicycle tires are available in many designs and specifications, ranging from
general-purpose designs to tires designed to perform best under very specific
weather or terrain conditions. If, once you’ve gained experience with your new E-bike,
you feel that a dierent tire might better suit your riding needs.
The size, pressure rating, and on some high-performance tires the specific
recommended use, are marked on the sidewall of the tire. The part of this information
which is most important to you is Tire Pressure.
WARNING: Never inflate a tire beyond the maximum pressure marked on the
tire’s sidewall. Exceeding the recommended maximum pressure may blow the
tire o the rim, which could cause damage to the bike and injury to the rider and
bystanders.
The best and safest way to inflate a bicycle tire to the correct pressure is with a
bicycle pump which has a built-in pressure gauge.
WARNING: There is a safety risk in using gas station air hoses or other air
compressors. They are not made for bicycle tires. They move a large volume of
air very rapidly, and will raise the pressure in your tire very rapidly, which could
cause the tube to explode.
CAUTION: Pencil type automotive tire gauges can be inaccurate and should not
be relied upon for consistent, accurate pressure readings. Instead, use a high
quality dial gauge.
8.1 Specification
· 36V/48V Power Supply
· Rated working current: 10mA
· The maximum working current: 30mA
· O-state leakage current: <1μA
· Working temperature:-20°C~ 60°C
· Storage temperature: -30°C~ 70°C

20
YOU-RIDE BARCELONA
8. LCD Display
8.2 Function Summary and Button Definition
· Function layout
· Function Summary
The LCD display has many functions to meet riders’ needs. The indication elements
are as follows:
· Intelligent battery SOC indication
· Motor output power indication
· Assist level selection and indication
· Speed indication (incl. current speed, Max. speed and Avg. speed)
· ODO and Trip
· Push-assistance function and indication
· Trip time indication
· Backlight ON/OFF and indication
· Error code indication
· Various Parameters Settings (e.g. wheel diameter, speed limit, battery power bar,
assist level, current limit,
· Recover Default Settings
· Button Definition
There are 3 buttons on the display ( ). In this manual, we use ON/OFF
button, UP, DOWN to represent these 3 symbols ( ).
·Installation
Th LCD display can be mounted on the left side of handlebar close to its grip. Adjust the
angle for a good screen view. Cut o the power before connecting the corresponding
connectors between display and controller.
Battery indicator
Light indicator Function list
Boost indicator
Asssistance level
indicator
Speed unit
Range / Power unit
Speed indicator
Text area indication
This manual suits for next models
1
Table of contents
Languages:
Other Youin Scooter manuals

Youin
Youin XL MAX LITE SC6000 User manual

Youin
Youin YOU-GO 2XL User manual

Youin
Youin BK1001 User manual

Youin
Youin You-Go Electric scooter L User manual

Youin
Youin KILIMANJARO BK4000 User manual

Youin
Youin YOU-GO L2 User manual

Youin
Youin XL2 User manual

Youin
Youin SC7000 User manual

Youin
Youin YOU-RIDE VIENA User manual

Youin
Youin SC2000 User manual