sparkfun Little Soundie DEV-14006 User manual

Little Soundie Audio Player Hookup Guide
Introduction
The Little Soundie is a fun and easy-to-use audio playback device breaking out VLSI’s VS1000D audio codec. The
Little Soundie can decode ogg vorbis (license free) and WAV type files.
SparkFun Little Soundie Audio Player
DEV-14006
Product Showcase: Noisy Cricket & Soundie Audio Boards
Y
O
U
R
A
C
C
O
U
N
T
L
O
G
I
N
R
E
G
I
S
T
E
R

Little Soundie Hookup Guide Wishlist SparkFun Wish List
No programming is required to get started but it will help to know binary. There are only a couple steps to set up
your Little Soundie:
Connect to your computer using a micro-USB cable
Press the power/play button
Format the disk when prompted
Drag and drop your .ogg or .wav files
From here, audio playback is a matter of attaching a powered speaker and triggering the GPIO pins at 3.3V logic.
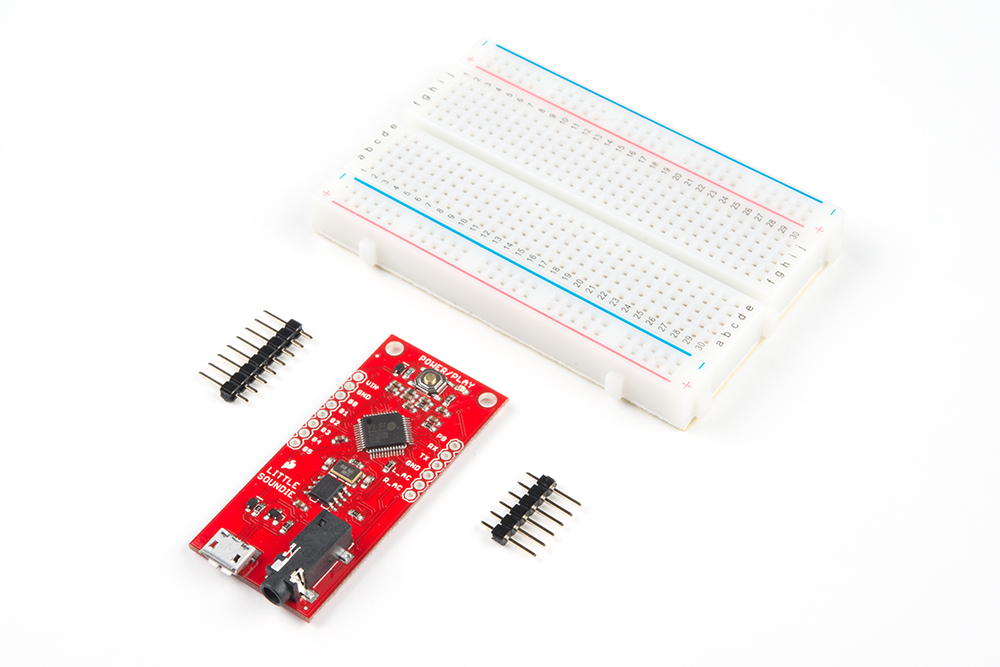
Required Materials
To follow along with this tutorial, you will need the following materials. You may not need everything though
depending on what you have. Add it to your cart, read through the guide, and adjust the cart as necessary.
Break Away Headers - Straight
PRT-00116
A row of headers - break to fit. 40 pins that can be cut to any size. Used with custom PCBs or general custom head…
Breadboard - Self-Adhesive (White)
PRT-12002
This is your tried and true white solderless breadboard. It has 2 power buses, 10 columns, and 30 rows - a total of …
SparkFun FTDI Basic Breakout - 3.3V
DEV-09873
This is the newest revision of our [FTDI Basic](http://www.sparkfun.com/commerce/product_info.php?products_id=…
Hamburger Mini Speaker
COM-14023
This will be a treat for your ears! The Hamburger Mini Speaker is a 3W economical speaker option for any project n…
Tools
You will need a soldering iron, solder, and general soldering accessories.
Solder Lead Free - 100-gram Spool
TOL-09325
Weller WLC100 Soldering Station
TOL-14228

Suggested Reading and Viewing
If you aren’t familiar with the following concepts, we recommend checking out these tutorials before continuing.
You may also want to check out this Audacity Tutorial on YouTube.
How to Solder: Through-Hole Soldering
This tutorial covers everything you need to know about
through-hole soldering.
Binary
Binary is the numeral system of electronics and
programming...so it must be important to learn. But,
what is binary? How does it translate to other numeral
systems like decimal?
Working with Wire
How to strip, crimp and work with wire.
How to Use a Breadboard
Welcome to the wonderful world of breadboards. Here
we will learn what a breadboard is and how to use one
to build your very first circuit.
Audacity: Complete Tutorial Guide to Audacity for Beginners

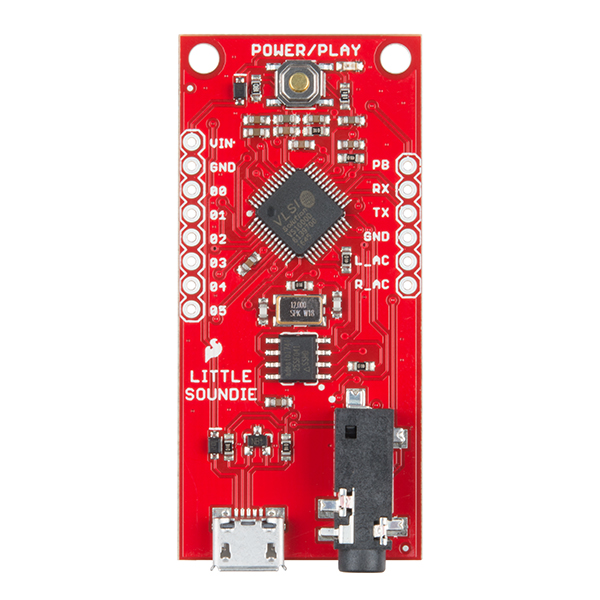
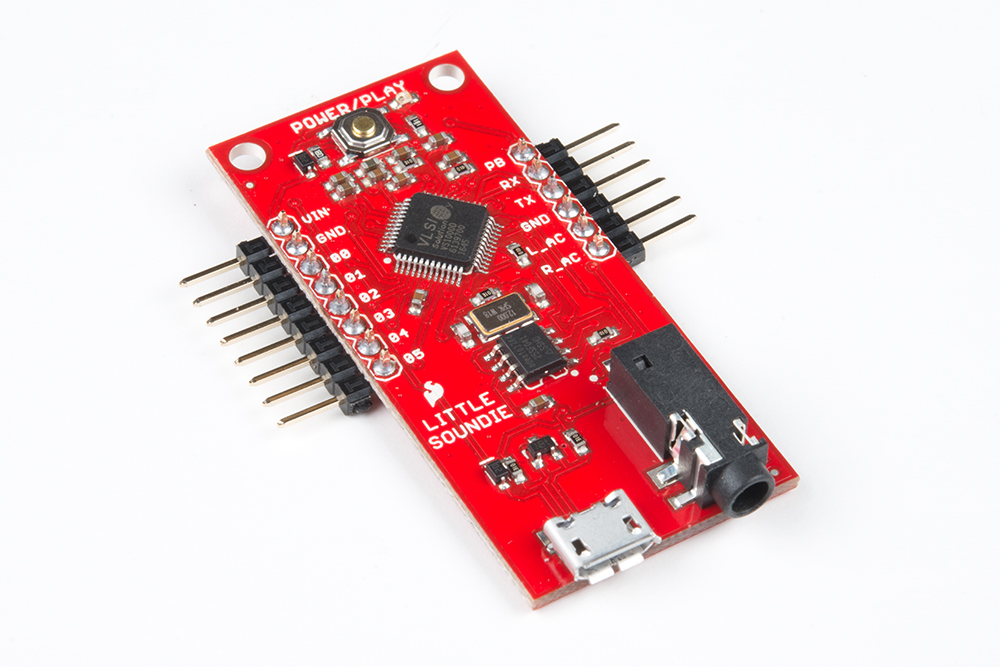
Hardware Overview
Details:
VIN 3.3V-5.5V
All IO 3.3V logic with pull down resistors (not 5V tolerant)
Plays audio stored on 4Mb SPI Flash
Load audio on USB Mass Storage
Uses high-performance license-free Ogg Vorbis decoder for compressed audio
Also plays .WAV type files
Customizable
Line-Out stereo analog output with SNR>90dB
Supports variable bit-rate and sample rates
6 GPIO for triggering audio playback (Binary Coded)
Programming free!
Connect a micro-USB cable from the Little Soundie to a computer and press the “Power/Play” button. You should
now see a mass storage device that you will need to format before you can drag and drop your audio files into.
You can name your files whatever you want to - the audio files are assigned a number based on the order you
place them on your Little Soundie. The hardware maps a GPIO pin to a specific audio file number.
Warning: You cannot power the Little Soundie through USB unless you are transferring files to the mass
storage device. When a USB is inserted, the Little Soundie boots into USB mass storage mode and no audio
files will play. Make sure to eject the storage device and remove it safely to avoid data corruption.
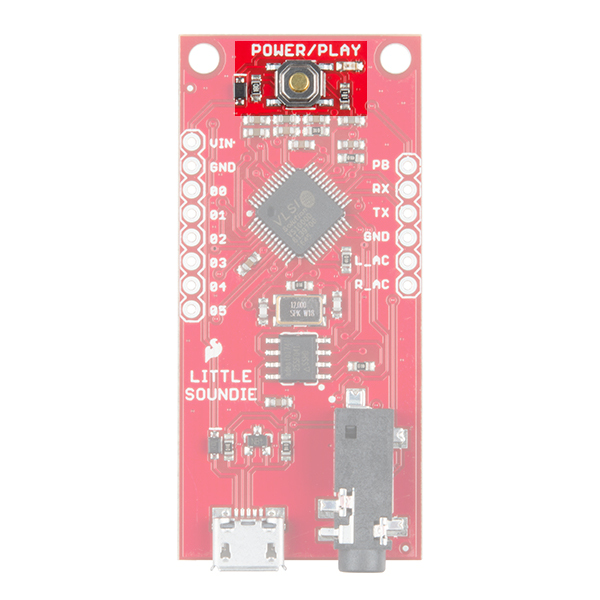
Power/Play Button
The Power/Play button is exactly what it says it is. This button needs to pressed once after connecting to a
computer and needs to be pressed once it is in a project. This button turns on the VS1000D which then triggers all
the internal voltage regulators. The “PB” (Power Button) pin has been broken out in case you want to trigger that

interaction hands-free or remotely. If your project gets stuck in an unknown state, pressing and holding the button
down for 5 seconds will reset the VS1000D.
Trigger Pins
The trigger pins can be found on the left side of the board. A momentary connection to 3.3V will trigger the audio
to playback. Leaving the pin high will cause the file to play on repeat. This is great for leaving a cricket in
someone’s office! In the Audio Files section this is outlined more exhaustively but a HIGH signal on pin 00 will
trigger file 1, on 00 and 01 will trigger file 3, and on 00, 02, and 03 will trigger file 13.
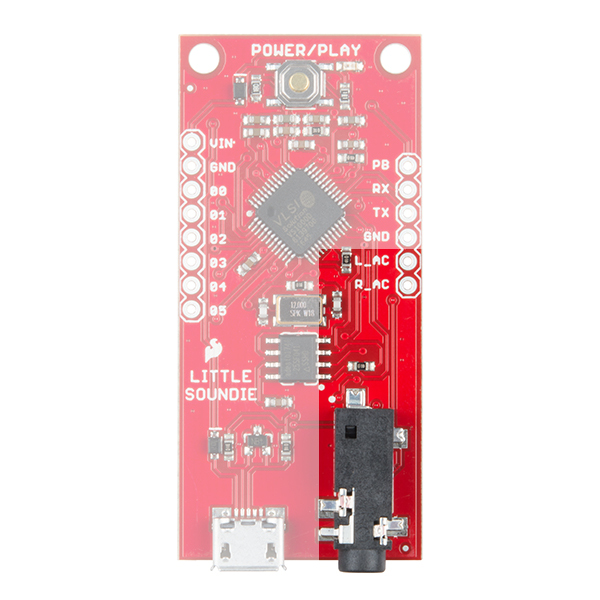
3.5mm Jack
The Little Soundie comes equipped with a 3.5mm jack for attaching a powered speaker. If this does not work for
your application the AC coupled left and right channels have been broken out so you can amplify the signals
individually. We recommend using the Noisy Cricket and a speaker or transducer but you can also use two
SparkFun Mono Audio Amp Breakout. The 3.5mm jack is not for headphones.

VSIDE Pins
If you wanted to change any functionality of the Little Soundie you will need VSIDE. VSIDE is an IDE for VSDSP
signal processor chips like the VS100D. There are several example projects you can build from or simply use.
Programming is through UART so you’ll only need to connect TX, RX, VCC, and GND. You can even use one of
our FTDI breakout boards.
You do not need to reprogram your Little Soundie. The VS1000D programming pins are broken out if you wish to
update the firmware in VSIDE.
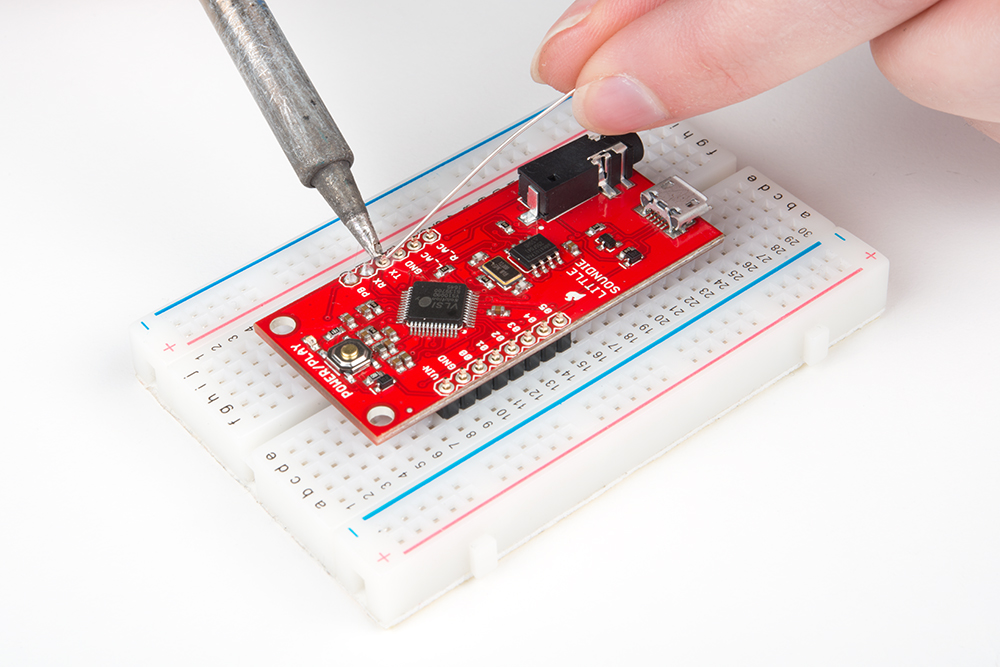
Assembly Tips
Very minimal assembly is required to get started.

To connect the Little Soundie’s 6 I/O pins to external components, apply power, connect audio out, and use the
VS1000D programming pins, you’ll need to do some soldering. It is much easier to solder when the headers are
placed in the breadboard.
For a flat project like a birthday card or a wearable gauntlet I’d recommend soldering the right angle headers
instead.
Audio Files
You can trigger about 20 files (2-3 seconds sound bites each) from the SPI flash storage (USB mass storage). The
total SPI flash size is 4Mb. OGG files take up much less space than .WAV so I recommend using OGG if more
then 5-6 sound bites are to be used.
Quick Note about using WAV: The VS1000 developer library contains a simple WAV decoder, which is
included in the firmware on the Little Soundie. Currently the WAV decoder supports 8-bit ulaw, 8-bit linear
PCM, and 16-bit linear PCM formats.

Ogg Vorbis is an audio file format developed by xiph, an open source multi-media company.
Ogg Vorbis is a fully open, non-proprietary, patent-and-royalty-free, general-purpose
compressed audio format for mid to high quality (8kHz-48.0kHz, 16+ bit, polyphonic)
audio and music at fixed and variable bitrates from 16 to 128 kbps/channel. This
places Vorbis in the same competitive class as audio representations such as MPEG-
4 (AAC), and similar to, but higher performance than MPEG-½ audio layer 3, MPEG-
4 audio (TwinVQ), WMA and PAC.
Information courtesy of xiph.org
There are sites out there that will do the conversion for you without having to open a program, like this one.
Audacity is a great open source resource for all things audio that also has fantastic documentation.
There are several sound effects sites such as Zapsplat and Soundbible. You can grab license-free sound bites
from these locations and then convert to .OGG or .WAV using the methods listed above.
Binary Coded Playback
To get the most out of your device and trigger more sounds than there are available pins, the firmware is set up to
trigger pins based on a binary code. The binary associates an audio file with a specific set of pins held either high
or low. While the pin combinations on Little Soundie can trigger up to 64 files, it is likely you will only be able to fit
about 20 .OGG files on the device. In the binary column below, the number represents which pins on the Little
Soundie are pulled high and which pins are held low. Pin 04 is the first digit and pin 00 is the last. Pin 05 is there in
case you want to reprogram the VS1000D to change the playback functions.
File No. Binary/IO Pin State
1 00001
2 00010
3 00011
4 00100
5 00101
...
16 10000
17 10001
18 10010
19 10011
20 10100
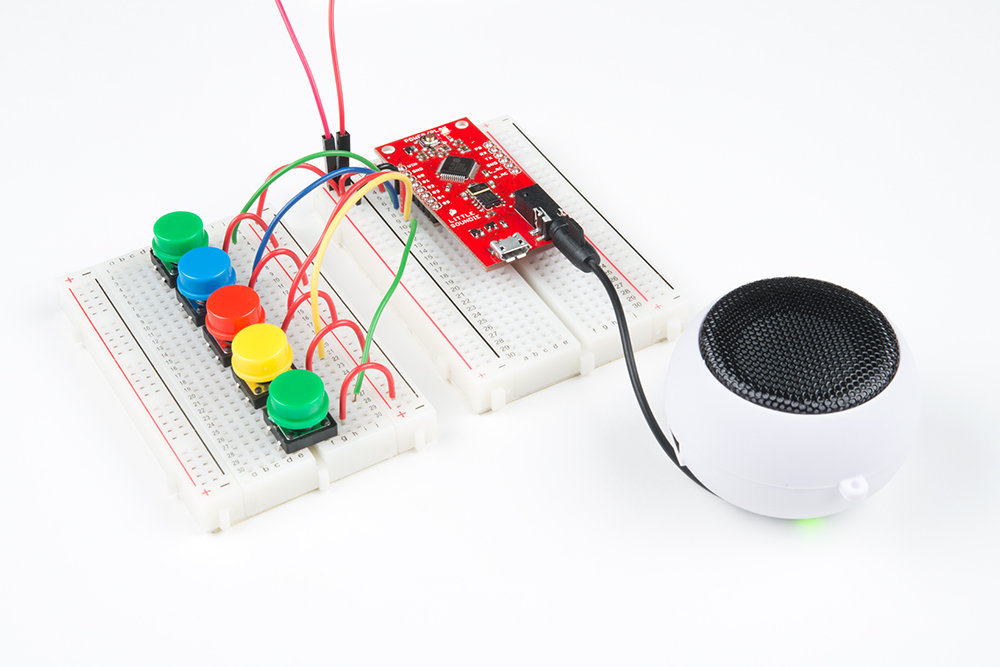
Hardware Example

Little Soundie Hardware Hookup Wish List SparkFun Wish List
The Little Soundie includes almost everything you’ll need to add sound effects to your project. You’ll need, a USB
cable to connect to your computer, a power supply of 3.3V to 5.5V, and either a button, a switch, or anything that
will set a pin HIGH at 3.3V logic.
For this project you will need the following the parts:
Lithium Ion Battery - 850mAh
PRT-13854
These are very slim, extremely light weight batteries based on Lithium Ion chemistry. Each cell outputs a nominal 3…
Solder Lead Free - 100-gram Spool
TOL-09325
This is your basic spool of lead free solder with a water soluble resin core. 0.031" gauge and 100 grams. This is a …
Break Away Headers - Straight
PRT-00116
A row of headers - break to fit. 40 pins that can be cut to any size. Used with custom PCBs or general custom head…
Breadboard - Self-Adhesive (White)
PRT-12002
This is your tried and true white solderless breadboard. It has 2 power buses, 10 columns, and 30 rows - a total of …
Jumper Wires Standard 7" M/M - 30 AWG (30 Pack)
PRT-11026
If you need to knock up a quick prototype there's nothing like having a pile of jumper wires to speed things up, and …
Hamburger Mini Speaker
COM-14023
This will be a treat for your ears! The Hamburger Mini Speaker is a 3W economical speaker option for any project n…
(2) Multicolor Buttons - 4-pack
PRT-14460
Load Your Audio Clip
Load the sound clips you wish to use for this project. Simply connect the board to your computer through USB and
press the power/play button, drag and drop your audio files, and safely remove the hardware via your computer
(don’t just unplug it). Remove the USB. You can not power your project from the USB port - this causes the
VS1000D to boot into “USB, Mass Storage Device” mode.
Power
Since you can power your project from 3.3V to 5.5V, I used a LiPo battery to power this project. Keep in mind that
the I/O is not 5V tolerant.
Buttons
The Little Soundie’s GPIO pins are connected to GND through pull-down resistors. This makes the hardware
wiring a bit easier. For each switch connected to a GPIO pin you’ll need to connect one side of the switch to a
GPIO pin on the Little Soundie and the other side to the 3.3V rail. When the button is pressed the file
corresponding to the pin(s) sent HIGH will trigger playback of the audio file. With this set-up it may appear as
though you can only trigger 5 files, but you can actually trigger 32. Since the GPIO are binary coded, pressing

button 1 will correspond to the first file saved to the drive. If the first and third buttons are pressed at the same time
the fifth file saved to the drive will play. Remember - the naming conventions of your audio files does not matter;
what matters is the order in which they are loaded onto the USB drive.
Hardware Hookup
For a clearer look at the wiring hookup, see the Fritzing diagram below.
Warning: Do not strip your lithium battery's JST connector. Please use M/M jumpers to connect your lithium
battery to the breadboard!
Having a hard time seeing the circuit? Click the image for a closer look!
Once your wiring is set up, plug in a powered speaker to the 3.5mm jack. Alternatively, you can use the left and
right audio signals that are broken out on a Mono Amp Breakout Board or use the Noisy Cricket.
When you are all set up and ready to hear some sounds press the power/play button and you should hear a little
pop in the speaker. This lets you know the VS1000D is powered and ready to go.

This project is easily extensible by replacing the buttons with connections to a microcontrollers I/O. Hands-free,
sensor-based, or remote controlled sound effects are just a Pro-Mini and Arduino sketch away!
Troubleshooting
Little Soundie Not Working?
Try pressing the reset button for 5 seconds. If that doesn’t work you can reflash the VS1000D using VSIDE.
VLSI SOFTWARE PAGE FOR VSIDE
Resources and Going Further
Additional Modes
If you have the VSIDE software downloaded and installed, this would also be a good opportunity to experiment
with other modes of play. There are source code examples to control volume, features like play/pause, FF/RW,
next and previous, as well as other types of triggering modes.
Now that you’ve successfully got your Little Soundie up and running, it’s time to incorporate it into your own
project! For more information, check out the resources below:
Schematic (PDF)
Design Files (ZIP)
VS1000D Datasheet (PDF)
VSIDE
GitHub Repository
Fritzing Diagram
SparkFun Product Showcase: Noisy Cricket & Soundie Audio Boards
If you’re looking for inspiration for other fun projects, check these out:
Interactive Hanging LED Array
Learn how we converted 72 lightbulbs into an
interactive LED array for our conference room.
Hackers in Residence: The Sound Visualizer Pt.
2
An addition to a previous project, this time using a PC
and a custom Java app to create your own music
visualizer using a RGB LED matrix.
http://www.vlsi.fi/en/support/software/vside.html

Table of contents


