sparkfun Wimp User manual

Weather Station Wirelessly Connected to Wunderground
CONTRIBUTORS: NATE
FAVORITE 19
Wimp Weather
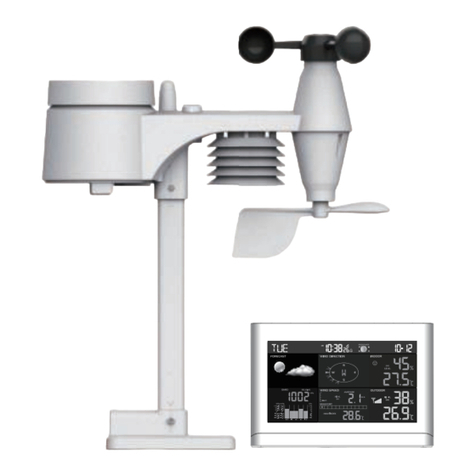
The Wimp is a personal weather station that uses the weather shield along with an Electric Imp to push live weather data up to Wunderground. You can help increase
the accuracy and prediction of weather by adding a weather meter to your house! But why buy an off-the-shelf system when you can build you own? For around
$250 you can build a cutting edge open source station that you have complete control over! All you need is a pile of parts and access to a Wifi network.
Live weather in downtown Boulder
Wunderground makes it really easy to setup your own weather station. You fill out a form, pick a username and password, then get a station ID. Using this ID and
password, we can push weather data with a simple HTTP POST command:
http://rtupdate.wunderground.com/weatherstation/updateweatherstation.php?ID=KCOBOULD115&PASSWORD=SparkFun&dateutc=2014-07-02+03%3A32%3A42&windd
ir=270&windspeedmph=7.0humidity=45.4&tempf=43.1&baromin=29.4161&realtime=1&rtfreq=10&action=updateraw
Copy and paste the above code into a browser, and press return. You should see
success
. Note: You may have to modify the 2014-07-01 to today’s date. You can
then view the weather station data you just posted here. Congrats! You’ve just published your first weather data to the Internet of Things.
The above link shows how to push temperature data to the web, but you can also post a large number of other weather metrics. This example will show you how to
report the following bits of weather:
Temperature
Humidity
Light level
Rain fall
Instantaneous Wind speed + direction
Gusting speed + direction for the last 2 minutes
Gusting speed + direction for the last 60 minutes

Imp Weather Station
SparkFun Wish List
Weather data on data.sparkfun.com
You can also see even more data at the Wimp Weather Stations channel over on data.sparkfun.com. This channel includes some extra bits including battery voltage
level, ambient light level, and local time stamp (including DST correction).
This project builds on quite a few concepts. You may want to read the following tutorials if they are unfamiliar to you:
I2C
Battery Technologies
Analog to Digital Conversion
What’s a Shield? - particularly soldering shield headers
Weather Shield Hook Up Guide
Electric Imp Hook Up Guide
Electronics
Here are the parts we used to build our weather station:
RedBoard
Electric Imp
Electric Imp Shield
Weather Shield
RJ11 Jacks x 2
Weather Meters
Shield Header Kit x 2
Solar Panel
6000mAh LiPo Battery
Sunny Buddy MPPT Solar Charger
Plastic Enclosure (optional)
Light pipe (optional)
Below is a wishlist to make things a bit easier:
(2) RJ11 6-Pin Connector
PRT-00132
Through-hole RJ11 socket with PCB mounting posts. 6-pin connection - housing accepts common telephone connectors/wiring.If you need a board for this c…
SparkFun Weather Shield
DEV-12081
The Weather Shield is an easy to use Arduino shield that grants you access to barometric pressure, relative humidity, luminosity and temperature. Ther…
Weather Meters
SEN-08942
Whether you're an agriculturalist, a professional meteorologist or a weather hobbyist, building your own weather station can be a really rewarding pro…
Electric Imp
WRL-11395
We know what you're thinking, "What's the big deal? Looks like an SD card..." Well this is no SD card! The Electric Imp is a WiFi enabled development …
Electric Imp Shield
DEV-11401
If you aren't familiar with the Electric Imp, it essentially provides an easy, integrated way to connect almost any hardware device both to other devi…
Solar Cell Large - 2.5W
PRT-07840
Packaged solar cell with barrel plug termination. This is a custom cell produced for SFE - not a small toy surplus item! This unit is rated for 8V ope…
(2) Arduino Stackable Header Kit - R3
PRT-11417
These headers are made to work with the Arduino Uno R3, Leonardo and new Arduino boards going forward. They are the perfect height for clearing the US…
Sunny Buddy - MPPT Solar Charger
PRT-12084
This is the Sunny Buddy, a maximum power point tracking (MPPT) solar charger for single-cell LiPo batteries. This MPPT solar charger provide you with …
Polymer Lithium Ion Battery - 6Ah
PRT-08484
If you need some juice, this 6Ahr triple pack is for you. These are very slim, extremely light weight batteries based on the new Polymer Lithium Ion c…
Here are additional parts that SparkFun doesn’t carry:
Solar Shield - We got ours from Ambient Weather. $40, works great!
Camera Tripod - We found a cheap one on Amazon for $20 and chopped the camera mount off.
Handful-o-zipties - If you don’t have these laying around, you’ll need some to secure the various charging and weather meter cables.
2" Hose Clamps - Sometimes called worm clamps, these connect the weather meter to the headless camera tripod. The weather meters should come with a
few to get you started.
Cement ballast - Solid concrete blocks can be found for a few dollars at a hardware store
Eyebolts and concrete anchors - Ballast is useless if you can’t attach to it securely. An eyebolt with a lead anchor makes a very secure connection to the
cement block.
Wire rope, cable clips, and turnbuckle - Wire rope with clips should survive extreme conditions. The turnbuckle was key; it allowed mass to be easily tensioned
onto the tripod.
Galvanized metal bits - To hold the solar panel in place.
The system is designed to be low-power enough that a battery+charger+solar combination will suffice, but, if you have a source of power near your weather station,
feel free to simplify things and use a wall adapter.

RedBoard
This is our Arduino-compatible workhorse. It will gather all the weather data from the weather shield and then pipe serial strings to the Imp.
Weather Shield
You can read all about the Weather Shield over on its hookup guide tutorial. All you really need to know is that it’s capable of reading a huge number of weather
metrics but doesn’t have the capabilities to wirelessly report them.
Electric Imp
You will need to modify the Electric Imp shield in three ways:
Clear the card detect Jumper
Clear and move the TX and RX jumpers
Add jumper from P1 to RST for wireless bootloading
Clear the card detect CD-A0 jumper so that the Arduino can take readings from the wind vane without being affected by the Electric Imp shield. The easiest way to
clear this jumper is to carefully cut the connecting trace with an exacto knife.

Modified for wireless Arduino bootloading
The Electric Imp is a simple to use internet-of-things device. It’s like a Wifi adapter with a bunch of built in bells and whistles. We’ll set it up to receive the serial strings
from the RedBoard and pipe that data to an agent that will in turn post the weather metrics to Wunderground.
Note:
The Electric Imp shield shown above has been modified for wireless bootloading of the Arduino. This saves an immeasurable amount of work! We can
reprogram the Arduino from the comfort of our living room rather than climbing up on a ladder and plugging in a USB cable. To find out more checkout our tutorial on
Wireless Arduino Programming.
Power System
Weather station stackup with solar charger and 2000mAh battery. Final installation uses a 6000mAh battery.
The Wimp runs off a 3.7V 6000mAh LiPo battery. The following measurements were taken for various bits of the project:
Electric Imp (average when posting data every 5 seconds): [4.5mA during sleep for 8s, 80-100mA for 2s] = 22mA avg
Weather Shield: 2mA (with out GPS)
RedBoard: 15mA
The voltage of the LiPo battery will vary from 4.2V when fully charged to 3.2V when very dead. This is acceptable because the RedBoard can operate from 5V down
to about 3V, and both the Electric Imp and the Weather Shield have on board 3.3V regulators. The RedBoard can also detect what the system voltage is at by doing
an analog to digital conversion. Basically we connect the 3.3V rail of the Arduino to one of the analog pins so that we can establish what the battery level voltage
actually is. You can read more about this trick over on the ML8511 UV tutorial.
The average total current consumption of the system is about 39mA. This means on a 6000mAh battery the system will run for about 150 hours or about 6 days. This
should be pretty good for Colorado, with 300 days of sunshine. If the solar cell does get covered in snow, the angle of the panel will help remove it. If all things go
pear shaped and the system dies, you’ve probably got bigger (weather) problems to be worrying about.
If anyone knows of a good article on how to size your battery capacity vs power requirements vs charging system, we would be thrilled to link to it!
Enclosure
Solar Shield with top mount
Creating a good weather station enclosure is difficult. There has been a fair number of comments on the Weather Shield product page and a great number of
discussions and solutions proposed on the Internet.

Our plastic red enclosure is very robust against adverse weather and is easily modified with tools found at home (hand drill, dremel, etc). The problem is that
depending on where you want to mount your weather station, the red box enclosure can heat up quite a bit. In Colorado direct sunlight can be quite intense, so do
plenty of Googling to determine what’s best for you.
For this project, we went all out and used a radiation shield from Ambient Weather. A solar shield allows for free flow of air across the sensors while reflecting the
majority of incident heat. Additionally, this enclosure had plenty of room for our stack-up of Arduino shields, batteries, and solar charger. There are three long
threaded rods with three wing nuts that hold the stack of plastic layers together. Opening the enclosure takes a few minutes but is pain free.
It is not obvious from the photo, but the three cables (wind, rain, and charging) enter into the enclosure through the gap between two of the layers about half way
down the enclosure.
Initially, because the solar shield is open to the elements I was nervous that stray wind and rain would eventually cause the electronics to fail. My wife had the
excellent idea of wrapping the non-sensor bits in cellophane. Two of the layers are wrapped, and the top shield (the weather shield) is left exposed so that the air can
freely move across the sensors. It’s not entirely clear if this method is preventing water damage to the stack of boards, but it puts my mind at ease. When repairs are
needed, I’ll update the tutorial with any future insights.
At first, I thought I would need a light pipe to get light into the enclosure. After installing the station on my roof, I found that plenty of light is passed through the gaps
of the radiation shielding to get a great ambient light reading. If you’re looking for a more scientific reading, you might consider piping light directly.
Someday, it would be fun to gather UV data as well. We’ve got a great ultraviolet light sensor, but the light pipe material may or may not pass UV light specifically. If
you have any information or experience gathering UV readings, we welcome your feedback!
Assembly
First, solder the headers onto the shields, and build up the stack. Not sure how to solder the headers on? Checkout this tutorial. Solder the two RJ11 jacks to the
weather shield as well. These will connect to the cables coming off the weather meters.
Once you are finished soldering, you’re ready to program your weather station!
Firmware

You will need to associate your Imp to your Wifi network. This has been documented a few times. I used my cell phone and their free android app. It took a few tries,
but I was eventually able to get the Imp to link up to my home network.
Note:
This example assumes you are using the latest version of the Arduino IDE on your desktop. If this is your first time using Arduino, please review our
tutorial on installing the Arduino IDE. If you have not previously installed an Arduino library, please check out our installation guide.
Below, you will find example code, but, for the latest version of everything, see the Wimp github repo.

/*
Weather Station using the Electric Imp
By: Nathan Seidle
SparkFun Electronics
Date: October 4th, 2013
License: This code is public domain but you buy me a beer if you use this and we meet someday (Beerware license).
Much of this is based on Mike Grusin's USB Weather Board code.
This code reads all the various sensors (wind speed, direction, rain gauge, humidty, pressure, light, batt_lvl)
and sends it to the imp, which then forwards that data to an Imp Agent on the cloud that does some processing then
bounces the weather data to Wunderground.
The Imp Shield has Card Detect tied to pin A0. We use A0 for wind direction. You will need to cut the trace on the Imp shield.
Current:
130 for 2 seconds while transmitting
~30mA during sleep
Todo:
Reset after 45 days to avoid millis roll over problems
What was the wind direction and speed gust for the last 10 minutes?
Is the 3.3V pin tied on the weather shield or elsewhere?
*/
#include <avr/wdt.h> //We need watch dog for this program
#include <Wire.h> //I2C needed for sensors
#include "MPL3115A2.h" //Pressure sensor
#include "HTU21D.h" //Humidity sensor
//#define ENABLE_LIGHTNING
//SoftwareSerial imp(8, 9); // RX, TX into Imp pin 7
MPL3115A2 myPressure; //Create an instance of the pressure sensor
HTU21D myHumidity; //Create an instance of the humidity sensor
//Hardware pin definitions
//-=-=-=-=-=-=-=-=-=-=-=-=-=-=-=-=-=-=-=-=-=-=-=-=-=-=-=-=
// digital I/O pins
const byte WSPEED = 3;
const byte RAIN = 2;
const byte STAT1 = 7;
#ifdef ENABLE_LIGHTNING
const byte LIGHTNING_IRQ = 4; //Not really an interrupt pin, we will catch it in software
const byte slaveSelectPin = 10; //SS for AS3935
#endif
// analog I/O pins
const byte WDIR = A0;
const byte LIGHT = A1;
const byte BATT = A2;
const byte REFERENCE_3V3 = A3;
//-=-=-=-=-=-=-=-=-=-=-=-=-=-=-=-=-=-=-=-=-=-=-=-=-=-=-=-=
#ifdef ENABLE_LIGHTNING
#include "AS3935.h" //Lighting dtector
#include <SPI.h> //Needed for lighting sensor
byte SPItransfer(byte sendByte);
AS3935 AS3935(SPItransfer, slaveSelectPin, LIGHTNING_IRQ);
#endif
//Global Variables
//-=-=-=-=-=-=-=-=-=-=-=-=-=-=-=-=-=-=-=-=-=-=-=-=-=-=-=-=
long lastSecond; //The millis counter to see when a second rolls by
unsigned int minutesSinceLastReset; //Used to reset variables after 24 hours. Imp should tell us when it's midnight, this is backup.
byte seconds; //When it hits 60, increase the current minute
byte seconds_2m; //Keeps track of the "wind speed/dir avg" over last 2 minutes array of data
byte minutes; //Keeps track of where we are in various arrays of data
byte minutes_10m; //Keeps track of where we are in wind gust/dir over last 10 minutes array of data
long lastWindCheck = 0;
volatile long lastWindIRQ = 0;
volatile byte windClicks = 0;
#ifdef ENABLE_LIGHTNING
byte lightning_distance = 0;
#endif
//We need to keep track of the following variables:
//Wind speed/dir each update (no storage)
//Wind gust/dir over the day (no storage)

//Wind speed/dir, avg over 2 minutes (store 1 per second)
//Wind gust/dir over last 10 minutes (store 1 per minute)
//Rain over the past hour (store 1 per minute)
//Total rain over date (store one per day)
byte windspdavg[120]; //120 bytes to keep track of 2 minute average
#define WIND_DIR_AVG_SIZE 120
int winddiravg[WIND_DIR_AVG_SIZE]; //120 ints to keep track of 2 minute average
float windgust_10m[10]; //10 floats to keep track of largest gust in the last 10 minutes
int windgustdirection_10m[10]; //10 ints to keep track of 10 minute max
volatile float rainHour[60]; //60 floating numbers to keep track of 60 minutes of rain
//These are all the weather values that wunderground expects:
int winddir; // [0-360 instantaneous wind direction]
float windspeedmph; // [mph instantaneous wind speed]
float windgustmph; // [mph current wind gust, using software specific time period]
int windgustdir; // [0-360 using software specific time period]
float windspdmph_avg2m; // [mph 2 minute average wind speed mph]
int winddir_avg2m; // [0-360 2 minute average wind direction]
float windgustmph_10m; // [mph past 10 minutes wind gust mph ]
int windgustdir_10m; // [0-360 past 10 minutes wind gust direction]
float humidity; // [%]
float tempf; // [temperature F]
float rainin; // [rain inches over the past hour)] -- the accumulated rainfall in the past 60 min
volatile float dailyrainin; // [rain inches so far today in local time]
//float baromin = 30.03;// [barom in] - It's hard to calculate baromin locally, do this in the agent
float pressure;
//float dewptf; // [dewpoint F] - It's hard to calculate dewpoint locally, do this in the agent
//These are not wunderground values, they are just for us
float batt_lvl = 11.8;
float light_lvl = 0.72;
// volatiles are subject to modification by IRQs
volatile unsigned long raintime, rainlast, raininterval, rain;
//-=-=-=-=-=-=-=-=-=-=-=-=-=-=-=-=-=-=-=-=-=-=-=-=-=-=-=-=
//Interrupt routines (these are called by the hardware interrupts, not by the main code)
//-=-=-=-=-=-=-=-=-=-=-=-=-=-=-=-=-=-=-=-=-=-=-=-=-=-=-=-=
void rainIRQ()
// Count rain gauge bucket tips as they occur
// Activated by the magnet and reed switch in the rain gauge, attached to input D2
{
raintime = millis(); // grab current time
raininterval = raintime - rainlast; // calculate interval between this and last event
if (raininterval > 10) // ignore switch-bounce glitches less than 10mS after initial edge
{
dailyrainin += 0.011; //Each dump is 0.011" of water
rainHour[minutes] += 0.011; //Increase this minute's amount of rain
rainlast = raintime; // set up for next event
}
}
void wspeedIRQ()
// Activated by the magnet in the anemometer (2 ticks per rotation), attached to input D3
{
if (millis() - lastWindIRQ > 10) // Ignore switch-bounce glitches less than 10ms (142MPH max reading) after the reed switch closes
{
lastWindIRQ = millis(); //Grab the current time
windClicks++; //There is 1.492MPH for each click per second.
}
}
void setup()
{
wdt_reset(); //Pet the dog
wdt_disable(); //We don't want the watchdog during init
Serial.begin(9600);
pinMode(WSPEED, INPUT_PULLUP); // input from wind meters windspeed sensor
pinMode(RAIN, INPUT_PULLUP); // input from wind meters rain gauge sensor
pinMode(WDIR, INPUT);
pinMode(LIGHT, INPUT);
pinMode(BATT, INPUT);
pinMode(REFERENCE_3V3, INPUT);
pinMode(STAT1, OUTPUT);
midnightReset(); //Reset rain totals
//Configure the pressure sensor
myPressure.begin(); // Get sensor online

myPressure.setModeBarometer(); // Measure pressure in Pascals from 20 to 110 kPa
myPressure.setOversampleRate(128); // Set Oversample to the recommended 128
myPressure.enableEventFlags(); // Enable all three pressure and temp event flags
myPressure.setModeActive(); // Go to active mode and start measuring!
//Configure the humidity sensor
myHumidity.begin();
#ifdef ENABLE_LIGHTNING
startLightning(); //Init the lighting sensor
#endif
seconds = 0;
lastSecond = millis();
// attach external interrupt pins to IRQ functions
attachInterrupt(0, rainIRQ, FALLING);
attachInterrupt(1, wspeedIRQ, FALLING);
// turn on interrupts
interrupts();
Serial.println("Wimp Weather Station online!");
reportWeather();
// wdt_enable(WDTO_1S); //Unleash the beast
}
void loop()
{
wdt_reset(); //Pet the dog
//Keep track of which minute it is
if(millis() - lastSecond >= 1000)
{
lastSecond += 1000;
//Take a speed and direction reading every second for 2 minute average
if(++seconds_2m > 119) seconds_2m = 0;
//Calc the wind speed and direction every second for 120 second to get 2 minute average
windspeedmph = get_wind_speed();
winddir = get_wind_direction();
windspdavg[seconds_2m] = (int)windspeedmph;
winddiravg[seconds_2m] = winddir;
//if(seconds_2m % 10 == 0) displayArrays();
//Check to see if this is a gust for the minute
if(windspeedmph > windgust_10m[minutes_10m])
{
windgust_10m[minutes_10m] = windspeedmph;
windgustdirection_10m[minutes_10m] = winddir;
}
//Check to see if this is a gust for the day
//Resets at midnight each night
if(windspeedmph > windgustmph)
{
windgustmph = windspeedmph;
windgustdir = winddir;
}
//Blink stat LED briefly to show we are alive
digitalWrite(STAT1, HIGH);
//reportWeather(); //Print the current readings. Takes 172ms.
delay(25);
digitalWrite(STAT1, LOW);
//If we roll over 60 seconds then update the arrays for rain and windgust
if(++seconds > 59)
{
seconds = 0;
if(++minutes > 59) minutes = 0;
if(++minutes_10m > 9) minutes_10m = 0;
rainHour[minutes] = 0; //Zero out this minute's rainfall amount
windgust_10m[minutes_10m] = 0; //Zero out this minute's gust
minutesSinceLastReset++; //It's been another minute since last night's midnight reset
}
}
//Check to see if there's been lighting
#ifdef ENABLE_LIGHTNING
if(digitalRead(LIGHTNING_IRQ) == HIGH)
{

//We've got something!
lightning_distance = readLightning();
}
#endif
//Wait for the imp to ping us with the ! character
if(Serial.available())
{
byte incoming = Serial.read();
if(incoming == '!')
{
reportWeather(); //Send all the current readings out the imp and to its agent for posting to wunderground. Takes 196ms
//Serial.print("Pinged!");
#ifdef ENABLE_LIGHTNING
//Give imp time to transmit then read any erroneous lightning strike
delay(1000); //Give the Imp time to transmit
readLightning(); //Clear any readings and forget it
#endif
}
else if(incoming == '@') //Special character from Imp indicating midnight local time
{
midnightReset(); //Reset a bunch of variables like rain and daily total rain
//Serial.print("Midnight reset");
}
else if(incoming == '#') //Special character from Imp indicating a hardware reset
{
//Serial.print("Watchdog reset");
delay(5000); //This will cause the system to reset because we don't pet the dog
}
}
//If we go for more than 24 hours without a midnight reset then force a reset
//24 hours * 60 mins/hr = 1,440 minutes + 10 extra minutes. We hope that Imp is doing it.
if(minutesSinceLastReset > (1440 + 10))
{
midnightReset(); //Reset a bunch of variables like rain and daily total rain
//Serial.print("Emergency midnight reset");
}
delay(100); //Update every 100ms. No need to go any faster.
}
//Prints the various arrays for debugging
void displayArrays()
{
//Windgusts in this hour
Serial.println();
Serial.print(minutes);
Serial.print(":");
Serial.println(seconds);
Serial.print("Windgust last 10 minutes:");
for(int i = 0 ; i < 10 ; i++)
{
if(i % 10 == 0) Serial.println();
Serial.print(" ");
Serial.print(windgust_10m[i]);
}
//Wind speed avg for past 2 minutes
/*Serial.println();
Serial.print("Wind 2 min avg:");
for(int i = 0 ; i < 120 ; i++)
{
if(i % 30 == 0) Serial.println();
Serial.print(" ");
Serial.print(windspdavg[i]);
}*/
//Rain for last hour
Serial.println();
Serial.print("Rain hour:");
for(int i = 0 ; i < 60 ; i++)
{
if(i % 30 == 0) Serial.println();
Serial.print(" ");
Serial.print(rainHour[i]);
}
}
//When the imp tells us it's midnight, reset the total amount of rain and gusts
void midnightReset()
{

dailyrainin = 0; //Reset daily amount of rain
windgustmph = 0; //Zero out the windgust for the day
windgustdir = 0; //Zero out the gust direction for the day
minutes = 0; //Reset minute tracker
seconds = 0;
lastSecond = millis(); //Reset variable used to track minutes
minutesSinceLastReset = 0; //Zero out the backup midnight reset variable
}
//Calculates each of the variables that wunderground is expecting
void calcWeather()
{
//current winddir, current windspeed, windgustmph, and windgustdir are calculated every 100ms throughout the day
//Calc windspdmph_avg2m
float temp = 0;
for(int i = 0 ; i < 120 ; i++)
temp += windspdavg[i];
temp /= 120.0;
windspdmph_avg2m = temp;
//Calc winddir_avg2m, Wind Direction
//You can't just take the average. Google "mean of circular quantities" for more info
//We will use the Mitsuta method because it doesn't require trig functions
//And because it sounds cool.
//Based on: http://abelian.org/vlf/bearings.html
//Based on: http://stackoverflow.com/questions/1813483/averaging-angles-again
long sum = winddiravg[0];
int D = winddiravg[0];
for(int i = 1 ; i < WIND_DIR_AVG_SIZE ; i++)
{
int delta = winddiravg[i] - D;
if(delta < -180)
D += delta + 360;
else if(delta > 180)
D += delta - 360;
else
D += delta;
sum += D;
}
winddir_avg2m = sum / WIND_DIR_AVG_SIZE;
if(winddir_avg2m >= 360) winddir_avg2m -= 360;
if(winddir_avg2m < 0) winddir_avg2m += 360;
//Calc windgustmph_10m
//Calc windgustdir_10m
//Find the largest windgust in the last 10 minutes
windgustmph_10m = 0;
windgustdir_10m = 0;
//Step through the 10 minutes
for(int i = 0; i < 10 ; i++)
{
if(windgust_10m[i] > windgustmph_10m)
{
windgustmph_10m = windgust_10m[i];
windgustdir_10m = windgustdirection_10m[i];
}
}
//Calc humidity
humidity = myHumidity.readHumidity();
//float temp_h = myHumidity.readTemperature();
//Serial.print(" TempH:");
//Serial.print(temp_h, 2);
//Calc tempf from pressure sensor
tempf = myPressure.readTempF();
//Serial.print(" TempP:");
//Serial.print(tempf, 2);
//Total rainfall for the day is calculated within the interrupt
//Calculate amount of rainfall for the last 60 minutes
rainin = 0;
for(int i = 0 ; i < 60 ; i++)
rainin += rainHour[i];
//Calc pressure
pressure = myPressure.readPressure();
//Calc dewptf

//Calc light level
light_lvl = get_light_level();
//Calc battery level
batt_lvl = get_battery_level();
//Lightning is checked in the main loop
}
//Returns the voltage of the light sensor based on the 3.3V rail
//This allows us to ignore what VCC might be (an Arduino plugged into USB has VCC of 4.5 to 5.2V)
float get_light_level()
{
float operatingVoltage = averageAnalogRead(REFERENCE_3V3);
float lightSensor = averageAnalogRead(LIGHT);
operatingVoltage = 3.3 / operatingVoltage; //The reference voltage is 3.3V
lightSensor *= operatingVoltage;
return(lightSensor);
}
//Returns the voltage of the raw pin based on the 3.3V rail
//The battery can ranges from 4.2V down to around 3.3V
//This function allows us to ignore what VCC might be (an Arduino plugged into USB has VCC of 4.5 to 5.2V)
//The weather shield has a pin called RAW (VIN) fed through through two 5% resistors and connected to A2 (BATT):
//3.9K on the high side (R1), and 1K on the low side (R2)
float get_battery_level()
{
float operatingVoltage = averageAnalogRead(REFERENCE_3V3);
float rawVoltage = averageAnalogRead(BATT);
operatingVoltage = 3.30 / operatingVoltage; //The reference voltage is 3.3V
rawVoltage *= operatingVoltage; //Convert the 0 to 1023 int to actual voltage on BATT pin
rawVoltage *= 4.90; //(3.9k+1k)/1k - multiply BATT voltage by the voltage divider to get actual system voltage
return(rawVoltage);
}
//Returns the instataneous wind speed
float get_wind_speed()
{
float deltaTime = millis() - lastWindCheck; //750ms
deltaTime /= 1000.0; //Covert to seconds
float windSpeed = (float)windClicks / deltaTime; //3 / 0.750s = 4
windClicks = 0; //Reset and start watching for new wind
lastWindCheck = millis();
windSpeed *= 1.492; //4 * 1.492 = 5.968MPH
/* Serial.println();
Serial.print("Windspeed:");
Serial.println(windSpeed);*/
return(windSpeed);
}
int get_wind_direction()
// read the wind direction sensor, return heading in degrees
{
unsigned int adc;
adc = averageAnalogRead(WDIR); // get the current reading from the sensor
// The following table is ADC readings for the wind direction sensor output, sorted from low to high.
// Each threshold is the midpoint between adjacent headings. The output is degrees for that ADC reading.
// Note that these are not in compass degree order! See Weather Meters datasheet for more information.
if (adc < 380) return (113);
if (adc < 393) return (68);
if (adc < 414) return (90);
if (adc < 456) return (158);
if (adc < 508) return (135);
if (adc < 551) return (203);
if (adc < 615) return (180);
if (adc < 680) return (23);
if (adc < 746) return (45);
if (adc < 801) return (248);
if (adc < 833) return (225);

if (adc < 878) return (338);
if (adc < 913) return (0);
if (adc < 940) return (293);
if (adc < 967) return (315);
if (adc < 990) return (270);
return (-1); // error, disconnected?
}
//Reports the weather string to the Imp
void reportWeather()
{
calcWeather(); //Go calc all the various sensors
Serial.print("$,winddir=");
Serial.print(winddir);
Serial.print(",windspeedmph=");
Serial.print(windspeedmph, 1);
Serial.print(",windgustmph=");
Serial.print(windgustmph, 1);
Serial.print(",windgustdir=");
Serial.print(windgustdir);
Serial.print(",windspdmph_avg2m=");
Serial.print(windspdmph_avg2m, 1);
Serial.print(",winddir_avg2m=");
Serial.print(winddir_avg2m);
Serial.print(",windgustmph_10m=");
Serial.print(windgustmph_10m, 1);
Serial.print(",windgustdir_10m=");
Serial.print(windgustdir_10m);
Serial.print(",humidity=");
Serial.print(humidity, 1);
Serial.print(",tempf=");
Serial.print(tempf, 1);
Serial.print(",rainin=");
Serial.print(rainin, 2);
Serial.print(",dailyrainin=");
Serial.print(dailyrainin, 2);
Serial.print(","); //Don't print pressure= because the agent will be doing calcs on the number
Serial.print(pressure, 2);
Serial.print(",batt_lvl=");
Serial.print(batt_lvl, 2);
Serial.print(",light_lvl=");
Serial.print(light_lvl, 2);
#ifdef LIGHTNING_ENABLED
Serial.print(",lightning_distance=");
Serial.print(lightning_distance);
#endif
Serial.print(",");
Serial.println("#,");
//Test string
//Serial.println("$,winddir=270,windspeedmph=0.0,windgustmph=0.0,windgustdir=0,windspdmph_avg2m=0.0,winddir_avg2m=12,windgustmph_10m=0.0,wi
ndgustdir_10m=0,humidity=998.0,tempf=-1766.2,rainin=0.00,dailyrainin=0.00,-999.00,batt_lvl=16.11,light_lvl=3.32,#,");
}
//Takes an average of readings on a given pin
//Returns the average
int averageAnalogRead(int pinToRead)
{
byte numberOfReadings = 8;
unsigned int runningValue = 0;
for(int x = 0 ; x < numberOfReadings ; x++)
runningValue += analogRead(pinToRead);
runningValue /= numberOfReadings;
return(runningValue);
}
//The following is for the AS3935 lightning sensor
#ifdef ENABLE_LIGHTNING
byte readLightning(void)
{
byte distance = 0;
//Check to see if we have lightning!
if(digitalRead(LIGHTNING_IRQ) == HIGH)
{
// first step is to find out what caused interrupt
// as soon as we read interrupt cause register, irq pin goes low
int irqSource = AS3935.interruptSource();
// returned value is bitmap field, bit 0 - noise level too high, bit 2 - disturber detected, and finally bit 3 - lightning!
if (irqSource & 0b0001)
{

//Serial.println("Noise level too high, try adjusting noise floor");
}
if (irqSource & 0b0100)
{
//Serial.println("Disturber detected");
distance = 64;
}
if (irqSource & 0b1000)
{
// need to find how far that lightning stroke, function returns approximate distance in kilometers,
// where value 1 represents storm in detector's near victinity, and 63 - very distant, out of range stroke
// everything in between is just distance in kilometers
distance = AS3935.lightningDistanceKm();
//Serial.print("Lightning: ");
//Serial.print(lightning_distance, DEC);
//Serial.println(" km");
//The AS3935 remembers the nearest strike distance. For example 15km away then 10, then overhead all following
//distances (10, 20, 30) will instead output as 'Storm overhead, watch out!'. Resetting the chip erases this.
lightning_init();
}
}
return(distance);
}
void startLightning(void)
{
pinMode(slaveSelectPin, OUTPUT); // set the slaveSelectPin as an output:
pinMode(LIGHTNING_IRQ, INPUT_PULLUP); //Set IRQ pin as input
SPI.begin(); //Start SPI
SPI.setDataMode(SPI_MODE1); // NB! chip uses SPI MODE1
SPI.setClockDivider(SPI_CLOCK_DIV16); //Uno 16MHz / 16 = 1MHz
SPI.setBitOrder(MSBFIRST); // and chip is MSB first
lightning_init(); //Setup the values for the sensor
Serial.println("Lightning sensor online");
}
void lightning_init()
{
AS3935.reset(); // reset all internal register values to defaults
// if lightning detector can not tune tank circuit to required tolerance,
// calibration function will return false
if(!AS3935.calibrate())
{
Serial.println("Tuning out of range, check your wiring, your sensor and make sure physics laws have not changed!");
}
AS3935.setOutdoors(); //The weather station is outdoors
AS3935.enableDisturbers(); //We want to know if a man-made event happens
AS3935.setNoiseFloor(3); //See table 16 of the AS3935 datasheet. 4-6 works. This was found through experimentation.
//printAS3935Registers();
}
/*void printAS3935Registers()
{
int noiseFloor = AS3935.getNoiseFloor();
int spikeRejection = AS3935.getSpikeRejection();
int watchdogThreshold = AS3935.getWatchdogThreshold();
Serial.print("Noise floor is: ");
Serial.println(noiseFloor, DEC);
Serial.print("Spike rejection is: ");
Serial.println(spikeRejection, DEC);
Serial.print("Watchdog threshold is: ");
Serial.println(watchdogThreshold, DEC);
}*/
byte SPItransfer(byte sendByte)
{
return SPI.transfer(sendByte);
}
#endif

Load the code onto your RedBoard (or Arduino of choice). Open a terminal window at 9600bps. You should see new weather data upon power up and every time
you send the
!
character.

// This agent gathers data from the device and pushes to Wunderground
// Talks to wunderground rapid fire server (updates of up to once every 10 sec)
// by: Nathan Seidle
// SparkFun Electronics
// date: October 4, 2013
// license: BeerWare
// Please use, reuse, and modify this code as you need.
// We hope it saves you some time, or helps you learn something!
// If you find it handy, and we meet some day, you can buy me a beer or iced tea in return.
// Example incoming serial string from device:
// $,winddir=270,windspeedmph=0.0,windgustmph=0.0,windgustdir=0,windspdmph_avg2m=0.0,winddir_avg2m=12,windgustmph_10m=0.0,windgus
t
local STATION_ID = "KCOBOULD95" ;
local STATION_PW = "password"; //Note that you must only use alphanumerics in your password. Http post won't work otherwise.
local sparkfun_publicKey = "dZ4EVmE8yGCRGx5XRX1W" ;
local sparkfun_privateKey = "privatekey" ;
local LOCAL_ALTITUDE_METERS = 1638; //Accurate for the roof on my house
local midnightReset = false; //Keeps track of a once per day cumulative rain reset
local local_hour_offset = 7; //Mountain time is 7 hours off GMT
const MAX_PROGRAM_SIZE = 0x20000;
const ARDUINO_BLOB_SIZE = 128;
program <- null;
//------------------------------------------------------------------------------------------------------------------------------
html <- @"<HTML>
<BODY>
<form method='POST' enctype='multipart/form-data'>
Program the ATmega328 via the Imp.<br/><br/>
Step 1: Select an Intel HEX file to upload: <input type=file name=hexfile><br/>
Step 2: <input type=submit value=Press> to upload the file.<br/>
Step 3: Check out your Arduino<br/>
</form>
</BODY>
</HTML>
";
//------------------------------------------------------------------------------------------------------------------------------
// Parses a HTTP POST in multipart/form-data format
function parse_hexpost (req, res) {
local boundary = req.headers["content-type" ].slice(30);
local bindex = req.body.find(boundary);
local hstart = bindex + boundary.len();
local bstart = req.body.find("\r\n\r\n", hstart) + 4;
local fstart = req.body.find("\r\n\r\n--" + boundary + "--", bstart);
return req.body.slice(bstart, fstart);
}
//------------------------------------------------------------------------------------------------------------------------------
// Parses a hex string and turns it into an integer
function hextoint(str) {
local hex = 0x0000;
foreach (ch in str) {
local nibble;
if (ch >= '0' && ch <= '9') {
nibble = (ch - '0');
} else {
nibble = (ch - 'A' + 10);
}
hex = (hex << 4) + nibble;
}
return hex;
}
//------------------------------------------------------------------------------------------------------------------------------
// Breaks the program into chunks and sends it to the device
function send_program () {
if (program != null && program.len() > 0) {
local addr = 0;
local pline = {};
local max_addr = program.len();
device .send("burn", {first=true});
while (addr < max_addr) {
program .seek(addr);

pline .data <- program.readblob(ARDUINO_BLOB_SIZE );
pline .addr <- addr / 2; // Address space is 16-bit
device .send("burn", pline)
addr += pline.data.len();
}
device .send("burn", {last=true});
}
}
//------------------------------------------------------------------------------------------------------------------------------
// Parse the hex into an array of blobs
function parse_hexfile (hex) {
try {
// Look at this doc to work out what we need and don't. Max is about 122kb.
// https://bluegiga.zendesk.com/entries/42713448--REFERENCE-Updating-BLE11x-firmware-using-UART-DFU
server .log("Parsing hex file" );
// Create and blank the program blob
program = blob(0x20000); // 128k maximum
for (local i = 0; i < program.len(); i++) program.writen(0x00, 'b');
program .seek(0);
local maxaddress = 0, from = 0, to = 0, line = "", offset = 0x00000000;
do {
if (to < 0 || to == null || to >= hex.len()) break;
from = hex.find(":", to);
if (from < 0 || from == null || from+1 >= hex.len()) break;
to = hex.find(":", from+1);
if (to < 0 || to == null || from >= to || to >= hex.len()) break;
line = hex.slice(from+1, to);
// server.log(format("[%d,%d] => %s", from, to, line));
if (line.len() > 10) {
local len = hextoint(line.slice(0, 2));
local addr = hextoint(line.slice(2, 6));
local type = hextoint(line.slice(6, 8));
// Ignore all record types except 00, which is a data record.
// Look out for 02 records which set the high order byte of the address space
if (type == 0) {
// Normal data record
} else if (type == 4 && len == 2 && addr == 0 && line.len() > 12) {
// Set the offset
offset = hextoint(line.slice(8, 12)) << 16;
if (offset != 0) {
server .log(format("Set offset to 0x%08X" , offset));
}
continue;
} else {
server .log("Skipped: " + line)
continue;
}
// Read the data from 8 to the end (less the last checksum byte)
program .seek(offset + addr)
for (local i = 8; i < 8+(len*2); i+=2) {
local datum = hextoint (line.slice(i, i+2));
program .writen(datum, 'b')
}
// Checking the checksum would be a good idea but skipped for now
local checksum = hextoint(line.slice(-2));
/// Shift the end point forward
if (program.tell() > maxaddress ) maxaddress = program.tell();
}
} while (from != null && to != null && from < to);
// Crop, save and send the program
server .log(format("Max address: 0x%08x" , maxaddress ));
program .resize(maxaddress);
send_program ();
server .log("Free RAM: " + (imp.getmemoryfree ()/1024) + " kb")
return true;
} catch (e) {
server .log(e)
return false;
}

}
//------------------------------------------------------------------------------------------------------------------------------
// Handle the agent requests
http.onrequest(function (req, res) {
// return res.send(400, "Bad request");
// server.log(req.method + " to " + req.path)
if (req.method == "GET") {
res.send(200, html);
} else if (req.method == "POST") {
if ("content-type" in req.headers) {
if (req.headers["content-type" ].len() >= 19
&& req.headers["content-type" ].slice(0, 19) == "multipart/form-data" ) {
local hex = parse_hexpost (req, res);
if (hex == "") {
res .header("Location", http.agenturl());
res .send(302, "HEX file uploaded" );
} else {
device .on("done", function(ready) {
res .header("Location", http.agenturl());
res .send(302, "HEX file uploaded" );
server .log("Programming completed" )
})
server .log("Programming started" )
parse_hexfile (hex);
}
} else if (req.headers["content-type" ] == "application/json" ) {
local json = null;
try {
json = http.jsondecode(req.body);
} catch (e) {
server .log("JSON decoding failed for: " + req.body);
return res.send(400, "Invalid JSON data" );
}
local log = "";
foreach (k,v in json) {
if (typeof v == "array" || typeof v == "table") {
foreach (k1,v1 in v) {
log += format("%s[%s] => %s, " , k, k1, v1.tostring());
}
} else {
log += format("%s => %s, " , k, v.tostring());
}
}
server .log(log)
return res.send(200, "OK");
} else {
return res.send(400, "Bad request" );
}
} else {
return res.send(400, "Bad request" );
}
}
})
//------------------------------------------------------------------------------------------------------------------------------
// Handle the device coming online
device.on("ready", function(ready) {
if (ready) send_program ();
});
//------------------------------------------------------------------------------------------------------------------------------
// When we hear something from the device, split it apart and post it
device.on("postToInternet" , function(dataString) {
//server.log("Incoming: " + dataString);
//Break the incoming string into pieces by comma
a <- mysplit(dataString,',');
if(a[0] != "$" || a[16] != "#")
{
server .log(format("Error: incorrect frame received (%s, %s)" , a[0], a[16]));
server .log(format("Received: %s)" , dataString ));
return(0);
}
//Pull the various bits from the blob

//a[0] is $
local winddir = a[1];
local windspeedmph = a[2];
local windgustmph = a[3];
local windgustdir = a[4];
local windspdmph_avg2m = a[5];
local winddir_avg2m = a[6];
local windgustmph_10m = a[7];
local windgustdir_10m = a[8];
local humidity = a[9];
local tempf = a[10];
local rainin = a[11];
local dailyrainin = a[12];
local pressure = a[13].tofloat();
local batt_lvl = a[14];
local light_lvl = a[15];
//a[16] is #
server.log(tempf);
//Correct for the actual orientation of the weather station
//For my station the north indicator is pointing due west
winddir = windCorrect (winddir);
windgustdir = windCorrect (windgustdir );
winddir_avg2m = windCorrect (winddir_avg2m );
windgustdir_10m = windCorrect (windgustdir_10m );
//Correct for negative temperatures. This is fixed in the latest libraries: https://learn.sparkfun.com/tutorials/mpl3115a2-pr
e
currentTemp <- mysplit(tempf, '=');
local badTempf = currentTemp [1].tointeger();
if(badTempf > 200)
{
local tempc = (badTempf - 32) * 5/9; //Convert F to C
tempc = (tempc<<24)>>24; //Force this 8 bit value into 32 bit variable
tempc = ~(tempc) + 1; //Take 2s compliment
tempc *= -1; //Assign negative sign
tempf = tempc * 9/5 + 32; //Convert back to F
tempf = "tempf=" + tempf; //put a string on it
}
//Correct for humidity out of bounds
currentHumidity <- mysplit(humidity, '=');
if(currentHumidity [1].tointeger() > 99) humidity = "humidity=99" ;
if(currentHumidity [1].tointeger() < 0) humidity = "humidity=0" ;
//Turn Pascal pressure into baromin (Inches Mercury at Altimeter Setting)
local baromin = "baromin=" + convertToInHg (pressure);
//Calculate a dew point
currentHumidity <- mysplit(humidity, '=');
currentTempF <- mysplit(tempf, '=');
local dewptf = "dewptf=" + calcDewPoint (currentHumidity [1].tointeger(), currentTempF [1].tointeger());
//Now we form the large string to pass to wunderground
local strMainSite = "http://rtupdate.wunderground.com/weatherstation/updateweatherstation.php" ;
local strID = "ID=" + STATION_ID;
local strPW = "PASSWORD=" + STATION_PW ;
//Form the current date/time
//Note: .month is 0 to 11!
local currentTime = date(time(), 'u');
local strCT = "dateutc=";
strCT += currentTime .year + "-" + format("%02d", currentTime .month + 1) + "-" + format("%02d", currentTime .day);
strCT += "+" + format("%02d", currentTime .hour) + "%3A" + format("%02d", currentTime .min) + "%3A" + format("%02d", currentTime
//Not sure if wunderground expects the + or a %2B. We shall see.
//server.log(strCT);
local bigString = strMainSite ;
bigString += "?" + strID;
bigString += "&" + strPW;
bigString += "&" + strCT;
bigString += "&" + winddir;
bigString += "&" + windspeedmph ;
bigString += "&" + windgustmph ;
bigString += "&" + windgustdir ;
bigString += "&" + windspdmph_avg2m ;
bigString += "&" + winddir_avg2m ;
bigString += "&" + windgustmph_10m ;
bigString += "&" + windgustdir_10m ;
bigString += "&" + humidity;
bigString += "&" + tempf;
bigString += "&" + rainin;
bigString += "&" + dailyrainin ;

bigString += "&" + baromin;
bigString += "&" + dewptf;
//bigString += "&" + weather;
//bigString += "&" + clouds;
bigString += "&" + "softwaretype=SparkFunWeatherImp" ; //Cause we can
bigString += "&" + "realtime=1" ; //You better believe it!
bigString += "&" + "rtfreq=10" ; //Set rapid fire freq to once every 10 seconds
bigString += "&" + "action=updateraw" ;
//server.log("string to send: " + bigString);
//Push to Wunderground
local request = http.post(bigString, {}, "");
local response = request.sendsync();
server.log("Wunderground response = " + response.body);
server.log(batt_lvl + " " + light_lvl );
//Get the local time that this measurement was taken
local localMeasurementTime = "measurementtime=" + calcLocalTime ();
//Now post to data.sparkfun.com
//Here is a list of datums: measurementTime, winddir, windspeedmph, windgustmph, windgustdir, windspdmph_avg2m, winddir_avg2m
,
//Now we form the large string to pass to sparkfun
local strSparkFun = "http://data.sparkfun.com/input/" ;
local privateKey = "private_key=" + sparkfun_privateKey ;
bigString = strSparkFun ;
bigString += sparkfun_publicKey ;
bigString += "?" + privateKey ;
bigString += "&" + localMeasurementTime ;
bigString += "&" + winddir;
bigString += "&" + windspeedmph ;
bigString += "&" + windgustmph ;
bigString += "&" + windgustdir ;
bigString += "&" + windspdmph_avg2m ;
bigString += "&" + winddir_avg2m ;
bigString += "&" + windgustmph_10m ;
bigString += "&" + windgustdir_10m ;
bigString += "&" + humidity;
bigString += "&" + tempf;
bigString += "&" + rainin;
bigString += "&" + dailyrainin ;
bigString += "&" + baromin;
bigString += "&" + dewptf;
bigString += "&" + batt_lvl;
bigString += "&" + light_lvl;
//Push to SparkFun
local request = http.get(bigString);
local response = request.sendsync();
server.log("SparkFun response = " + response.body);
//Check to see if we need to send a midnight reset
checkMidnight (1);
server.log("Update complete!" );
});
//Given a string, break out the direction, correct by some value
//Return a string
function windCorrect (direction) {
temp <- mysplit(direction, '=');
//My station's North arrow is pointing due west
//So correct by 90 degrees
local dir = temp[1].tointeger() - 90;
if(dir < 0) dir += 360;
return(temp[0] + "=" + dir);
}
//With relative humidity and temp, calculate a dew point
//From: http://ag.arizona.edu/azmet/dewpoint.html
function calcDewPoint (relativeHumidity , tempF) {
local tempC = (tempF - 32) * 5 / 9.0;
local L = math.log(relativeHumidity / 100.0);
local M = 17.27 * tempC;
local N = 237.3 + tempC;
local B = (L + (M / N)) / 17.27;
local dewPoint = (237.3 * B) / (1.0 - B);
//Result is in C
//Convert back to F
Table of contents
