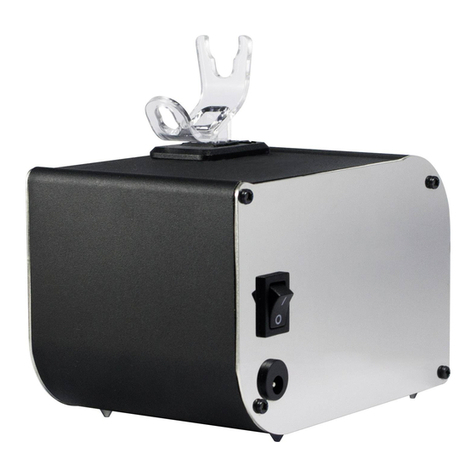
Sparmax Beetle VDC-2 User manual

User’s Manual
Copyright © 2019 ANEST IWATA SPARMAX Co., Ltd. All rights reserved.
EN_MAN_Beetle_A4_20190723.1
www.SPARMAXair.com
1/2
IMPORTANT SAFETY INFORMATION
• When using electrical appliances, basic precautions should always be followed to reduce the risk of damage, fire, electric shock, personal injury
or property damage.
• Only plug this product’s power cord into a compatible power outlet. NOTE: This product is compatible with any AC voltage (100 – 240 V ).
• Do not overload wall outlets, extension cords, or power strips beyond their capacity. This could cause a circuit breaker trip, insufficient voltage
supply, or an electrical fire.
• To avoid electric shock, never operate the compressor outdoors when raining, in wet conditions, or near open water sources.
• Always place the compressor on a stable and flat surface.
• Always remain in attendance when the compressor is in operation.
• Never place objects against, or on top of, the compressor. Operate the compressor in an open area without any obstructions that would restrict
the flow of fresh air into the compressor.
• Exceeding the pressure rating of pneumatic tools, such as airbrushes, spray guns, or air operated devices, could damage the tool and could also
cause serious personal injury. Never exceed the maximum allowable pressure rating recommended by your pneumatic tool’s manufacturer.
• Verify that the compressor is operating properly before using the compressor for human applications (such as the application of cosmetics).
• Do not insert any foreign objects into the openings of the compressor.
• Do not disassemble the compressor or attempt to modify the compressor in any way.
can not be held responsible for damage or injury caused by improper use or modification of this device.
Product Overview
Parts List
1 Pressure adjustment knob
2 Air Outlet
3 On/Off Button
Foot Stand4
5 Airbrush Holder
6DC Power Jack
7
8
DC Power Supply
PU Hose
Specifications
Model: DC-25N
Airflow: 6 lpm at 10 psi / 0.21 cfm at 0.69 bar
Preset max pressure: 2.1 bar / 30 psi
Dimensions: L12.4 x W10 x H11.4 cm (4.9”x 3.9” x 4.5”)
Weight: 0.6 kg / 1.35 lbs
* Air flow range indicated shows average values over different voltages and frequencies. There will be tolerance for each unit and current fluctuation also affects
actual airflow performance.
This manual contains important information on product safety, set-up, operation, and maintenance. For optimum performance and safety,
read this manual carefully before using this product. Please keep this manual in a safe place for future reference.
Front view Rear view Included accessories
1
2
5
7
8
6
3
4

User’s Manual
Copyright © 2019 ANEST IWATA SPARMAX Co., Ltd. All rights reserved.
EN_MAN_Beetle_A4_20190723.1
www.SPARMAXair.com
2/2
Product Set Up
1. First use: Carefully unpack the unit, verify that all parts listed in the “Parts List” are present, and visually inspect for damage. If there are any signs of
damage or if any parts are missing, do not use the product. Contact your retailer or supplier immediately.
2. Place the compressor in a clean, dry, and well-ventilated area that has adequate air circulation.
3. Connect flower shape adaptor of the PU Hose onto the compressor’s Air Outlet , and the other end of the hose to your airbrush. NOTE: Different
adaptors may be required for different airbrush brands and models. If your airbrush needs an adaptor, please contact your local retailer or supplier.
4. Plug the appropriate end of the DC Power Supply into the compressor.
The Beetle uses the Sparmax Smart-Stop design, which automatically stops the compressor when a SPARMAX airbrush is placed
into the holder on the compressor. This energy saving design allows users to stop the compressor when not in use. This reduces
pressure fluctuations when compared to using an auto on/off switch and regulator. The Smart-Stop is an intuitive design which
aims to improve user experience whilst extending the lifetime of the compressor.
*Patented Worldwide: M505546, US20160131129A1, GB2532098, 2015100687, 201420781435.X, 2014-006061, Nr.202014106203.3
Product Operation
1. Suggest not to use in surrounding temperature of below 10˚C, and for indoor use only.
2. Insert the wall plug of the DC Power Supply into a working power outlet. Turn the compressor on by pressing the On/Off Button. The Button
will light up with the power on.
3.
4.
5. To avoid damage, do not expose the Smart-Stop airbrush holder to water or any forms of liquid.
6. Avoid touching any exposed metal parts on the compressor during, or immediately after, operation. The compressor may be warm to the touch for
several minutes after operation.
7. It is recommended that the compressor run continuously for no more than 40 minutes. After 40 minutes of continuous operation, use the On/Off
Button to turn off the unit or place the airbrush into the holder to pause the compressor. Allow the unit to cool for 10 to 15 minutes before turning the
compressor back on.
8. After each use, make sure the unit is turned off and unplugged. Also be sure to release any remaining air from the compressor by depressing the
airbrush trigger.
Troubleshooting
If airflow is not sufficient …
• Check for air leaks where air can be heard escaping, or apply a soap and water solution on all connections. Resulting bubbles indicate an air leak.
Tighten fittings where necessary.
• PTFE seal tape is recommended for all threaded connections.
• Replace the Air Hose if the hose is torn or damaged.
If compressor shuts off frequently, the motor fails to come up to full speed or becomes hotter than usual during operation …
• Disconnect other appliances that are using the same power outlet.
• Avoid using extension cords.
If problems arise which you cannot solve with the information provided above, please contact your retailer or supplier for assistance. Do not
attempt to fix the device yourself. Improper operation and/or dismantling of the device may damage the compressor. If any parts/accessories are
damaged, please contact your retailer or supplier for replacement or repair.
To adjust air pressure, turn the pressure adjustment knob clockwise to increase air
pressure, or counter-clockwise to decrease air pressure.
NOTE: Adjust pressure only when the compressor is turned on and connected to an airbrush, with
trigger depressed.
When the airbrush is not in use, place it into the Airbrush Holder, the compressor
will stop due to the Smart-Stop design. The compressor will start working again at
previous adjusted pressure when the airbrush is taken off the holder.
NOTE: Depending on the airbrush model placed into the Airbrush Holder, the Smart Stop sensor
may not activate. In such case, position the compressor set until the hose hangs down smoothly off
the table and the Smart Stop is able to detect the airbrush and activate.
Table of contents
Other Sparmax Compressor manuals
Popular Compressor manuals by other brands
Emerson
Emerson Copeland Scroll Digital HLR Series Application guidelines

Drawmer
Drawmer 1968 MKII Operator's manual

Badger Air-Brush
Badger Air-Brush X-Air 80-8 User and maintenance instructions

Omnitronic
Omnitronic CL-166 user manual
Scheppach
Scheppach HC24V Translation from the original instruction manual

Ingersoll-Rand
Ingersoll-Rand centac C950 Planning and installation manual
