SPEAKMAN®
400 Anchor Mill Rd. New Castle, DE 19720 Phone: 800-537-2107 Fax: 800-977-2747
7/06/17 www.speakman.com 92-SEF-TW-08
Adding Mixing Valve to Existing Installed SEF-9000-FM Unit (SEF-9200-FM):
a. With the hot & cold supplies for the sink fitting turned off, remove hot stop spindle/nut from the sink
fitting, which are located on the bottom side of the sink fitting. Unscrew the eyewash hose from the cold
housing on the sink fitting.
b. Unbag the housing assembly. Remove the protective sleeve from the assembly and lubricate the housing
o-ring with o-ring lube. Screw the assembly into the hot side stop location of the sink fitting. Tighten with a
wrench. Assemble the bushing to the hot housing and carefully tighten. At this time go to “All Installations”
below.
All Installations:
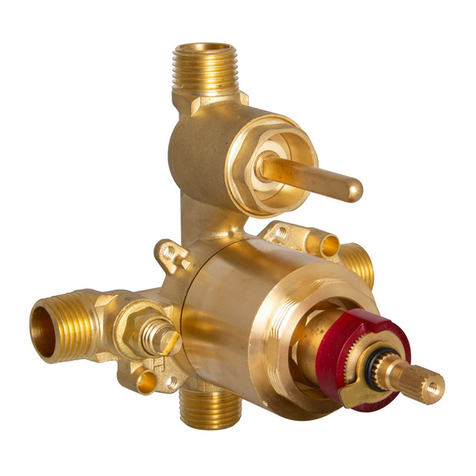
a. Assemble the nipples, tees, elbows, and plugs to the mixing valve hot & cold inlets (See Roughing-In). If
eyewash unit has an in-line vacuum breaker, assemble it to the mixing valve outlet using the (2) reducing
nipples on both side of the vacuum breaker. If eyewash unit does not have a vacuum breaker, assemble the
pipe nipple to the mixing valve outlet. Tighten all of the connections.
b. Mount the thermostatic mixing valve to the wall alongside the sink fitting (See Roughing-In). Fasten valve
to the wall using ½ pipe hangers with wall plates (not supplied). Connect the (2) supply hoses (male end)
to the mixing valve tee inlets and wrench tighten. Connect the other end of the hoses (with fiber washer)
to the sink fitting housings, making sure the hot is to hot & the cold is too cold. Wrench tighten.
c. Screw the eyewash assembly hose onto the outlet of the mixing valve. Hand tighten, then wrench tighten
½ -1 turn. Place the eyewash valve assembly into the eyewash bracket (If applicable).
NOTE-REFER TO THE SEPARATE IOM SHEET LOCATED IN THE MIXING VALVE BOX FOR ADJUSTMENT,
TESTING, & MAINTENANCE INSTRUCTIONS.
d. Go to Step 3 of the SEF-9200/9200-FM Installation Instruction Sheet at this time, if applicable.
INSTALLATION INSTRUCTION foR SEF-1800 MODELS
Adding SEF-TW to Existing Installed SEF-1800 Models
a. Turn off hot and cold supply water before starting any work.
b. Disconnect the hot and cold supply lines from the unit.
c. Remove the tee from the tepid water supply inlet which supplied
the eyewash and the cold water valve.
d. The unit should now look like the figure to the right.
e. Go to ‘All Installations’ step.
Adding SEF-TW to New Installation of SEF-1800 Models
a. Follow the SEF-1800 product installation sheets for a ‘Dedicated
Tepid Water Supply’ Installation.
b. The unit should now look like the figure to the right.
c. Go to ‘All Installations’ step.
All Installations:
a. Attach the elbows, tees and pipe nipples to the hot and cold
inlet of the thermostatic mixing valve with checks.
b. Use Teflon tape on all threaded connections.
c. See the installation and maintenance manual provided for the SE-370
Emergency Eye Wash.
d. Valve for the required installation recommendations.
e. The drawing above provides the roughing in dimensions for
mounting the unit. The valve should be mounted less than 18” from
the sink surface. This allows enough clearance for the supply hoses
to reach the inlets. Verify the supply hoses reach the connections
before mounting the valve.
f. Mount the thermostatic mixing valve to the wall and fasten the valve
to the wall using ½ pipe hangers with wall plates (not supplied).
