800-537-2107 www.speakman.com
NEED HELP?
For additional assistance or service please contact:
TOOLS & SUPPLIES NEEDED IMPORTANT
MAINTENANCE:
Your new Speakman Product is designed for
years of trouble-free performance. Keep it
looking new by cleaning it periodically with a
soft cloth. Avoid abrasive cleaners, steel wool,
and harsh chemicals as these will dull the finish
and void your warranty.
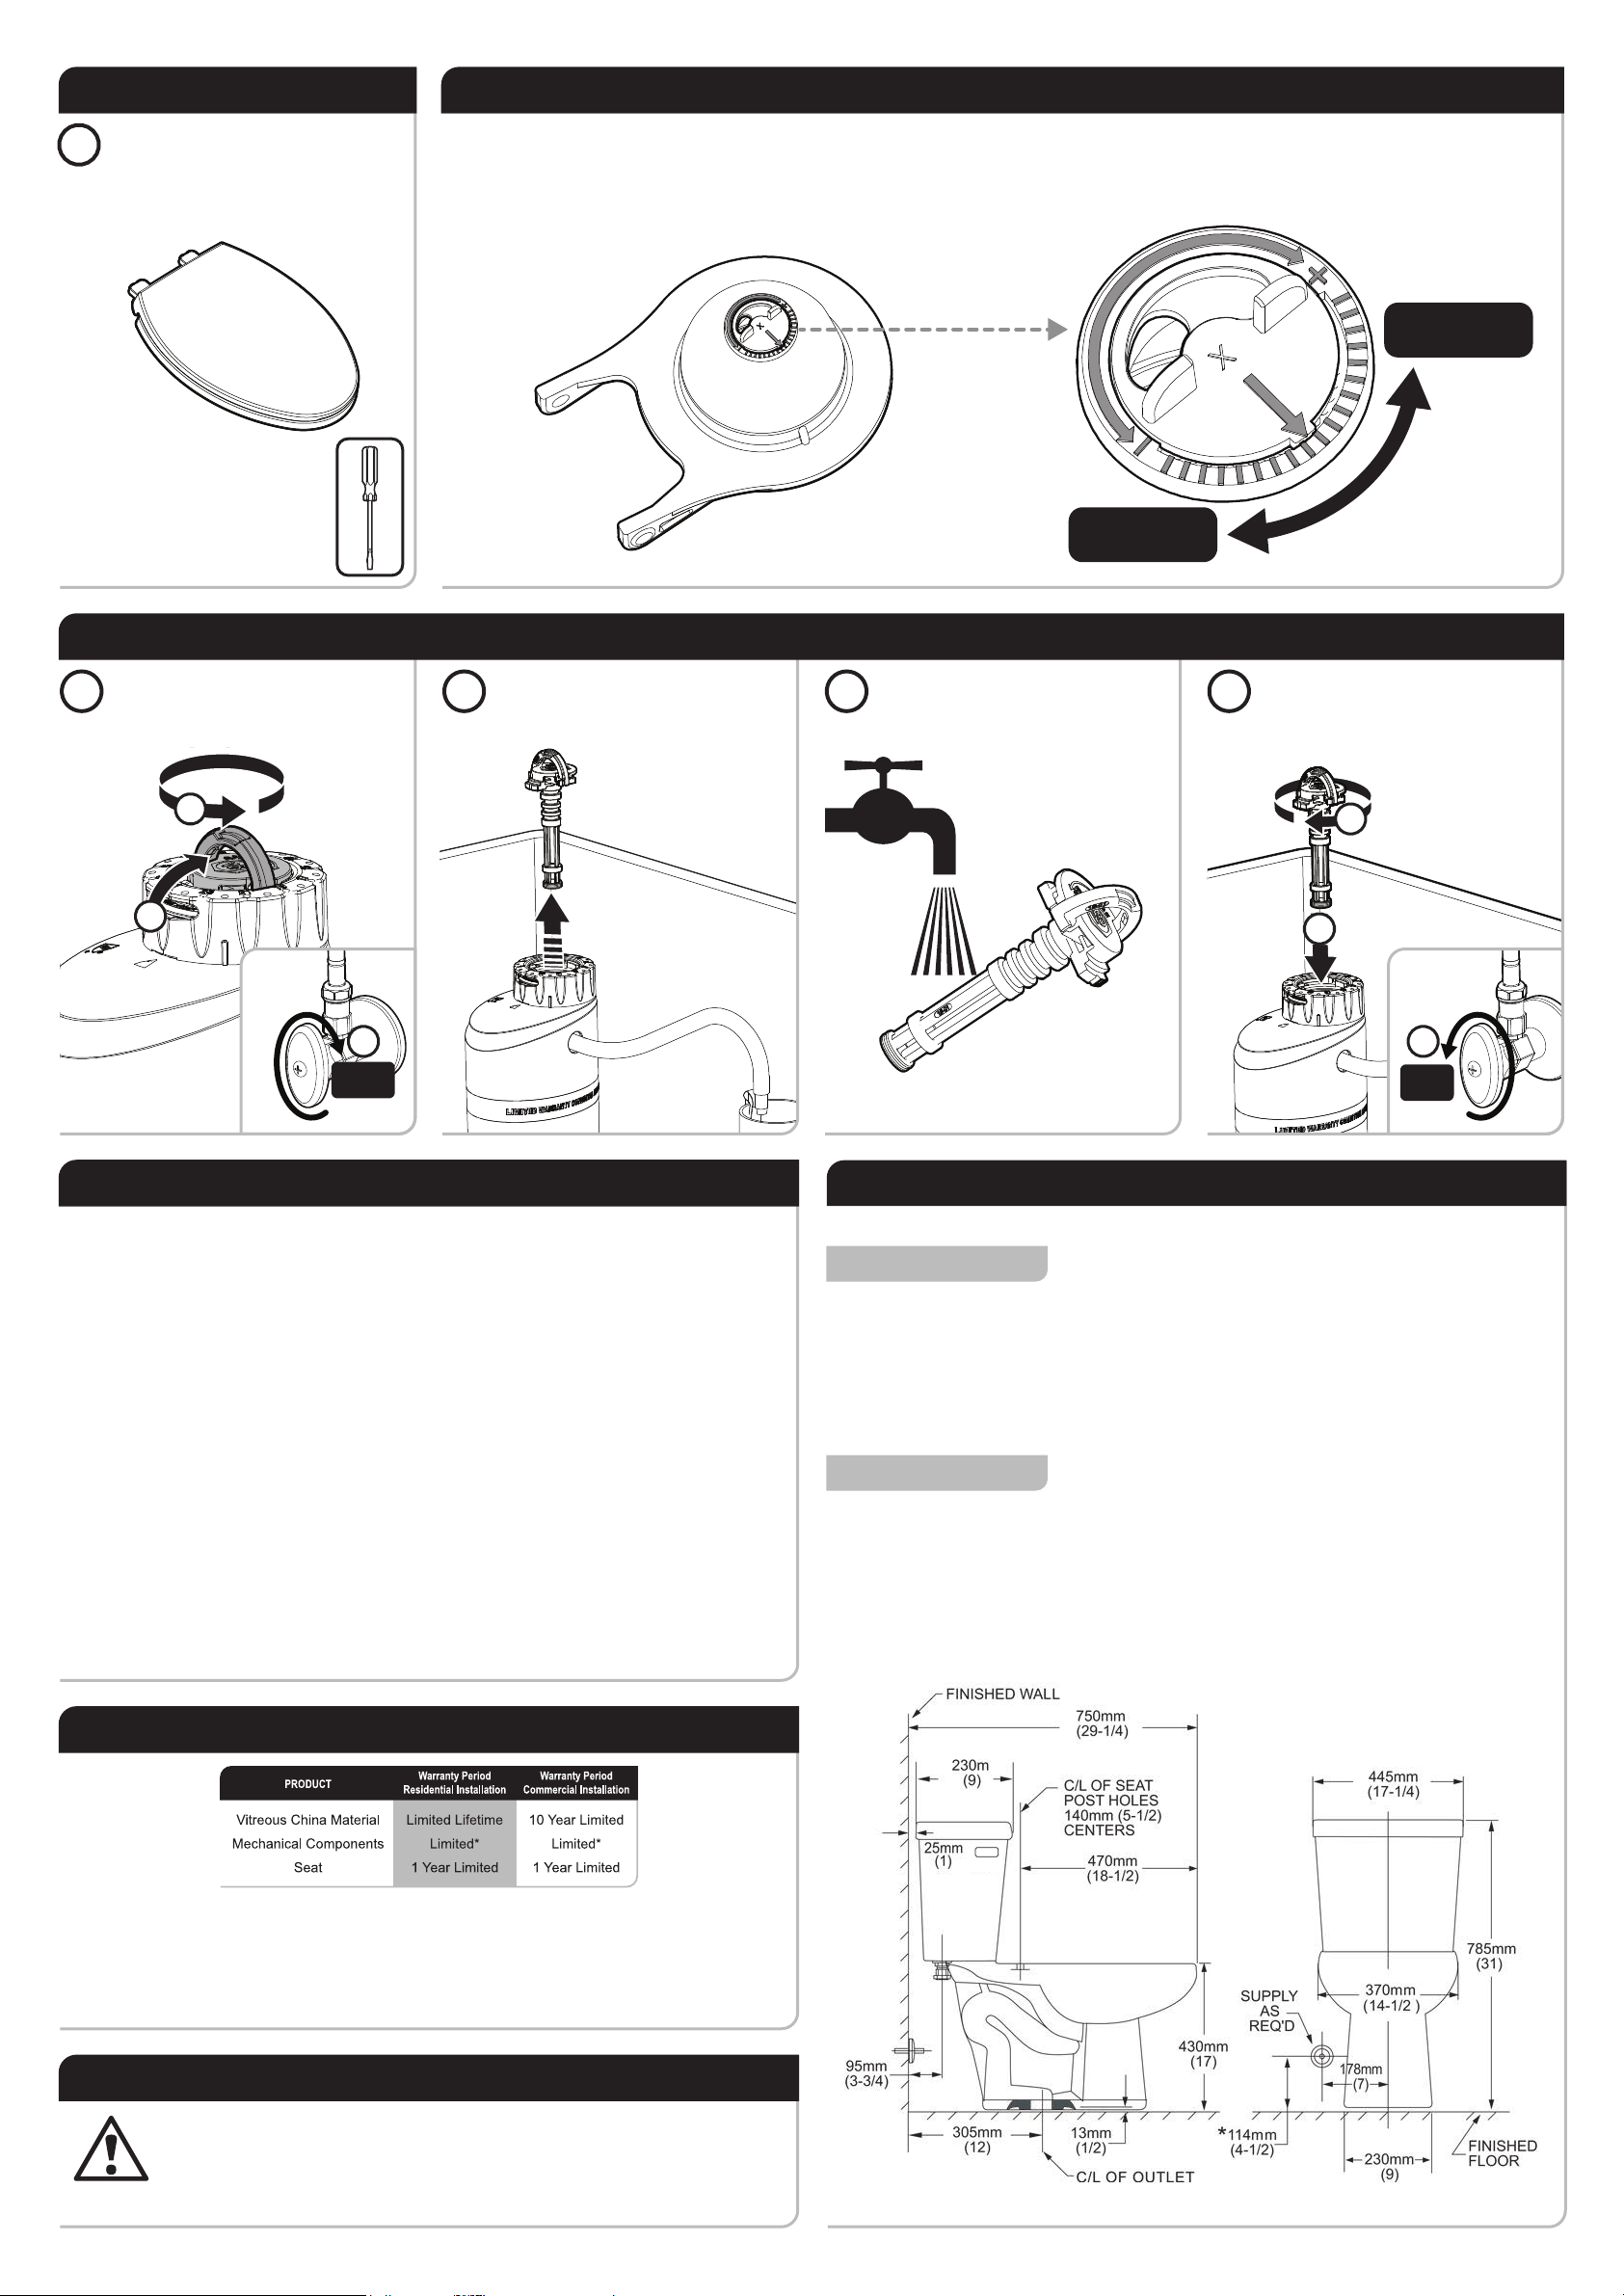
Your new Speakman Toilet includes a premium
fill valve with an internal filter designed to trap
impurities allowing for reliable operation of the
fill valve. Periodic removal and cleaning of the
filter is recommended for optimal performance.
Please see the “Fill Valve Filter Cleaning”
section of this document for more information.
SAFETY TIPS:
Be sure to read and understand all instructions
before beginning installation.
Inspect all connections after installation.
Be sure to wear proper eye protection.
NOTE:
This installation manual covers several
models of Toilets. While the appearance of your
Toilet may differ from those shown, the
installation method is the same.
WARNING
DO NOT OVER-TIGHTEN
CONNECTIONS OR DAMAGE MAY
OCCUR.
DO NOT USE CHLORINE OR ANY
CHEMICALLY RELATED
COMPONENTS AS THIS WILL
RESULT IN DAMAGE TO TANK
COMPONENTS AND MAY CAUSE
FLOODING AND PROPERTY
DAMAGE.
USE OF CHLORINE OR
CHEMICALLY RELATED
COMPONENTS WILL VOID
WARRANTY.
Flat Tip
Screwdriver
Phillips
Screwdriver
Slip Joint
Wrench
Adjustable
Wrench
Level
Measuring
Tape
Supply Hose with
7/8” Ballcock End
(Included)
INSTALLATION INSTRUCTIONS
T-5002
Two-Piece Elongated Toilet
92-T-5002-02
Wax Bowl Gasket
(Included)
Closet Bolts and Caps
(Included)
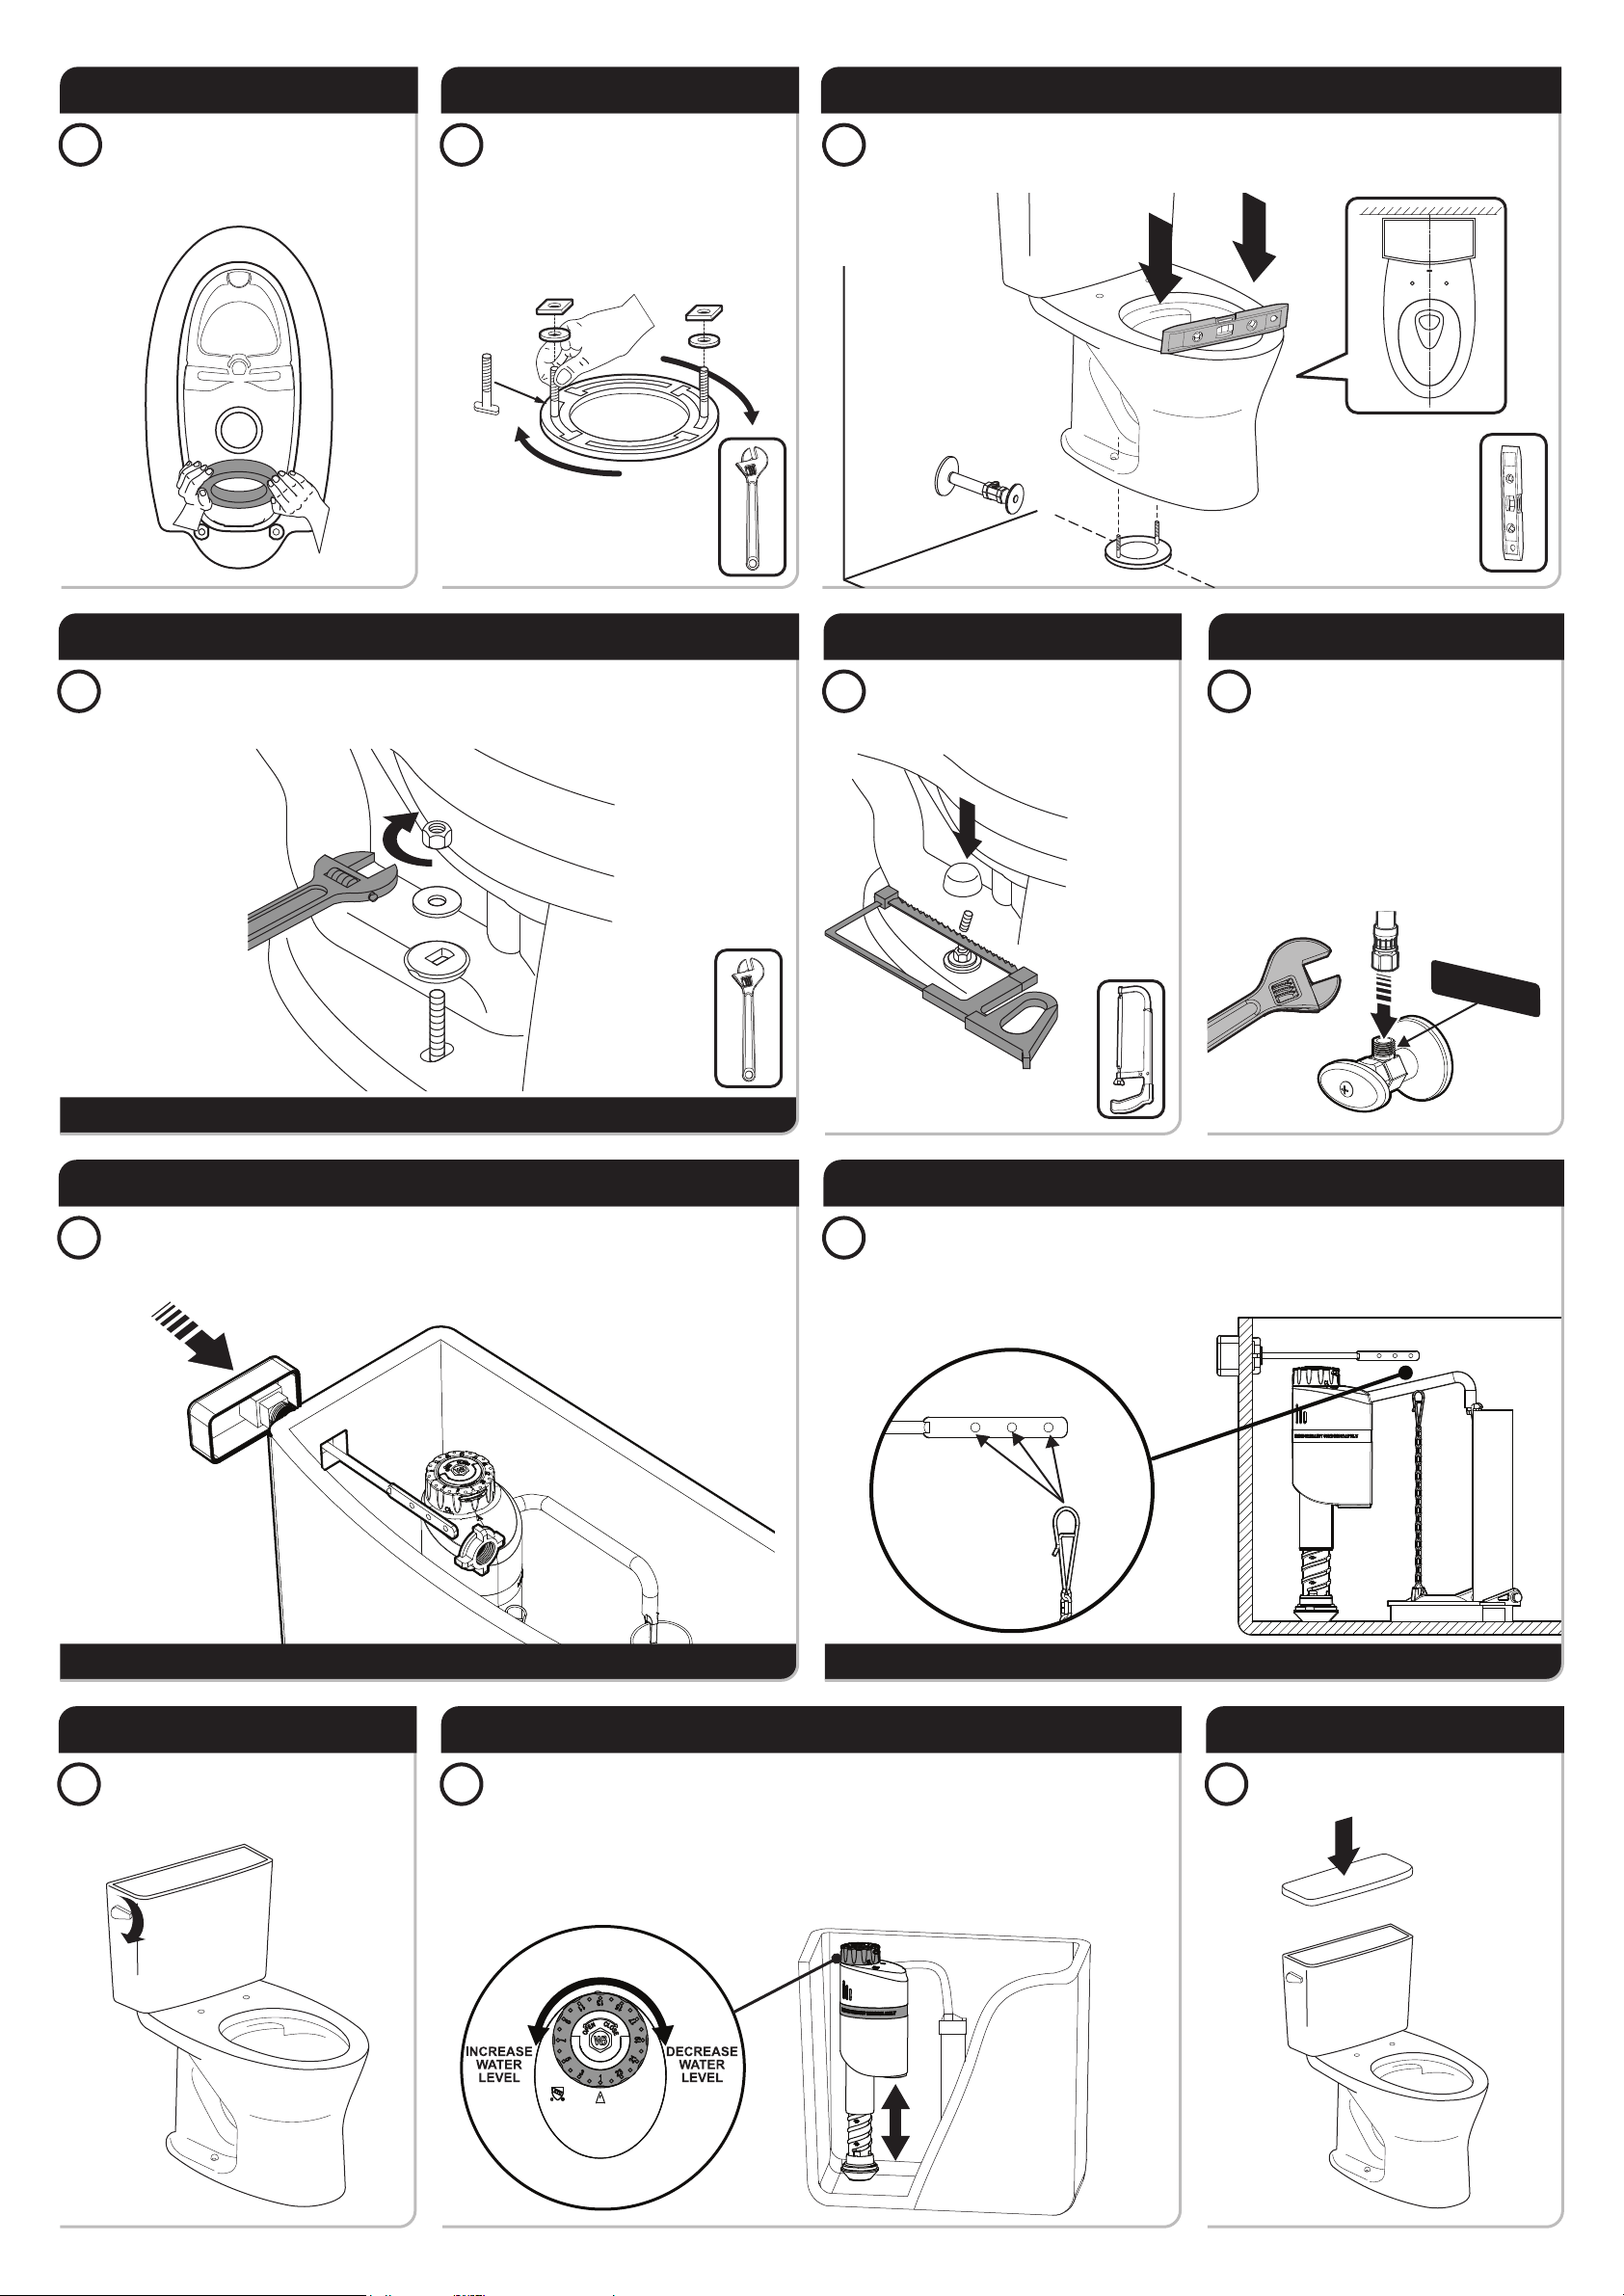
VERIFY ROUGH-IN
1For your Toilet to fit correctly, the rough-in distance between the finished wall to the center of the
Closet Flange must be at least 12”
Finished
Wall
Water
Supply
Valve
12”
Closet
Flange
PREPARING THE TANK
2Place the Toilet Tank upside down onto padding. Inspect the pre-installed Fill Valve Nut and Flush
Valve Nut for a secure connection.
Fill Valve Nut: Hand tighten only!
Flush Valve Nut: Hand tighten, then wrench tighten 1/2 turn.
Place the Tank-to-Bowl Gasket onto the Flush Valve Nut. While pressing down, spread the
Gasket over the Nut until the Gasket touches the bottom of the Tank.
Note: A small gap between the Tank Bottom and Gasket is allowable.
Fill Valve Nut Flush Valve Nut
Tank-to-Bowl
Gasket
DRY CONNECTION ONLY!
DO NOT USE ANY THREAD SEALANT ON THIS CONNECTION
INSTALL SUPPLY LINE TO TANK
3Install Water Supply Line to the Inlet Shank
of the Fill Valve. Tighten into position. Do
Not Over-Tighten connection or damage
may occur.
4
CAUTION: Do not over-tighten or damage may occur.
INSTALL TANK BOLTS
Install the Conical Rubber Washers onto
Tank Bolts with the tapered side facing
down. Reach inside the Tank and position
the Tank Bolts through the Bolt Holes in
the bottom of the Tank. From below the
Tank, install a set of Rubber Washers,
Metal Washers, Lock Washers, and Nuts.
Wrench tighten.
CAUTION: Do not over-tighten or damage may occur.
SECURING THE TANK TO THE BOWL
5Position Tank above Bowl and guide Tank Bolt Assemblies through the appropriate holes in the
Bowl. From below, install a 2nd set of Metal Washers, Lock Washers, and Nuts to secure the Tank
to the Bowl. Wrench tighten until Tank makes several points of contact to the bowl.