Speaksee Microphone Kit User manual
User Manual
Speaksee Microphone Kit
Information in this document may change without notice.
©Speaksee. All rights reserved.

User Manual Speaksee Microphone Kit 2
Content
Parts overview 3
In the box of the Microphone Kit 3
Charging dock 3
Speaksee Microphones 4
Accessories for charging 4
Installation 5
Follow the steps of the Quickstart Card 5
Follow the steps of the Speaksee App 6
1) Creating an account 6
2) Verifying your account 7
3) Verifying your Microphone Kit 7
4) Turning on the Microphone Kit 8
5) Connecting via Bluetooth 8
6) Pairing the Microphone Kit with your Phone 9
7) Setting up Wi-Fi 9
8) Removing the protective stickers 10
9. Ready for use 11
Regular use 12
Turn on the Microphone Kit 12
Turn on the Microphones 12
Wear the Microphones 12
Clip or neck strap 12
Transcribe conversations 13
Turn off the Microphone Kit 13
Charge the Microphone Kit 13
Adjusting settings 14
Customise transcription view 14
Font size & colour theme 14
Microphone name 15
Adding additional Wi-Fi networks 16
Advanced features 18
Using a mobile hotspot 18
Android 18
Samsung 18
Motorola 18
Google Pixel 18
Huawei 18
iOS 18
Contact details 19

User Manual Speaksee Microphone Kit 3
Parts overview
In the box of the Microphone Kit
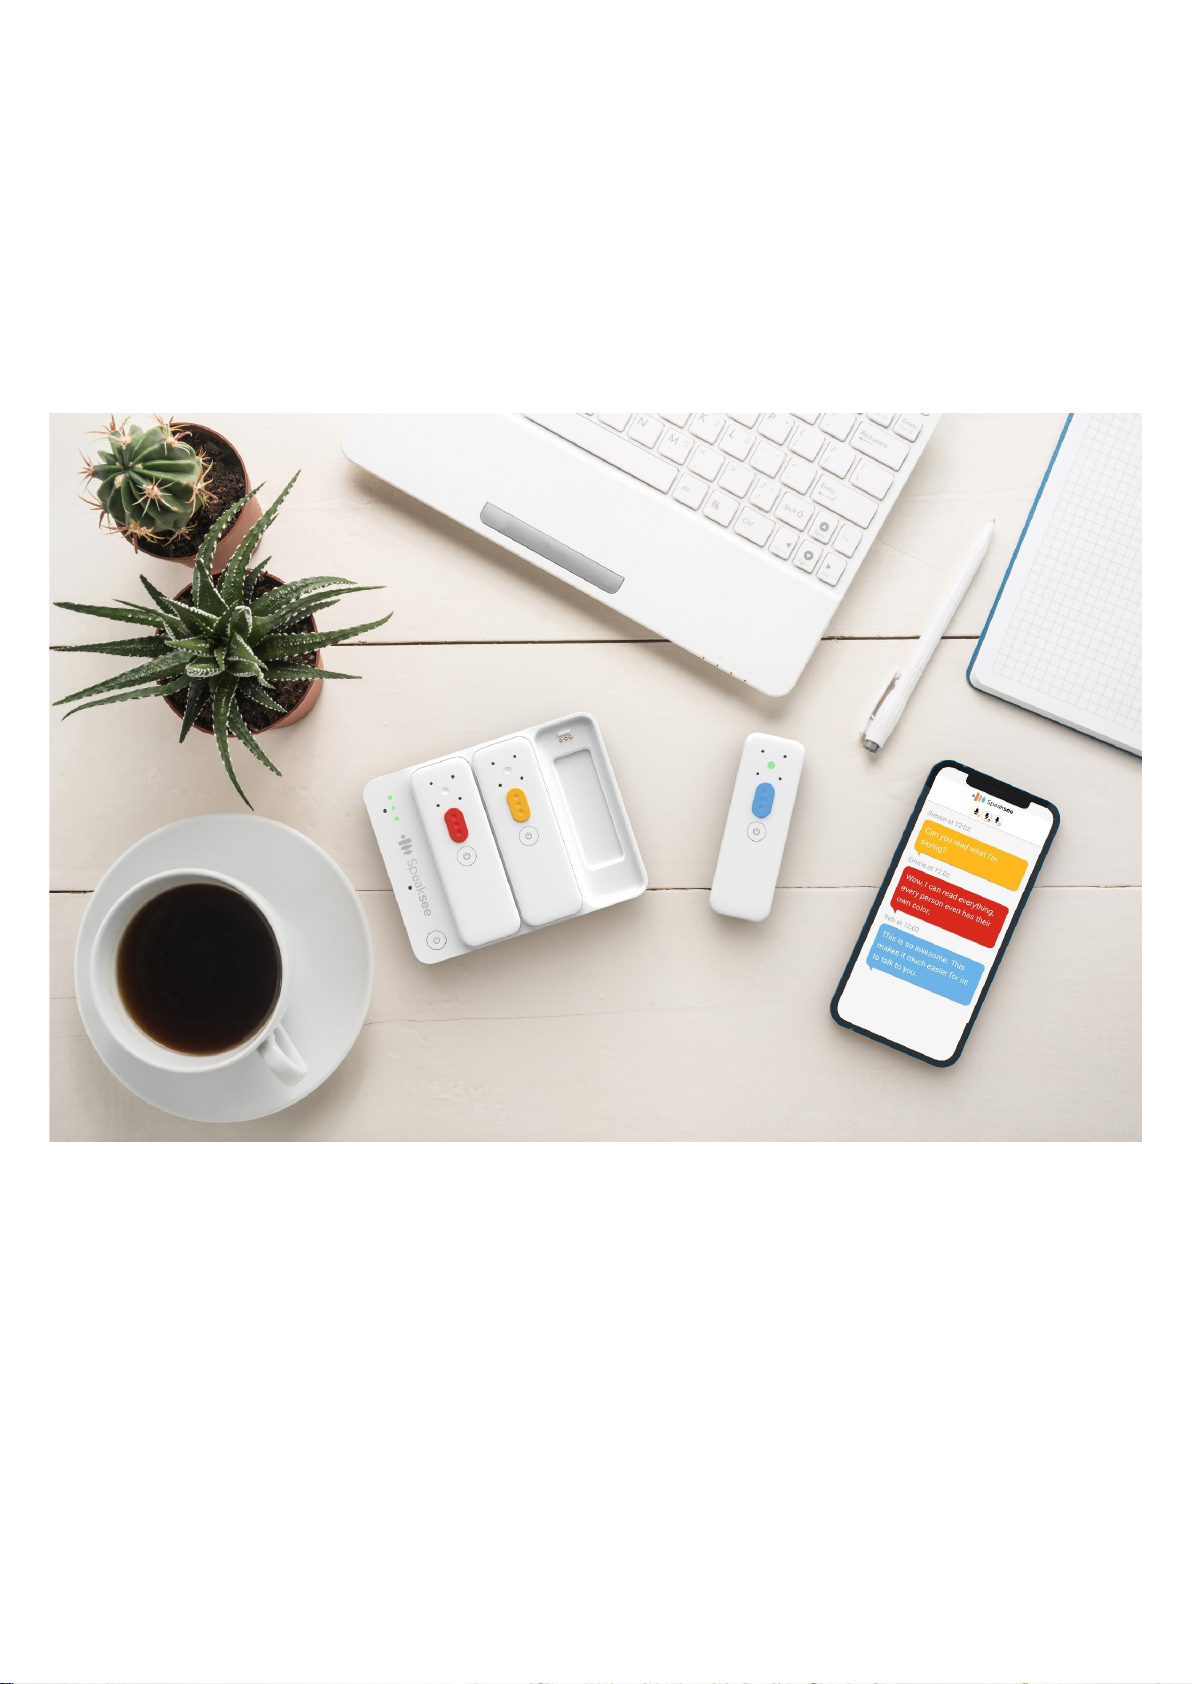
In the Speaksee Microphone Kit you will find the following parts and accessories:
●1 x charging dock
●3 x Speaksee microphones
●9 x colour pucks
●3 x neck straps
●1 x international adaptor
●1 x USB-C cable
●1 x carry case
The packaging also includes the following printed documentation:
●Quickstart Card
●User Guide
●Legal Information Card
Charging dock
1. Audio jack port
Connect your hearing aid streaming
device, headphones or earphones to
directly receive the audio picked-up by
the Speaksee Microphone Kit.
2. USB-C charge port
Use this port to charge your Microphone
Kit.
3. Ethernet port
In addition to the wifi connection, you
can connect cable internet. Ethernet
priority is higher than wifi, to ensure a
speedy and stable connection.
4. LED Lights
To indicate the charging dock status.
5. Charging pins
These connect the microphones to the dock to charge them.
6. Power button
Press this to turn on the Speaksee dock. Then turn on the microphones separately.

User Manual Speaksee Microphone Kit 4
Speaksee Microphones
1. Focused speech detection
To pick up the voice of the person wearing it.
2. LED light
Indicating the microphone status.
3. Microphone receivers
To listen and transcribe what is being said in real-time
4. Colour puck
Indicating the transcription colour of the speaker wearing the
microphone.
5. Power button
After switching on the charging dock, switch on the microphones
by pressing this power button.
Accessories for charging
1. Power outlet
Will look different depending on the country you are in.
2. International adaptor
Change the adaptor head to
suit your power outlet.
3. USB-C cable
To connect the adaptor to
the charging dock.
4. USB-C port
Plug the USB-C cable into
this port of the charging
dock.

User Manual Speaksee Microphone Kit 5
Installation
Follow the steps of the Quickstart Card
With your Microphone Kit, a paper printed Quickstart card can be found in the inside pocket
of your carry case. It looks like this:
[2021 production run]
Follow these 3 steps and use the Verification code to onboard your device:
1. Scan the QR code as shown on the Quickstart Card to download the Speaksee app or
visit: speak-see.com/setup
2. Follow the instructions in the app to set-up your Microphone kit. You will be prompted to
use your verification code as printed on your Quickstart Card.
3. Enjoy transcribing!

User Manual Speaksee Microphone Kit 6
Follow the steps of the Speaksee App
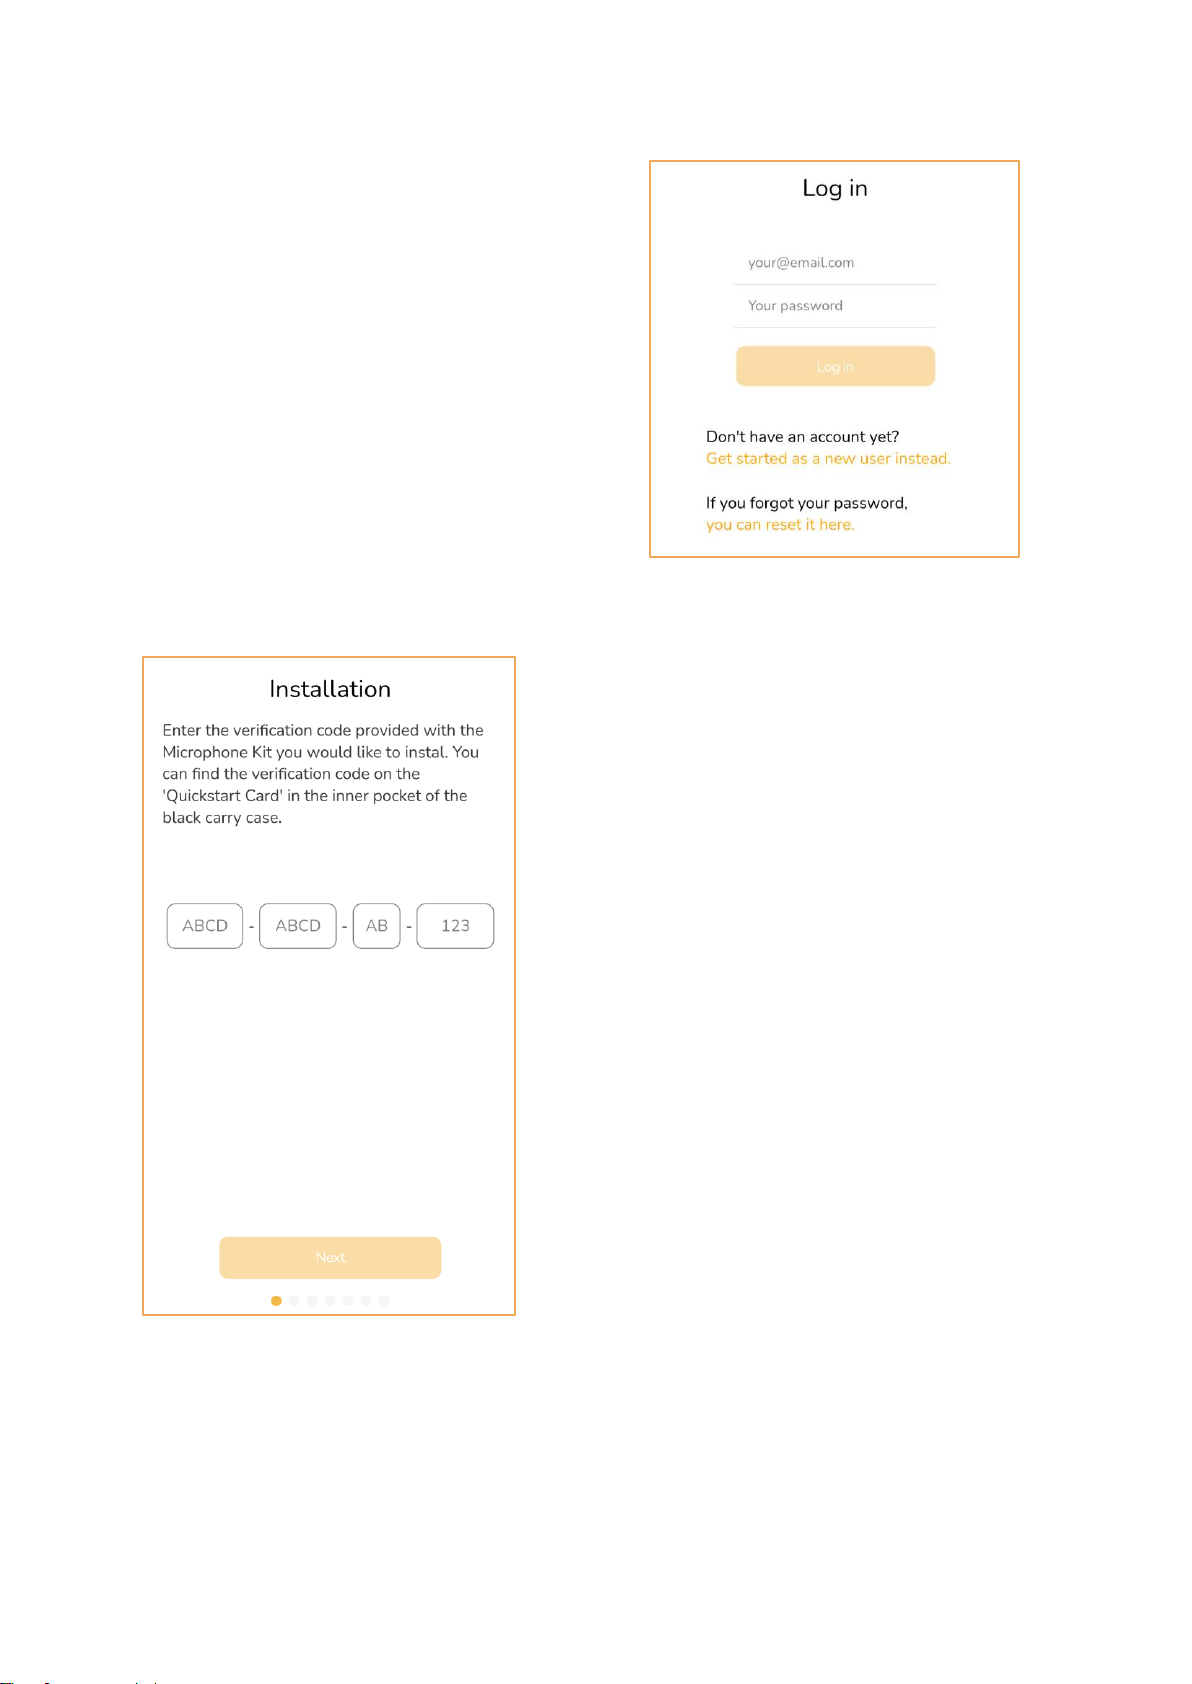
1) Creating an account
If you do not have a Speaksee account yet, press
the ‘’Get started’’ button. Do you already have an
account? Then you can press ‘’Login’’. Continue
with step 3. Do you already have an account for
Speaksee AutoCaption? Then you can login with
the same credentials.
Fill in the complete form to be able to create your
Speaksee account.
For the transcription language, you can select the
language of the audio that the Microphones are
receiving. Later on we will add a language
switcher inside the application.
Choose your own password to be able to login to
your Speaksee account, this is NOTthe unique
verification code on your quick start card. Your
password needs to pass the following
requirements:
●Minimum of 10 characters
●One capital letter
●One number
●One special character
User Manual Speaksee Microphone Kit 7
2) Verifying your account
After creating your account, you will receive an
email to verify your account. Click on the link in
the email and your account will be verified. After
clicking on the link, you can return to the app and
login with your Speaksee account.
3) Verifying your Microphone Kit
Fill in the unique verification code delivered
with your Speaksee Microphone Kit. You can find
the verification code on the Quickstart Card in the
inner pocket of your Speaksee carry case.
User Manual Speaksee Microphone Kit 8
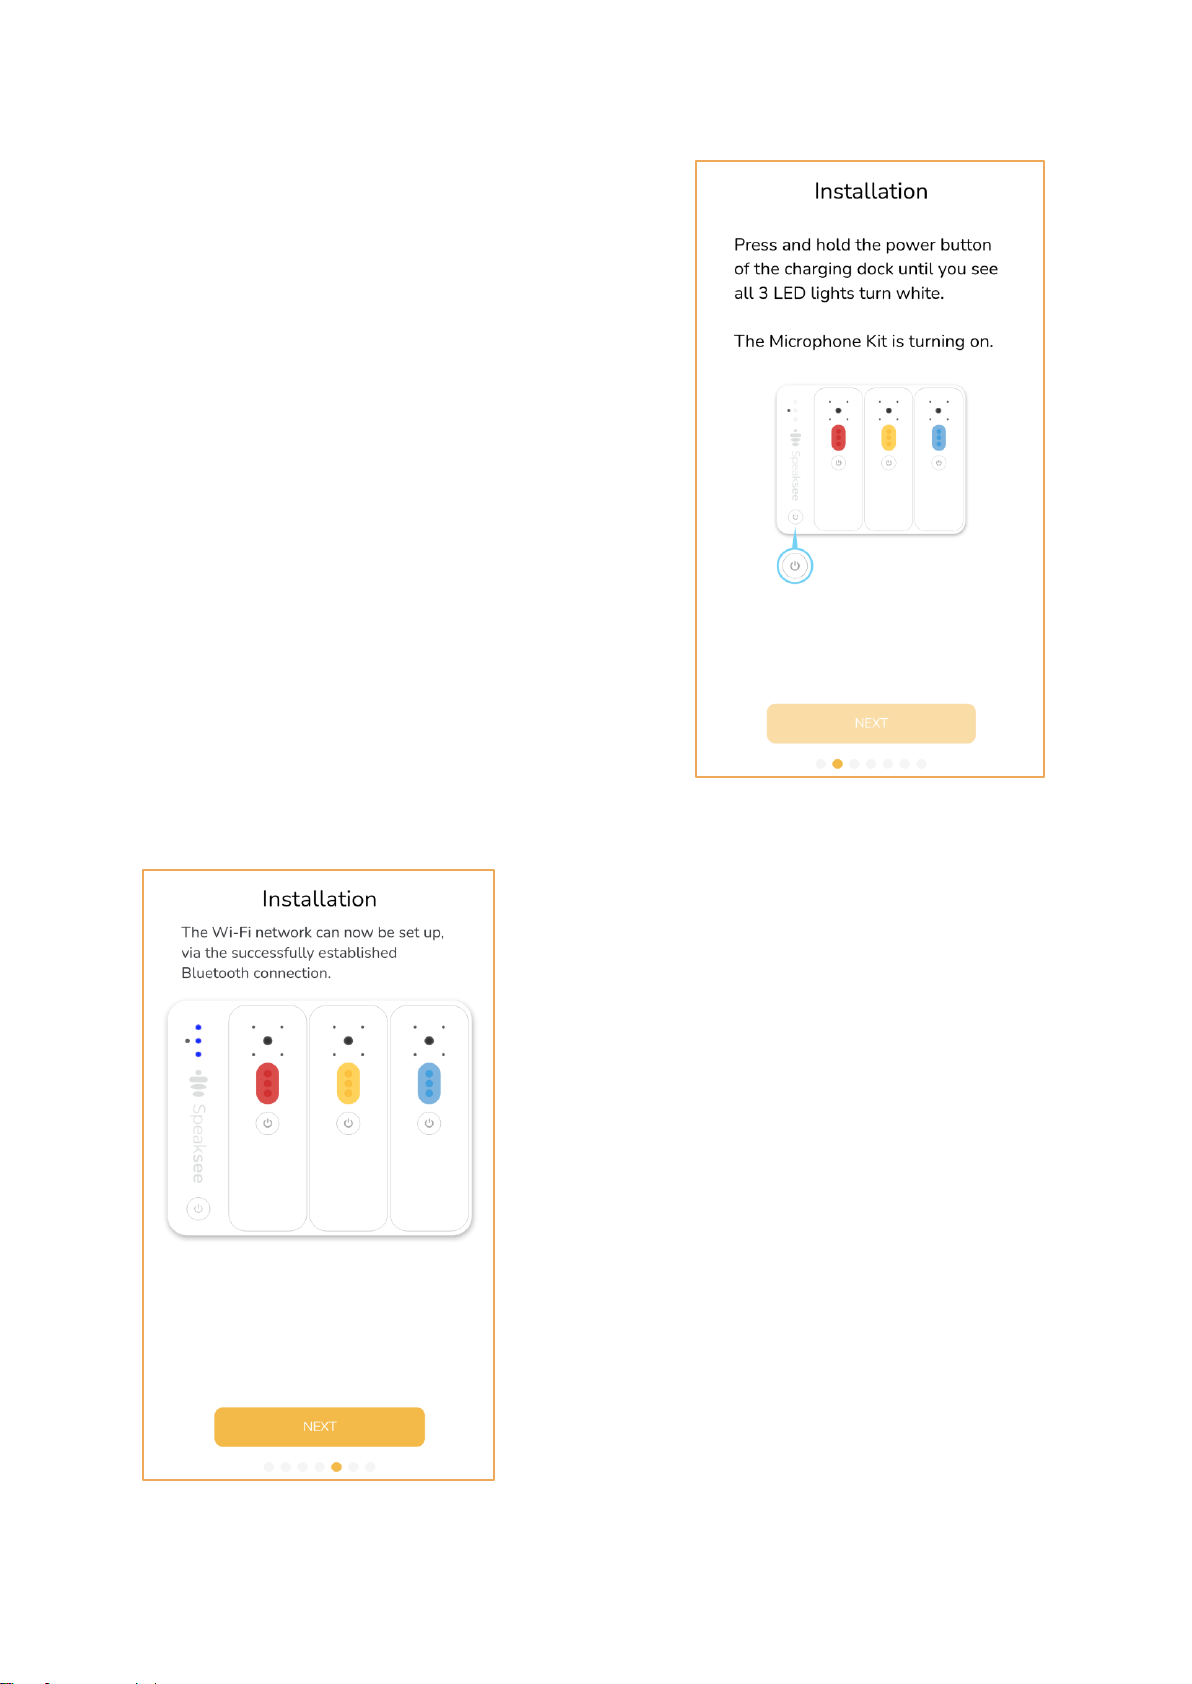
4) Turning on the Microphone Kit
Press the power button to turn the Microphone Kit on.
You will see that all 3 LED lights turn white and start
blinking. If the Microphone Kit is turned on
successfully, you can press ‘’Next’’.
5) Connecting via Bluetooth
To be able to connect the Speaksee Kit to your
smartphone, you need to turn on your Bluetooth.
Please note: Android users also need to turn on
their location. Wait for the 3 LED’s to turn steady
blue, this means you have successfully established a
bluetooth connection. You can now press ‘’Next’’.

User Manual Speaksee Microphone Kit 9
6) Pairing the Microphone Kit with your Phone
The app is scanning to set up a connection between
your phone and the Microphone Kit. Once the
Microphone Kit under the name Speaksee is found,
you can press ‘’Pair’’. You will now be able to connect
a Wi-Fi network on the next page.
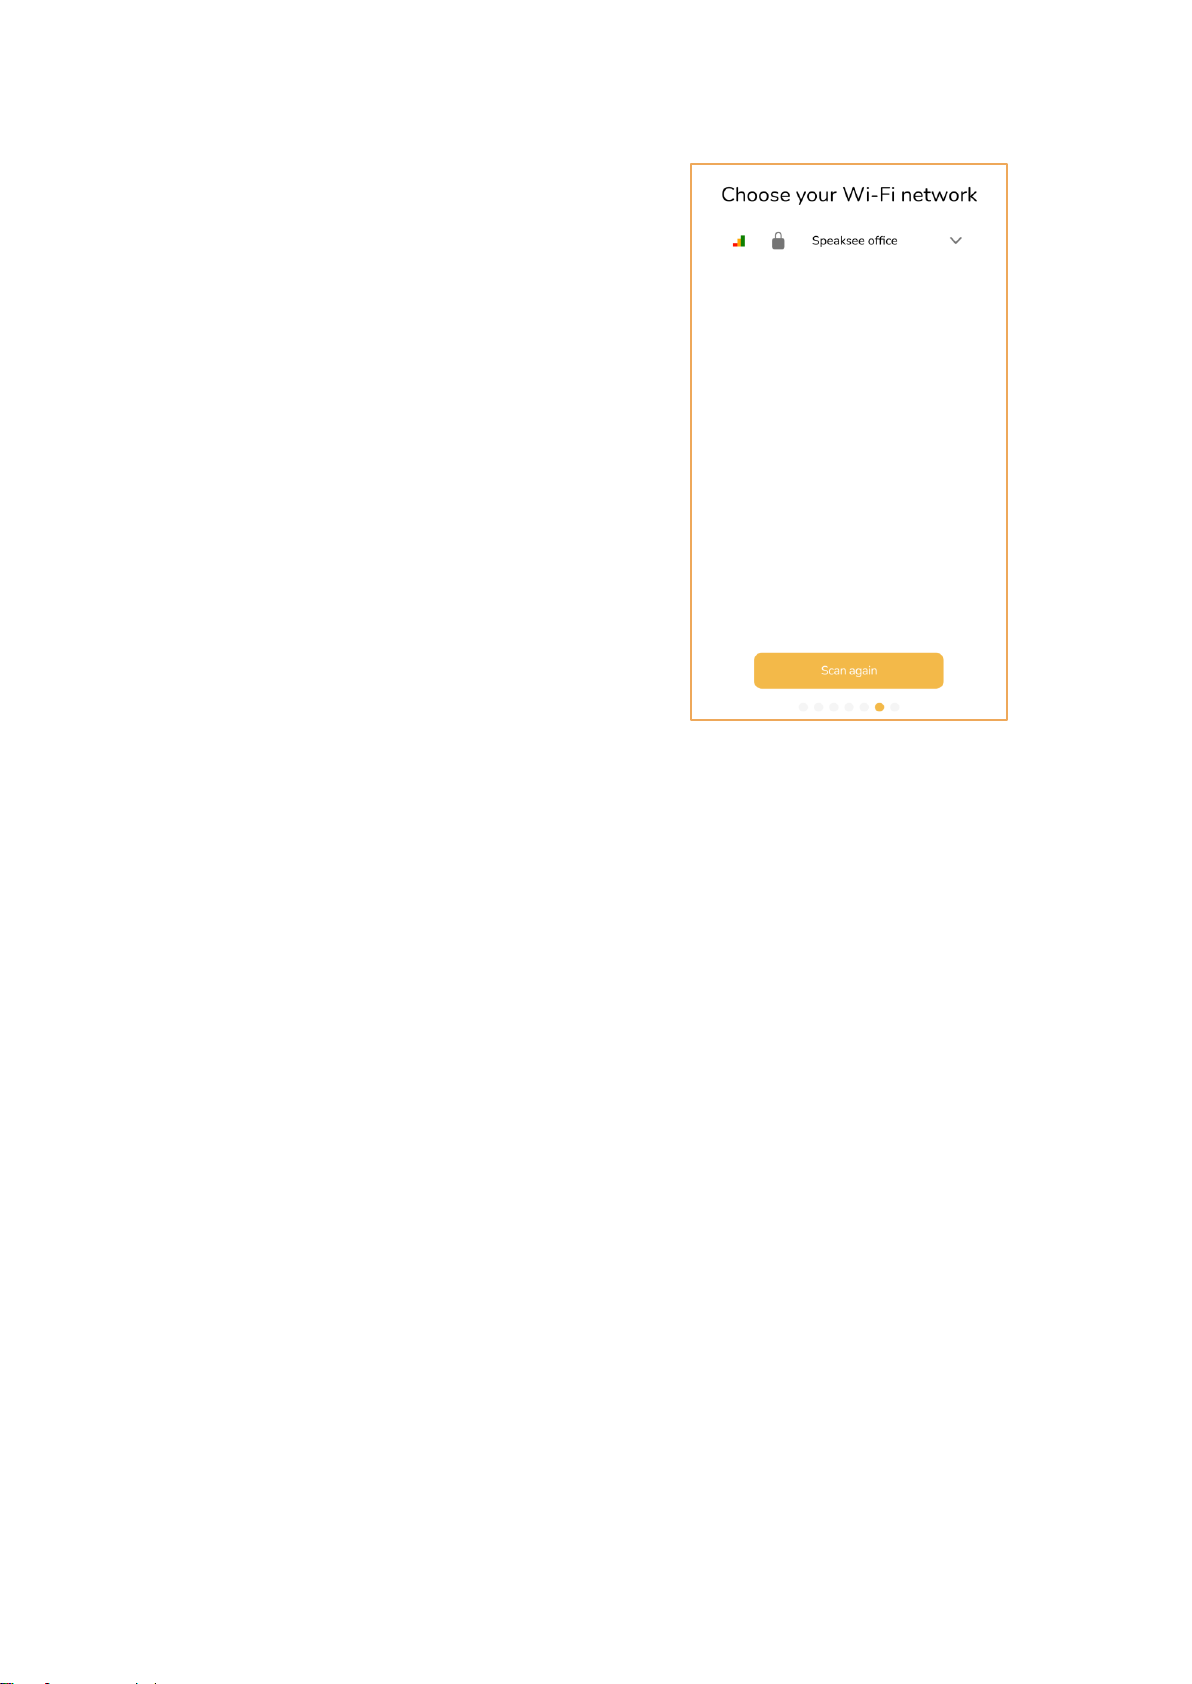
7) Setting up Wi-Fi
Select the Wi-Fi network you would like to connect to
the Speaksee Microphone Kit. Fill in the correct Wi-Fi
credentials and press ‘’Connect’’.Is the app unable to
find your desired network? Please press ‘’Scan
again’’. If the app is still unable to find your network
after 3 tries, please contact our support team.

User Manual Speaksee Microphone Kit 10
8) Removing the protective stickers
Please remove all 3 protective stickers from your
Microphones before you start using your Microphone
Kit. Once this is done, you can press ‘’Finish’’. You
have now successfully installed your Microphone Kit!
User Manual Speaksee Microphone Kit 11
9. Ready for use
You are now ready to use your Speaksee
Microphone kit. Please move to the next page for
the instructions on how to use your Microphone Kit.
User Manual Speaksee Microphone Kit 12
Regular use
Turn on the Microphone Kit
Press the power button on the dock. Once the 3 LED’s are steady green, the Microphone Kit
is ready for usage. You can now take out the Microphones.
Turn on the Microphones
Press and hold the power button on the Microphone for 1 second. Once the Microphone
LED is steady green, the Microphone is ready for usage. You can now hand out the
Microphone to each speaker.
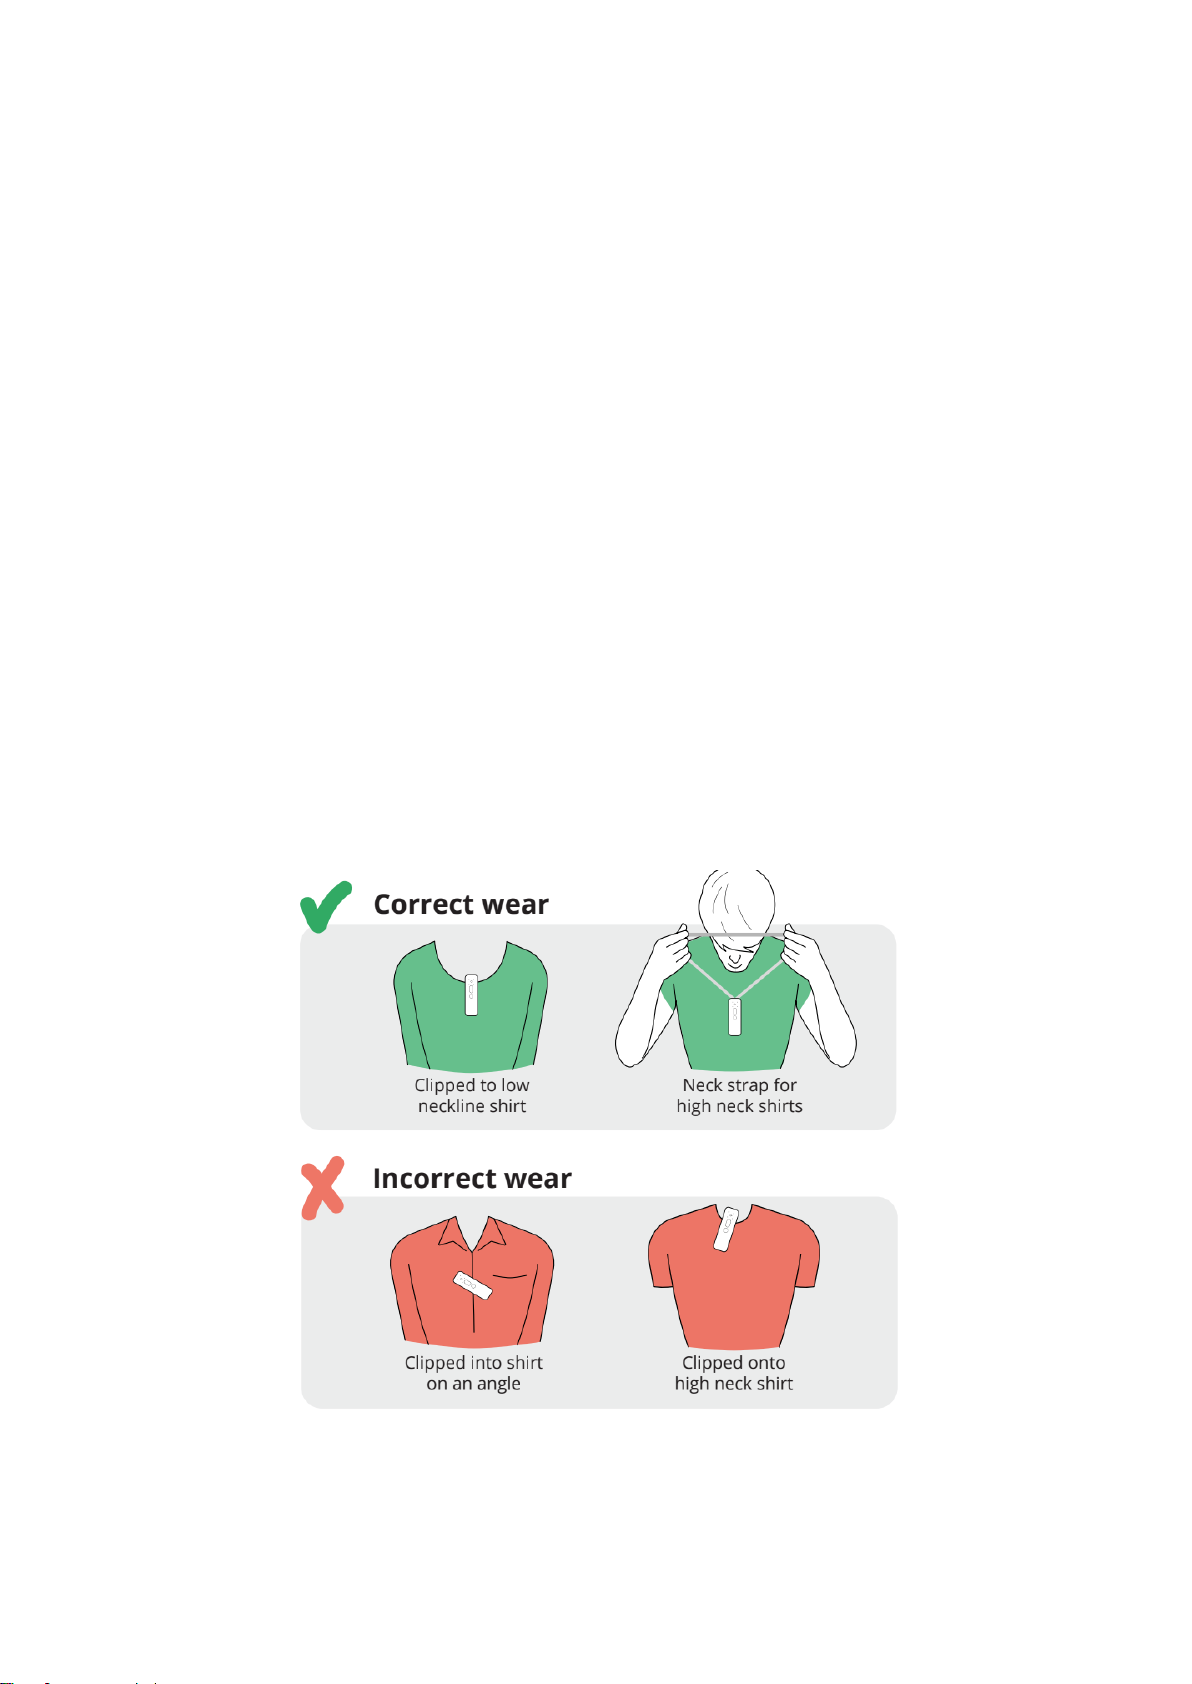
Wear the Microphones
Each speaker should wear their own microphone to be able to transcribe a conversation
accurately. To pick up the voice of the person wearing it, it is important that the microphone
points upwards towards the mouth of the speaker.
Clip or neck strap
Use the clip for shirts that have a top pocket or a low neckline.
For all other clothing, attach the neck strap to the microphone.

User Manual Speaksee Microphone Kit 13
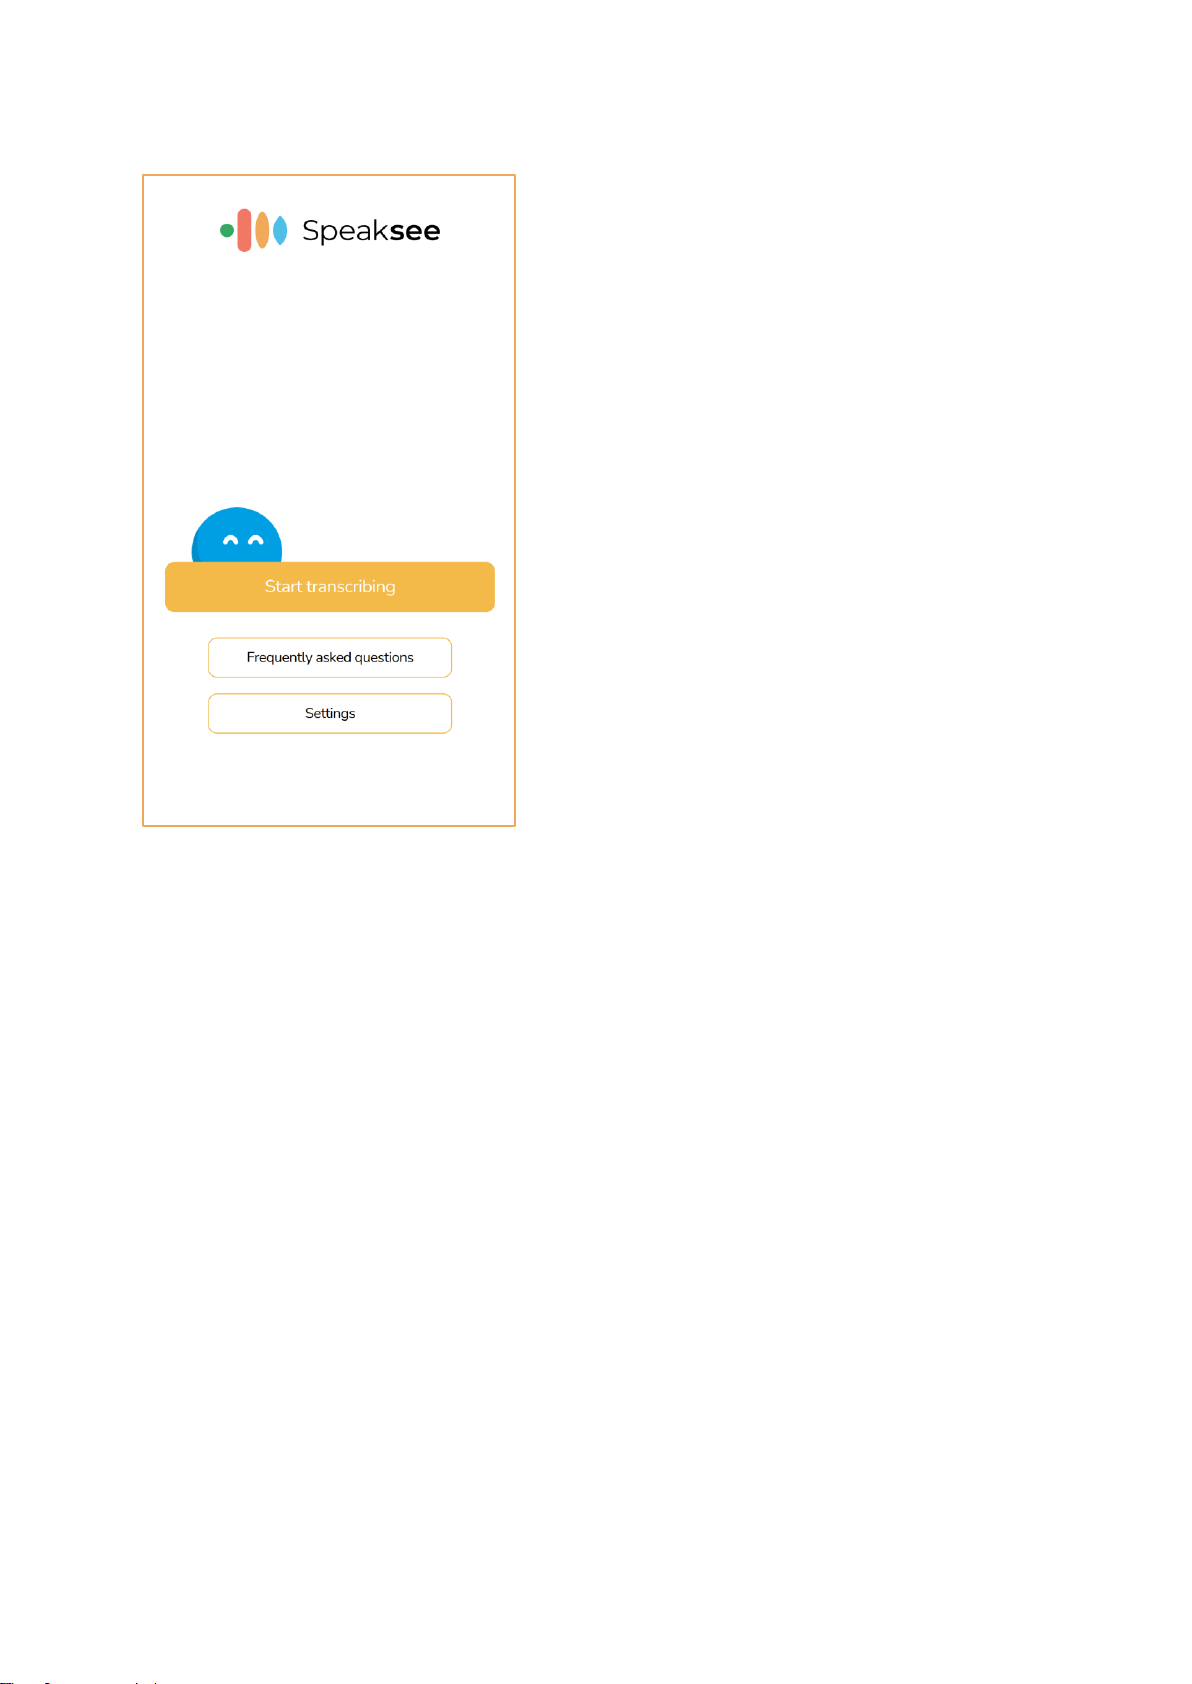
Transcribe conversations
Once the Microphone Kit is turned on you can press the
‘’Start transcribing’’ button in the app. You can then
select the Microphone Kit in the popup. Every speaker
can now start talking and the transcripts will appear in the
app.
For transcriptions via the web browser, navigate to
frontend.speaksee.ai. Login with your Speaksee account
and select the Microphone Kit you would like to use.
Every speaker can now start talking and the transcripts
will appear in the app.
Turn off the Microphone Kit
When you are done using the Microphone Kit, you can place the microphones back into the
dock. The Microphones will then turn off automatically. Hold the power button on the dock for
1 second to turn it off. If the dock is not plugged into the charger, all LED lights should turn
off.
Charge the Microphone Kit
The microphones will charge automatically when they are placed back in the dock. The
microphones will not charge when the battery level of the dock is too low. You can see if the
microphone is charging when the LED on the microphone is blinking white every second.

User Manual Speaksee Microphone Kit 14
Adjusting settings
Customise transcription view
Font size & colour theme
Press the settings wheel icon in the bottom left corner
of the screen. This will open the settings menu to be
able to adjust the settings
Drag the font size bar to the left or right to be able to
make the text of the transcripts smaller or bigger.
Select a theme to style your transcript screen to your
own preferences. You can choose between Color and
Glow.
User Manual Speaksee Microphone Kit 15
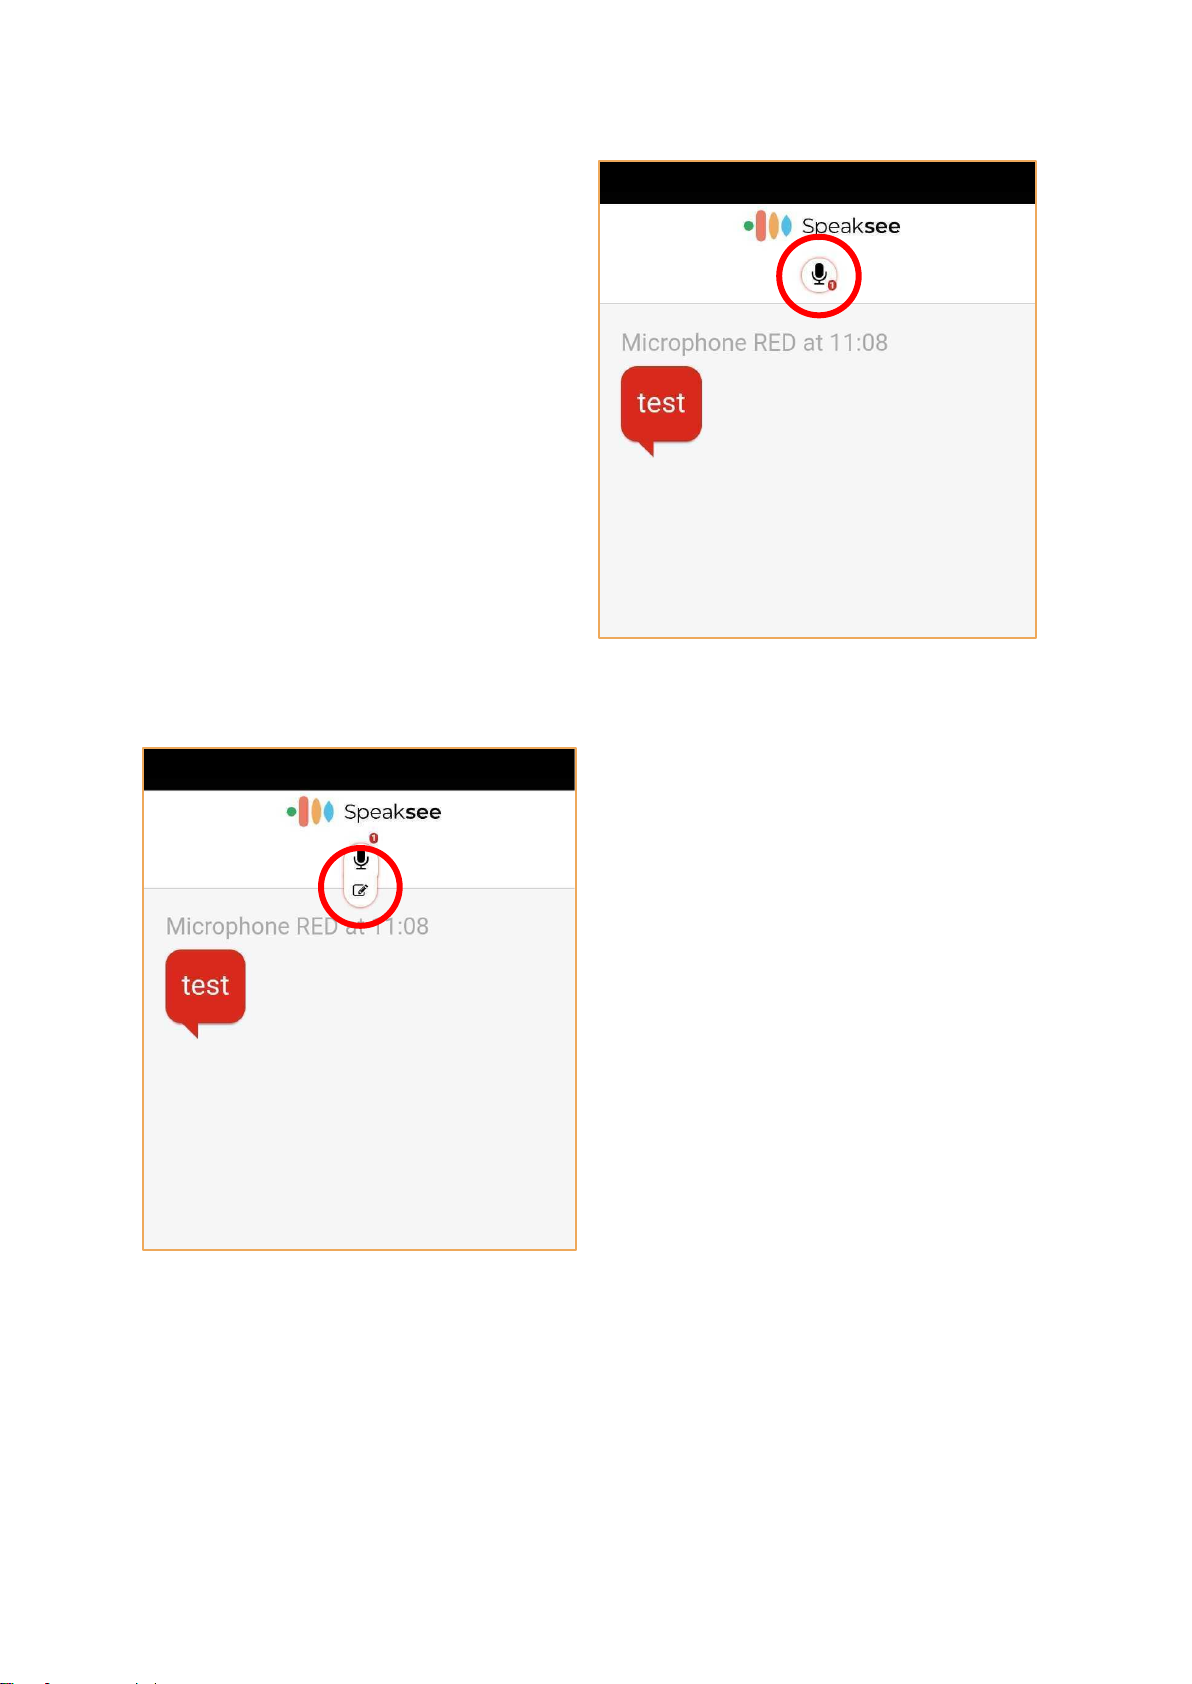
Microphone name
You can give your own names to speakers
(microphones) by pressing on the
Microphone icon at the top of your screen.
You can now press the pencil icon under the
microphone icon. This will open a pop-up
where you can enter the name of the person
wearing the microphone.

User Manual Speaksee Microphone Kit 16
Adding additional Wi-Fi networks
Press the settings button in the menu of the
Speaksee app and then press ‘’Add additional Wi-Fi
networks’’. First turn on the dock by pressing the
on-button on the dock for 2 seconds. The 3 LED
lights will start blinking white. After that, shortly
press the on-button twice in a row. Now you will
see 3 blinking blue LED lights on the Dock.
The app is scanning to set up a connection between your
phone and the Microphone Kit. Once the Microphone Kit
under the name Speaksee is found, you can press ‘’Pair’’.
You will now be able to connect a Wi-Fi network on the
next page.
User Manual Speaksee Microphone Kit 17
Select the Wi-Fi network you would like to connect to
the Speaksee Microphone Kit. Fill in the correct Wi-Fi
credentials and press ‘’Connect’’.Is the app unable to
find your desired network? Please press ‘’Scan
again’’. If the app is still unable to find your network
after 3 tries, please contact our support team.
Once the Wi-Fi connection is successfull, the 3 LED’s
on the charging dock will be steady green and you
can now use your Microphone Kit on the new Wi-Fi
network.

User Manual Speaksee Microphone Kit 18
Advanced features
Using a mobile hotspot
If you want to use your Speaksee Microphone Kit outside, you need an internet connection
to be able to use it. You can create a mobile hotspot on your phone to create an internet
connection for the Speaksee Microphone Kit. Below you can find the instructions on how to
turn on a mobile hotspot for Android and iOS smartphones.
Android
From your Android Smartphone’s Quick Settings
Swipe down from the top of the screen to view notifications. Swipe down again to see quick
settings. Tap Mobile hotspot to enable.If the Hotspot shortcut isn’t already there, tap Edit,
then long-press on Hotspot and drag it to the grid of tiles.
To turn on Wi-Fi hotspot on your Android smartphone or device as a hotspot, see
instructions corresponding to the brand of your device:
Samsung
Navigate to Connections > Mobile Hotspot and Tethering > Mobile Hotspot and toggle it on.
A pop-up window will appear, where you can find the Wi-Fi password for devices that want
to connect.
Motorola
Navigate to Settings > Network & internet > Hotspot & tethering. Here, you can select to
share a connection via Wi-Fi, USB, or Bluetooth.
For a Wi-Fi connection, tap Wi-Fi hotspot and toggle it on. The hotspot name will be
displayed on this screen. Tap Advanced > Hotspot password for the password.
Google Pixel
Pull down from the top of the screen and navigate to Settings > Network & Internet > Hotspot
& Tethering > Wi-Fi Hotspot, and toggle the switch to on. The hotspot name and password
will then be visible.
Huawei
Navigate to Settings > Wireless & networks >Tethering & portable hotspot > Portable Wi-Fi
hotspot. Choose Configure Wi-Fi hotspot to set a name, security setting, and password for
your hotspot, then tap Save.
iOS
To set up a personal hotspot on your iPhone or iPad (Wi-Fi + Cellular), go to Settings >
Personal Hotspot > Allow Others to Join and toggle it on (if you don't see Personal Hotspot
in Settings, tap Cellular > Personal Hotspot). Make note of the Wi-Fi password.

User Manual Speaksee Microphone Kit 19
Contact details
If you would like to get in contact with us feel free to reach out to us via support@speak-
see.com or submit our contact form via: https://speak-see.com/pages/contact
Do you have any questions? View our FAQ here: https://speak-see.com/apps/help-center
Instagram: https://www.instagram.com/speak_see/
Facebook: https://www.facebook.com/Speaksee
Twitter: https://www.twitter.com/speak_see
LinkedIn: https://www.linkedin.com/company/speaksee/
YouTube: https://www.youtube.com/channel/UCQvGf%20iasHyUYZ42RhrsDAMg
Speaksee
Westblaak 7G, 3012 KC Rotterdam, The Netherlands.
Other manuals for Microphone Kit
2
Table of contents


