Spectur HD5 User manual

Document No.
Author
Revision
Review Date
OPSMN011
M Dyson
1
6/12/21
OPSMN011
M Dyson
2
22/01/22
OPSMN011
M Dyson
3
29/06/22
HD5 Assembly Guide

Guide for HD5 Assembly
OPSMN011 Rev 3 Dated: 29.06.2022
2
Contents
Top Cover Assembly...............................................................................................................................4
Materials:............................................................................................................................................4
Step 1:.................................................................................................................................................4
Step 2:.................................................................................................................................................5
Step 3:.................................................................................................................................................5
Step 4:.................................................................................................................................................6
Step 5:.................................................................................................................................................6
Bottom Cover assembly.........................................................................................................................7
Materials:............................................................................................................................................7
Step 1:.................................................................................................................................................7
Step 2:.................................................................................................................................................8
Step 3:.................................................................................................................................................8
Step 4:.................................................................................................................................................8
Solar Assembly.......................................................................................................................................9
Materials:............................................................................................................................................9
Step 1:.................................................................................................................................................9
Step 2:...............................................................................................................................................10
Router assembly...................................................................................................................................11
Materials:..........................................................................................................................................11
Step 1:...............................................................................................................................................12
Step 2:...............................................................................................................................................12
Door assembly......................................................................................................................................13
Materials:..........................................................................................................................................13
Step 1:...............................................................................................................................................14
Step 2:...............................................................................................................................................14
Step 3:...............................................................................................................................................15
Step 4:...............................................................................................................................................15
Step 5:...............................................................................................................................................16
Step 6:...............................................................................................................................................16
Step 7:...............................................................................................................................................17
Step 8:...............................................................................................................................................17
Full Assembly .......................................................................................................................................18

Guide for HD5 Assembly
OPSMN011 Rev 3 Dated: 29.06.2022
3
Materials:..........................................................................................................................................18
Step 1:...............................................................................................................................................19
Step 2:...............................................................................................................................................19
Step 3:...............................................................................................................................................20
Step 4:...............................................................................................................................................21
Step 6:...............................................................................................................................................21
Step 7:...............................................................................................................................................22
Step 8:...............................................................................................................................................23
Step 9:...............................................................................................................................................24
Step 10:.............................................................................................................................................24
Step 11:.............................................................................................................................................25
Step 12:.............................................................................................................................................25
Step 13:.............................................................................................................................................26
Step 14:.............................................................................................................................................26
Step 15:.............................................................................................................................................26
Step 16:.............................................................................................................................................27
Step 17:.............................................................................................................................................27
Step 18:.............................................................................................................................................28
Step 19:.............................................................................................................................................28
Step 20:.............................................................................................................................................30
Step 21:.............................................................................................................................................31
Step 22:.............................................................................................................................................31
Step 23:.............................................................................................................................................32
Step 24:.............................................................................................................................................32

Guide for HD5 Assembly
OPSMN011 Rev 3 Dated: 29.06.2022
4
Top Cover Assembly
Materials:
Item
Quantity
M24 Washers
2
M24 Nuts
2
M4x10 Bolt
4
Door Cover
1
Brass solar
gland
1
Solar Gland
1
Solar Plug
1
Nut Clip
1
Top Cover
1
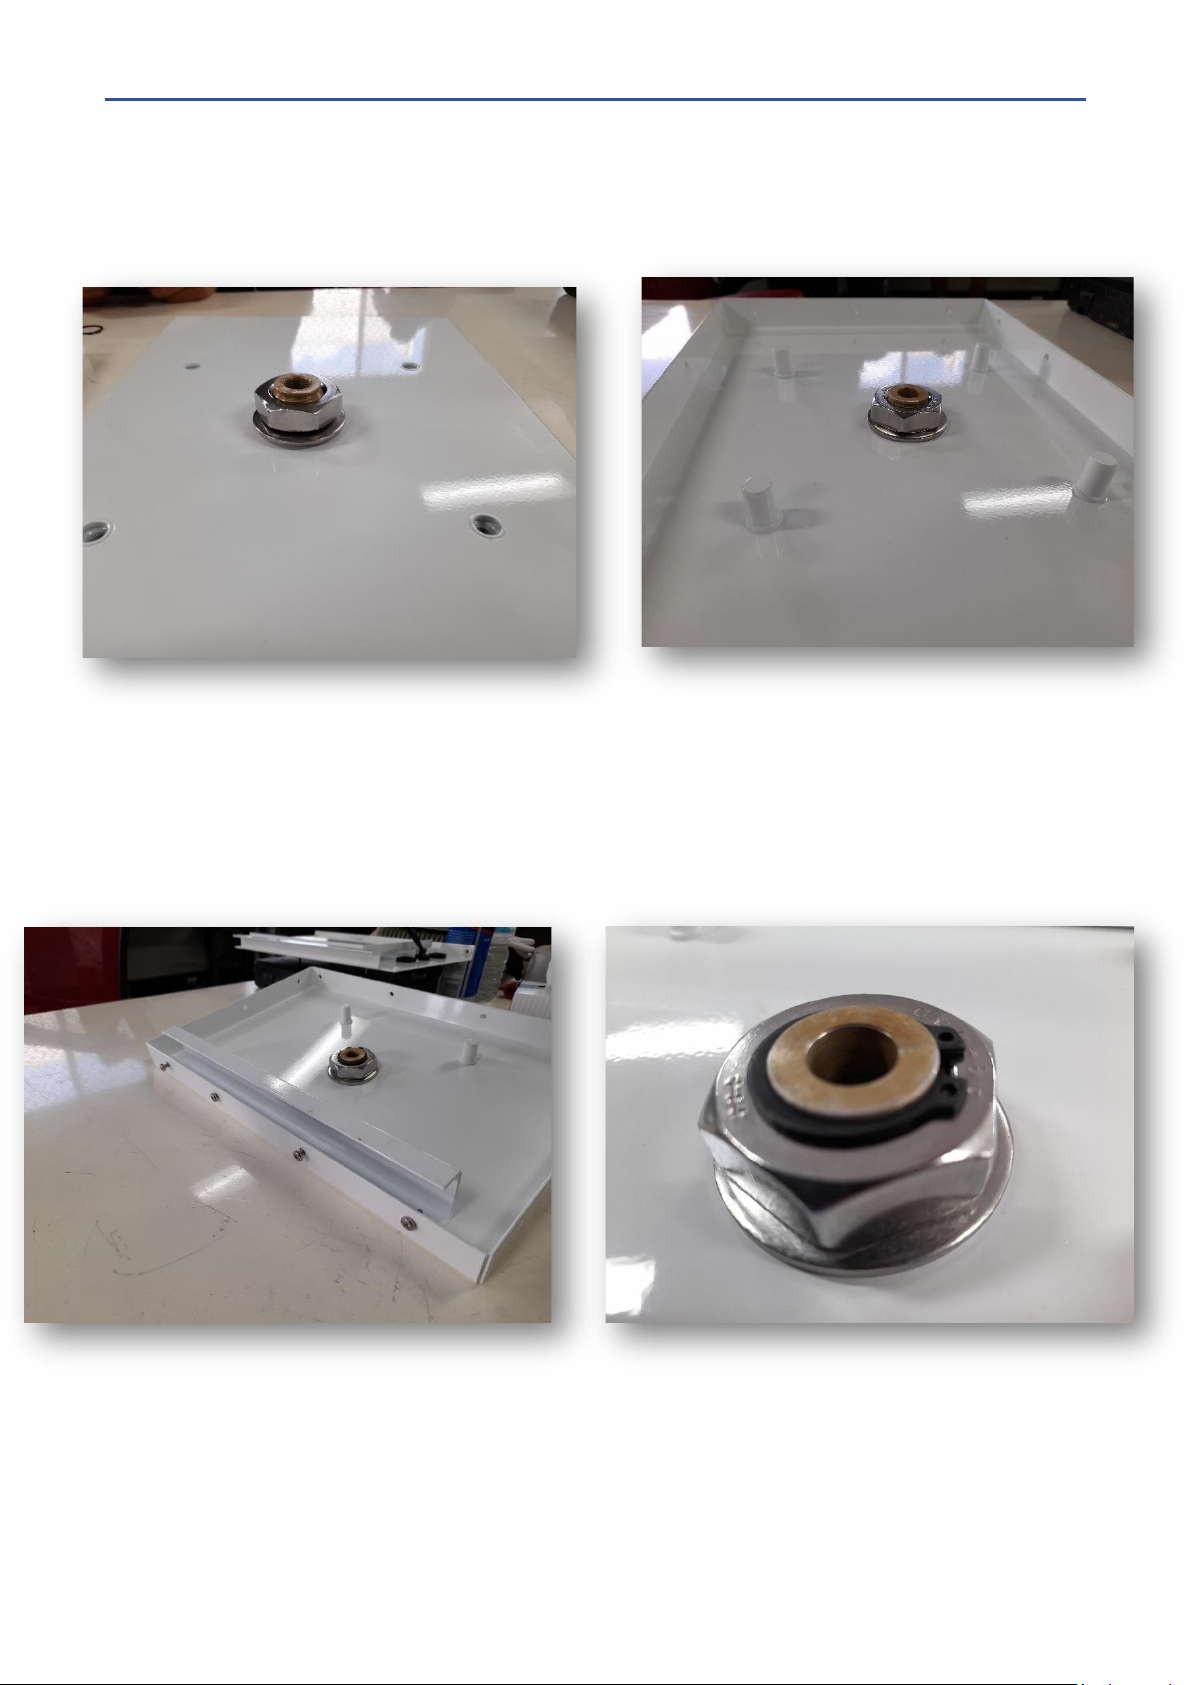
Step 1:
With the thread on top, screw the Brass solar gland
into the top of the cover.
Guide for HD5 Assembly
OPSMN011 Rev 3 Dated: 29.06.2022
5
Step 2:
Secure on both sides with 2 M24 washers and 2 M24 Nuts. And add nut clip
Step 3:
Using 4 M4x10 bolts to attach the Door cover. Tighten until firm.
Other manuals for HD5
2
Table of contents
Other Spectur Industrial Equipment manuals


