Spedal C326 User manual

USER MANUAL
009C1823-EN
C326
DASHCAM

CONTENT
Thank you for purchasing the SPEDAL C326 2K Dashcam. Please read this user manual carefully and keep
it for future reference. If you need any assistance, please contact our support team and send your product
SAFETY INSTRUCTIONS ..................................................................................................................01
Warnings ...........................................................................................................................................01
Caution ..............................................................................................................................................01
INSTALLATION GUIDE......................................................................................................................02
Installation Position ...........................................................................................................................02
TF Card Installation ...........................................................................................................................02
lnstallation Method ............................................................................................................................02
PRODUCT INTRODUCTION ..............................................................................................................03
Package Contents .............................................................................................................................03
Product Diagram ...............................................................................................................................03
System LED Indicators......................................................................................................................03
Control Buttons..................................................................................................................................03
GENERAL SETTINGS........................................................................................................................04
FUNCTION INTRODUCTION .............................................................................................................05
Video Recording................................................................................................................................05
Emergency Recording.......................................................................................................................05
Audio Recording................................................................................................................................05
Snapshot ...........................................................................................................................................06
Viewing Photos and Videos...............................................................................................................06
Deleting and Locking / Unlocking Photos and Videos.......................................................................06
FILE TRANSFER ................................................................................................................................06
USB File Transfer..............................................................................................................................06
TF Card File Transfer ........................................................................................................................06
SPECIFICATIONS ..............................................................................................................................07
- 01 -
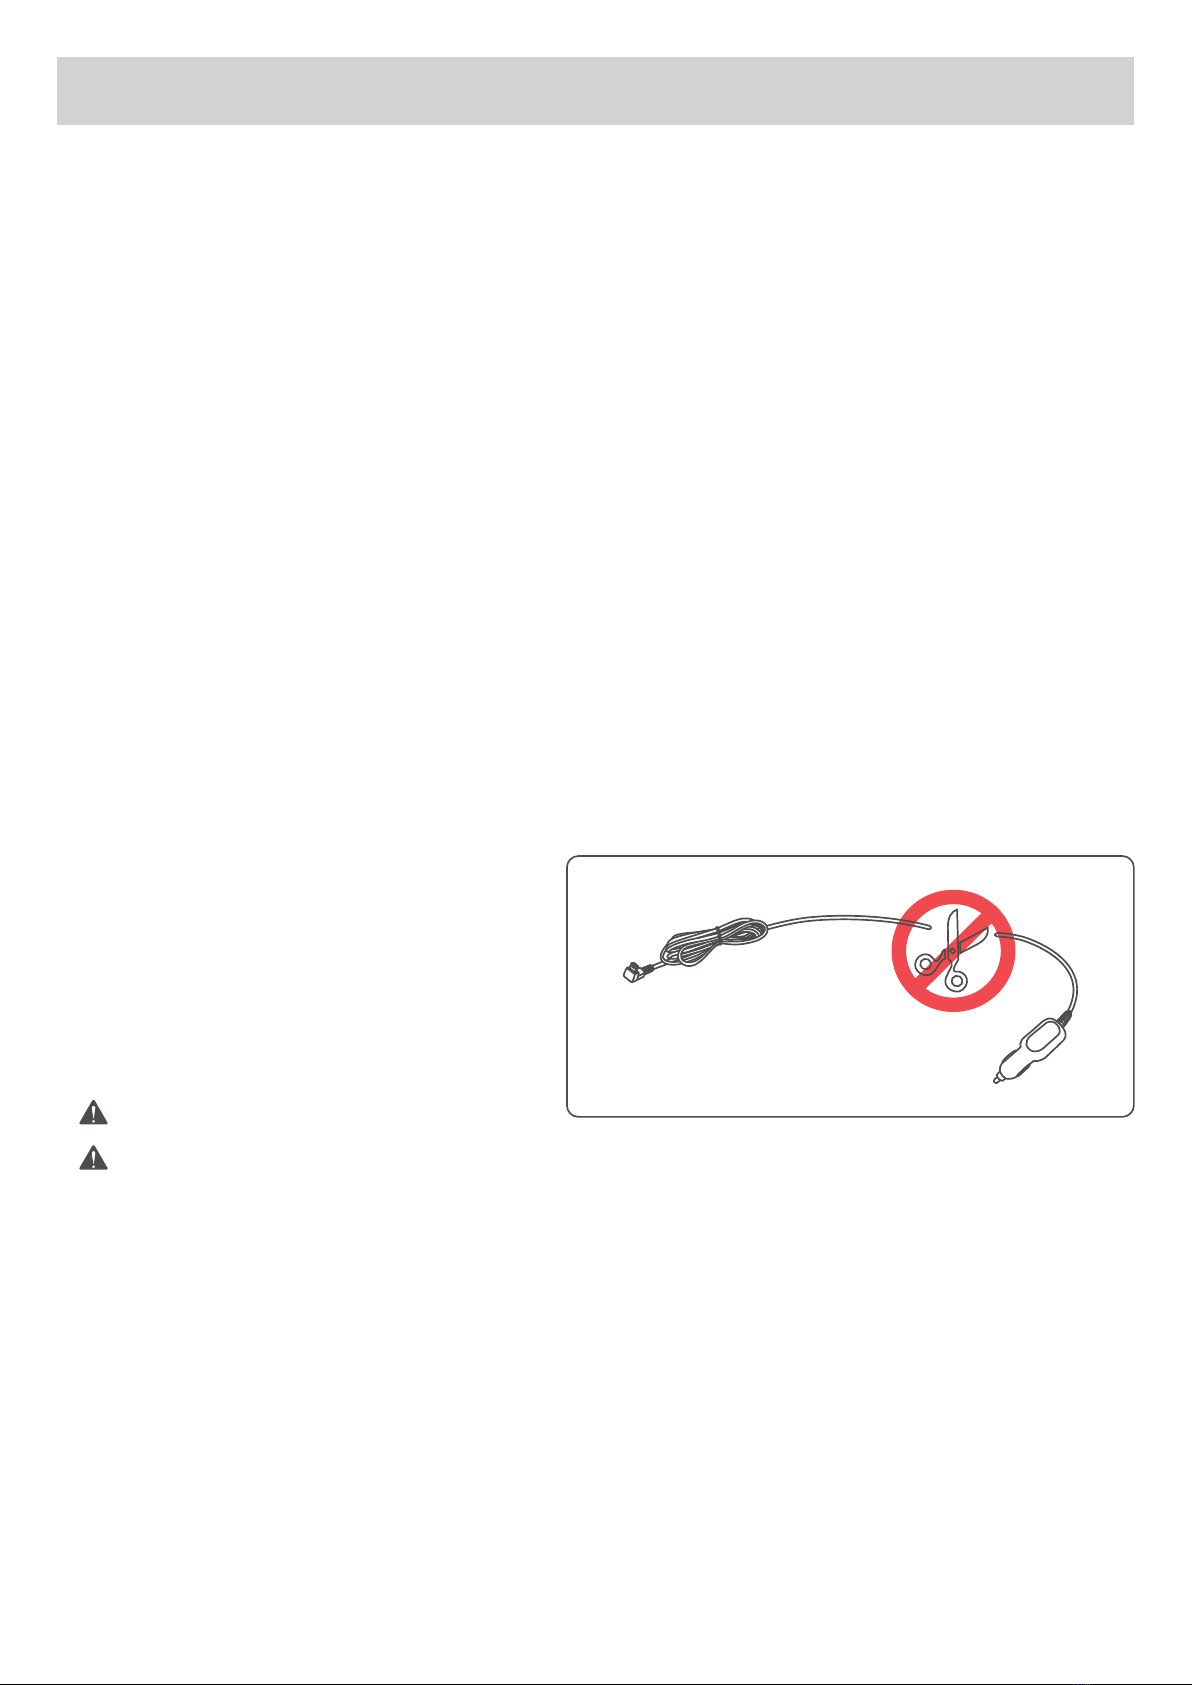
Do not cut the charging cable!
Damage caused to the dashcam as a result is not covered by the warranty!
SAFETY INSTRUCTIONS
Warnings
● Do not install or operate the dashcam with wet hands.
● Do not install the dashcam in places with high humidity, flammable gases, liquids, and positions
blocking the sight of the driver or the safety area.
● Do not expose the dashcam in high temperature inside a sealed compartment for a long time.
● Do not use the dashcam in excess of the rated voltage.
● The cigarette lighter socket of your car continues to supply electricity after the engine is off, please
disconnect the dashcam plug from the socket before leaving the car to prevent the automotive battery
from depletion or other accidents.
● Keep the dashcam, accessories and package away from children!
● Use only the charging cable provided by the manufacturer. This company assumes no responsibility for
any damage caused by the use of non-genuine charging cables.
● Do not disassemble the dashcam or the charging cable.
● Please recycle the battery in accordance with local laws and regulations.
● Please do not attempt to disassemble, modify or heat up the battery.
● Do not replace the battery by yourself. Improper battery replacement may result in explosion!
● Keep the battery away from water (e.g. seawater) and other liquids.
Caution
● Do not forcefully press the lens.
● Do not prick the dashcam or accessories with an awl or sharp object.
● Do not immediately remove the TF card from a shutting down dashcam to prevent the file from damage.
● Please use a Class 10 or above TF card of at least 8GB (maximum 128GB)
● Before using the TF card on the dashcam for the first time, please format the TF card in the dashcam
to ensure read / write stability.
● Do not disconnect power during system upgrade! The dashcam may be unable to boot afterwards!
● Contents of this manual are subject to change without prior notice.
● Prevent short circuit on the battery.
● Keep the battery away from direct sunlight,
fire, or an environment with excessive
heat to prevent explosion.
● Do not throw the battery in a fire to prevent
explosion.
- 02 -
The suction mount can be replaced by sticker mount. Select a proper position, tear the
protective paper and paste into the front windshield (do not move within 24 hours)
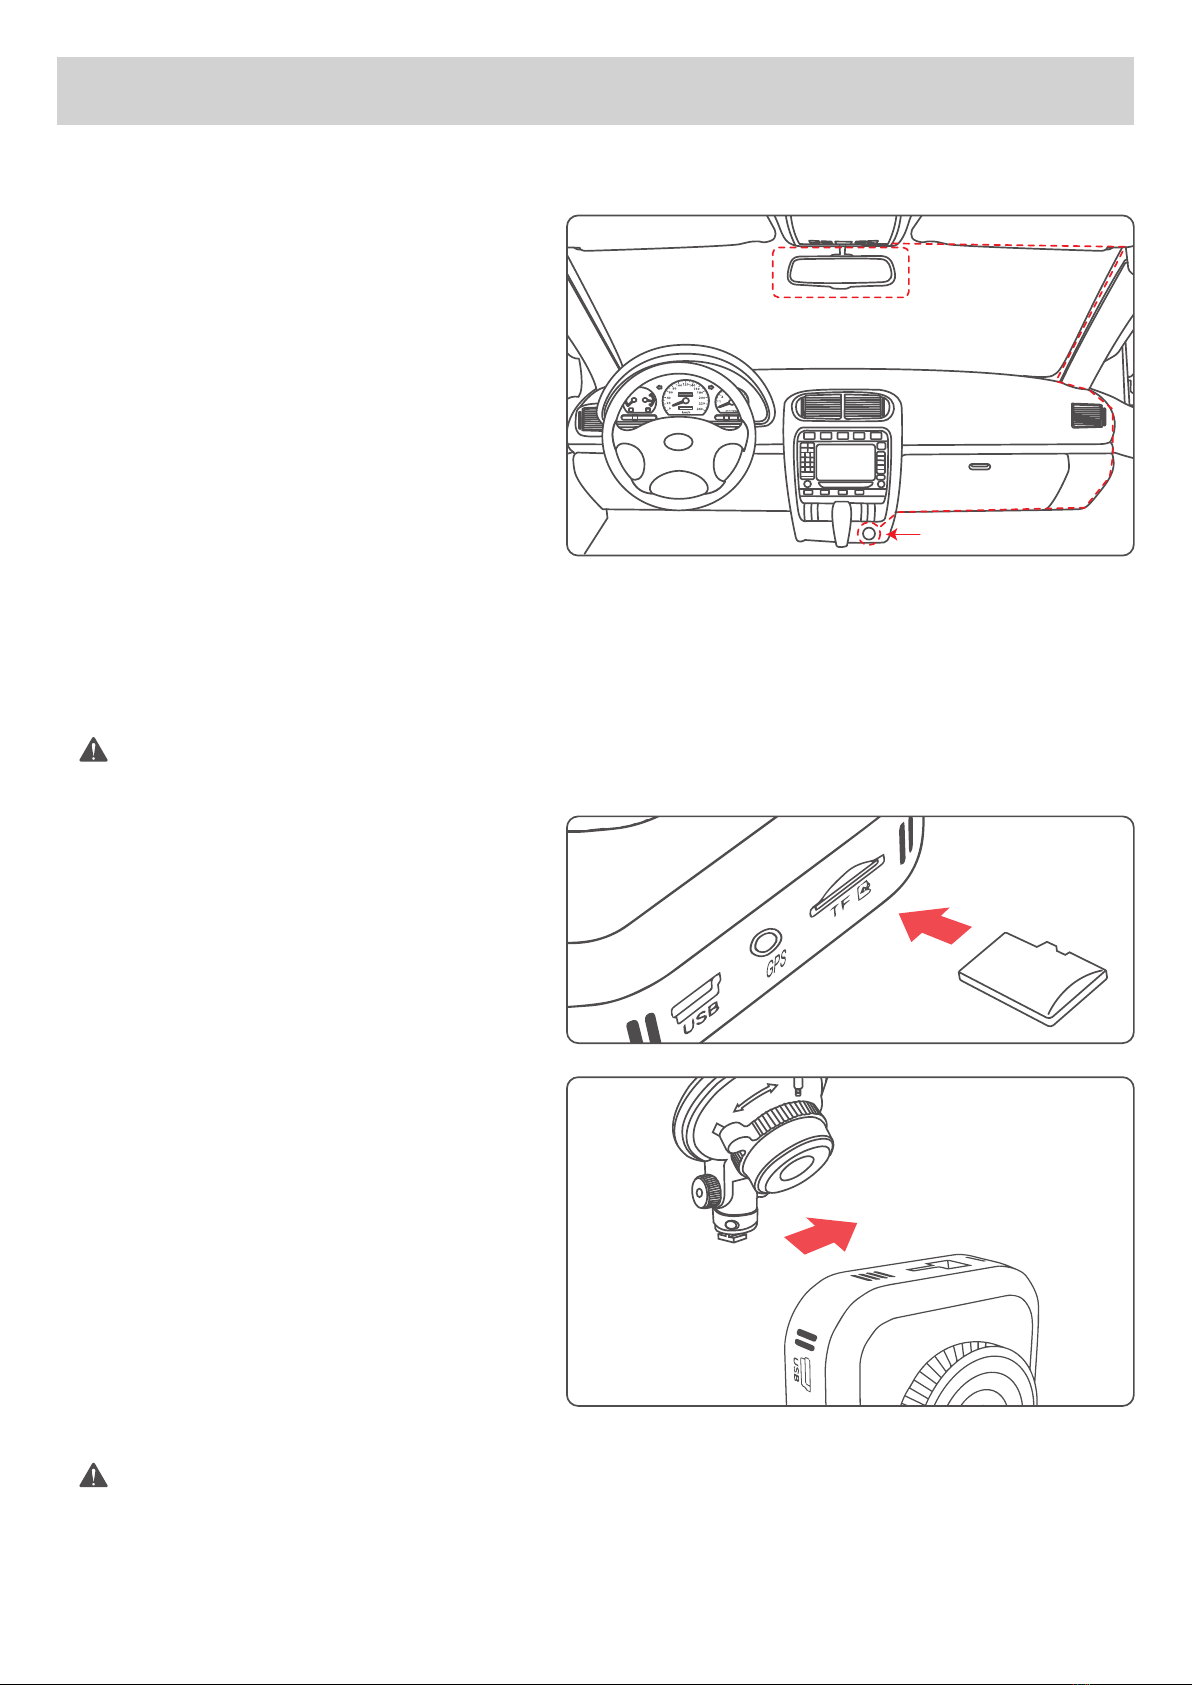
lnstallation Method
1. Aim the magnetic transfer slide buckle at
the mount buckle on the dashcam.
2. Hold the dashcam and chuck bracket with
your hands, and aim the mount at the
chuck bracket on the dashcam.
3. Select a proper position (such as the
center of the rearview mirror), attach the
suction mound to the windshield and
rotate the mount clockwise to lock.
4. Adjust the recording angle (it is the best angle that the car front shows in the middle of the display).
Do not install the dashcam on top of the airbag cover or the airbag operating range. This
company assumes no responsibility for injury or death caused by car impact or airbag
problems.
Installation Position
● Do not install the dashcam in a position
that will block the view of the driver or in
an unsafe area.
● Install the dashcam near the rearview
mirror but not in a place that will block the
vision of the driver.
● lnstall the dashcam within the wiper blade
area to ensure that the camera lens will
capture clear video on a rainy day.
● Do not install the dashcam near the airbag operating range.
● Do not install the dashcam on the windscreen protection film to prevent damage to the protection film.
● Install the dashcam in a position that will not affect any other electronic devices you may have in your
vehicle.
Dashcam
In-Car Charger
● Install the TF card in the TF socket with the
pins facing downwards.
TF Card Installation
INSTALLATION GUIDE

- 03 -
Control Buttons
Recording Mode
Long press to turn off the dashcam when connected to car power.
Long press again to turn it back on.
: Entering emergency recording mode
: View playlist (short press)
Turn on / off Audio
Recording (long press)
Press and hold for 7 seconds to restart the dashcam (this will not affect the saved files)
: Open “Setup” menu (short press)
Take a snapshot (long press)
: Turn on / off the screen
Playlist & Setup Menu
: Return to previous menu
: Move up
: Move down
: Enter / Confirm
Playback Mode
: Return to playlist / Stop
: Delete / Rewind
: Lock & Unlock / Fast-forward
: Play / Pause
PRODUCT INTRODUCTION
Package Contents
Product Diagram
● 2K Dashcam ● Car Charger ● Sticker Mount ● Suction Mount
● Cable Clips ● Quick Guide
System LED Indicators
● Solid Green: On; not recording ● Flashing Green: On; recording
Mount Locking Clip
Lens
GPS Input
USB Input
TF Card Slot
Screen
Control Buttons
Reset Button
Microphone
Power Button

- 04 -
Resolution
Video Duration
Date / Time
Time Zone
Date Stamp
Audio Recording
Keyboard Clicks
EV
Light Source Frequency
Speed Unit
Collision Sensitivity
Language
Screen Saver
Motion Detection
Time-lapse Recording
Format
Format Warning
Restore Factory Settings
Version
Choose recording resolutions from 1440P30 2560*1440 /
1296P30 2304*1296 / 1080P60 1920*1080 / 1080P30 1920*1080
/ 720P60 1280*720 / 720P30 1280*720.
Choose a time length from 3 / 5 / 10 minutes for each video
recording.
Change the date and time in system.
Choose Greenwich Mean Time between GMT -12 and GMT +13).
Turn on / off time display on your videos / photos.
Trun on / off audio recording when in video recording mode.
Turn on / off the keyboard click sound.
Choose exposure value from -1.0, -2/3, -1/3, +0.0, +1/3, +2/3,
+1.0.
Choose light source frequency from 50Hz and 60Hz.
Choose speed unit display from km/h and mp/h.
Choose gravity sensor sensitivity from Low / Middle / High / Off.
Choose system language from English, Français, Español,
Deutsch, Italiano, 日本語, Português, Русский, 简体中文, 繁體中
文.
Choose automatic screen off time from 1 minute / 3 minutes / off.
Turn on / off motion detection.
Turn on / off time-lapse recording.
Delete all data and restore the device back to factory settings.
Choose format timer from 15 Days / 30 Days / 60 Days / Off.
Restore all settings without deleting any videos or photos.
View the system version.
GENERAL SETTINGS

- 05 -
Time-Lapse Recording is not suitable for monitoring purposes while driving.
Video Recording
FUNCTION INTRODUCTION
● Loop Recording
The dashcam will start video recording automatically after powering on. When the TF card storage is full,
old footages will be replaced by new ones automatically if the old ones are not locked. You can choose 3
/ 5 / 10 Minutes for the video length.
● Motion Detection Recording
Turn on “Motion Detection” in “Setup” menu. This function is designed to monitor, when you have parked
and left your vehicle but still requires a continuous power supply. It will record video each time motion is
detected.
● Time-Lapse Recording
Turn on “Time-Lapse Recording” in “Setup” menu. This function will capture ten photos per second to
make a video played at a high-quality 10fps frame rate. The videos will be saved in the “Video File” folder.
You can enter the playlist or “Setup” menu (or disconnect power) to end emergency recording
mode.
Emergency Recording
● Manual File Backup
Press to back up the current file so that it will not be overwritten. An icon will appear in the
top-left of the screen to indicate a protected emergency recording is in progress.
● Auto File Backup
Once the G-sensor is activated by a sudden collision, the dashcam will automatically start recording and
protect it from being overwritten. You can adjust the G-sensor sensitivity in the “Setup” menu.
Audio Recording
Turn on / off audio recording by long-pressing when in video recording mode (or by turning on
“Audio Recording” in the “Setup” menu). Details from the recorded sound may provide useful information,
such as possible hazards that may develop, especially when off-camera.

- 06 -
USB File Transfer
FILE TRANSFER
1. Connect the dashcam (with TF card inserted) to your computer using your own USB mini-B data cable
(the included cable is for power supply only). It should be recognized as a removable device.
2. Find the video recording files located in the \SPEDAL\Movie folder. Find the snapshots in
\SPEDAL\Photo.
3. Copy the files to your computer.
TF Card File Transfer
1. Shut down the dashcam and eject the TF card.
2. Insert the TF card into a computer TF card slot or reader and your computer will automatically detect
the TF card.
3. Find the video recording files located in the \SPEDAL\Movie folder or \SPEDAL\Photo for snapshots.
4. Copy the files to your computer.
Snapshot
● Hold down for 3 seconds to take a snapshot while in recording mode.
● The snapshot files are located in the \SPEDAL\Photo folder on the TF card.
● An icon will be shown after you take a snapshot. This will not interfere with the video recording.
Viewing Photos and Videos
1. Press to enter the playlist.
2. View photos or videos by choosing either “Photo File” or “Video File”.
3. Select the file you want to view and press .
4. For videos, press again to begin playback.
Deleting and Locking / Unlocking Photos and Videos
● Press to delete or to lock / unlock a photo or video file after selecting it from the playlist.
If a video is being played, press to stop it and then press to delete or to lock / unlock.
● Once deleted, photos and videos can not be recovered.
● If you lock a photo or video, it will be protected and will not be overwritten.

- 07 -
SPECIFICATIONS
Display
Aperture
Resolution
Field Angle
Power Input
Video Format
Photo Format
Storage Device
Operating Temp.
Dimensions
Weight
2.0" LCD
F#1.6
1440p (30fps), 1296p (30fps), 1080p (30fps), 1080p (60fps),
720p (60fps), 720p (30fps)
170°
DC 5V 1.5A
MP4
JPEG
TF card (Max support 128GB)
0°C~60°C / 32°F~140°F
63*64*33mm / 2.49”*2.51”*1.32”
70g
For any questions please contact [email protected]
EN
DE
FR
ES
IT
PL
SV
Download manuals of other languages from our homepage.
Laden Sie Handbücher in anderen Sprachen von unserer Homepage herunter.
Téléchargez des manuels dans d'autres langues depuis notre page d'accueil.
Descargue manuales en otros idiomas desde nuestra página de inicio.
Scarica manuali in altre lingue dalla nostra homepage.
Pobierz instrukcje obsługi w innych językach z naszej strony internetowej.
Ladda ner manualer från andra språk från vår hemsida.
Scan the QR Code
www.spedal.cc
Table of contents
Other Spedal Dashcam manuals


