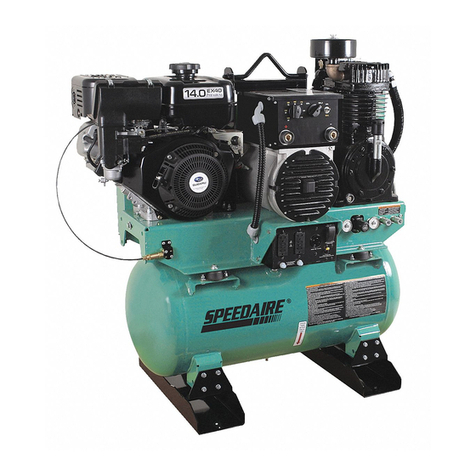
Speedaire 787U81 Instructions for use

Operating Instructions & Parts ManualEN
Model 787U81
Portable Electric
Quiet Oil-Free
Air Compressor

EVASDNADAERESAELP
.SNOITCURTSNIESEHT
YLLUFERACDAER
BEFORE ATTEMPTING
TO ASSEMBLE, INSTALL,
EHTNIATNIAMROETAREPO
PRODUCT DESCRIBED.
PROTECT YOURSELF AND
OTHERS BY OBSERVING ALL
SAFETY INFORMATION. FAILURE
TO COMPLY WITH INSTRUCTIONS
COULD RESULT IN PERSONAL
INJURY AND/OR PROPERTY DAMAGE!
RETAIN INSTRUCTIONS FOR FUTURE
REFERENCE.
PLEASE REFER TO BACK COVER
GNIDRAGERNOITAMROFNIROF
THE SPEEDAIRE WARRANTY AND OTHER
IMPORTANT INFORMATION.
Model #: ___________________
Serial #: ___________________
Purch. Date: _______________
Form 5S787U81 / Printed in China
03865 Version 0 10/2021
© 2021 W.W. Grainger, Inc.
All Rights Reserved

BEFORE YOU BEGIN
GETTING STARTEDSAFETY /
SPECIFICATIONS
ASSEMBLY /
INSTALLATIONOPERATION TROUBLESHOOTING MAINTENANCE /
REPAIR
1
Electrical requirements:
• 120 V AC, 60 Hz, 15 Amps
UNPACKING
KEY PARTS DIAGRAM
K. Power CordE. Air Pressure Regulator
G. Outlet Pressure Gauge
F. Tank Pressure Gauge
D. ON/OFF Switch
H. 2 Quick CouplersB. Air Compressor Pump
A. Electric Motor
See General Safety Instructions on page 3, and Cautions and
Warnings as shown.
J. Air Tank
I. Drain ValveC. Safety Valve
D
2. When unpacking the unit, carefully inspect for any damage that
may have occurred during transit.
3. Check for loose, missing or damaged parts before putting the
unit into service.
4. If the unit has been damaged, contact customer service
at 1-800-323-0620.
1. The carton should contain:
• Air Compressor
• Operating Instruction & Parts Manual
C
I
OFF
ON
F
GE
H
J
A
K
B

PARTS DESCRIPTION
2
A. Electric Motor
The motor is used to power the pump.
B. Air Compressor Pump
The pump is used to compress the air and discharge it into the tank via
the piston moving up and down in the cylinder.
C. Safety Valve
This valve is used to prevent system failure by reducing pressure from the
system when it reaches a preset level if the ON/OFF switch has not shut
down the motor. It will pop open automatically, or it can be activated
manually by pulling the ring on the valve.
D. ON/OFF Switch
This switch turns on the compressor and is operated manually. When in
the ON position, it allows the compressor to start up or shut down
automatically, without warning, upon air demand. ALWAYS set this switch
to OFF when the compressor is not being used, and before unplugging
the compressor.
E. Air Pressure Regulator
The regulator is used to adjust the pressure inside the line to the tool that
is being used. Turn the knob clockwise to increase the pressure and
counterclock-wise to decrease the pressure.
F. Tank Pressure Gauge
The gauge is used to measure the stored air pressure level of the tank. It is
not adjustable by the operator and does not indicate line pressure.
G. Outlet Pressure Gauge
The gauge measures the regulated outlet pressure.
H. Quick Coupler
The quick coupler is connected to a quick connector and is used for
connecting an air hose.
I. Drain Valve
The drain valve is used to remove moisture from the air tank after
the unit is shut off.
J. Air Tank
The tank is used to store the compressed air.
K. Power Cord
This product is for use on a nominal 120-volt circuit and should be
grounded. A cord with a grounding plug must be used. Make sure the
product is connected to an outlet having the same configuration as the plug
(see Figure 1). No adapter should be used with this product.
Check with a licensed electrician if the grounding instructions are not
understood or there is doubt as to whether the product is properly
grounded. Do not modify the plug provided. If it will not fit the outlet,
have the proper outlet installed by a licensed electrician.
Improper installation of the grounding plug will
result in a risk of electric shock.
If repair or replacement of the cord or plug is
necessary, do not connect the grounding wire to
either at blade terminal. The grounding wire is in
the green outer surface.
DANGER
Plug
Figure 1
Grounded
Outlet
Grounding
Pin
MAINTENANCE /
REPAIR TROUBLESHOOTING OPERATION ASSEMBLY /
INSTALLATION
SAFETY /
SPECIFICATIONS GETTING STARTED

GETTING STARTED SAFETY /
SPECIFICATIONS
ASSEMBLY /
INSTALLATION OPERATION TROUBLESHOOTING MAINTENANCE /
REPAIR
GENERAL SAFETY INFORMATION
The manufacturer cannot possibly anticipate every possible circumstance
that might involve a hazard. The warnings in this manual, and the tags and
decals affixed to the unit are, therefore, not all-inclusive. If you use a
procedure, work method, or operating technique that the manufacturer
does not specifically recommend, you must satisfy yourself that it is safe
for you and others. You must also make sure that the procedure, work
method, or operating technique that you choose does not render the
compressor unsafe.
The safety alert symbol indicates a potential hazard to personal injury. A signal
word (DANGER, WARNING, or CAUTION) is used with the alert symbol to
designate a degree or level of hazard seriousness. A safety symbol may be
used to represent the type of hazard. The signal word NOTICE is used to address
practices not related to personal injury.
Product Information
Body color SPEEDAIRE Green powder coat finish.
Materials of
ConstructionSteel tank.
Advantage
or benefit
Reinforced frames well protect the pump/motor.
Oil-free pump is maintenance free.
ApplicationNailer, framing nailer, impact wrench, ratchet,
spray gun, air chisel etc 14 above air tools.
Other
information
Portable electric oil-free air compressor, vertical
tank type, weight 123 lb.
3
Important Safety Information
Safety Symbols and Meanings
Hot SurfaceFlying Objects
WarningElectrical ShockToxic Fumes
Operator's Manual BurstingFire
Hearing
Indicates a hazard which, if not avoided, will result in
death or serious injury.
Indicates a hazard which, if not avoided, could result in
death or serious injury.
Indicates a hazard which, if not avoided, may result in
minor or moderate injury.
Notice: Indicates a practice not related to personal injury which if not avoided, may
result in property change.
DANGER
CAUTION
WARNING

DO NOT OPERATE THIS UNIT UNTIL YOU READ AND UNDERSTAND THIS
INSTRUCTION MANUAL FOR SAFETY, OPERATION, AND MAINTENANCE
INSTRUCTIONS.
GENERAL SAFETYINFORMATION
4
WARNING
Dust can be created when cutting, sanding, drilling or grinding
materials such as wood, paint, metal, concrete, cement, or
other masonry. To reduce your exposure to these chemicals,
work in a well ventilated area and ALWAYS wear approved
safety equipment.
Do not weld or repair tank.
Risk of fire caused by sparks from motor and ON/OFF switch
could result in death or serious injury. Do not operate compressor
near flammable gas or vapor. Never store flammable liquids or
gases in vicinity of compressor.
High pressure air could result in death or serious injury. Never
operate above maximum operating pressure of the spray gun
or tool. Drain water from tank after each use.
Do not operate with ON/OFF switch or safety valve set above
maximum allowable working pressure.
Do not restrict compressor ventilation openings or place
objects against or on top of compressor. Operate compressor
only in a clean, dry, well ventilated area.
Do not operate unattended. Always turn off and unplug unit
when not in use.
Do not spray flammable materials in vicinity of any flame or
ignition sources including the compressor unit.
Risk of fire could result in death or serious injury.
Hot compressor surfaces could result in serious injury. Allow
compressor to cool before touching.
Inhalation hazard. Using compressor to supply breathing air
could result in death or serious injury. Do not use compressor
to supply breathing air.
Risk of serious eye injury. Always wear ANSI Z87.1 approved
safety glasses when using air compressor. Do not spray any part
of the body.
Shock risk could result in death or serious injury. Only connect
compressor to a properly grounded receptacle.
KEEP CHILDREN AWAY FROM THE AIR COMPRESSOR
AT ALL TIMES.
This product can expose you to chemicals
including lead, which is known to the State of
California to cause cancer, birth defects or ther reproductive harm.
For more information go to www.P65warnings.Ca.Gov.
WARNING
MAINTENANCE /
REPAIR TROUBLESHOOTING OPERATION ASSEMBLY /
INSTALLATION
SAFETY /
SPECIFICATIONS GETTING STARTED

5
DIAGRAMS
Grainger
Item No. Air TankMotor
Ratings
CFM
Ratings
Pressure
Ratngs
Lube
RequirementsMotor Type
787U81 Vertical
Tank Type,
Tank Size
26 gal
HP 2.0,
120V AC
Voltage,
Full Load
Amps
15
Free Air
CFM @
90 PSI
5.2,
Free Air
CFM
@ Max.
Pressure
3.9
Max.
Pressure
150 PSI,
dBA @
3Feet
73.0
Lubrication
Type Oil
Free,
UL 1450
Standard
Motor RPM
1700,
Quiet
Induction
Motor Type,
Avg. Pump
Life 1000
hrs
787U81 20.5/521 17.5/445 48/1219
DIMENSIONS
SPECIFICATIONS
GETTING STARTED SAFETY /
SPECIFICATIONS
ASSEMBLY /
INSTALLATION OPERATION TROUBLESHOOTING MAINTENANCE /
REPAIR
521 mm
20.5 Inches 445 mm
17.5 Inches
521 mm
20.5 Inches
1219 mm
48 Inches
Grainger Item No. Length (In./mm) Width (In./mm) Height (In./mm)

6
ASSEMBLY INSTRUCTIONS
1. Positioning of the air compressor (Fig A):
a. Position the air compressor (1) near an electrical outlet (2).
b. The compressor must be at least 12" (31 cm) from any wall (3)
or obstruction, in a clean, well-ventilated area to ensure sufficient
air flow and cooling.
c. Place the air compressor on the floor or a hard, level surface.
The air compressor must be level to ensure proper drainage.
2. Connect air hose to compressor (Fig B):
Connect the air hose (1) to the compressor’s quick coupler (2) with the
quick connector (3).
Fig A Fig B
Fig C
NOTE: Air hose and quick connector are not provided and need to be
purchased separately. Apply plumber's tape on all threads
to prevent air leakage.
WARNING
CAUTION
To avoid personal injury, always shut off and unplug the unit and relieve
all air pressure from the system before performing any service on the
air compressor.
Escaping air and moisture can propel debris that may cause
eye injury. Wear safety glasses when opening the drain valve.
Risk of unsafe operation. Unit cycles automatically when power is on.
When performing maintenance, you may be exposed to voltage sources,
compressed air or moving parts. Personal injuries can occur. Before performing
any maintenance or repair, disconnect power source from the compressor and
bleed off all air pressure.
MAINTENANCE /
REPAIR TROUBLESHOOTING OPERATION ASSEMBLY /
INSTALLATION
SAFETY /
SPECIFICATIONS GETTING STARTED
12 / 31 cm
(1) (1)
(2) (2)
(3)
(3)
3. Attaching the air filters (Fig C):
a. Insert the threaded end of
b. Rotate clockwise to tighten.
Hand tighten only.
(4)
the air filters (4) into the
threaded port of the pump
head. Do not apply thread
tape to the air filter
assembly's threads.

7
OPERATING INSTRUCTIONS
Break in the pump (Fig D):
1. Set the ON/OFF switch (1) to the OFF position.
2. Open tank drain valve (4) by turning it counter-clockwise to permit the
air to escape and prevent air pressure build-up in the air tank during
the break-in period.
3. Turn the air pressure regulator (5) clockwise until it stops.
4. Plug in the power cord (2).
a. Use a dedicated circuit. The compressor will use the full capacity of
a typical 15A household circuit. If any other electrical devices are
drawing from the compressor's circuit, the air compressor may fail to
start, especially in cold conditions.
b. Disconnect the power cord only after break-in process has been
completed, otherwise the motor might get damaged.
5. Set the ON/OFF switch (1) to the ON position. The compressor will
start. Run the compressor for 30 minutes. If it fails, turn it off
immediately and call the toll-free helpline at:
1-800-323-0620
.
Please note that breaking-in the unit is only requiresd prior to first
use.
6. After 30 minutes, turn off the ON/OFF switch.
7. Close the tank drain valve (1) by turning it clockwise.
8. Set the ON/OFF switch (1) to the ON position. The air receiver will fill
to "cut-out" pressure and then the compressor's motor will stop.
The compressor is now ready for use.
GETTING STARTED SAFETY /
SPECIFICATIONS
ASSEMBLY /
INSTALLATION OPERATION TROUBLESHOOTING MAINTENANCE /
REPAIR
Before each start-up (Fig D and E):
1. Set the ON/OFF switch (1) to the OFF position.
2. Turn the air pressure regulator (5) counter-clockwise until it
stops.
3. Attach air hose/accessories or air tools (not included) to the air line
outlet.

OPERATING INSTRUCTIONS
How to start (Fig D):
1. Close the tank drain valve (4).
2. Plug-in the power cord (2).
3. Set the ON/OFF switch (1) to the ON position and allow the tank pressure
to build. Motor will stop when tank pressure reaches cut-out pressure.
4. Turn the air pressure regulator knob (5) clockwise until desired pressure
is reached.
5. The compressor is ready for use.
How to shut down (Fig D):
1. Set the ON/OFF switch (1) to the OFF position.
2. Unplug the power cord (2).
3. Reduce the pressure in the tank through the outlet hose or by pulling the
safety valve ring (3) and keeping it open.
4. Once pressure has been removed from the tank, tip the compressor so
the tank drain valve (4) is at the bottom of the tank. Open the tank drain
valve counter-clockwise to allow any moisture to drain from the tank.
Fig D
4
1
5
2
8
MAINTENANCE /
REPAIR TROUBLESHOOTING OPERATION ASSEMBLY /
INSTALLATION
SAFETY /
SPECIFICATIONS GETTING STARTED
Fig E
3
OFF
ON

9
TROUBLESHOOTING
Possible CausesSymptoms Corrective
Actions
1. There is low pressure,
not enough air, or the
compressor does
not stop.
2. Air leaks from the
regulator or the
regulator does not
regulate air pressure.
1. The tank drain valve is open.
2. There is a leak in the fittings.
3. There is a prolonged or
excessive use of air.
4. The CFM of this unit is
not large enough.
5. There is a hole in the
air hose.
6. The tank leaks.
7. The seals are blown.
8. The valve leaks.
9. There is a leaking or
worn piston.
1. The internal parts of the
regulator are dirty or
damaged.
1. Replace the regulator or
internal parts.
3. The outlet pressure
gauge reading drops
when the air accessory
is being used.
1. This is normal.
2. The CFM of this unit is
not large enough.
1. If the pressure drops
too low, adjust the outlet
pressure gauge while
the accessory is used.
2. Check the air requirement
of the accessory. If it is
higher than the CFM and
the pressure supplied by
the compressor, you need
a larger compressor. Most
accessories are rated at
25% of the actual CFM
while running continuously.
1. Close the drain valve.
2. Check fittings with soapy
water. Tighten or reseal
leaking fittings. DO NOT
OVERTIGHTEN.
3. Decrease the amount of
air used.
4. Check the air requirement
of the accessory. If it is
higher than the CFM and
the pressure supplied by
the compressor, you need
a larger compressor. Most
accessories are rated at
25% of the actual CFM
while running continuously.
5. Check and replace
if necessary.
6. Immediately replace the
tank. DO NOT attempt
to repair.
7. Replace the seals.
8. Replace the valve.
9. Replace the piston.
GETTING STARTED SAFETY /
SPECIFICATIONS
ASSEMBLY /
INSTALLATION OPERATION TROUBLESHOOTING MAINTENANCE /
REPAIR

10
TROUBLESHOOTING
Possible CausesSymptoms Corrective
Actions
4. The safety valve
opens.
1. The tank pressure exceeds
the normal rating pressure.
2. The pressure switch is stuck.
1. Replace the
pressure switch.
2. Replace the
pressure switch.
5. The motor does not run. 1. Tank pressure exceeds the
preset pressure switch limit.
2. The fuse is blown or the
circuit breaker tripped
3. The check valve is stuck
in the open position.
4. The wire gauge of the cord
is wrong or the extension
cord length is excessive.
5. There are loose electrical
connections.
6. The motor, capacitor or
safety valve is defective.
1. The motor will start
automatically when the
tank pressure drops
below the tank cut-in
pressure.
2. Replace the blown fuse
or reset the circuit
breaker. Do not use a
fuse or circuit breaker
with a higher rating than
specified for your branch
circuit. Check for proper
fuse; type T fuse is
acceptable. Check for
low voltage and proper
extension cord size.
Disconnect other
electrical devices from
the circuit. Operate the
compressor on a
dedicated circuit.
3. Remove and clean
or replace.
4. Check for proper
gauge and extension
cord length.
5. Contact an authorized
serviec center.
6. Have the compressor
serviced by a
qualified technician.
MAINTENANCE /
REPAIR TROUBLESHOOTING OPERATION ASSEMBLY /
INSTALLATION
SAFETY /
SPECIFICATIONS GETTING STARTED

11
MAINTENANCE
To avoid personal injury, always shut off and unplug the unit and remove all
air pressure from the system before performing any maintenance.
Regular maintenance will ensure trouble-free operation.
DESCRIPTIONTASK SERVICE
INTERVAL
To prevent corrosion inside the tank, the condensation
must be drained at the end of every workday. Be sure
to wear protective goggles. Relieve the air pressure in
the system and then open the drain valve on the
bottom of the tank. CLOSE
OPEN
Pull the ring on the safety valve daily to ensure that it is
operating properly and to clear the valve of any
possible obstructions.
Check all connections to insure they are tight. A small
leak of any of part (the tank, hoses, pipe connections
or transfer tubes) will reduce the unit’s performance.
Spray a small amount of soapy water around the area
of the suspected leak with a spray bottle. If bubbles
appear, repair or replace the faulty component. Do not
overtighten any connections.
Before storing the unit for a long period, use an air
blow gun to clean all dust and debris from the
compressor. Disconnect and coil the power cord. Pull
the ring on the safety valve to release all pressure from
the tank. Drain all moisture from the tank. Cover the
entire unit to protect it from moisture and dust.
Drain the tank
Check the
safety valve
Test for
leaks
Storage
Daily
Daily
Monthly
Prior to
storing
WARNING
GETTING STARTED SAFETY /
SPECIFICATIONS
ASSEMBLY /
INSTALLATION OPERATION TROUBLESHOOTING MAINTENANCE /
REPAIR

REPAIR PARTS ILLUSTRATION FOR 787U81
For Repair Parts, call 1-800-323-0620
24 hours a day – 365 days a year
Please provide following information:
-Model number
-Serial number (if any)
-Part description and number as shown in parts list
12
MAINTENANCE /
REPAIR TROUBLESHOOTING OPERATION ASSEMBLY /
INSTALLATION
SAFETY /
SPECIFICATIONS GETTING STARTED

REPAIR PARTS ILLUSTRATION FOR 787U81
Parts Description Part No. Qty.
1
2
3
4
5
6
7
8
9
10
11
12
13
14
15
16
17
18
19
20
21
22
23
24
25
26
27
28
29
30
31
32
33
34
35
36
Flange Nut M5
Flange Nut M8
Screw M4×10
Screw
Heat Shroud
4
Check Valve
Screw ST4.8×14F
Screw ST3.9×16F
Motor
Power Cord
ON/OFF Switch
Air Tank
Drain Valve
Crimp Cap
Cushion Pad
Metal Tube
Elbow Fitting
Flange Bolt M5x12
J2022130032
4
J0808250033
1
F9913700669
1
J0304060201
1
F5013700787
1
F5013700787
1
J6017460845
1
Q4202111001
1
J0782730032
2
J2991850047
3
J0800960033
Flange Bolt M5x12 4
J0801100033
Control Panel
Safety Valve
End Cap
O-Ring
Pressure Regulator Knob
Quick Coupler
1
Q42010270011
1
J0186100290
1
J7437800370
1
D3005000168
1
D6004006017
1
J7383090034
1
J0993680201
1
J3166080042
1
J0783480674
1
F0000901043
Capacitor Plug 1
X6058840257
2
D5010003001
2
J0783470485
1
Z1240000256
1
A0778911091
4
X0004360212
8
J2020810033
2
J3095040201
2
J0782380299
2
X4521200189
Hand Grip
37
38
39
40
Rubber Hose
Outlet Pressure Gauge
Pressure Regulator Valve
Exhaust Tube
Capacitor
Seat board
Air Filter
Crimping Board
1
J6496900843
1
J0022520037
1
J3122050032
1
D1015069140
1
J0905070201
1
AT4030.00.00.01
Foot Pad 2
X5730590251
2
F4813700896
2
J0802430032
Flat Washers 2
J2984440032
2
J2021830040
Tank Pressure Gauge
41
42
43
44
Flange Bolt M8x40
Hex Bolt M10x25
Wheel
2
J6500920028
Bonnet
Hex Nut M10
13
GETTING STARTED SAFETY /
SPECIFICATIONS
ASSEMBLY /
INSTALLATION OPERATION TROUBLESHOOTING MAINTENANCE /
REPAIR
Capacitor Cover

LIMITED WARRANTY
DAYTON ONE-YEAR LIMITED WARRANTY. SPEEDAIRE® MODEL 787U81 COVERED IN THIS
MANUAL IS WARRANTED BY DAYTON ELECTRIC MFG. CO. (DAYTON) TO THE ORIGINAL
USER AGAINST DEFECTS IN WORKMANSHIP OR MATERIALS UNDER NORMAL USE FOR ONE
YEAR AFTER DATE OF PURCHASE. ANY PART WHICH IS DETERMINED TO BE DEFECTIVE IN
MATERIAL OR WORKMANSHIP AND RETURNED TO AN AUTHORIZED SERVICE LOCATION,
AS DAYTON DESIGNATES, SHIPPING COSTS PREPAID, WILL BE, AS THE EXCLUSIVE
REMEDY, REPAIRED OR REPLACED AT DAYTON’S OPTION. FOR LIMITED WARRANTY CLAIM
PROCEDURES, SEE “PROMPT DISPOSITION” BELOW. THIS LIMITED WARRANTY GIVES
PURCHASERS SPECIFIC LEGAL RIGHTS WHICH VARY FROM JURISDICTION TO JURISDIC-
TION.
LIMITATION OF LIABILITY. TO THE EXTENT ALLOWABLE UNDER APPLICABLE LAW, DAYTON’S
LIABILITY FOR CONSEQUENTIAL AND INCIDENTAL DAMAGES IS EXPRESSLY DISCLAIMED.
DAYTON’S LIABILITY IN ALL EVENTS IS LIMITED TO AND SHALL NOT EXCEED THE
PURCHASE PRICE PAID.
WARRANTY DISCLAIMER. A DILIGENT EFFORT HAS BEEN MADE TO PROVIDE PRODUCT
INFORMATION AND ILLUSTRATE THE PRODUCTS IN THIS LITERATURE ACCURATELY;
HOWEVER, SUCH INFORMATION AND ILLUSTRATIONS ARE FOR THE SOLE PURPOSE OF
IDENTIFICATION, AND DO NOT EXPRESS OR IMPLY A WARRANTY THAT THE PRODUCTS
ARE MERCHANTABLE, OR FIT FOR A PARTICULAR PURPOSE, OR THAT THE PRODUCTS
WILL NECESSARILY CONFORM TO THE ILLUSTRATIONS OR DESCRIPTIONS. EXCEPT AS
PROVIDED BELOW, NO WARRANTY OR AFFIRMATION OF FACT, EXPRESSED OR IMPLIED,
OTHER THAN AS STATED IN THE “LIMITED WARRANTY” ABOVE IS MADE OR AUTHORIZED
BY DAYTON.
Technical Advice and Recommendations, Disclaimer. Notwithstanding any past practice or dealings
or trade custom, sales shall not include the furnishing of technical advice or assistance or system
design. Dayton assumes no obligations or liability on account of any unauthorized recommenda-
tions, opinions or advice as to the choice, installation or use of products.
Product Suitability. Many jurisdictions have codes and regulations governing sales, construction,
installation, and/or use of products for certain purposes, which may vary from those in neighboring
areas. While attempts are made to assure that Dayton products comply with such codes, Dayton
cannot guarantee compliance, and cannot be responsible for how the product is installed or used.
Before purchase and use of a product, review the product applications, and all applicable national
and local codes and regulations, and be sure that the product, installation, and use will comply with
them.
Certain aspects of disclaimers are not applicable to consumer products; e.g., (a) some jurisdictions
do not allow the exclusion or limitation of incidental or consequential damages, so the above
limitation or exclusion may not apply to you; (b) also, some jurisdictions do not allow a limitation on
how long an implied warranty lasts, consequently the above limitation may not apply to you; and (c)
by law, during the period of this Limited Warranty, any implied warranties of implied merchantability
or fitness for a particular purpose applicable to consumer products purchased by consumers, may
not be excluded or otherwise disclaimed.
Prompt Disposition. A good faith effort will be made for prompt correction or other adjustment with
respect to any product which proves to be defective within limited warranty. For any product
believed to be defective within limited warranty, first write or call dealer from whom the product was
purchased. Dealer will give additional directions. If unable to resolve satisfactorily, write to Dayton
at address below, giving dealer’s name, address, date, and number of dealer’s invoice, and
describing the nature of the defect. Title and risk of loss pass to buyer on delivery to common
carrier. If product was damaged in transit to you, file claim with carrier.
Manufactured for Dayton Electric Mfg. Co., 5959 W. Howard St., Niles, Illinois 60714-4014

Instrucciones de Operación & Manual de Piezas ES
Compresor de aire
sin aceite silencioso
eléctrico portátil
Modelo 787U81

POR FAVOR LEA Y GUARDE ESTAS
INSTRUCCIONES. LEA
ATENTAMENTE ANTES DE INTENTAR
ARMAR, INSTALAR, OPERAR O
MANTENER EL PRODUCTO
DESCRITO.
PROTEGERSE Y OTROS
OBSERVANDO TODA LA
INFORMACIÓN DE SEGURIDAD. NO
CUMPLIR CON LAS INSTRUCCIONES
PUEDE RESULTAR EN LESIONES
PERSONALES Y / O DAÑOS A LA
PROPIEDAD! GUARDE LAS
INSTRUCCIONES PARA FUTURA
REFERENCIA.
CONSULTE EN LA CONTRAPORTADA
LA INFORMACIÓN SOBRE LA
GARANTÍA DE SPEEDAIRE Y OTRA
INFORMACIÓN IMPORTANTE.
Modelo #:
___________________
Serie #:
___________________
Fecha de Compra:
_______________
Formulario 5S787U81 / Impreso en China
03865 Versión 0 10/2021
© 2021 W.W. Grainger, Inc.
Todos los derechos reservados

ANTES DE QUE EMPIECES
EMPEZANDO LA SEGURIDAD /
ESPECIFICACIONES
ASAMBLEA /
INSTALACIÓN OPERACIÓN SOLUCIÓN DE
PROBLEMAS
MANTENIMIENTO /
REPARAR
1
Requisitos eléctricos:
• 120 V AC, 60 Hz, 15 Amps
Desembalaje
2. Al desembalar la unidad, es importante verificar por cualquier
daño que pueda haber ocurrido durante el transporte.
3. Compruebe si hay piezas sueltas, faltantes o dañados antes de
poner en servicio la unidad.
4. Si la unidad está dañada, póngase en contacto con el servicio de
atención al cliente llamando al 1-800-323-0620.
DIAGRAMA DE COMPONENTES PRINCIPALES
K. Cable de alimentaciónE. Regulador de presión de aire
G. Manómetro de salida
F. Manómetro del depósito
D. Interruptor ON/OFF
H. 2 Anclaje rápidoB. Bomba de compresor de aire
A. Motor eléctrico
Vea las Instrucciones Generales de Seguridad en la página 3 y
precauciones y advertencias como se muestra.
J. Depósito de aire
I. Válvula de drenajeC. Válvula de seguridad
1. La caja debe contener:
• Compresor de aire
• Manual de instrucciones de funcionamiento y componentesl
D
C
I
OFF
ON
F
GE
H
J
A
K
B

DESCRIPCIÓN DE LOS COMPONENTES
2
A. Motor eléctrico
El motor se utiliza para alimentar la bomba.
B. Bomba de compresor de aire
La bomba se utiliza para comprimir el aire y descargarlo en el depósito a
través del pistón que sube y baja en el cilindro.
C. Válvula de seguridad
Esta válvula sirve para evitar el fallo del sistema al reducir la presión cuando
se alcanza un nivel preestablecido si el motor no se ha apagado con el
interruptor ON/OFF. Se abrirá automáticamente o se puede activar
manualmente tirando del anillo de la válvula.
D. Interruptor ON/OFF
Este interruptor enciende el compresor y se acciona manualmente. Cuando
está en la posición ON, permite que el compresor se ponga en marcha o
se apague automáticamente, sin previo aviso, ante la demanda de aire.
Establezca SIEMPRE este interruptor en la posición OFF cuando no se
utilice el compresor y antes de desenchufarlo.
E. Regulador de presión de aire
El regulador se utiliza para ajustar la presión dentro de la línea a la
herramienta que se está utilizando. Gire el mando en el sentido de las
agujas del reloj para aumentar la presión y en el sentido contrario para
disminuirla.
F. Manómetro del depósito
El manómetro se utiliza para medir el nivel de presión del aire almacenado
en el depósito. No es ajustable por el operador y no indica la presión de
la línea.
G. Manómetro de salida
El manómetro mide la presión de salida regulada.
H. Anclaje rápido
El anclaje rápido se conecta a un conector rápido y se utiliza para conectar
una manguera de aire.
I. Válvula de drenaje
La válvula de drenaje se utiliza para eliminar la humedad del depósito de
aire después de apagar la unidad.
J. Depósito de aire
El depósito sirve para almacenar el aire comprimido.
K. Cable de alimentación
Este producto está concebido para el uso en un circuito nominal de 120
voltios y debe conectarse a tierra. Debe utilizarse un cable de toma de
tierra. Asegúrese de que el producto se conecta a una toma de corriente
con la misma configuración que el enchufe (véase la Figura 1). No debe
utilizarse ningún adaptador con este producto.
PELIGRO
Enchufar
Figura 1
Toma de
tierra
Pin de puesta
a tierra
MANTENIMIENTO /
REPARAR
SOLUCIÓN DE
PROBLEMAS OPERACIÓN ASAMBLEA /
INSTALACIÓN
LA SEGURIDAD /
ESPECIFICACIONES EMPEZANDO
Una instalación incorrecta del enchufe de conexión
a tierra provocará un riesgo de descarga eléctrica.
Si es necesario reparar o sustituir el cable o el
enchufe, no conecte el cable de conexión a tierra a
ninguno de los dos en el terminal de la hoja. El
cable de conexión a tierra está en la superficie
exterior verde.
Consulte a un electricista cualificado si no entiende las instrucciones de
conexión a tierra o si tiene dudas sobre si el producto está correctamente
conectado a tierra. No modifique el enchufe suministrado. Si no se ajusta a
la toma de corriente, haga que un electricista cualificado instale la toma de
corriente adecuada.
Table of contents
Languages:
Other Speedaire Air Compressor manuals
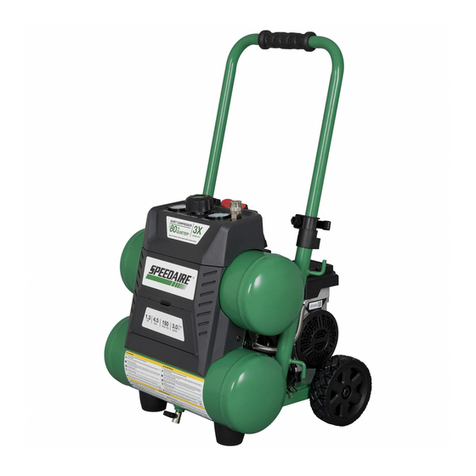
Speedaire
Speedaire 48UY04 Instructions for use
Speedaire
Speedaire Cast Iron Series User manual
Speedaire
Speedaire 787U76 Instructions for use

Speedaire
Speedaire 4UP73 Instructions for use
Speedaire
Speedaire 40HU29 User manual
Speedaire
Speedaire 5Z598C Service manual
Speedaire
Speedaire 787U77 Instructions for use
Speedaire
Speedaire 787U78 Instructions for use

Speedaire
Speedaire 1WC95 Service manual
Speedaire
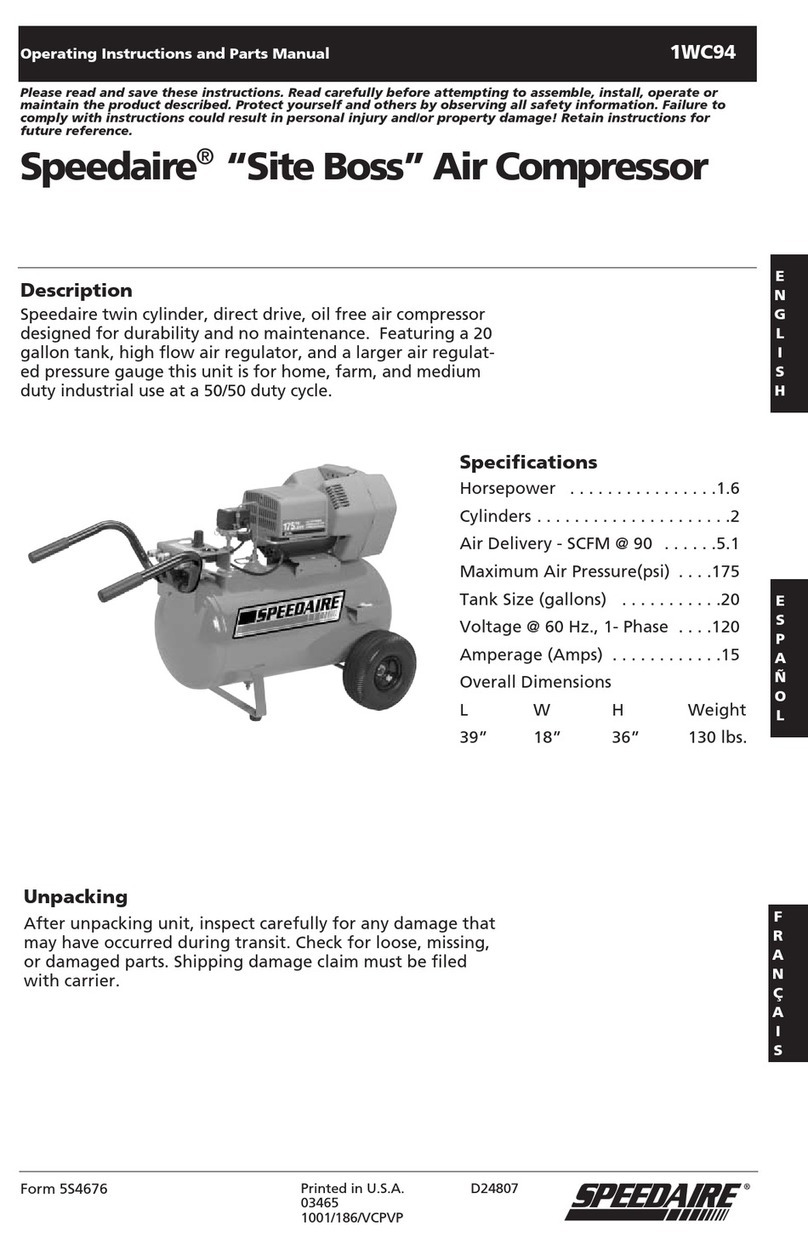
Speedaire 1WC94 User manual

