- 4 -
III. OPERATING INSTRUCTIONS
A. MEASURING PROCEDURE
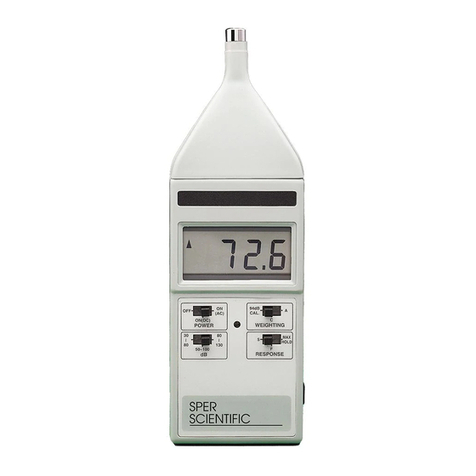
• Slide the POWER selector to the ON (AC) or ON (DC) position.
• Slide the WEIGHTING selector to the "A" or "C" position. The "A"
frequency weighting simulates human ear response. During an
environmental sound level measurement, select the "A" weighting.
The "C" weighting approximates a flat response. Typically, "C" is
used to check the noise of machinery where the target sound level
is already known. (See Frequency Weighting Characteristics,
page 7.)
• Slide the RESPONSE selector to the FAST or SLOW position.
For general applications, select FAST, which simulates the human
ear's response time. The SLOW setting is used to obtain an
average of vibrating sound levels.
• Find the appropriate measuring range using the RANGE selector.
If the OVERLOAD INDICATOR (a triangle shape) appears in the
upper-left display, slide the RANGE selector to another setting.
• Point the microphone at the sound source, the sound level will be
displayed in decibels (dB).
• To power off the unit, slide the POWER selector to the OFF
position.
B. SETTINGS FOR GENERAL APPLICATIONS
• Set POWER selector to an ON position.
• Set RESPONSE selector to Fast.
• Set WEIGHTING to "A".
• Set RANGE selector to the appropriate range.
C. SIGNAL OUTPUT
• The 3.5 mm diameter SIGNAL OUTPUT terminal may be used to
connect the unit to an external output device, such as an analyzer,
recorder, or controller.
• When connecting meter with an external output device, use the
appropriate ON selection (AC or DC).
D. CALIBRATION
The meter's CALIBRATION ADJUSTMENT is located on the front
panel. The meter has a built-in internal standard of 94 dB/1 KHz. Use
the following procedures to calibrate the instrument before operating
for the first time, or when the meter has not been in use for awhile.
Internal Calibration:
- 5 -
• Slide the POWER selector to an ON position.
• Slide the RANGE selector to the 50 - 100 dB position.
• Slide the RESPONSE selector to FAST.
• Slide the WEIGHTING selector to CAL.
• Use the calibration screw driver to gently turn the CALIBRATION
ADJUSTMENT until the display reads 94.0 dB.
External Calibration:
Use Sper Scientific's Acoustical Calibrator 850016 (or equivalent) to
calibrate the unit, including the microphone, in compliance with OSHA.
• Slide POWER selector to an ON position.
• Power on the acoustical calibrator and place the calibrator onto the
Sound Level Meter's MICROPHONE.
• Slide the RANGE selector to the 50 - 100 dB position.
• Slide the RESPONSE selector to FAST.
• Slide the WEIGHTING selector to "A".
• Use the calibration screw driver to gently turn the CALIBRATION
ADJUSTMENT until the display reads 94.0.
E. PRECAUTIONS
• Do not store or operate the unit in high temperatures or in a
high humidity environment for long periods.
• Keep the microphone dry and avoid intense vibrations.
• Do not force the CALIBRATION ADJUSTMENT, doing so may
damage the mechanism and void the warranty.
F. BATTERY REPLACEMENT
Replace the battery when "BAT" is displayed. Accurate measurements
may be made for several hours after the low battery indicator appears.

