Spinning spinner AERO User manual
OWNER’S MANUAL
spinner® AerO owner’s manual
Copyright ©2011 Mad Dogg Athletics, Inc. All rights reserved. Spin®, Spinner®, Spinning® and the Spinning logo are registered trademarks of Mad Dogg Athletics, Inc.
www.spinning.com 800.847.SPIN (7746)
1
CONTENTS
1Welcome to the Spinning® Program
2Spinning® Program Safety
4 Your Spinner® Bike
5 Caring for Your Spinner® AERO Bike
6 Bike Assembly
8 Testing the Bike
9 Troubleshooting
10 Lubricating the Chain
11 Chain Tension & Adjustment
12 Brake Pad Replacement
13 Warranty
WELCOME TO THE
SPINNING®PROGRAM
Millions worldwide have lost weight, gained energy and gotten into
the best shape of their lives with the help of the Spinning® program.
The Spinner® bike, with accompanying DVDs, gives you everything
you need to join them. Ready to get started? These guidelines will
give you the insight you need to change your body and your life.
›› For more information on the Spinning program, Spinning gear
and tips that will help you make the most of every ride, visit
www.spinning.com.

spinner® AerO owner’s manual
Copyright ©2011 Mad Dogg Athletics, Inc. All rights reserved. Spin®, Spinner®, Spinning® and the Spinning logo are registered trademarks of Mad Dogg Athletics, Inc.
www.spinning.com 800.847.SPIN (7746)
32
»
Stay hydrated. Drink water throughout your ride as needed.
»
Only pedal without resistance during warm-up and cool-down.
»
Stay in control by executing all movements and hand positions at a
slow place before attempting to increase your pedaling speed.
»
Focus on form, posture and smooth transitions between movements.
»
Do not use the bike without proper footwear. Never operate the bike
with bare feet.
»
Prevent your feet from coming out of the toe clip or shoe cage by
keeping shoe laces tucked in and foot straps snug around your shoe.
If your foot does become disengaged, push down on the resistance
knob to stop the flywheel’s motion.
SPINNING®PROGRAM SAFETY
» Consult your physician before beginning this or any other exercise
routine. Not all exercise programs are suitable for everyone.
Discontinue any exercise that causes you discomfort and consult a
medical expert.
» Ensure that adjustment knobs (seat height, seat fore-and-aft, and handlebar
height) are properly secured and do not interfere with range of motion
during exercise.
»
Children under the age of 16 should not ride the Spinner® AERO bike.
»
Do not insert any object, hands or feet into any openings, or expose
hands, arms or feet to the drive mechanism or any other potentially
moving parts of the bike.
»
The body weight for individuals riding the Spinner AERO bike should
not exceed 350 pounds.
»
Spinner bikes have a weighted flywheel and a fixed gear. This means
that in order to stop, you must gradually slow your pedal strokes rather
than stopping abruptly. If you do need to stop immediately, push down
on the RED resistance knob.
»
After exercising, turn the resistance knob to increase resistance so
the pedals will not rotate freely and potentially injure someone.
»
If at any time you feel dizzy or have diculty breathing, gradually stop
pedaling and carefully dismount the bike.
»
Listen to your body, ride at your own place and set your bike’s
resistance at the level that feels right for you.
»
Keep children and pets away from the bike whenever it’s in use.
»
Never turn the pedal crank arms by hand.

spinner® AerO owner’s manual
Copyright ©2011 Mad Dogg Athletics, Inc. All rights reserved. Spin®, Spinner®, Spinning® and the Spinning logo are registered trademarks of Mad Dogg Athletics, Inc.
www.spinning.com 800.847.SPIN (7746)
CARING FOR
YOUR SPINNER® AERO BIKE
» MOVING YOUR BIKE
Stand in front the bike, grasp the handlebars and tip the bike toward you until
the transport wheels are touching the floor. Roll the bike to the desired location
and then gently lower the rear of the bike back to the floor.
» LEVELING YOUR BIKE
If you place your bike on an uneven surface, you may adjust how the bike sits
by adjusting one or all of the four levelers located on the bottom of each corner
of the bike.
» AdjUstING ANd LEVELING YOUR sAddLE
If you experience saddle discomfort while riding or sitting on your bike, the
angle can be adjusted by loosening the 14mm nuts located under the saddle.
After making your adjustment, be sure to retighten the nuts before riding
your bike.
» PREVENtING RUst
After each use, raise handlebar and seat posts to the highest settings to
expose moisture. Using an absorbent cloth, focus on all areas where perspiration
can settle.
» PROtECtING YOUR BIKE’s FINIsH
After each ride, protect your bike’s finish by wiping it down with a damp cloth.
You may use bike cleaner such as SPINTECH® Fitness Equipment Polish, but do
not use de-greasers. When cleaning your bike, be sure to keep your hands and
fingers clear of a moving drivetrain.
» PEdALs
Check pedals weekly to ensure that the threads are tightened. If the pedals
have become loose, tighten threads with the wrench supplied to ensure they
are securely attached.
54
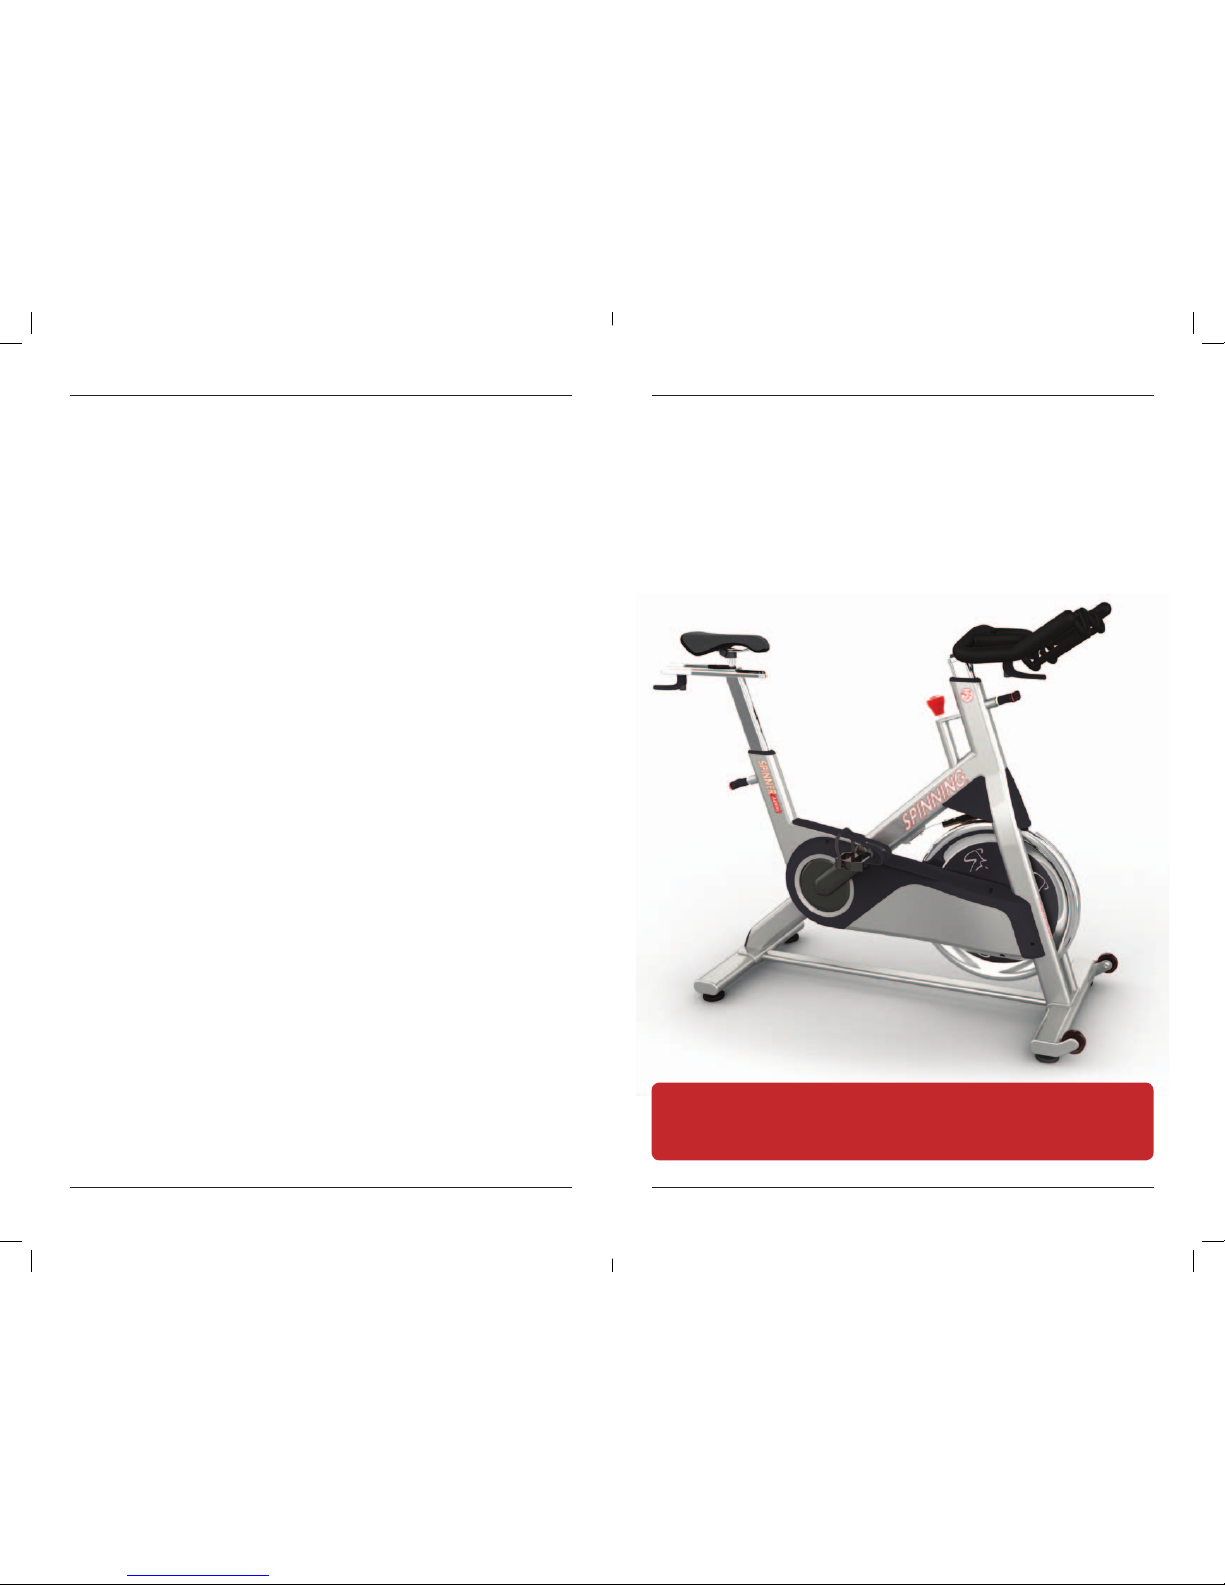
YOUR
SPINNER®BIKE
The patented Spinner bike is specially designed for the Spinning® program. The
Spinner bike lets you change positions with ease and includes the following
features to create an enjoyable, eective workout:
» A contoured seat to keep you comfortable and balanced. Adjust the seat
horizontally and vertically to create a personalized fit.
» Adjustable handlebars featuring foam grips and a patented design that
facilitates proper Spinning hand positions.
» An adjustable resistance knob to keep you in control of your ride. Simply
twist the dial to add more or less resistance.
» A weighted flywheel to create a non-impact workout and facilitate a fluid
pedal stroke.
Your Spinner bike uses a direct-drive fixed flywheel system that does not allow you
to coast. To stop, decrease your speed gradually. If you need to stop immediately,
push down on the red resistance knob.
-
-

SPINNER® AERO OWNER’S MANUAL
Copyright ©2011 Mad Dogg Athletics, Inc. All rights reserved. Spin®, Spinner®, Spinning® and the Spinning logo are registered trademarks of Mad Dogg Athletics, Inc.
www.spinning.com 800.847.SPIN (7746)
stEP 1: UNPACK tHE CARtON
Open the shipping carton and remove all parts. Make sure the following parts are included
and that no damage has occurred during shipping.
76
WARNING!
save these instructions
THE FLYWHEEL MOMENTUM OF THE BIKE WILL KEEP THE PEDALS TURNING EVEN
AFTER THE USER STOPS PEDALING OR IN THE EVENT THE USER’S FEET SLIP OFF
THE PEDALS. DO NOT DISMOUNT THE BIKE OR ATTEMPT TO REMOVE YOUR FEET
FROM THE PEDALS UNTIL BOTH THE PEDALS AND THE FLYWHEEL HAVE STOPPED
COMPLETELY. FAILURE TO COMPLY MAY LEAD TO LOSS OF CONTROL AND SERIOUS
PERSONAL INJURY.
BIKE ASSEMBLY
Bike frame with flywheel
Front stabilizer bar with transportation
wheels
Rear stabilizer bar
Handlebars
» Handlebar post
Pedals (set of two)
Seat slider and seat
Seat post
» Adjustment handles (2 pcs)
Water bottle
Tools: Multi-wrench, 2mm Allen wrench
Owner’s Manual
Guide to Ride
Ultimate Rides Collection DVDs
Take time now to enter your Spinner® bike serial number in the space below (serial number is located
on the bottom crossbar). If parts are missing, or if you have any assembly questions, please contact
customer service at 800.847.SPIN (7746) or 310.823.7008.
Serial No. : __________________________________________________________
stEP 2: AttACH tHE stABILIZING BARs
Remove the bolts and washers from the front
stabilizer bar (with transportation wheels) and
set aside. Lift the front of the bike.
Place the front stabilizer bar under the frame.
Line up the holes in the stabilizer bar with the
holes in the frame. Using the multi-wrench,
secure the front stabilizer bar to the frame
with bolts and washers. Tighten the bolts
securely.
Repeat process for rear stabilizer bar.
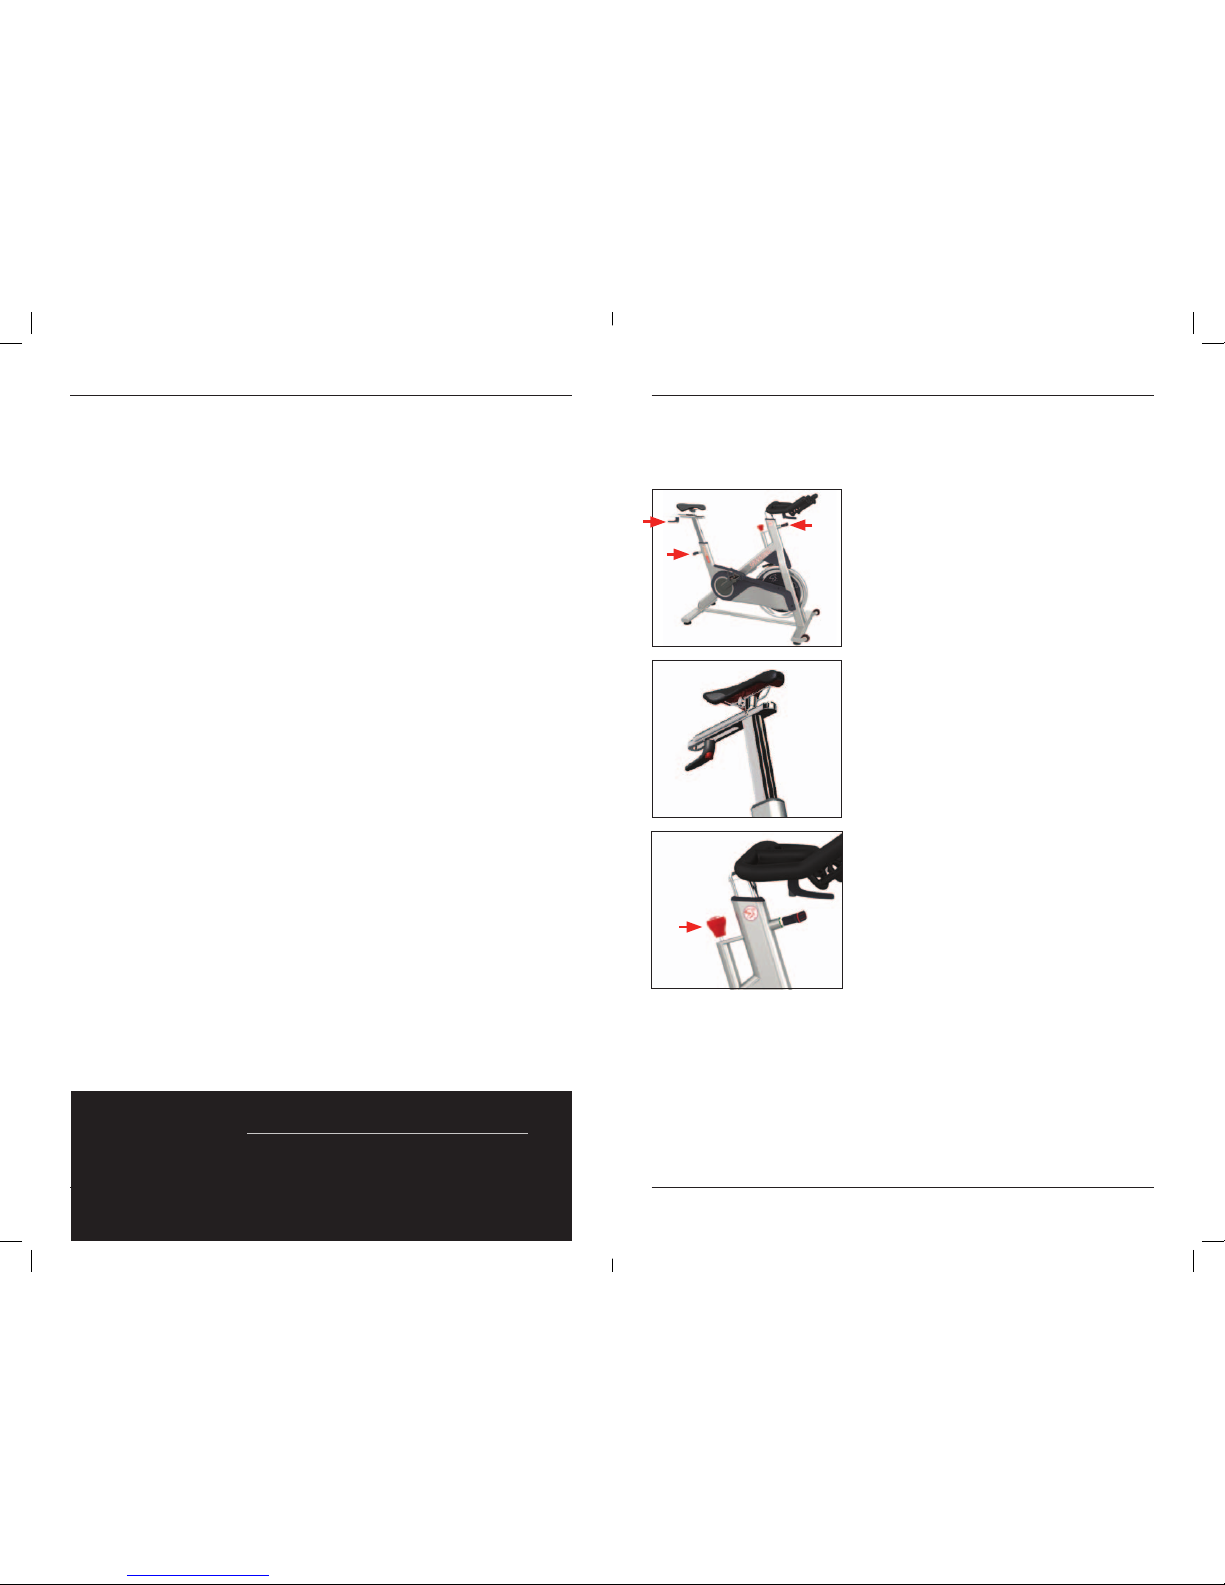
stEP 3: INstALL tHE sEAt
While holding the seat post pop-pin, slide
the seat post into the seat tube. Release the
pop-pin. Adjust the seat post to make sure
the pop-pin is engaged. Tighten the seat
post pop-pin securely.
Position seat slider and seat on top of the
seat post. Secure in place using a adjustment
handle and washer. Tighten the adjustment
handle securely.
NOTE: Adjustment handle can be
pulled out and turned to a convenient
position without aecting tension.
stEP 4: INstALL tHE HANdLEBARs
Unscrew, pull out and hold the handlebar
pop-pin. Slide the handlebar post all the
way into the handlebar tube. Release the
handlebar pop-pin. Adjust the handlebars to
make sure pop-pin is engaged. Tighten the
handlebar pop-pin securely.
Position the handlebar on top of the
handlebar post. Secure in place using an
adjustment handle and washer. Tighten the
adjustment handle securely.
NOTE: Adjustment handle can be
pulled out and turned to a convenient
position without aecting tension.
stEP 5: INstALL tHE PEdALs
: The pedal spindles are marked “L” (left)
and “R” (right) to aid in assembly. Left and right
are referenced from a seated position on the
bike. Be sure to install the pedals on the correct
side of the bike.
Turn the resistance knob all the way to the
right until crank arms are immobilized. Install
the left pedal on the left pedal crank. Use the
multi-wrench supplied and turn the left pedal
spindle counterclockwise to tighten. Install
the right pedal on the right pedal crank. Use
the multi-wrench supplied and turn the right
pedal spindle clockwise to tighten. Be sure
both pedals are tightened securely.
stEP 6: LEVEL tHE BIKE
Move the bike to the location where it will be
used. Your Spinner® AERO requires 4’ x 6’
of floor space for proper operation. Rock the
bike gently to check for wobble. If needed,
use the leveling adjusters under the front and
rear stabilizer bars to steady the bike.
1
5
6
2
3
FRONT
REAR
NOTE: Front side marked by . If positioned
incorrectly, bolt holes will not line up.
For correct bike fit please refer to Guide to Ride.
4
For correct bike fit please refer to Guide to Ride.
spinner® AerO owner’s manual
Copyright ©2011 Mad Dogg Athletics, Inc. All rights reserved. Spin®, Spinner®, Spinning® and the Spinning logo are registered trademarks of Mad Dogg Athletics, Inc.
www.spinning.com 800.847.SPIN (7746)
98
TROUBLESHOOTING
RAttLING HANdLEBARs
OR sEAt tOwER POP-PINs ANd
AdjUstMENt KNOBs
Make sure pop-pins are correctly locked
into place.
sEAt PAIN
Check to ensure the seat is centered
and level. Adjust as necessary. Bear in
mind that it does take time for the body
to adjust to the seat. A gel-padded seat
cover and/or cycling shorts can make
your ride more comfortable.
ROUGH, dRY FEELING wHEN
INCREAsING REsIstANCE
Put a few drops of oil underneath the
resistance knob and let it run down to
the resistance shaft thread barrel. This
typically makes the motion of adjustment
feel smoother.
Use this checklist to perform the bike test procedure.
Recheck all the bolts, and make sure they are all tightened and that no
parts are missing.
Test the handlebar and seat post to make sure they move freely and
you are able to lock them at dierent positions.
Check the seat to make sure it is level and tight, and does not rotate
around or tilt. Tighten and adjust as needed.
Test the seat slider for movement front to rear and check it by setting it
at dierent settings.
Brake tension is adjustable using the red resistance knob in the front
of the bike. Pressing down on the knob will apply the brake if you need
to stop quickly.
Adjust seat post and handlebar post to your needs.
Refer to Guide to Ride or www.spinning.com.
Pedal at a moderate place and test for proper and smooth resistance
changes while varying the amount of turns on the resistance knob.
To move the bike after testing is complete, stand in front the bike,
grasp the handlebars and tip the bike toward you until the transport
wheels are touching the floor. Roll the bike to the desired location
and then gently lower the rear of the bike back to the floor. Adjust the
leveling feet so that the bike is stable.
TESTING THE BIKE
WARNING!
save these instructions
THE FLYWHEEL MOMENTUM OF THE BIKE WILL KEEP THE PEDALS TURNING EVEN
AFTER THE USER STOPS PEDALING OR IN THE EVENT THE USER’S FEET SLIP OFF
THE PEDALS. DO NOT DISMOUNT THE BIKE OR ATTEMPT TO REMOVE YOUR FEET
FROM THE PEDALS UNTIL BOTH THE PEDALS AND THE FLYWHEEL HAVE STOPPED
COMPLETELY. FAILURE TO COMPLY MAY LEAD TO LOSS OF CONTROL AND SERIOUS
PERSONAL INJURY.

spinner® AerO owner’s manual
Copyright ©2011 Mad Dogg Athletics, Inc. All rights reserved. Spin®, Spinner®, Spinning® and the Spinning logo are registered trademarks of Mad Dogg Athletics, Inc.
www.spinning.com 800.847.SPIN (7746)
1110
LUBRICATING THE CHAIN CHAIN TENSION & ADJUSTMENT
stEP 1: Remove the front chain guard. Using a
2mm Allen wrench, remove the 5 button head
screws on the front and 2 on the back of the
chain guard. Remove the front cover.
stEP 2: Use a chain lube such as SPINTECH®
Silicone Fitness Lube or other oil-based lubricant
with a spray nozzle. Do not use a wax-based
lubricant.
stEP 3: When spraying the lubricant onto the chain,
cover the floor under the bike and take care not to
allow the lubricant to drip onto the floor.
stEP 4: Lock the brake by turning the resistance
knob clockwise. With the brake locked up, spray
the lube onto the chain. Loosen the brake and
rotate the chain carefully and slowly, by hand,
approximately a quarter turn. Then stop it, tighten
the brake again and spray lube onto the next
portion of the chain. Repeat the above steps to
lubricate the entire chain.
stEP 5: Carefully replace the front cover. Secure
with 5 button head screws on the front and 2 on
the back of the chain guard. Your Spinner AERO
is now ready for testing.
The chain on your bike has been factory set and lubricated. It should
not require adjustment initially. Over time, however, you may need
to adjust the tension. If you have any questions regarding your chain
tension, please contact customer service at 800.847.SPIN (7746)
or 310.823.7008. for consultation prior to adjusting the tension of
the chain.
stEP 1: To access the axle nut on the right
side of the Spinner AERO you will need to
first remove the front chain guard cover.
Please refer to Step 1 in previous section.
stEP 2 : Using the the multi-wrench, loosen
the axle nuts on the right (fig. 1) and left (fig. 2)
sides of the flywheel. Using the multi-wrench,
loosen the adjustment lock nuts on both
sides of the flywheel.
stEP 3: To tighten the chain, turn the
adjustment screw in a clockwise rotation
equally on both sides using the multi-wrench.
CONTINUED ON NEXT PAGE »
WARNING!
save these instructions
REMOVAL OF THE CHAIN GUARD IS STRONGLY DISCOURAGED AND SHOULD
ONLY BE PERFORMED BY AN AUTHORIZED TECHNICIAN. FAILURE TO FOLLOW
THESE INSTRUCTIONS MAY RESULT IN SEVERE INJURY.
During heavy use of your Spinner® AERO, it may become necessary
to lubricate your chain to reduce chain associated noises. If you
have any questions regarding lubricating your chain, please contact
customer service at 800.847.SPIN (7746) or 310.823.7008 for
assistance.
2
1
SPINTECH® lubricants, polish and grease are
available at www.spinning.com.
CHAINGUARD
FRONT
CHAINGUARD
BACK
2
FIG. 1: RIGHT SIDE
FIG. 2: LEFT SIDE
3
ADJUSTMENT
LOCK NUT
ADJUSTMENT
LOCK NUT
AXLE NUT
AXLE NUT
RIGHT SIDE LEFT SIDE
ADJUSTMENT
LOCK SCREW ADJUSTMENT
LOCK SCREW

spinner® AerO owner’s manual
Copyright ©2011 Mad Dogg Athletics, Inc. All rights reserved. Spin®, Spinner®, Spinning® and the Spinning logo are registered trademarks of Mad Dogg Athletics, Inc.
www.spinning.com 800.847.SPIN (7746)
Mad Dogg Athletics, Inc. Limited Warranty
Spinner® AERO
MAD DOGG ATHLETICS, INC. WARRANTS TO THE ORIGINAL PURCHASER THAT THE SPINNER AERO WILL BE FREE FROM
DEFECTS IN WORKMANSHIP AND MATERIALS. ALL OTHER SPINNER AERO PARTS ARE COVERED FOR ONE 1 YEAR FROM THE
DATE OF PURCHASE SEE LIMITATIONS AND EXCLUSIONS BELOW. THIS WARRANTY DOES NOT COVER LABOR CHARGES
ASSOCIATED WITH REPLACING COVERED COMPONENTS. PARTS REPLACED UNDER THE TERMS OF THIS WARRANTY WILL BE
WARRANTED FOR THE REMAINDER OF THE ORIGINAL WARRANTY PERIOD ONLY. THIS WARRANTY BECOMES EFFECTIVE UPON
THE INVOICE DATE OF THE ORIGINAL PURCHASE.
TO ORDER REPLACEMENT PARTS, THE ORIGINAL PURCHASER MAY CONTACT MAD DOGG ATHLETICS, INC. PRODUCT
SUPPORT. PROOF OF PURCHASE OR WARRANTY REGISTRATION MAY BE NEEDED IN ORDER FOR MAD DOGG ATHLETICS,
INC. TO VERIFY WARRANTY COVERAGE AND ISSUE A RETURN MATERIALS AUTHORIZATION RMA NUMBER. PARTS BEING
RETURNED TO MAD DOGG ATHLETICS, INC. FOR WARRANTY CREDIT MUST BE SHIPPED PREPAID, ACCOMPANIED BY
A PACKING LIST OR TAG BEARING THE RMA NUMBER, AND CUSTOMER NAME. NO CREDIT WILL BE ISSUED FOR PARTS
RETURNED WITHOUT PRIOR AUTHORIZATION FROM MAD DOGG ATHLETICS, INC.
MAD DOGG ATHLETICS, INC. RESERVES THE RIGHT TO REVIEW DEFECTIVE PARTS. ALL COSTS OF SHIPPING DEFECTIVE
PARTS TO AND FROM MAD DOGG ATHLETICS, INC. FOR INSPECTION SHALL BE BORNE SOLELY BY THE ORIGINAL
PURCHASER. ANY REPAIR OR MODIFICATION OF DEFECTIVE PARTS BY ANYONE OTHER THAN A MAD DOGG ATHLETICS, INC.
TECHNICAL REPRESENTATIVE OR AUTHORIZED SERVICE PROVIDER WILL VOID THIS WARRANTY. IF MAD DOGG ATHLETICS,
INC. DETERMINES, IN ITS SOLE DISCRETION, THAT IT IS IMPRACTICAL TO SHIP DEFECTIVE PARTS TO MAD DOGG ATHLETICS,
INC., MAD DOGG ATHLETICS, INC. MAY DESIGNATE, IN ITS SOLE DISCRETION, A REPAIR FACILITY TO INSPECT AND ESTIMATE
THE COST TO REPAIR SUCH DEFECTIVE PARTS. THE COST, IF ANY, OF SHIPPING DEFECTIVE PARTS TO AND FROM SUCH
REPAIR FACILITY AND OF SUCH ESTIMATE SHALL BE BORNE SOLELY BY THE ORIGINAL PURCHASER. DEFECTIVE PARTS
MUST REMAIN AVAILABLE FOR INSPECTION UNTIL THE CLAIM IS FINALIZED. WHENEVER CLAIMS ARE SETTLED, MAD DOGG
ATHLETICS, INC. RESERVES THE RIGHT TO BE SUBROGATED UNDER ANY EXISTING INSURANCE POLICIES THE CLAIMANT MAY
HAVE.
LIMITATIONS AND EXCLUSIONS
THIS LIMITED WARRANTY DOES NOT APPLY TO COSMETIC DAMAGE, IMPERFECTIONS THAT ARE WITHIN DESIGN
SPECIFICATION(S) OR THAT DO NOT MATERIALLY ALTER FUNCTIONALITY, OR DAMAGE DUE TO ACTS OF GOD, ACCIDENT,
ABUSE, MISUSE, NEGLIGENCE, LACK OF NORMAL MAINTENANCE, ABNORMAL SERVICE OR HANDLING THAT DIFFERS FROM
THAT SPECIFIED FOR THIS MODEL, IMPROPER INSTALLATION OR OPERATION. IN ADDITION, ALTERATION OR MODIFICATION
OF THE PRODUCT, OR REPAIR BY ANYONE OTHER THAN A MAD DOGG ATHLETICS, INC. TECHNICAL REPRESENTATIVE OR
AUTHORIZED SERVICE PROVIDER WILL VOID THIS WARRANTY. THIS WARRANTY IS VALID ONLY IN THE CONTINENTAL UNITED
STATES.
DISCLAIMER OF WARRANTIES; LIMITATION OF LIABILITY
THIS WARRANTY IS IN LIEU OF ALL OTHER WARRANTIES, EXPRESS OR IMPLIED, INCLUDING WITHOUT LIMITATION, THE IMPLIED
WARRANTIES OF MERCHANTABILITY AND FITNESS FOR A PARTICULAR PURPOSE. REPAIR OR REPLACEMENT AS PROVIDED
ABOVE SHALL BE THE SOLE AND EXCLUSIVE REMEDY AVAILABLE TO THE PURCHASER. CORRECTION OF DEFECTS, IN THE
MANNER AND FOR THE PERIOD OF TIME DESCRIBED ABOVE, SHALL CONSTITUTE COMPLETE FULFILLMENT OF ALL LIABILITIES
AND RESPONSIBILITIES OF MAD DOGG ATHLETICS, INC. TO THE PURCHASER WITH RESPECT TO CONTRACT, NEGLIGENCE,
STRICT LIABILITY OR OTHERWISE. MAD DOGG ATHLETICS, INC. SHALL NOT BE LIABLE OR IN ANY WAY RESPONSIBLE FOR
ANY INCIDENTAL OR CONSEQUENTIAL DAMAGES BASED UPON BREACH OF ANY EXPRESS OR IMPLIED WARRANTY ON THIS
PRODUCT OR OTHERWISE.
SOME STATES DO NOT ALLOW THE EXCLUSION OR LIMITATION OF IMPLIED WARRANTIES OR INCIDENTAL OR CONSEQUENTIAL
DAMAGES, SO THE ABOVE EXCLUSIONS AND LIMITATIONS MAY NOT APPLY TO YOU. THIS WARRANTY GIVES YOU SPECIFIC
LEGAL RIGHTS, AND YOU MAY ALSO HAVE OTHER RIGHTS WHICH MAY VARY FROM STATE TO STATE.
The Spinner AERO is not for commercial use and is warranted for home use only.
One or more of the following patents apply: 8,057,364; 5,423,728; 5,722,916; 6,155,958; 6,468,185; 6,793,608; 6,881,178;
7,455,627; D465,818; D473,274; D473,602; D507,313; EP852155; GB2322085; ES2122954; GB2333241; TW407113.
U.S. and International Patents Pending.
2009.11.16-0013797. Copyright © 2011 Mad Dogg Athletics, Inc. All rights reserved. Spin®, Spinner®, Spinning® and the Spinning logo
are registered trademarks that are owned or used under exclusive license by Mad Dogg Athletics, Inc.
12
BRAKE PAD REPLACEMENT
stEP 1: REMOVAL
Remove tension from the brake pad by turning the Resistance
knob counterclockwise, until completely loose. Using the
Multi-wrench, remove the two bolts supporting the brake pad
onto the frame. Remove the old brake pad.
stEP 2: INSTALLATION
Position the new brake pad onto the frame. Carefully re-install the
two bolts through the brake pad bracket onto the frame. Using a
Multi-wrench, tighten the bolts.
13
stEP 4: To loosen the chain, turn
the adjustment screw on both sides
counterclockwise using the multi-wrench.
stEP 5: While adjusting the chain tension,
work on both sides of the flywheel. Adjust
the angle of the flywheel so it is straight front
to rear and evenly spaced within the frame
side to side.
If the chain is stretched beyond adjustment, the
replacement of the chain is recommended. Please
contact customer service at 800.847.SPIN (7746)
or 310.823.7008 for more information.
stEP 6: Tighten the adjustment lock nuts
and the axle nuts on both sides alternating
from side to side.
STEP 7: Carefully replace the front cover.
Secure with 5 button head screws on the
front and 2 on the back of the chain guard.
CHAIN TENSION & ADJUSTMENT
(CONTINUED)
5
4
RIGHT SIDE LEFT SIDE
ADJUSTMENT
LOCK SCREW ADJUSTMENT
LOCK SCREW
Mad Dogg Athletics, Inc.
2111 Narcissus Court
Venice, California 90291
Tel: 800.847.SPIN (7746)
www.spinning.com
Copyright ©2011 Mad Dogg Athletics, Inc. All rights reserved. Spin®, Spinner®, Spinning® and the Spinning logo are registered trademarks of Mad Dogg Athletics, Inc.
Spinner® AERO
Owner’s Manual
ITEM #6977
Other manuals for spinner AERO
1
Table of contents
Other Spinning Exercise Bike manuals


Popular Exercise Bike manuals by other brands


Schwinn
Schwinn IC4/800IC Assembly manual / owner's manual

Taurus
Taurus TF-K22604 Assembly and operating instructions

Schwinn
Schwinn SC7 Assembly instructions

Progressive
Progressive SX2000 Owner's manual and safety instructions

Weslo
Weslo Vector 503 Bike Manuale d'istruzioni

Sunny Health & Fitness
Sunny Health & Fitness P8300 user manual


