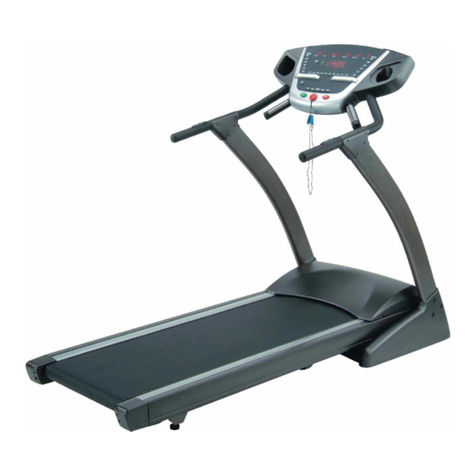
Spirit inspire IN300T User manual

MOTORIZED TREADMILL
OWNER’S MANUAL
IN300T
IN400T
P art No. 22412
BY

Table of Contents
ProductRegistration...............................................................................................................1
ImportantSafetyInstructions..................................................................................................2
ImportantElectricalInformation..............................................................................................3
ImportantOperationInstructions...................................................................................................4
FoldingInstructions.........................................................................................................................5
OperationofYour NewTreadmill..................................................................................................6
ProgrammableFeatures................................................................................................................8
ProgrammableOperationofYourNewTreadmill........................................................................8
TargetHeartRate...........................................................................................................................9
Usinga Heart RateTransmitter..........................................................................................10
HeartRateControlOperation.....................................................................................................12
MaintenanceofYourNewTreadmill.............................................................................................13
ServiceChecklist-DiagnosisGuide.........................................................................................15
Manufacturer’sLimitedWarranty................................................................................................16
ATTENTION - THIS TREADMILL IS INTENDED FOR RESIDENTIAL USE ONLY
AND IS WARRANTED FOR THAT APPLICATION. ANY OTHER APPLICATION VOIDS
THIS WARRANTY IN ITS ENTIRETY.

Thank you for your purchase of this quality treadmill from Spirit Manufacturing, Inc.
Your new treadmill was manufactured by one of the leading fitness manufacturers in the
world and is backed by one of the most comprehensive warranties available*. Through
your dealer, Spirit will do all we can to make your ownership experience as pleasant as
possible for many years to come.
The local dealership where you purchased this treadmill is your administrator for all
Spirit warranty and service needs. Their responsibility is to provide you with the techni-
cal knowledge and service personnel to make your experience more informed and any
difficulties easier to remedy. Please take a moment at this time to record the name of
the dealer, their telephone number, and the date of purchase below to make any future,
needed contact easy.
WeCONGRATULATIONS ON YOUR appreciate your support and we will always remember
that you are the reason that we are in business.
Please complete and mail your registration card today and enjoy your new treadmill.
Yours in Health,
Spirit Manufacturing, Inc.
Name of Dealer______________________________________
Telephone Number of Dealer___________________________
Purchase Date_______________________________________
*All claims are based upon published, available data at the time of this manual’s printing. Through our program of constant product improvement, some specifications are
subject to change without notice.
RECORD YOUR SERIAL NUMBER
Please record the Serial Number of this fitness product in the space provided below.
Serial Number________________________________
REGISTER YOUR PURCHASE
The self-addressed product registration card must be completed in full and returned to
Spirit Manufacturing, Inc.
CONGRATULATIONS ON YOUR
NEW TREADMILL AND WELCOME
TO THE SPIRIT FAMILY!
Product Registration
BY

Important Safety Instructions
WARNING - Read all instructions before using this appliance.
DANGER - To reduce the risk of electric shock disconnect your Spirit treadmill
from the electrical outlet prior to cleaning and/or service work.
WARNING - To reduce the risk of burns, fire, electric shock, or injury to persons,
install the treadmill on a flat level surface with access to a 120-volt, 20-amp
grounded outlet. DO NOT USE AN EXTENSION CORD: DO NOT ATTEMPT TO
DISABLE THE GROUNDED PLUG BY USING IMPROPER ADAPTERS, OR IN ANY
WAY MODIFY THE CORD SET. A serious shock or fire hazard may result along
with computer malfunctions. See Grounding Instructions, page 3.
■Do not operate treadmill on deeply padded, plush or shag carpet. Damage to both
carpet and treadmill may result.
■Do not block the rear of the treadmill. Provide a minimum of 3 1/2 feet clearance
between the rear of the treadmill and any fixed object.
■Keep children away from the treadmill. There are obvious pinch points and other
caution areas that can cause harm.
■Keep hands away from all moving parts.
■Never operate the treadmill if it has a damaged cord or plug. If it is not working
properly, call your dealer.
■Keep the cord away from heated surfaces.
■Do not operate where aerosol spray products are being used or where oxygen is
being administered.
■Never drop or insert any object into any openings.
■Do not use outdoors.
■To disconnect, turn all controls to the off position, remove tether cord, then remove
plug from outlet.
■Do not attempt to use your treadmill for any purpose other than for the purpose it is
intended.
■The pulse sensors are not medical devices. Various factors, including the user’s
movement, may affect the accuracy of heart rate readings. The pulse sensors are
intended only as exercise aids in determining heart rate trends in general.
■Use handrails provided; they are for your safety.
■Wear proper shoes. High heels, dress shoes, sandals or bare feet are not suitable
to be used on your treadmill. Quality athletic shoes are recommended to avoid leg
fatigue.
Remove tether cord after use to prevent unauthorized treadmill operation.
SAVE THESE INSTRUCTIONS - THINK SAFETY!
2

WARNING!
●●
●●
●
NEVER use a ground fault circuit interrupt (GFCI) wall outlet with this treadmill.
Route the power cord away from any moving part of the treadmill including the eleva-
tion mechanism and transport wheels.
●●
●●
●
NEVER remove any cover without first disconnecting AC power.
●●
●●
●
If voltage varies by ten percent (10%) or more, the performance of your treadmill may
be affected. Such conditions are not covered under your warranty. If you suspect
your voltage is low, contact your local power company or a licensed electrician for
testing. See Diagnosis Guide, page 15.
●●
●●
●
NEVER expose this treadmill to rain or moisture. This product is NOT designed for
use outdoors, near a pool or spa, or in any other high humidity environment.
●●
●●
●
A red lighted power switch is located on the front base near the power cord. It is not
necessary to trun this switch off except when service issues arise.
Important Electrical Information
Grounding Instructions
This product must be grounded. If it should malfunction or breakdown, grounding
provides a path of least resistance for electric current to reduce the risk of electric
shock. This product is equipped with a cord having an equipment-grounding plug. The
plug must be plugged into an appropriate outlet that is properly installed and grounded
in accordance with all local codes and ordinances.
DANGER - Improper connection of the equipment-grounding conductor can result
in a risk of electric shock. Check with a qualified electrician or serviceman if you
are in doubt as to whether the product is properly grounded. Do not modify the
plug provided with the product - if it will not fit the outlet, have a proper outlet
installed by a qualified electrician.
This product is for use on a nominal 120-volt circuit, and has a grounding plug that
looks like the plug illustrated in sketch A. A temporary adapter that looks like the
adapter illustrated in sketches B and C may be used to connect this plug to a 2-pole
receptacle as shown in sketch B if a properly grounded outlet is not available. The
temporary adapter should be used only until a properly grounded outlet (sketch A) can
be installed by a qualified electrician. The green colored rigid ear, lug, or the like
extending from the adapter must be connected to a permanent ground such as a
properly grounded outlet box cover. Whenever the adapter is used, it must be held in
place by a metal screw.
3
Grounded Outlet
Grounding Pin Grounded Outlet Box
Metal Screw
Adapter
Tab for
Grounding
Screw
A B C IN300T
IN400T

●●
●●
●
NEVER operate thistreadmillwithoutreadingand completely understanding the results
ofany operationalchangeyou request fromthecomputer.
●●
●●
●
Understandthat changes in speed and incline do not occur immediately. Setyour
desiredspeed on the computer console and releasetheadjustmentkey. The computer will
obeythe commandgradually.
●●
●●
●
NEVER useyourtreadmillduringanelectricalstorm. Surgesmayoccurinyourhouse-
holdpower supply thatcoulddamage treadmill components.
●●
●●
●
Usecaution while participating in other activities while walking onyourtreadmill;suchas
watchingtelevision, reading, etc. These distractions may cause youtolosebalanceor
strayfrom walkinginthe center ofthebelt; whichmayresult in seriousinjury.
●●
●●
●
NEVER mount or dismount the treadmill while the belt is moving. Spirit treadmillsstart
withzero speed and it is unnecessary to straddle thebeltduringstartup. Simplystanding
onthe belt during slow acceleration isproperafteryou have learned to operate theunit.
●●
●●
●
Alwaysholdontoahandrail or grabbarwhilemakingcontrolchanges(incline,speed,etc.).
Donot use excessive pressure on console control overlays. Theyareprecisionsetto
functionproperly with little finger pressure. Pushingharderisnot going to make the unitgo
fasteror slower. Ifyou feel thebuttonsare notfunctioningproperly withnormalpressure
contactyour Spirit dealer; adjustments can bemade. Allbuttonsshould operate and
controltreadmill functions withoutexcessivefinger effort. Damage tooverlaywill result if
excessivecontrol pressurecontinues.
Important Operation Instructions
Asafetytethercordis provided with this unit. It is a simple magnetic design that should be
usedat all times. It is for yoursafetyshouldyoufall or move too far backonthetreadbelt.
Pullingthis safetytethercordwill stoptreadbeltmovement.
To Use:
1. Place magnet into position ontheyellowportionof the console control head. Your
treadmillwill not start andoperatewithoutthis. Removing the magnet alsosecuresthe
treadmillfromunauthorizeduse.
2. Fastentheplasticclipontoyourclothingsecurelytoassuregoodholdingpower. Note:
Themagnet has strong enoughpowerto minimize accidental, unexpectedstoppingand
theclipshouldbeattachedsecurelyto make certain it does not come off. Be familiar with
itsfunction and limitations.
Thetreadmillwill stop,dependingonspeed,withaone to two stepcoastanytimethemag-
netispulledofftheconsole. UsetheredStop / Pause switch innormal operation.
4
Safety Tether Cord
IN300T
IN400T

5IN300T/ 400T
Donotattempttomove the unit unless it is in the locked position. Be sure the power cord
issecuredtoavoidpossibledamage. Itmaybeawkwardanddifficulttomaneuverfor
manyindividuals. Use both hand rails tomaneuvertheunit to desired position.
IN300T / 400T Folding Instructions
CAUTION!
You must be able to safely lift 40 lbs. in order to raise / lower and move the treadmill.
To Fold The Treadmill:
Make certain the treadmill is at minimum incline. Liftthetreadmillrunningdeck until it
issecuredbythelockingtelescopingtubeassemblyincenter back of base.
To Unfold The Treadmill:
Applyslight forward pressure*onthetreadmill running deck withonehand. Lift up on the
orangeunlocking lever andslowlylowerthe running deck tothefloor. Donot allow the base
todrop. Itbecomes heavier at waist level.
*At the rear roller area to relieve pressure on the locking system.
Transport

Operation of Your Treadmill
Note: Refer to upper drawing showing console display layout. IN400T display is shown,
IN300T is similar. You have two option control choices for speed and incline. The right hand
handle bar has a remote speed switch offering the same function as the display control keys.
The left hand handle bar remotely controls incline.
DO NOT S TAND ON T HE WAL K ING B E LT WHIL E L E A R NING
TO OP E R ATE Y OUR NE W TR E A DMIL L !!
B as ic Operation*:
S TE P 1: Press and release S tart / Dis play On key to wake display up (if not already on).
Note: If installing the tether key, the display is already lit (woke up).
S TE P 2: Press and release S tart / Dis play On key to begin belt movement at .6 mph and
adjust speed with F as t / S low keys (console or hand rail). You must have belt
movement for F as t / S low keys to function. You may also select the rapid speed
adjust values 2 thru 10.
S TE P 3: To slow treadbelt push and maintain S low key (console or hand rail) to desired
speed. You may also select the rapid speed adjust values 2 thru 10.
S TE P 4: To stop treadbelt, depress and maintain pressure on the S low key (console or
hand rail) or press and release red S top key.
*Tether cord must be in position. See also page 7, To Turn Treadmill Off, item (1). Display is in
manual mode when 1/4 mile track is displayed.
E laps ed T ime F eature:
When display is lit (before belt movement) you may adjust the time up (value will flash) for
countdown to automatic shut off (no belt movement). Use A djus t Up / Down keys to set to
desired time before belt movement.
P aus e F eature:
S TE P 1: When operating the treadbelt, the pause feature may be utilized by pressing
the red S top key. This will slowly decelerate the treadbelt to zero. Time,
Distance and Calorie will hold while unit is in the pause mode. After 4 minutes
the display will blank out but values are held in memory to resume workout. This
feature can be used in manual or programmable mode.
S TE P 2: To resume your exercise, you must reset desired speed (in manual mode). See
above step 2. 6

7
Incline Feature:
Maybeadjusted anytime after belt movement.
Press and maintainAdjust ▲▼ keys (console or hand rail) to achieve desired level of
effort. You may also choose a more rapid increase / decrease by selecting desired
valueonlefthand(incline).
Display will indicate incline percent as adjustments are made.
Inclinewillremaininit’spositionwhendisplayisturnedoff.
Dot Matrix Center Display (Manual Operation):
Twenty rows of“dots”(8high) indicate each segment ofaworkout. Thedotsareonlyto
showan approximate level (speed/incline) ofeffort. Theydonot necessarily indicate a
specificvalue - only an approximatepercenttocomparelevelsofintensity.
InManual Operation the Speed /Inclinedotmatrix window will buildaprofile“picture” as
valuesare changed during a workout. The dotmatrixwindowwill show the speed profile
whenmph is adjusted. Asmall flashing light (nearSpeedwindow)indicatesthedot matrix
valueis speed. If incline is adjusted (small lightissteady),thedot matrix window will
becomeaninclineprofile. Onlyaslightpress of the appropriate key is required to change
thedotmatrixdisplay from speed to incline (visa-versa). This window will remain a speed
orincline profile basedonlastadjustment. Only the verticalsegmentthatflashes will be
changed(alongwithalltotheright). Thisdisplayprofile picture is based on a 20 minute
workout. After20minutesthe dot will adjust“backwards”(tothe left).
1/4 Mile Track*:
The1/4mile track will be displayed around the dot matrix window. The flashing dot indi-
catesyourprogress. Oncethe1/4mileiscompletethisfeaturewillbeginagain.
*Manualoperationonly
Reset Feature*:
WhileinPausemode,press and maintain the ENTER reset key until the clock, Distance
andCalorie values zeroout. Youmayrestartyourworkout with differentvaluesor reset
clock(countdown).
*Manualoperationonly
Pulse Grip Feature:
ThePulse (Heart Rate) consolewindowwill display your currentheartratein beats per
minuteduring the workout. You mustuseboth stainlesssteel sensors on thefrontcross bar
todisplay your pulse. Pulse value displays anytime the upper display isreceivingaGrip
Pulsesignal. You may not usetheGripPulse feature while inHeartRate Control.
Note: Refer to Important Safety Instructions (page 2) concerning Pulse Grip operation.
Calorie Display:
Displaysthe cumulativecaloriesburnedat anygiventime during yourworkout.
Note: This is only a rough guide used for comparison of different exercise sessions, which
cannot be used for medical purposes. Calories are not calculated while in Heart Rate
Control.
To Turn Treadmill Off (Blank out Display):
Two methods accomplishthis: Useeitherone.
(1) Displaywill automatically turn off(blankout) after 4 minutes(nokey operations) in
Pause / Stop mode. Display will “wake” back up in mode it was in when it auto-
matically blanked out.
(2) Remove tether cord. This clears the display to “wake” back upinManualmode.

Programmable Features
TheSL Series offers 7 factory presetprogramson the IN400T and 10 ontheIN300T unit.
Note: You may change any speed / incline level during a workout. It will not be held in memory.
Eachpresetprogram(P-1andup)has a maximum speed and incline level that is dis-
playedwhen a desired workout is chosen. Themaximumspeedthatthe particular pro-
gramwillachievewillbedisplayedintheSpeed window. Similar with incline.
Alsoincluded are two user programs (U-1 /U-2)forcustom workouts.
To Select a Program:
STEP 1: Pressand release the START key. Display will light.
STEP 2: PressthePROGRAM key. The Speed windowwill display the maximum
speedthat this program will achieve. The Incline window willdisplaythe
maximumincline of this program.
STEP 3: Allprograms have the workout preset at20minutes. Youmay adjust up from 20
minutes(countdown)using Adjust ▲▼keys.
STEP 4: After selecting a program, press and release the START key.
Treadmill willbeginto move andworkouthasbegun.
Note: The segment time will always be 1/20th of the session time. Within 5 seconds of the end
of a segment run, a chime will alert a change. This statement applies to both preset and user
programs.
Dot Matrix Display:
BothIncline and Speed profiles will be displayed. However, onlyone(speedorincline) will
bedisplayedatatime. Anytimethespeedisadjustedthedisplaywillillustratethat(speed)
profile. Similarwithincline. Onlyaslight press of the appropriate key is required to
changethedot matrix display from speed to incline (visa-versa). Ared dot just leftbelow
Speedwindow,will flash if the dot matrix is profiling mph. Asolidred lightindicatesan
inclineprofile. This statement also applies to Manual operation.
User Programs:
STEP 1: SelectUserU-1orU-2 via the PROGRAMkey. Notethatthedotmatrixdisplay
portionwillhave a single row of dots at the bottom.
STEP 2: Notethe clock (Time)window is flashing. Use the Adjust ▲▼ keys to adjust up
from 20 minutes (if desired). Press ENTER key. This is a must to continue
eveniftime is not adjusted.
Note: Thetime (countdown)value is not heldinmemory.
STEP 3: UsingtheFast / Slow keyadjust the speed level to your desired effort. Similar
withincline Adjust ▲▼ keys.
STEP 4: PressENTER key. Notethenextrowofdotswill flash. This indicates the next
segment(outof 20) that will be programmed. Repeat step 2 and continue that
procedureuntil all segments (20) arecomplete.
STEP 5: Press and release the START key to begin workout.
8
Programmable Operation of Your Treadmill
IN300T400T

Target Heart Rate
● Theoldmotto, “no pain, no gain”, is a myth that has been overpowered by thebenefitsof
exercisingcomfortably. Agreat deal of this success has been promoted by the use of heart
ratemonitors. With the proper use of a heart rate monitor, many people find that their
choiceofexerciseintensityiseither too high or too low and exercise is much more enjoy-
ablebymaintaining their heart rate in the desired benefit range.
● To determine the
benefitrange in which
youwishtotrain,you
mustfirst determineyour
MaximumHeartRate.
Thiscanbeaccom-
plishedby using the
followingformula: 220 -
User’sAge = Maximum
HeartRate. Aftercalcu-
latingyourMaximum
HeartRate, youcan
decideuponwhichgoal
youwould liketopursue.
Thetwo mostpopular
reasonsfor, or goalsof
exercise,arecardiovas-
cularfitness (trainingfor
theheartandlungs) and
weightcontrol. The
blackcolumns onthe
chartaboverepresentthe Maximum Heart Rate for a person whose age is listed at the
bottomof each column. The training heartrateforeither cardiovascular fitness orweight
lossis represented by twodifferentlinesthatcutdiagonally through the chart. Adefinition
ofthe lines’ goal is inthebottomleft-hand corner of the chart. Ifyourgoalis cardiovascular
fitness or if it is weight loss, it can be achieved by training at 90% or 70%, respectively, of
yourMaximum HeartRateon ascheduleapproved by yourphysician. Consultyour physi-
cianbeforeparticipatinginanyexerciseprogram.
● With allSpiritHeartRateControl treadmills, you may usetheheartratemonitor feature
withoutusing the HeartRateControl program. This functioncanbe used duringmanual
modeor during any of the ninedifferentprograms. TheHeart Rate Control program auto-
maticallycontrols inclineandoverridesmanual adjustmentofincline grade.
Note: Refer to Heart Rate Control Operation for computer calculated target heart rate.
CAUTION!
The target value used in H-1 and H-2 programs is a suggestion only for normal, healthy
individuals. Do not exceed your limits! You may not be able to obtain your chosen
target. If in question, enter a higher age value that will set a lower target goal.
9IN300T / 400T
09/24/04
○○○○○○○○○○○○○○○○○○○○○○○○○○○
TARGET HEART RATE
TRAINING CHART
20 25 30 35 40 6545 6050 55
100
110
140
120
130
150
160
170
180
190
200
Age of User
Heart Rate (Beats per Minute)
Maximum Heart Rate
CardiovascularWeight Loss
○○○○○○○○○
○○○○○○○○○○○○○○○○○○○○○○○○○○○○○○○○○○○

Using a Heart Rate Transmitter
Theincludedcheststrapisa special high frequency design to minimize outside noise
interference. Itis not compatible with other brands of wrist moniters. Theon-boardradio
receiveris also not compatible with most transmitter chest straps (Polarforexample).
Howto wear yourwirelesschest strap transmitter:
1. Attach the transmittertotheelasticstrap using the locking parts.
2. Adjustthestrapastightly as possible as long as the strap is not too tight to remain
comfortable.
3. Positionthetransmitterwith the Spiritlogocenteredinthemiddle of your body facing
awayfrom your chest(somepeople must positionthetransmitterslightly left of
center). Attachthefinalend of the elastic strapbyinsertingthe round end and,
usingthe locking parts,securethe transmitter andstraparound your chest.
4. Positionthetransmitter immediately below thepectoralmuscles.
5. Sweatisthe best conductor to measure veryminuteheartbeat electrical signals.
However, plain water can also be used topre-wet the electrodes (2 black square areas
onthereversesideof the belt and either side of transmitter). It’s also recommended
thatyou wear the transmitterstrapa few minutes beforeyourworkout. Some users,
becauseof body chemistry, have a more difficulttimeinachievingastrong, steady
signalat the beginning. After“warming up”,thisproblemlessens. Asnoted,wearing
clothingover thetransmitter/strapdoesn’t effect performance.
6. Your workoutmustbewithin range -distancebetween transmitter/receiver -to
achievea strongsteadysignal. The length ofrangemay vary somewhatbutgenerally
stayclose enough to the console to maintain good,strong,reliablereadings.
Wearingthetransmitter immediately against bare skin assures you of proper
operation. If you wish,youmaywear the transmitter over ashirt. To do so, moisten
theareas of the shirtthattheelectrodes will rest upon.
Note: The transmitter is automatically activated when it detects activity from the user’s heart. Additionally, it
automatically deactivates when it does not receive any activity. Although the transmitter is water resistant,
moisture can have the effect of creating false signals, so you should take precautions to completely dry the
transmitter after use to prolong battery life (estimated transmitter battery life is 2500 hours). The replacement
batteryis Panasonic CR2032.
Erratic Operation:
Caution! Do not use this treadmill for Heart Rate Control unless a steady, solid
Actual Heart Rate value is being displayed. High, wild, random numbers being
displayed indicate a problem.
Ifyou are receiving erratic radio signals,thelargecenter display will show ERR. You must
correctthe cause ofinterferenceto continue.
Areas to look for on interference:
(1) Treadmill notproperlygrounded - Amust!
(2) Microwaveovens,T.V.’s,small appliances, etc.
(3) Fluorescentlights.
(4) Somehousehold securitysystems.
(5) Perimeter fence for a pet.
(6) Loosetreadmillconsole/upright.
10 IN300T /400T
09/24/04

WARNING!
DO NOT USE THE HEART RATE CONTROL PROGRAM IF YOUR HEART RATE IS
NOT REGISTERING PROPERLY ON THE TREADMILL’S DISPLAY!
Special Operations of Heart Rate Functions:
AllSpirittreadmills that are factory equippedwithaHeart Rate Control system have many
distinctfeatures both in the HeartRateControlprogram and during heartratemonitoring.
Thissectionwill give you a more detailed background to use yourtreadmillinthemost
effectivemanner.
How the Heart Rate Control Program Works:
HeartRate Control usesyourtreadmill’s incline systemtoadjustyour heart rate. Increases
anddecreases in elevation affect heartratemuchmore efficiently than changesinspeed.
Additionally,changesinincline keep you in control of the machine’sspeedinsteadofthe
machinecontrollingyou.
Note: Once you begin the Heart Rate Control mode by pressing the START key, you cannot
make incline adjustments by pressing the “UP” and “DOWN” keys. The computer makes all
incline adjustments for you.
Selecting a Heart Rate Control Program (H-1 to H-3):
Youhave the option, duringthesetupmode, to choose eithertheWeightControl(H-1)
programor the Cardiovascular (H-2) program. Weight Controlattemptstomaintain your
heartrate at 70% ofyourMaximumHeart Rate. Cardiovascular attempts to maintainyour
heartrate at 90% of your MaximumHeartRate. YourMaximum Heart Rate is based upon
aformula that subtracts youragefrom220. Yourage input is performed during thesetup
mode.
Note: H-3 program allows you to set the desired target before belt movement regardless of age
input or set percentages.
CAUTION!
The target value used in H-1 and H-2 programs is a suggestion only for normal,
healthy individuals. Do not exceed your limits! You may not be able to obtain your
chosen target. If in question, enter a higher age value that will set a lower target goal.
Program H-3 allows the user to set the desired target and should be used if H-1 / H-2
levels do not match the user’s ability.
11
IN300T/ 400T
09/24/04
Heart Rate Control

CAUTION!
Intended for wireless transmitter chest strap only. Do not use Pulse Grip bar for
Heart Rate Control. You must receive a strong / steady value in heart rate window. See
page 10.
STEP 1: Press and release the START key.
STEP 2: UsePROGRAMkeytochooseoneof3heartratecontrolprograms(H-1thruH-3).
STEP 3: Ifchoosing H-1 orH-2anAgevalue(30)willappear in Incline window. Use
Adjust ▲▼ keystomatchyour age. Press ENTER key. Thisage inputvalue
willbe held in memory.
STEP 4: Youmay,ifdesired, adjust theTime(countdown)up from 20:00minutes.
STEP 5: Pressand release START keyto begin your workout.
Note: Calorie calculation does not function in Heart Rate Control.
Heart Rate Control Operation
Thedisplay will automaticallyshowa heart ratevaluewhen receiving asignalinput (chest
strapor pulse grip). You may use this feature in ManualmodeoranyProgrammable
workout.
Note: Pulse Grip option is considered a monitor only. Do not use for Heart Rate Control.
Heart Rate Monitor (Only)
12
IN300T / 400T
09/24/04

General Maintenance
Belt and Bed - Your treadmill uses a very high-efficient low-friction bed. Performance
is maximized when the bed is kept as clean as possible. Use a soft, damp cloth or
paper towel to wipe the edge of the belt and the area between the belt edge and frame.
Also reach as far as practical directly under the belt edge. This should be done once a
month to extend belt and bed life. Use water only - no cleaners or abrasives. A mild
soap and water solution along with a nylon scrub brush will clean the top of the textured
belt. Allow to dry before using.
Belt Dust - This occurs during normal break-in or until the belt stabilizes. Wiping
excess off with a damp cloth will minimize buildup.
General Cleaning - Dirt, dust, and pet hair can block air inlets and accumulate on the
running belt. On a monthly basis, vacuum underneath your treadmill to prevent
buildup. Once a year, you should remove the black motor hood and vacuum out dirt
that may accumulate. UNPLUG POWER CORD BEFORE THIS TASK.
BELT ADJUSTMENTS:
Treadbelt Tension Adjustment - Belt tension is not critical for most users. It is very
important for joggers and runners in order to provide a smooth, steady running surface.
Adjustment must be made from the right side of the rear roller in order to adjust tension
with the 6 mm Allen wrench provided in the parts package. The adjustment bolt is
located at the end of the right side rail as noted in diagram below.
Tighten the rear roller only enough to prevent slippage at the front roller. Turn the
treadbelt tension adjusting bolt in increments of 1/4 turn and inspect for proper tension.
When an adjustment is made to the belt tension, you must also make a tracking
adjustment to compensate for the change in belt tension. This is accomplished by
turning both the tension and tracking Allen bolts an equal amount. This adjustment
should be made by turning both bolts clockwise by no more than a 1/4 turn at a time.
DO NOT OVERTIGHTEN - Overtightening will cause belt damage and premature
bearing failure.
Tracking
Adjustment
Side Only
Belt Tension
Adjustment
Side Only
13
Note: Adjustment is thru small hole of end cap.

TREADBELT TRACKING ADJUSTMENT:
The performance of your treadmill is dependent on the frame running on a reasonably
level surface. If the frame is not level, the front and back roller cannot run parallel, and
constant belt adjustment may be necessary.
The treadmill is designed to keep the treadbelt reasonably centered while in use. It is
normal for some belts to vary near a side while the belt is running with no one on it.
After a few minutes of use, the treadbelt should have a tendency to center itself. If,
during use, the belt continues to move toward one side, adjustments are necessary.
TO SET TREADBELT TRACKING:
A 6 mm Allen wrench is provided to adjust the rear roller. Make tracking adjustments
14
from the left side only. Set belt speed at
approximately 2 to 3 mph. A small adjust-
ment can make a dramatic difference. Turn
the bolt only a 1/4 turn and wait a few minutes
for the belt to adjust itself. Continue to make
1/4 turns until the belt stabilizes in the center
of the running deck.
The belt may require periodic tracking adjust-
ment depending on use and walking/running
characteristics. Some users will affect track-
ing differently. Expect to make adjustments
as required to center the treadbelt. Adjustments will become less of a maintenance
concern as the belt is used. Proper belt tracking is an owner responsibility common
with all treadmills.
ATTENTION:
DAMAGE TO THE RUNNING BELT RESULTING FROM IMPROPER TRACKING /
TENSION ADJUSTMENTS IS NOT COVERED UNDER THE SPIRIT WARRANTY.
BELT / DECK LUBRICATION:
Do not relube with other than Spirit lubricant. Spirit provides one application with this
unit. See your Spirit dealer for additional purchases. The use of some other lubricants
may destroy the deck surface or belt and will void warranty. Conditions exist beyond
Spirit’s control on belt / deck cleanliness which relates to friction.
You should apply the enclosed belt lubrication after approximately the first 50 hours of
operation. Use all the contents of one container (no more) and spread lubricant onto
middle portion (away from edges) of the deck (under treadbelt) along it’s width. When
walked on, the belt will make certain an even coat is applied. Lubricant is not harmful
to the skin. Lube will be distributed properly by walking at 2 to 3 mph for 3 to 5 minutes
on all areas of the belt. Use handrails for support. The first few minutes you will be
polishing your deck and lubricating the belt backing. Do not run on a newly lubri-
cated belt until the above break-in procedure is done. If the treadmill belt/deck is
kept reasonably clean it is possible to expect over 1000 hours before additional
relubing is necessary.
CAUTION - KEEP HANDS CLEAR
OF MOVING REAR PULLEY!
Note: Adjustment is thru small hole of end cap.
Belt will move in direction of allen wrench.

Before contacting your dealer for aid, please review the following information. It may
save you both time and expense. This list includes common problems that may not be
covered under the treadmill’s warranty.
PROBLEM SOLUTION/CAUSE
Display does not light
Treadbelt does not
stay centered
Treadmill belt hesitates
when walked/run on
Motor is not
responsive / Display
is lit
Treadmill will only
achieve approximately
7 mph but shows
higher speed on dis-
play
Treadbelt stops
quickly/suddenly when
tether cord is pulled
Treadmill trips on
board 15 amp circuit
breaker when running/
walking
Computer shuts off
when console is
touched (on a cold day)
while walking/running
Tether cord not in position.
Circuit breaker on front grill tripped. Push circuit breaker in until it locks.
Plug is disconnected. Make sure plug is firmly pushed into AC
household wall outlet.
Household circuit breaker may be tripped.
Treadmill defect. Contact your Spirit dealer.
See General Maintenance section under Belt Tracking.
A user may be walking while favoring or putting more weight on either
the left or right foot. If this walking pattern is natural, track the belt
slightly off-center to the side opposite from the belt movement.
See Maintenance section on Treadbelt Tension. Adjust as necessary.
Make certain clock is running. This indicates motor should be
receiving power to operate. Contact your Spirit dealer. Diagnostics
will indicate if warrantable.
Possible treadmill defect. Contact your Spirit dealer. Diagnostics
will indicate if warrantable.
Low AC voltage to treadmill. Do not use an extension cord. If an
extension cord is required it should be as short as possible and
heavy duty 16 gauge minimum.
Low household voltage. Contact an electrician or your Spirit dealer.
A minimum of 110 volt AC current is required.
High belt/deck friction. See General Maintenance section on lubrication.
Treadmill is not grounded. Static electricity is “crashing” the com-
puter. Refer to Grounding Instructions on page 3.
15
Service Checklist - Diagnosis Guide

Manufacturer’s Limited Warranty
Effective October 15, 2003
TREADMILL WARRANTY
SpiritManufacturingInc. warrants all itstreadmills’parts for aperiodofone (1) yearfromthe date of retailsale,as determined by
salereceipt,or eighteen (18)monthsfrom the originalfactoryshipping date,whichevercomesfirst. Spirit’s responsibilities
includeprovidingnew orremanufacturedparts,at Spirit’s option,andtechnical supporttoour independent dealersandservicing
organizations. Intheabsence ofadealer orserviceorganization, these warrantieswillbe administeredbySpirit directlytoa
consumer.Anextendedwarranty periodappliesto thefollowingcomponents:
NORMALRESPONSIBILITIESOFTHECONSUMER
Thiswarrantyapplies only toproductsin ordinary householduse,andthe consumer isresponsiblefor the itemslistedbelow:
1. Thewarrantyregistration card must becompletedand returned totheaddresslisted on thecardwithin 10 days oftheoriginal
purchasetovalidate themanufacturer’slimitedwarranty.
2. Properuseof thetreadmillin accordancewiththe instructionsprovidedin thismanual,including belttracking.
3. Properinstallationby anauthorizedSpiritservicerinaccordancewith instructionsprovidedwith the treadmillandwith all local
electriccodes.
4. Properconnectiontoa grounded power supplyofsufficientvoltage, replacement of blownfuses,repairof loose connections
or defects in house wiring.
5. Expensesformaking thetreadmillaccessible forservicing,including any itemthatwas notpartof thetreadmillat thetimeit
was shipped from the factory.
6. Damagesto thetreadmillfinishduringshipping, installationor followinginstallation.
EXCLUSIONS
This warranty does not cover the following:
1. CONSEQUENTIAL,COLLATERAL,ORINCIDENTALDAMAGESSUCHASPROPERTYDAMAGEANDINCIDENTALEXPENSES
RESULTINGFROMANYBREACHOFTHISWRITTENORANYIMPLIEDWARRANTY.
Note: Some states do not allow the exclusion or limitation of incidental or consequential damages, so this limitation or
exclusionmaynot apply toyou.
2. Servicecallreimbursement tothe consumer. Service callreimbursementto thedealerthat doesnotinvolve malfunctionor
defectsinworkmanshipor material, for unitsthatare beyond the warrantyperiod,forunits that are beyondtheservice call
reimbursementperiod, fortreadmillsnotrequiringcomponentreplacement,or treadmillsnot inordinaryhouseholduse.
3. Damagescausedby services performed bypersonsother than authorizedSpiritservicers;useof partsotherthan original
Spirit parts;orexternalcauses suchasalterations, modifications,abuse,misuse,accident,improper maintenance,inadequate
power supply, or acts of God.
4. Productswithoriginal serialnumbersthat havebeenremoved oraltered.
5. Productsthat havebeensold,transferred, bartered, or giventoa third party.
6. Productsthatdonot have a warrantyregistrationcardon file at Spirit Mfg. Spiritreserves the righttorequestproof of
purchase if no warranty record exists for the product.
7. THISWARRANTYISEXPRESSLYINLIEUOFALLOTHERWARRANTIESEXPRESSEDORIMPLIED,INCLUDINGTHEWARRAN-
TIESOFMERCHANTABILITYAND/ORFITNESSFORAPARTICULARPURPOSE.
SERVICE
Keepyourbillof sale. Twelve (12) monthsfromthe date on thebillof sale or eighteen(18)months from the dateoffactory
shippingasdetermined by theserialnumber establishes thewarrantyperiod should serviceberequired. If service isperformed,
itisinyour best interest toobtainand keep all receipts. Thiswritten warranty gives youspecificlegalrights. You may alsohave
otherrightsthatvary from state to state. Serviceunderthiswarranty must be obtained byfollowingthese steps, in order:
1. Contactyoursellingauthorized Spirit dealer. OR
2. Contactyour localauthorizedSpiritservice organization.
3. Ifthereisa question as towhereto obtain service, contactour service departmentat(870)935-1107.
4. Ifnolocalservice is available,Spirit will repairor replace theparts,atSpirit’s option,withinthewarranty period at nocharge
for parts. All transportation costs, both to our factory and upon return to the owner, are the responsibility of the owner. The
ownerisresponsible foradequatepackaging uponreturnto Spirit. Spiritisnot responsiblefordamages inshipping. Makeall
freightdamageclaimswiththeappropriatefreightcarrier. DONOTSHIPANYUNITTOOURFACTORYWITHOUTARETURN
AUTHORIZATION NUMBER. Allunitsarrivingwithoutareturnauthorizationnumberwillberefused.
5. Foranyfurther information, ortocontact our servicedepartmentbymail, send yourcorrespondenceto:
Spirit Manufacturing,Inc.
P.O.Box 2037
Jonesboro,AR 72402-2037
Productfeaturesorspecifications as describedorillustratedare subject to changewithoutnotice. All warranties are madeby
Spirit Manufacturing,Inc. Thiswarranty appliesonlyin the 50states of theU.S.A.and Canada.
IN300T Series IN400T Series
DriveMotor 10 Years 10 Years
Deck Wear 2 Years 2 Years
Electronics / Belt / Rollers 2 Years 2 Years
FrameWeldments Lifetime Lifetime
All OtherComponents 2 Years 2 Years
16
This manual suits for next models
1
Table of contents
Other Spirit Treadmill manuals

Spirit
Spirit XT685 User manual

Spirit
Spirit CT850 User manual

Spirit
Spirit CT850 User manual

Spirit
Spirit 1622768 User manual

Spirit
Spirit XT285 User manual

Spirit
Spirit CT 800 User manual

Spirit
Spirit Z100 User manual

Spirit
Spirit XT375 User manual

Spirit
Spirit XT685 User manual

Spirit
Spirit CT900ENT User manual

Spirit
Spirit XT 600 User manual

Spirit
Spirit XT385 User manual

Spirit
Spirit XT275 User manual

Spirit
Spirit XT285 User manual

Spirit
Spirit XT285 User manual

Spirit
Spirit CT800ENT User manual

Spirit
Spirit 1612275 User manual

Spirit
Spirit CT900 User manual

Spirit
Spirit Esprit CT80 User manual

Spirit
Spirit 1613285 XT285 User manual